
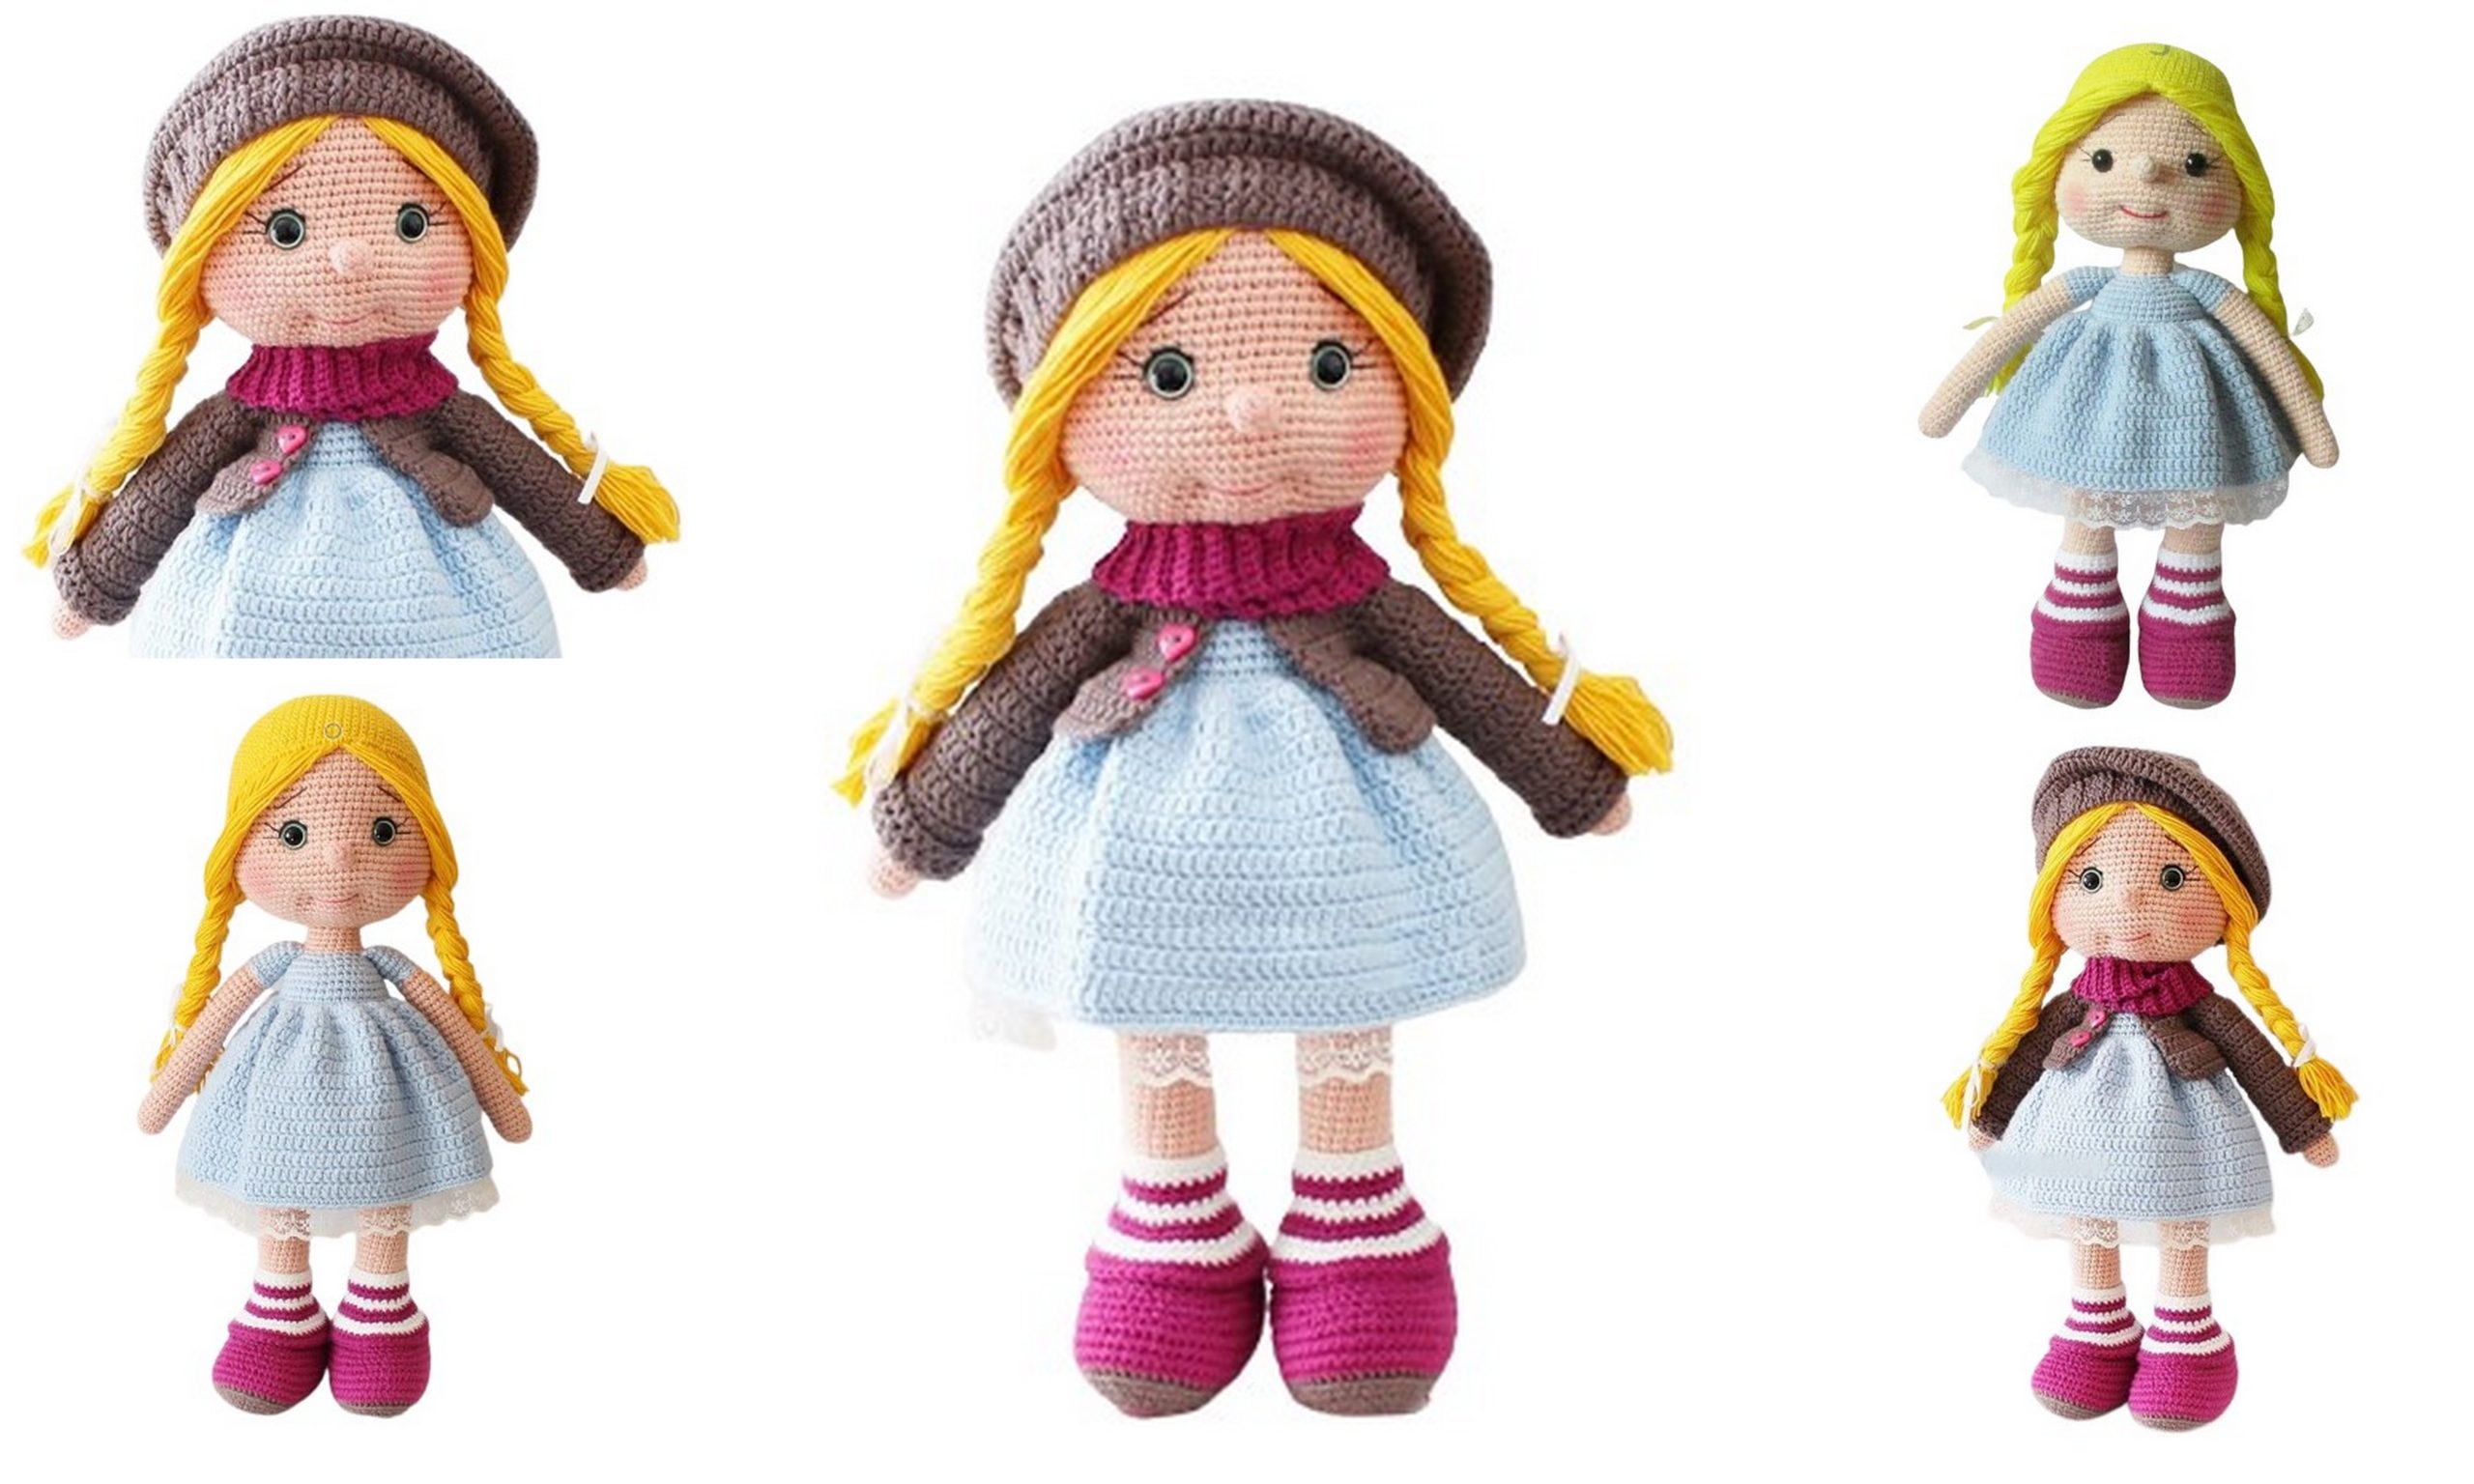
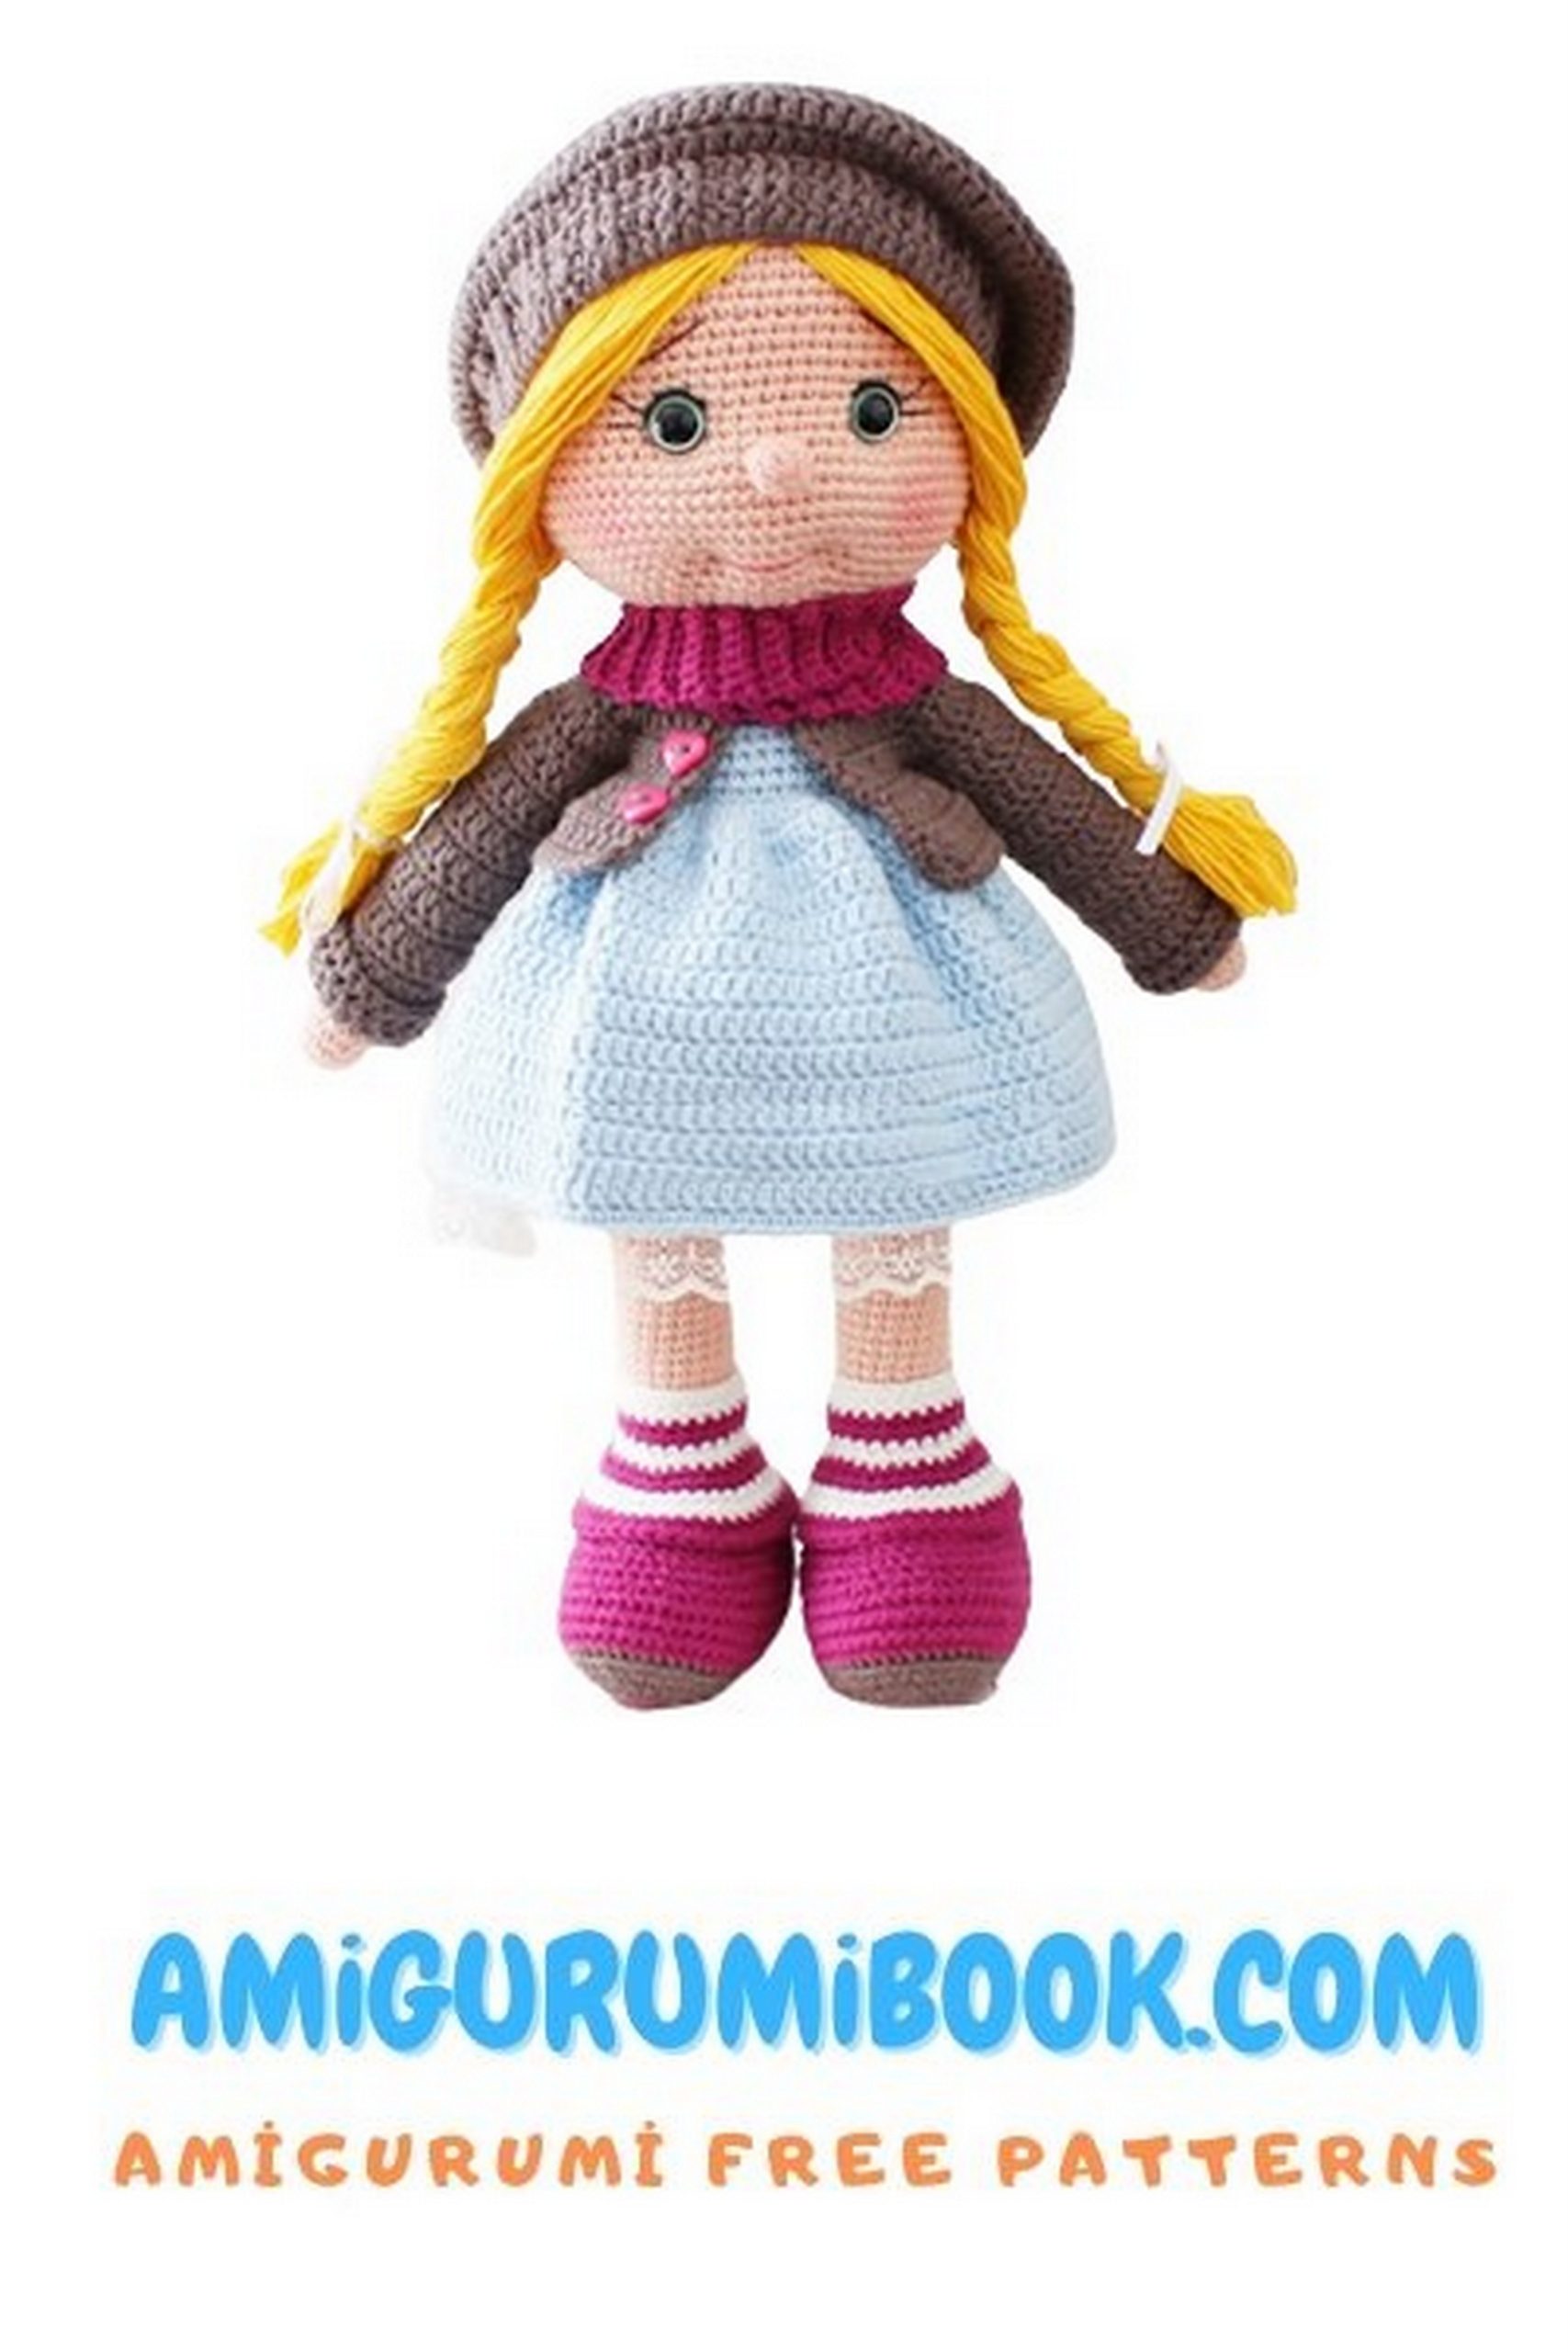
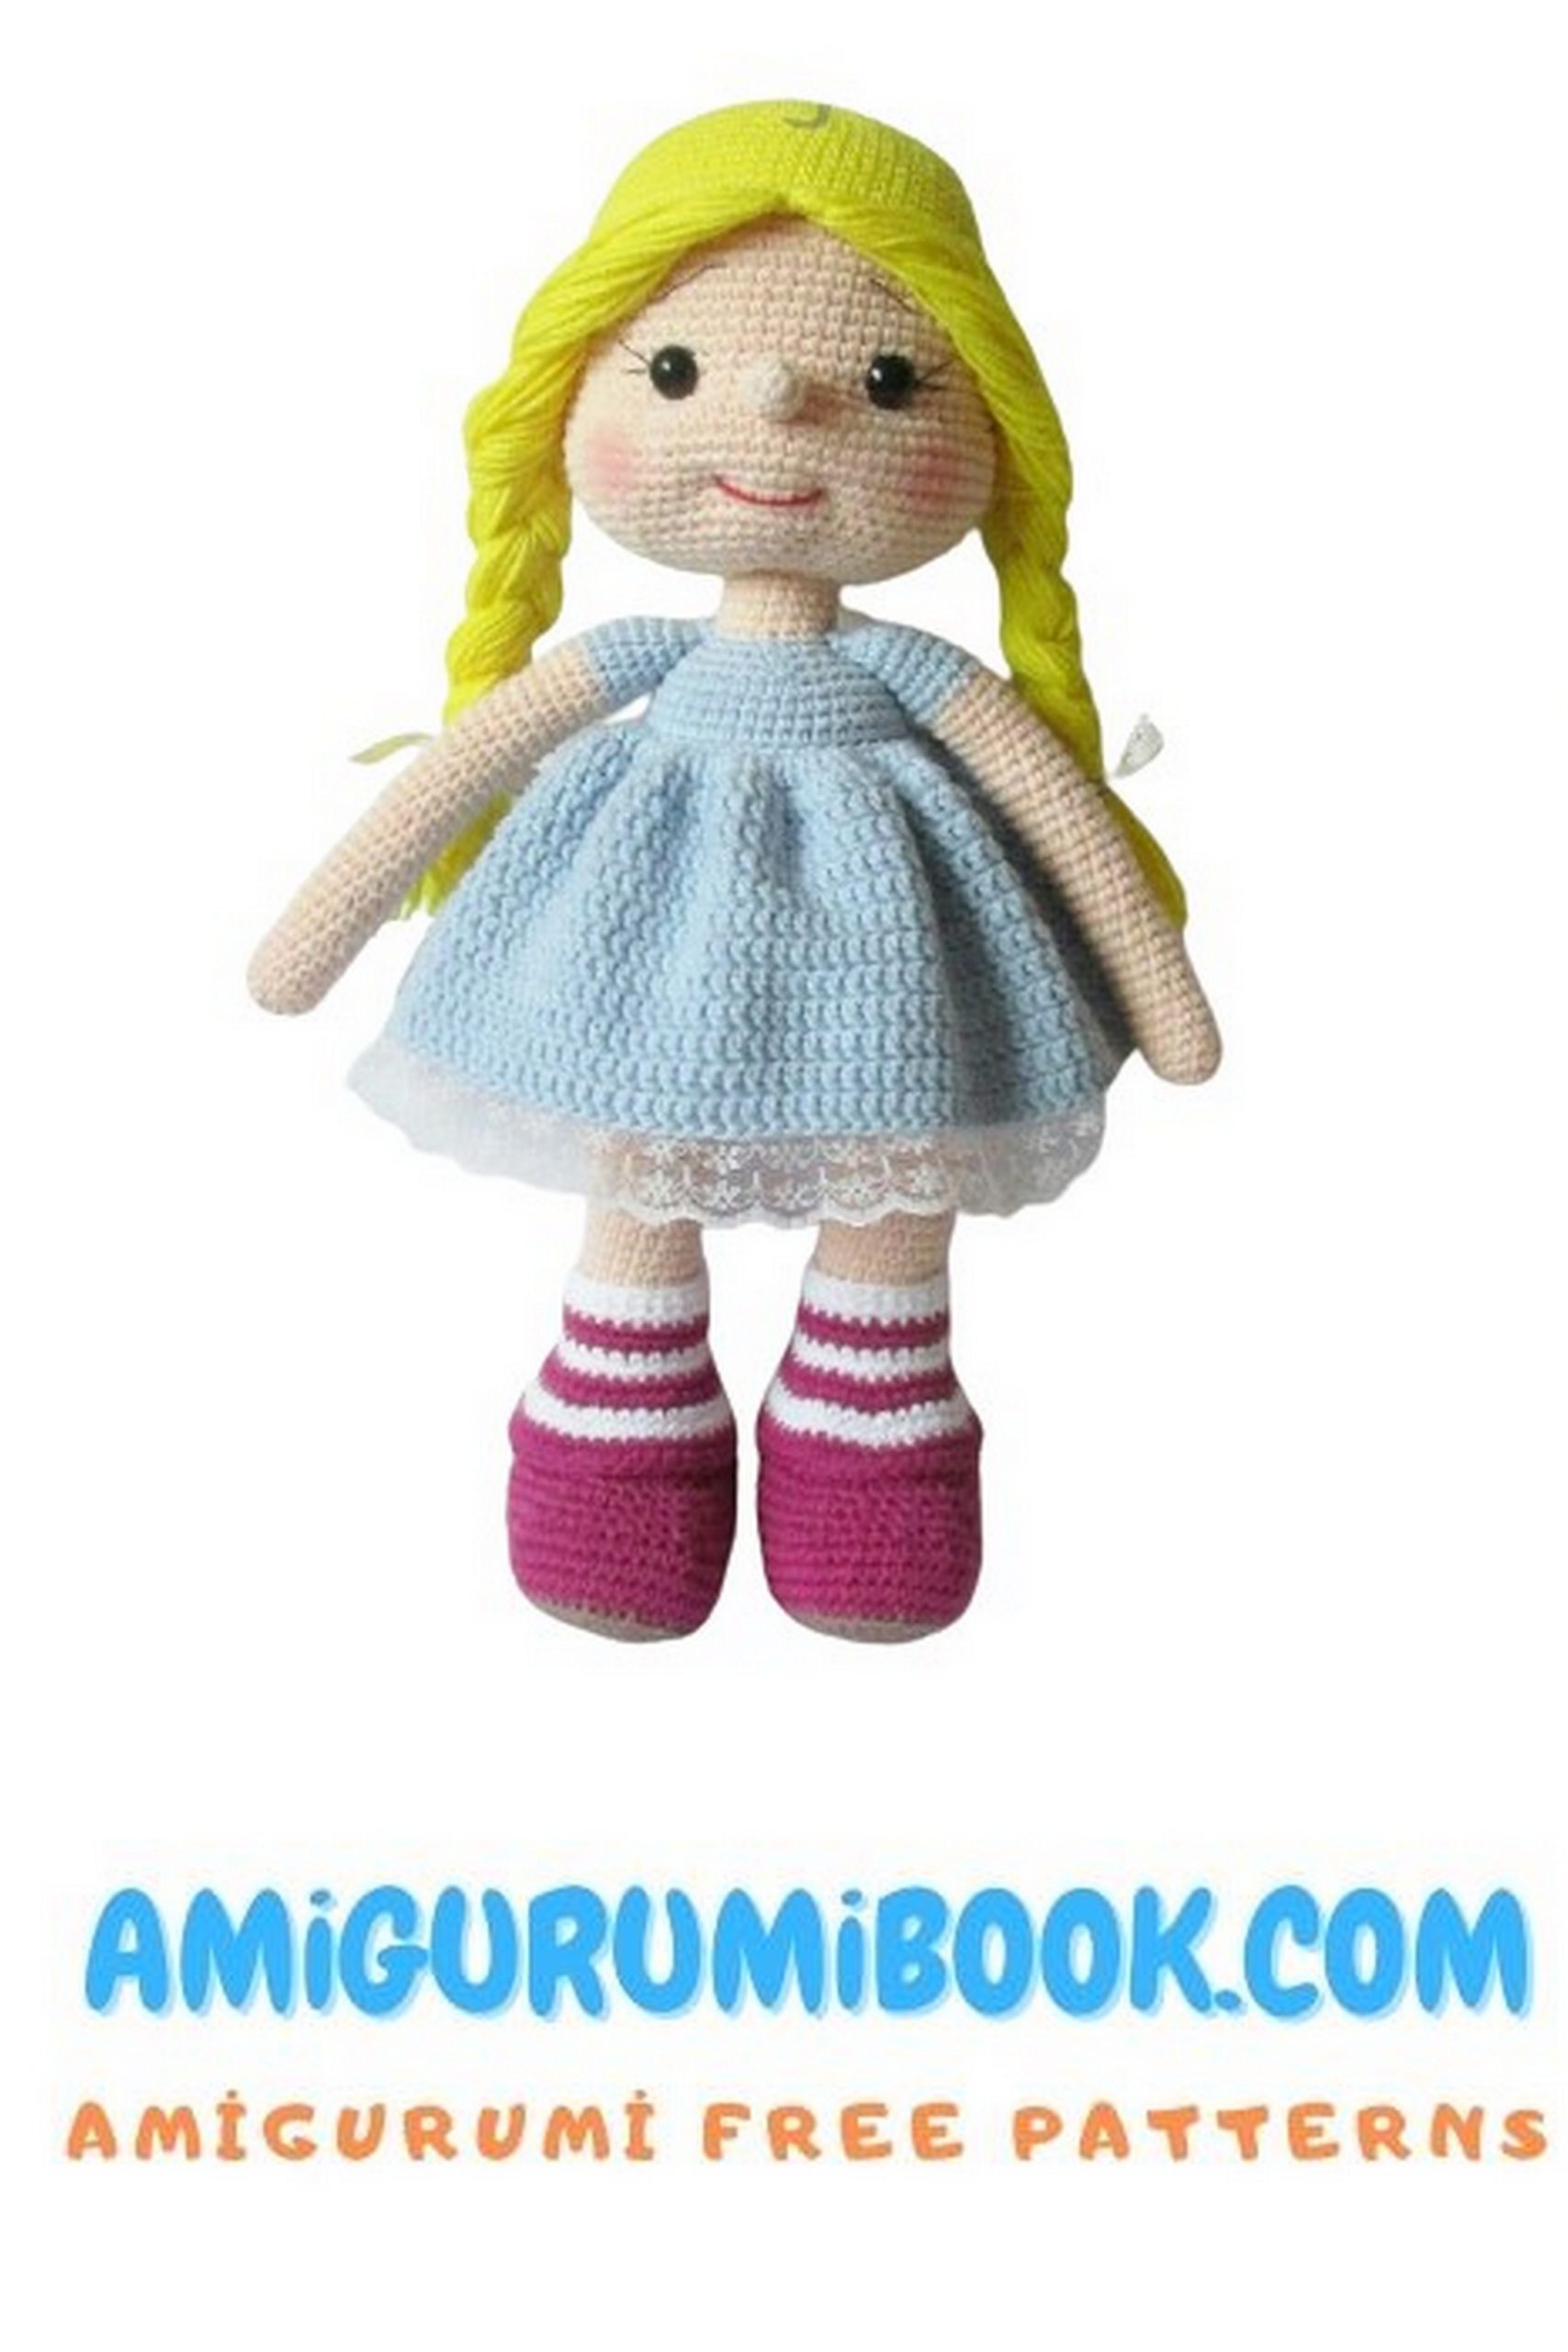
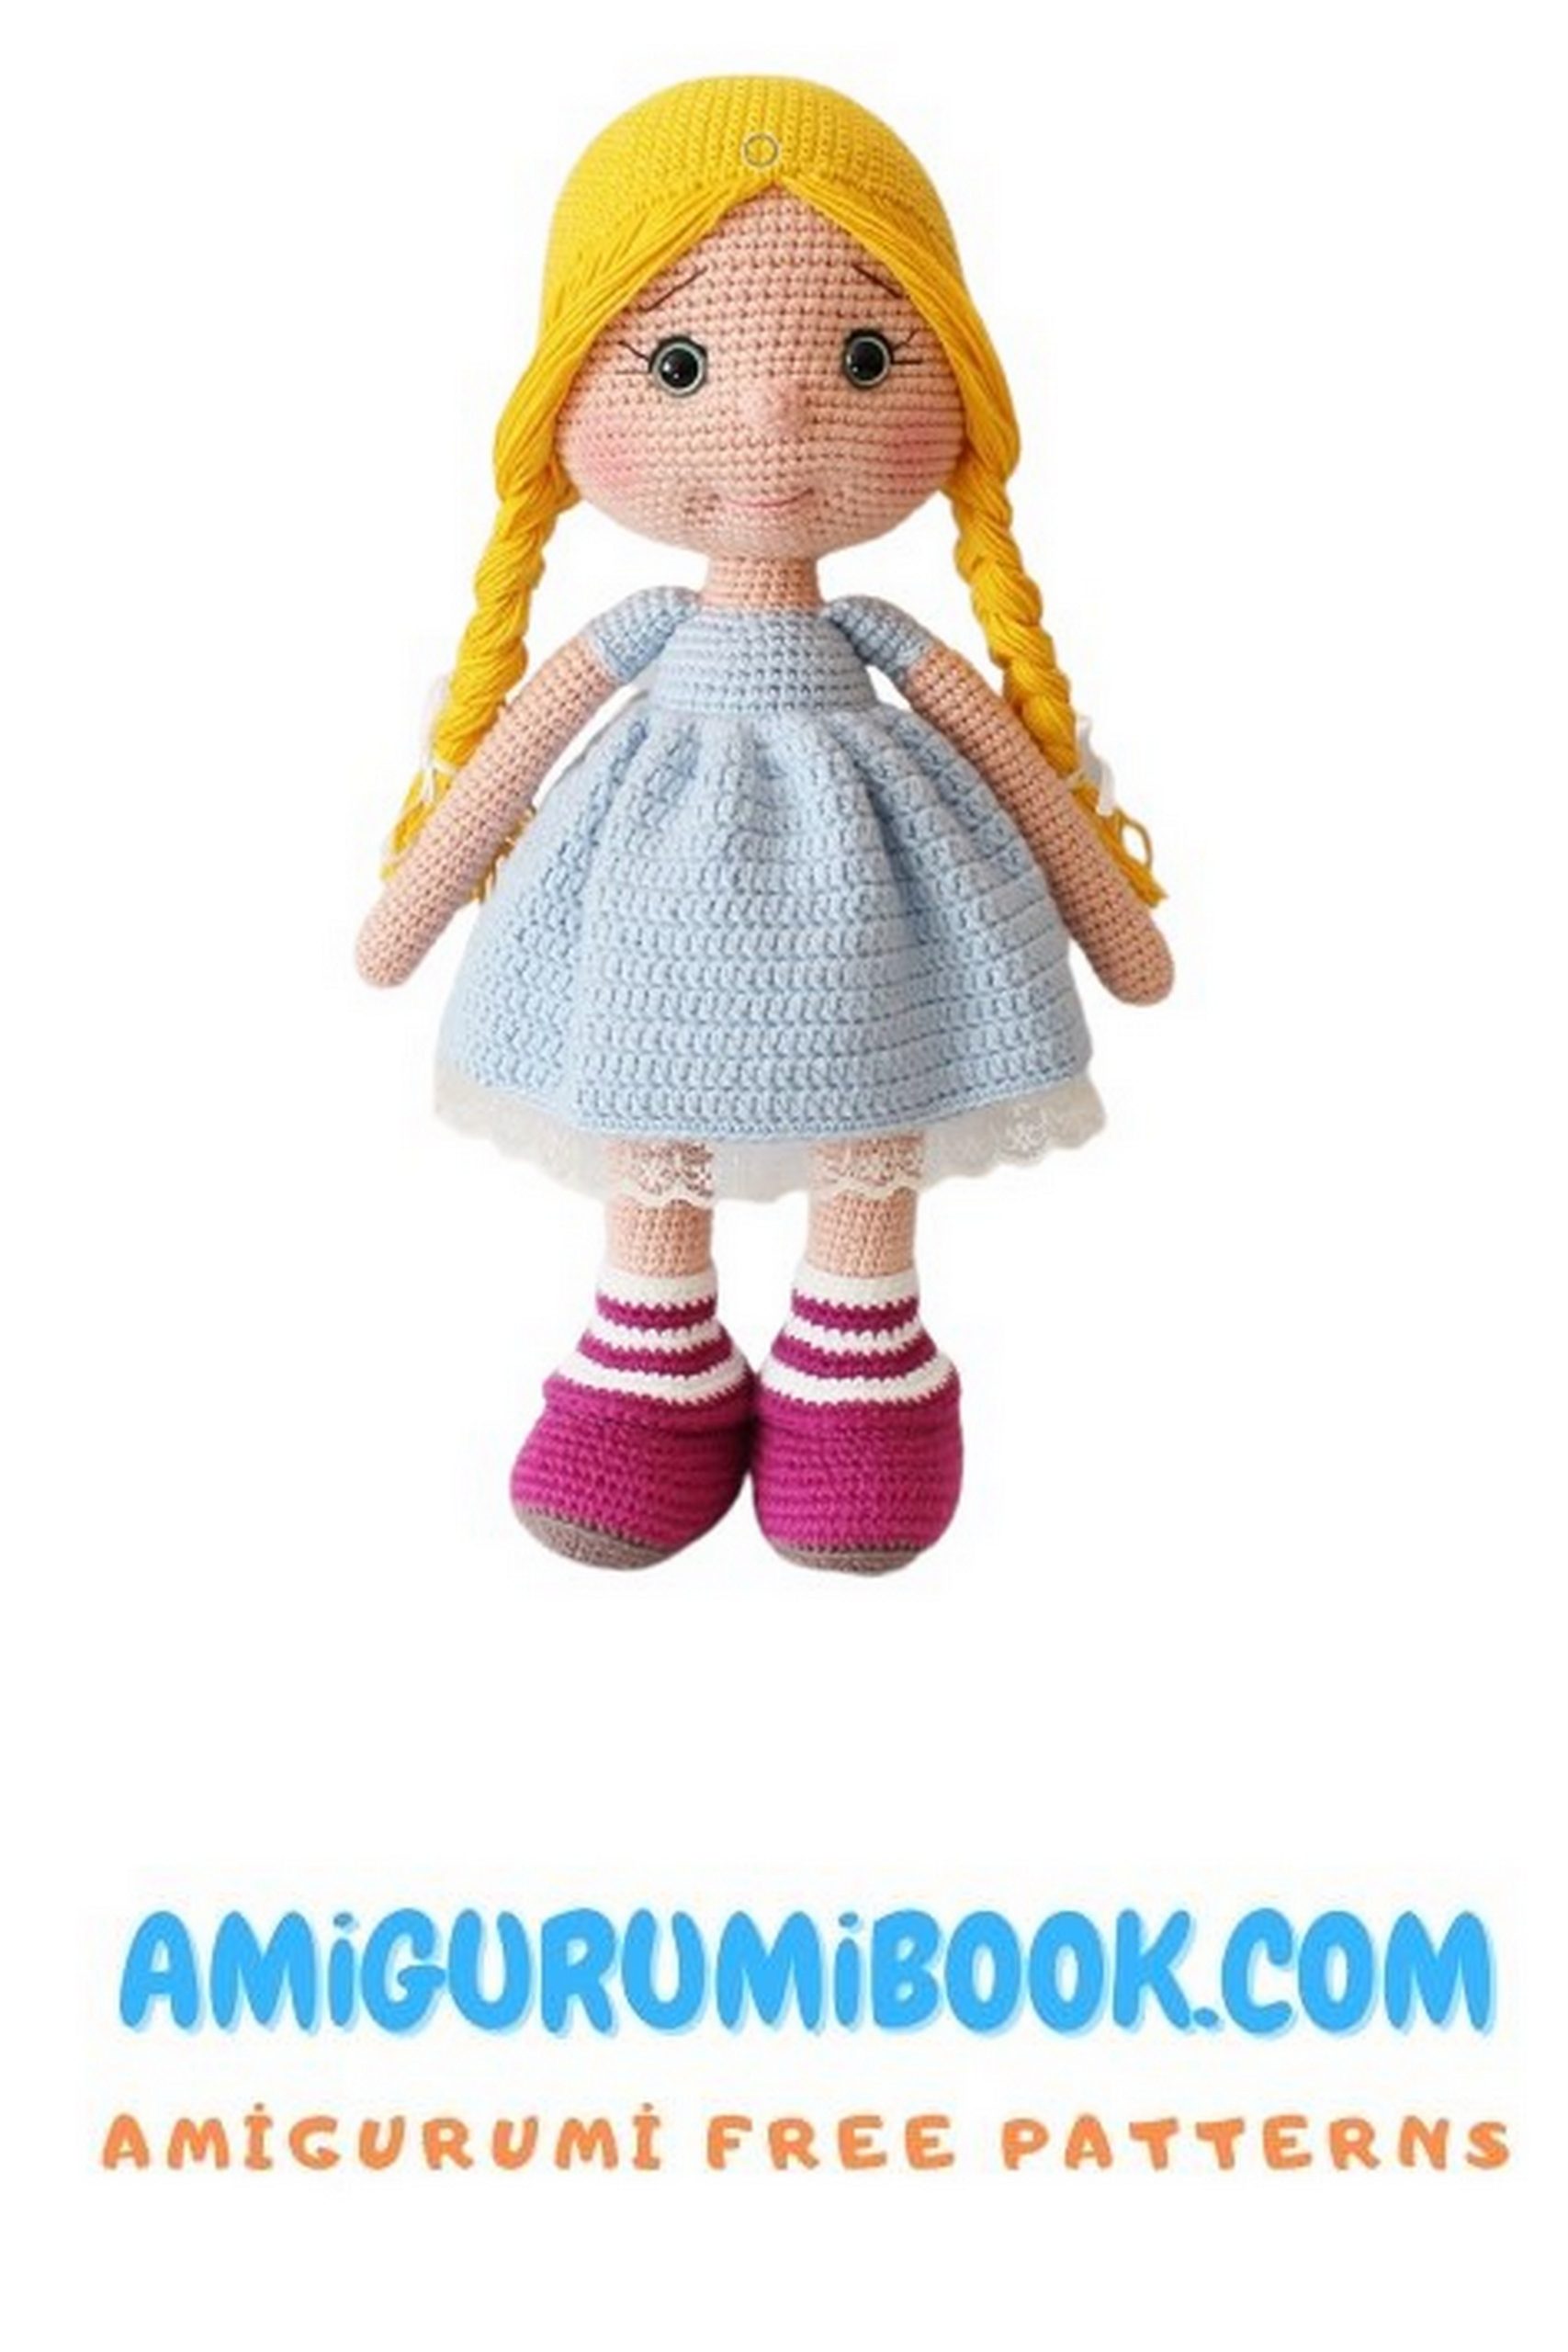
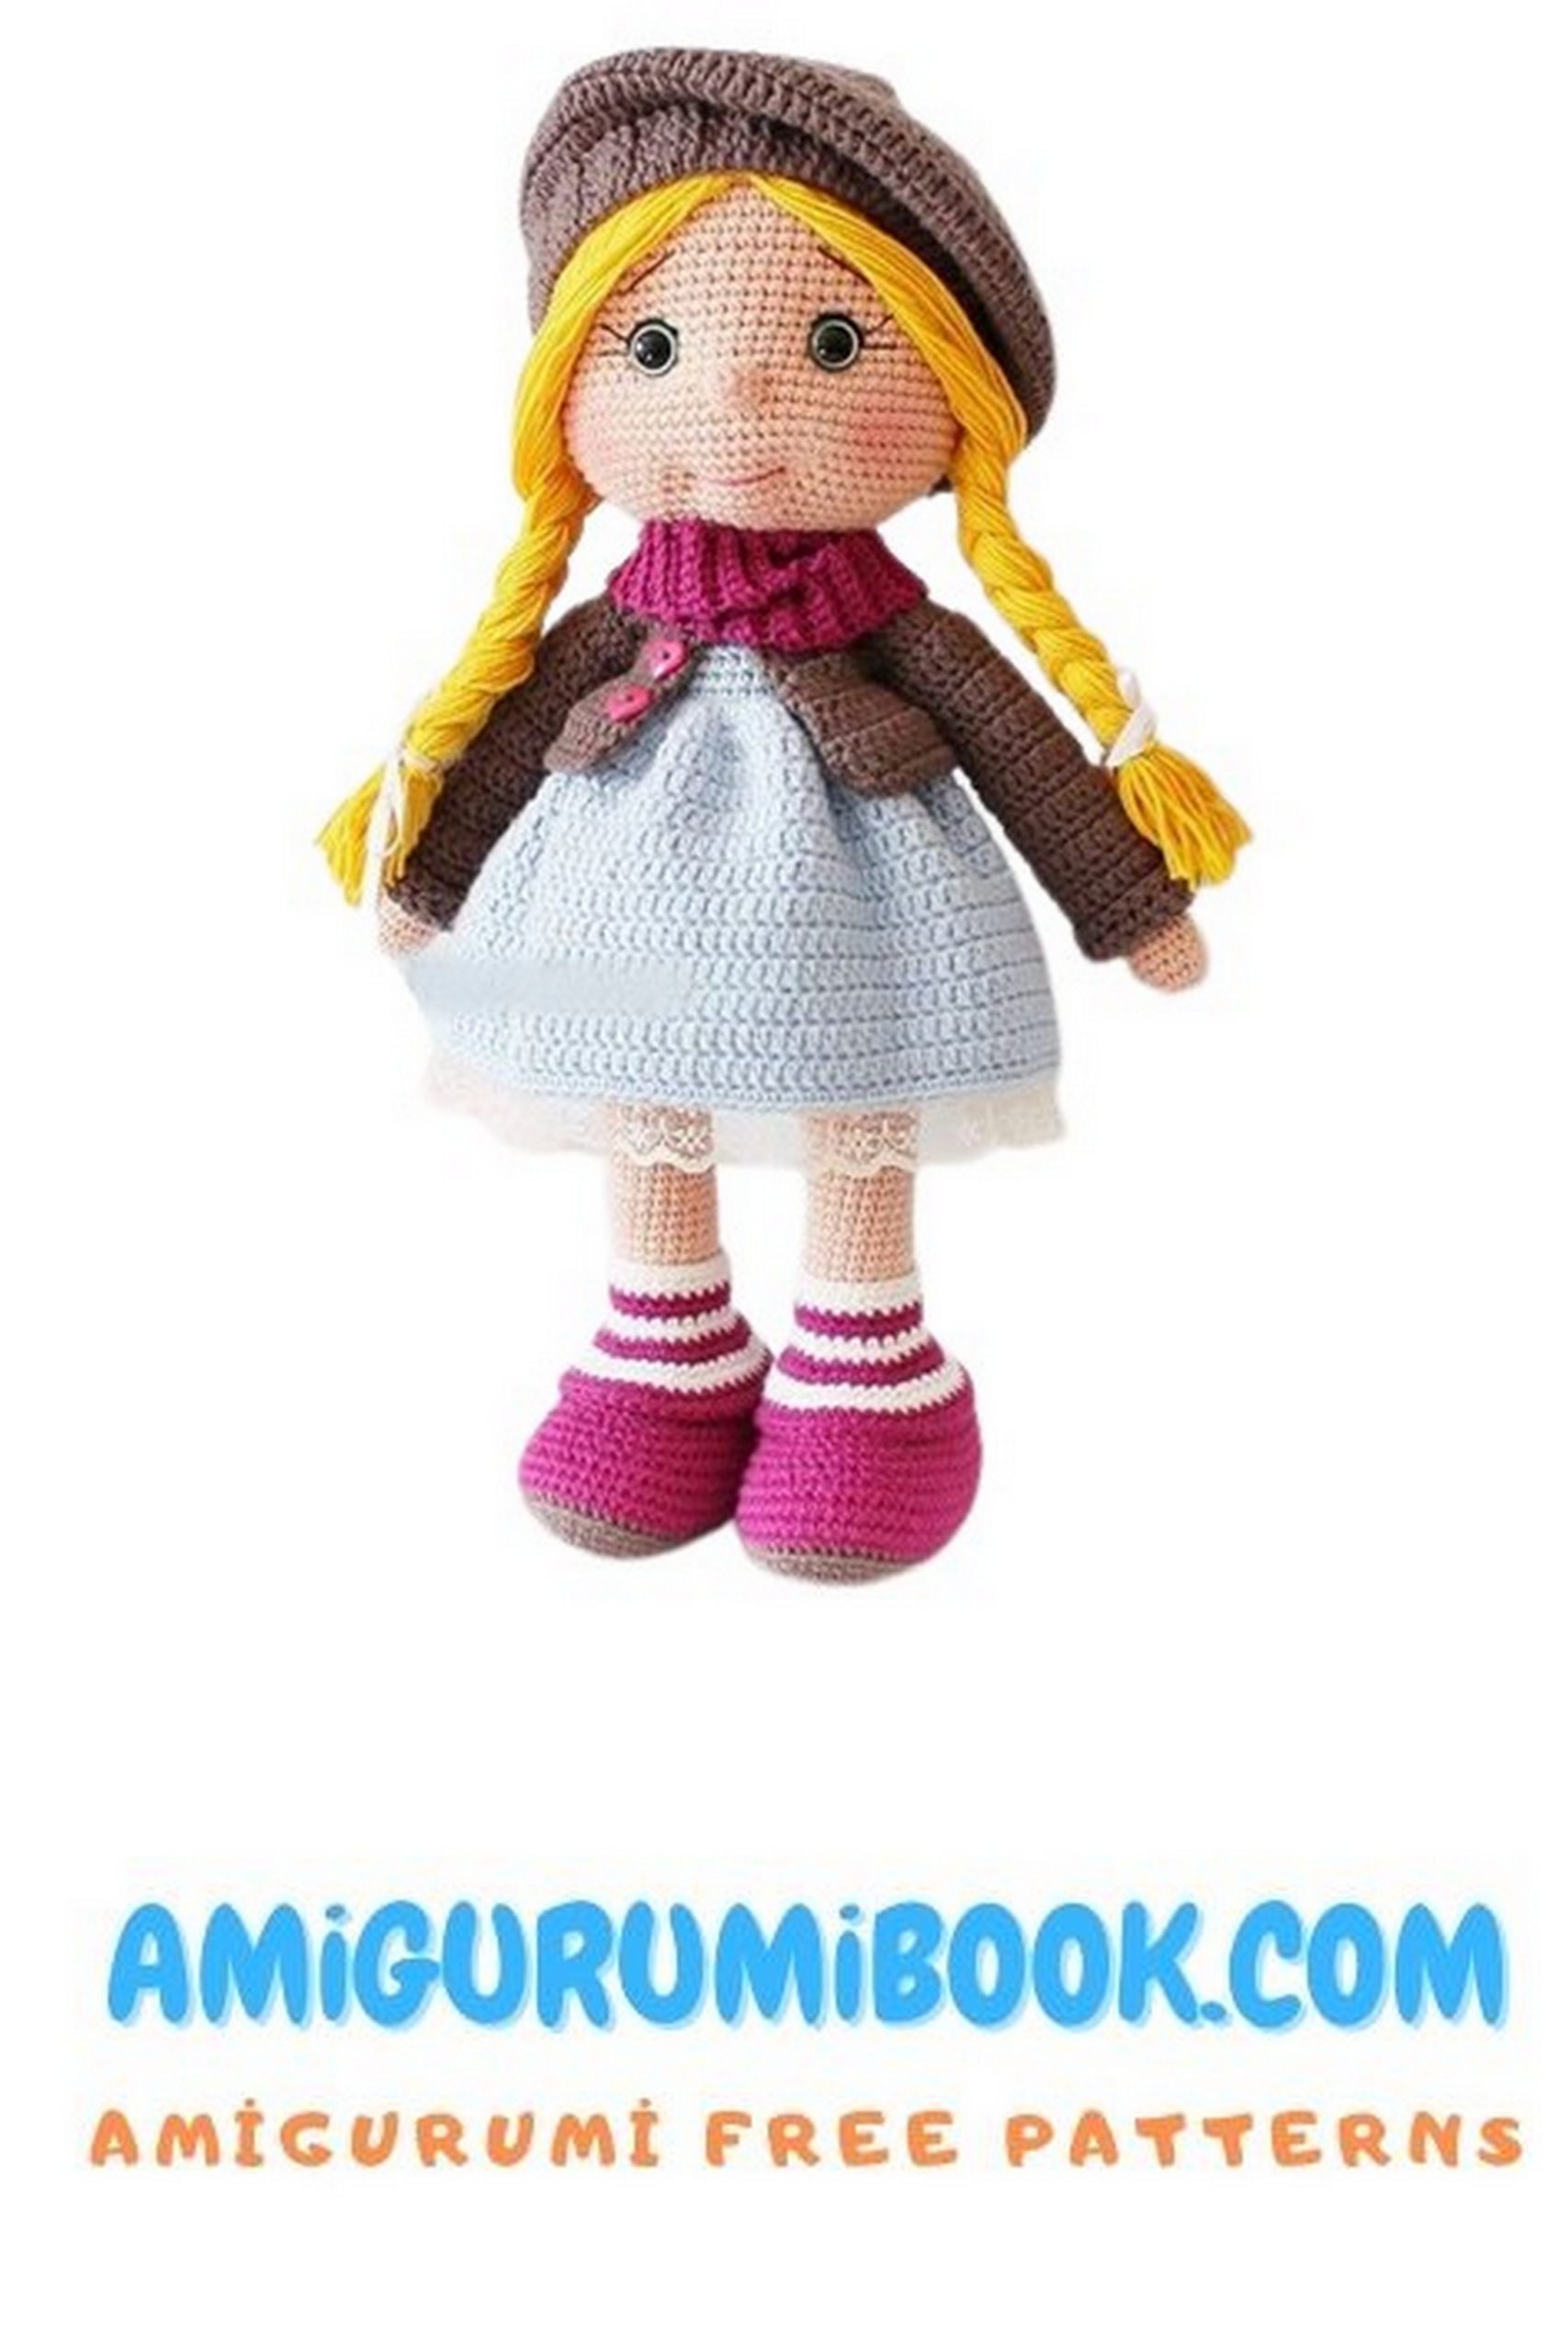
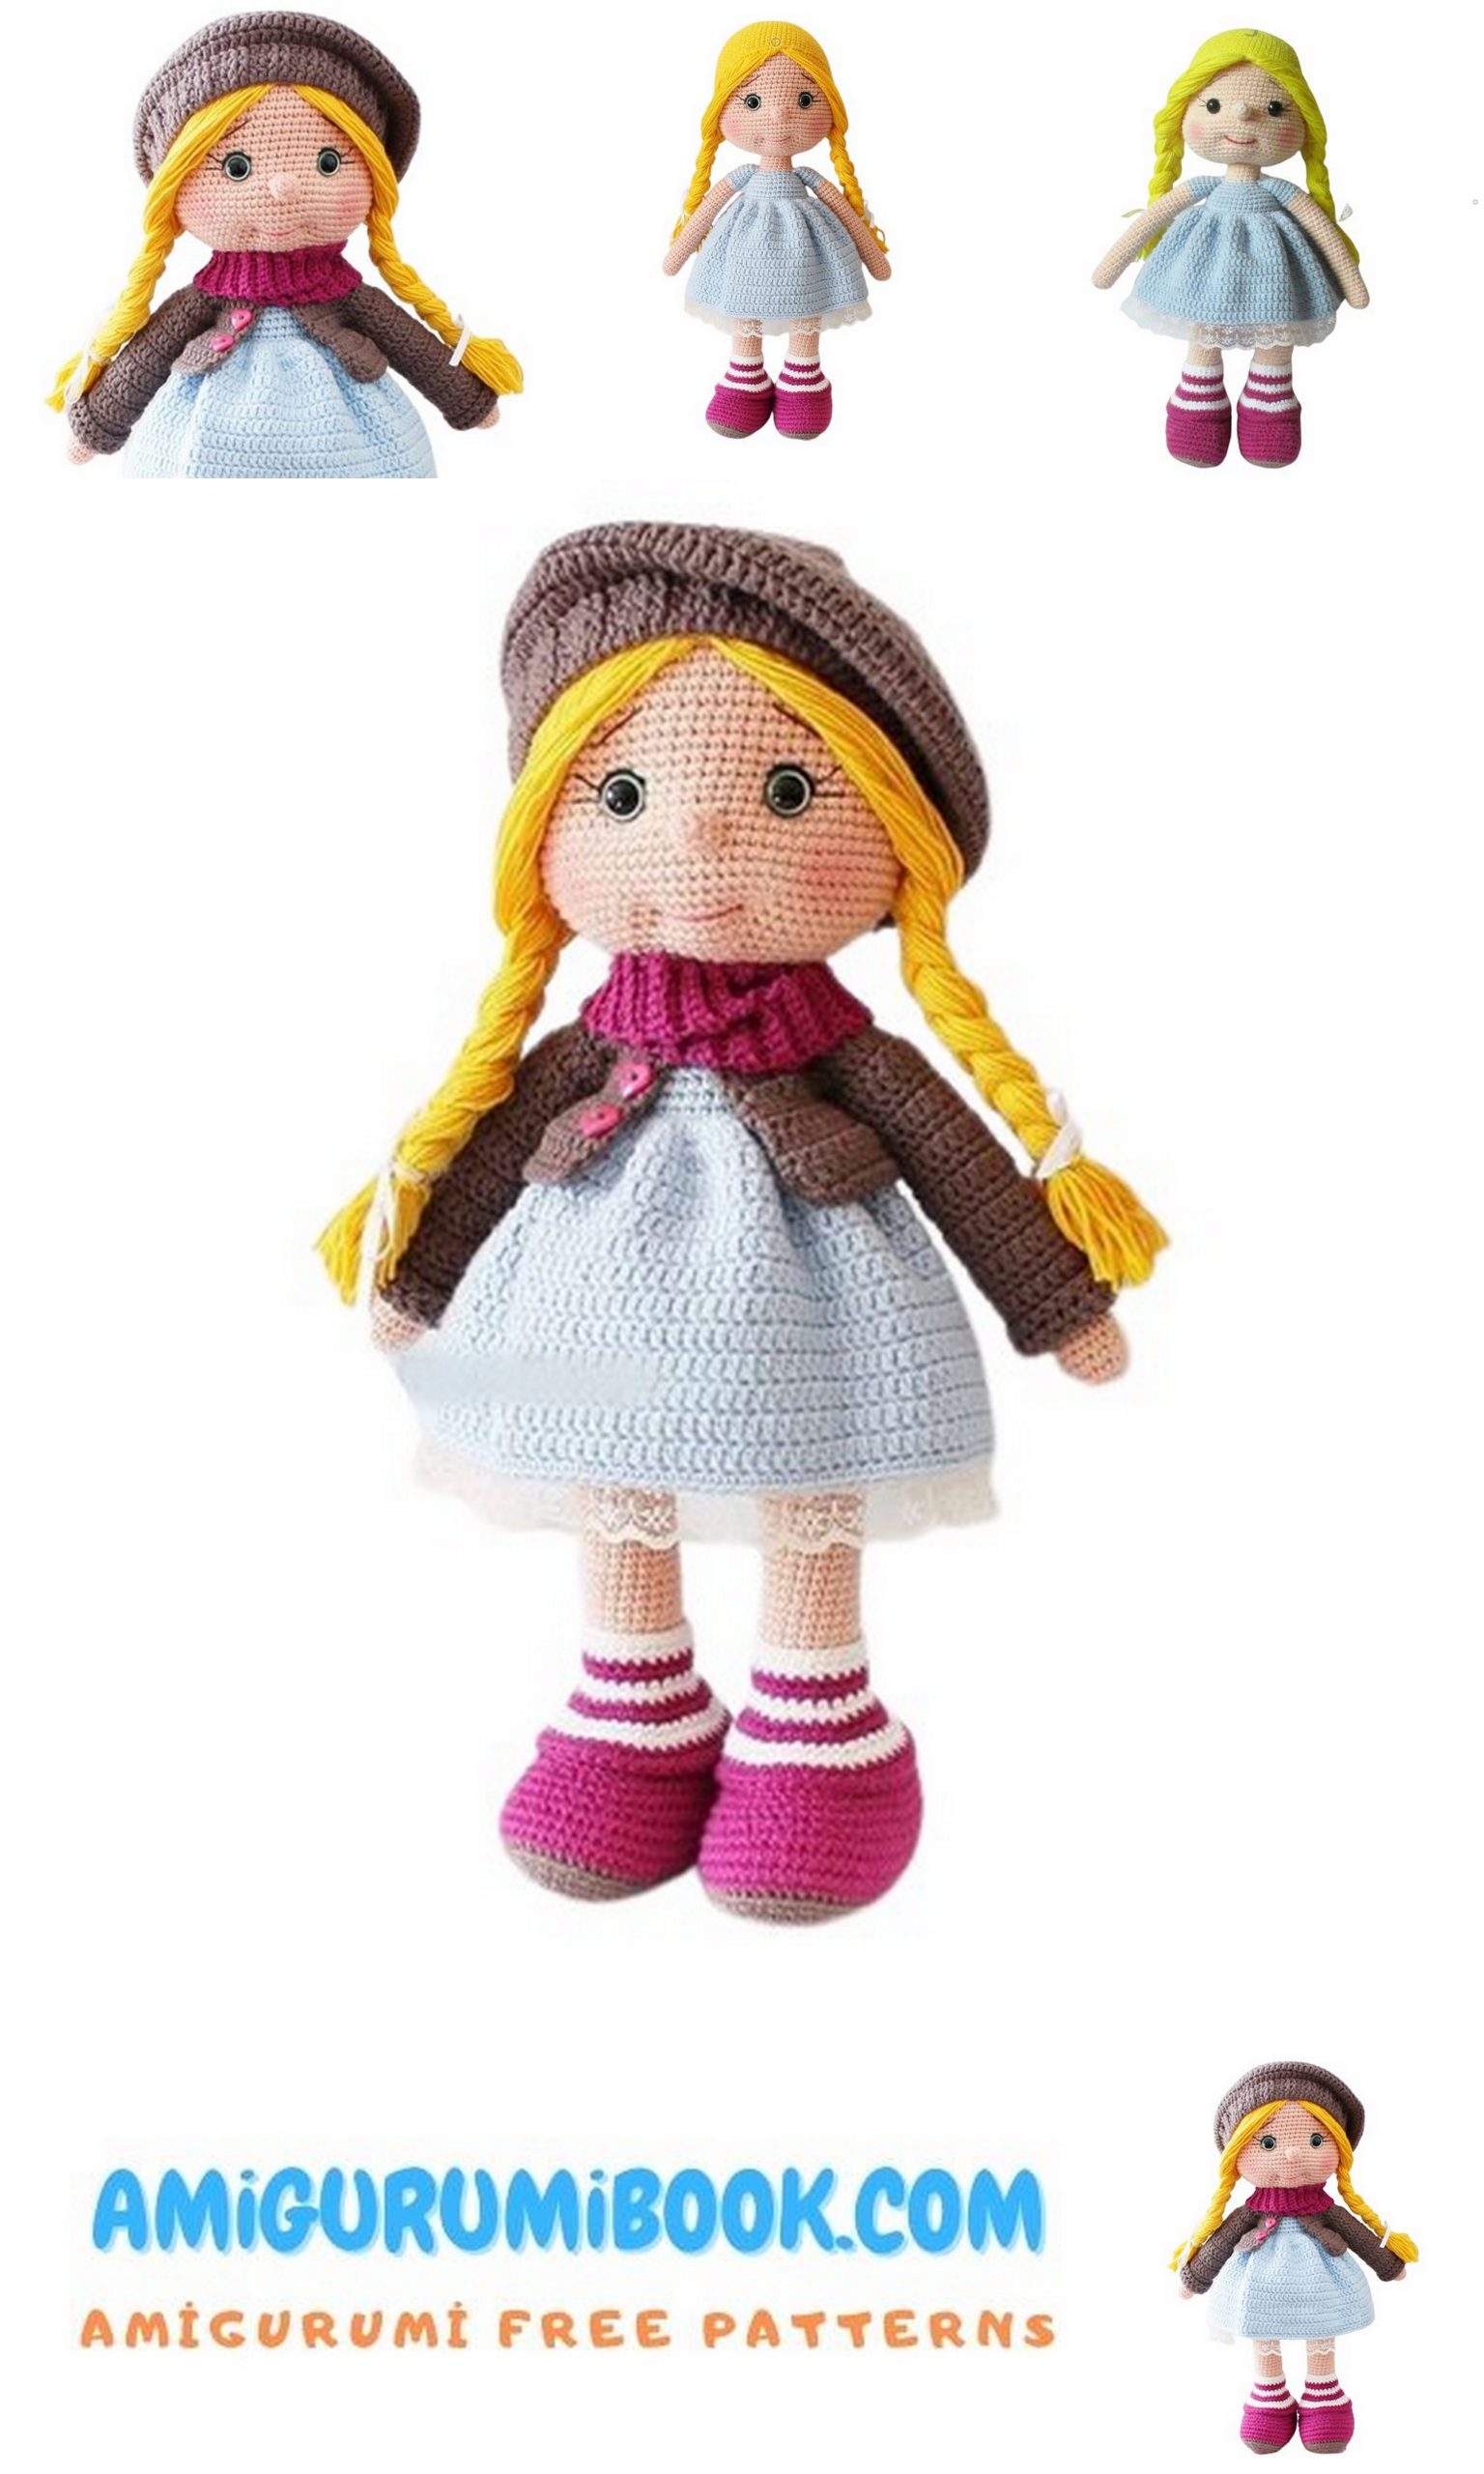
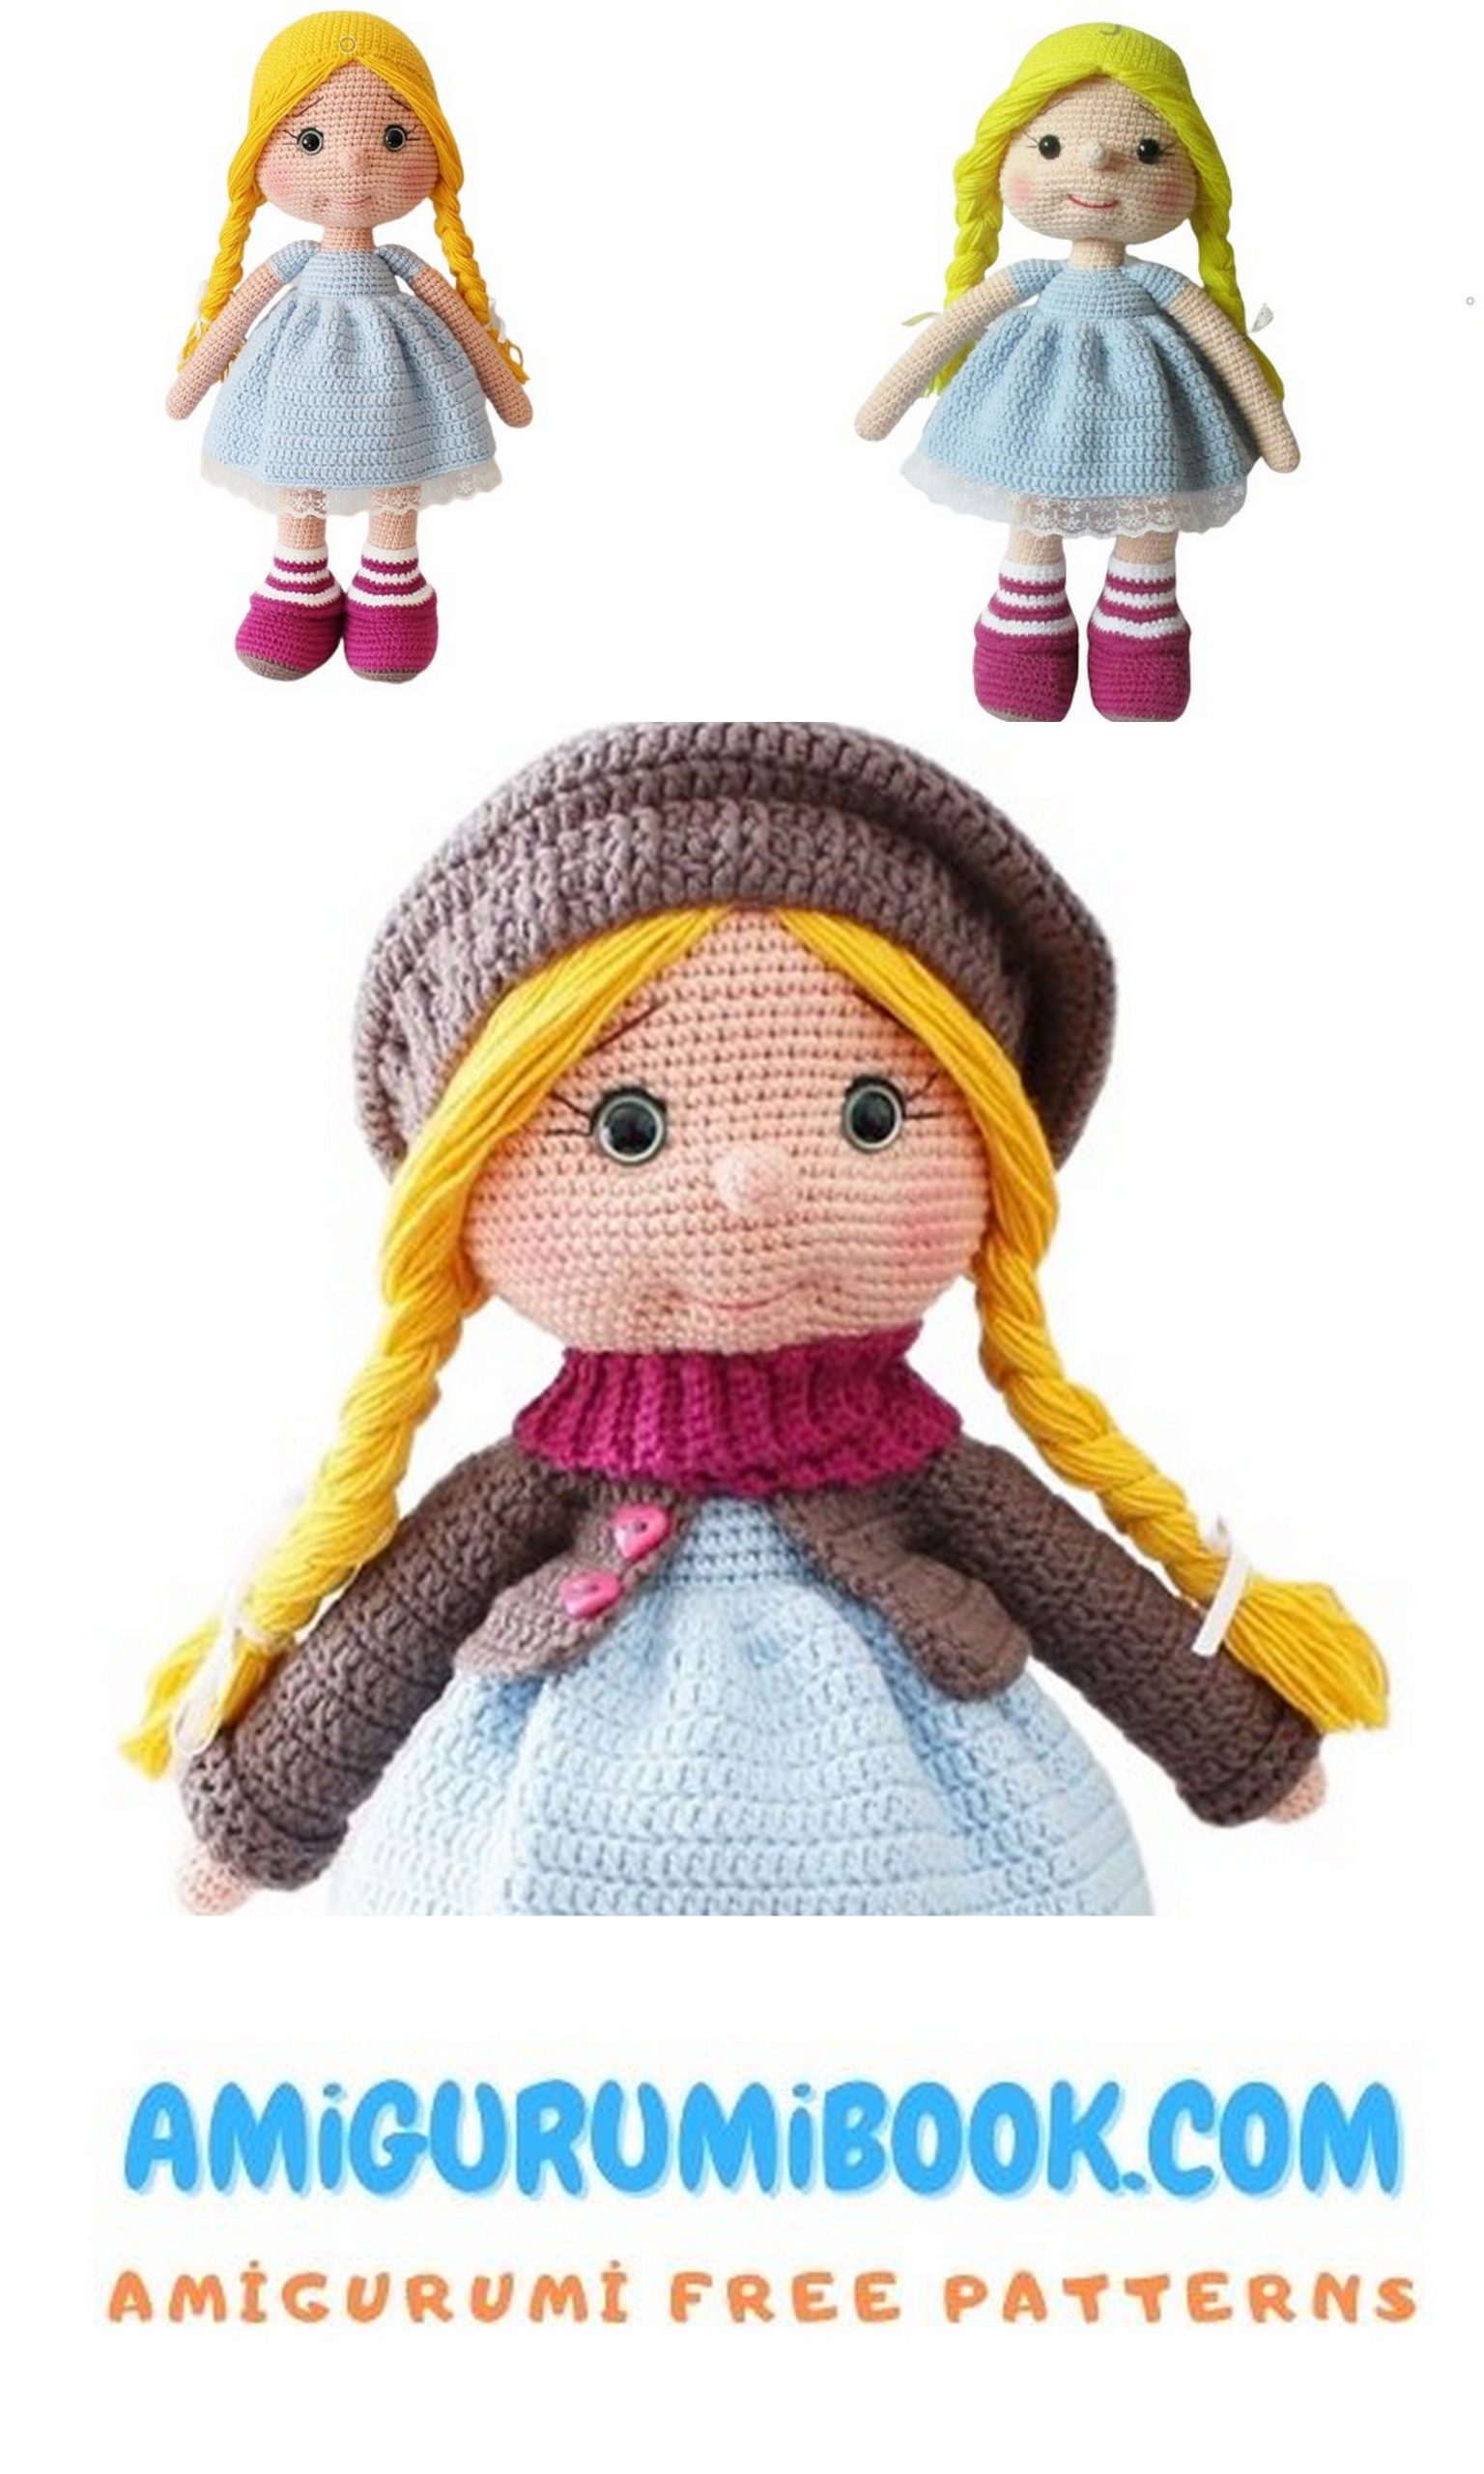
If you’re looking for a charming and stylish crochet project, this Tonton Doll Amigurumi Free Pattern is a perfect choice. With her adorable outfit, cozy scarf, and detailed design, this handmade crochet doll is sure to become a favorite in your amigurumi collection.
In this step-by-step crochet tutorial, you’ll learn how to create your own cute doll from scratch. Whether you’re making it as a gift or for your personal collection, this fun and creative amigurumi project is both enjoyable and rewarding.
If you want to access 1000+ free amigurumi patterns, you can download our application from this link!
Materials
To create this adorable Tonton doll amigurumi, you will need:
- Cotton or acrylic yarn in suitable colors
- Crochet hook appropriate for your yarn (usually 2.0–2.5 mm)
- Safety eyes or black thread for embroidery
- Polyester fiberfill stuffing
- Yarn needle for sewing parts
- Scissors
- Stitch marker
Abbreviations
DEC – decrease (crochet 2 stitches together)
CH – chain
SC – single crochet
DC – double crochet
INC – increase (2 stitches in the same stitch)
Pattern
Crocheted amigurumi doll made with a hook.
Legs (2 pieces)
Crochet with raspberry yarn. Stuff firmly as you go.
1: Ch 18. Starting from the 2nd ch from the hook:
16 sc, 3 sc in one stitch, 15 sc, inc (36)
2: inc, 15 sc, 3 inc, 15 sc, 2 inc (42)
3: sc, inc, 15 sc, (sc, inc) x3, 15 sc, (sc, inc) x2 (48)
4: 2 sc, inc, 15 sc, (2 sc, inc) x3, 15 sc, (2 sc, inc) x2 (54)
5: 19 sc, (sc, inc) x6, 23 sc (60)
6: 60 sc in BLO
7–9: 60 sc
10: 19 sc, (sc, dec) x6, 23 sc (54)
11: 54 sc
12: 17 sc, (sc, dec) x6, 19 sc (48)
13: 48 sc
14: 17 sc, 6 dec, 19 sc (42)
15: (5 sc, dec) x6 (36)
16: (4 sc, dec) x6 (30)
Change yarn to white
17: (3 sc, dec) x6 (24)
18: (4 sc, dec) x4 (20)
19–39: 20 sc (21 rows)
Fasten off and cut the yarn.
Make the second leg the same way.
Socks
Crochet loosely, alternating white and raspberry yarn every row.
Start with white yarn:
Ch 24
1–5: 24 sc
6: (3 sc, inc) x6 (30)
7: 30 sc
8: (4 sc, inc) x6 (36)
9: (5 sc, inc) x6 (42)
10–11: 42 sc
Fasten off and hide the yarn ends.
Place the socks onto the legs:
Sew the bottom edge with raspberry yarn
Sew the top edge with white yarn
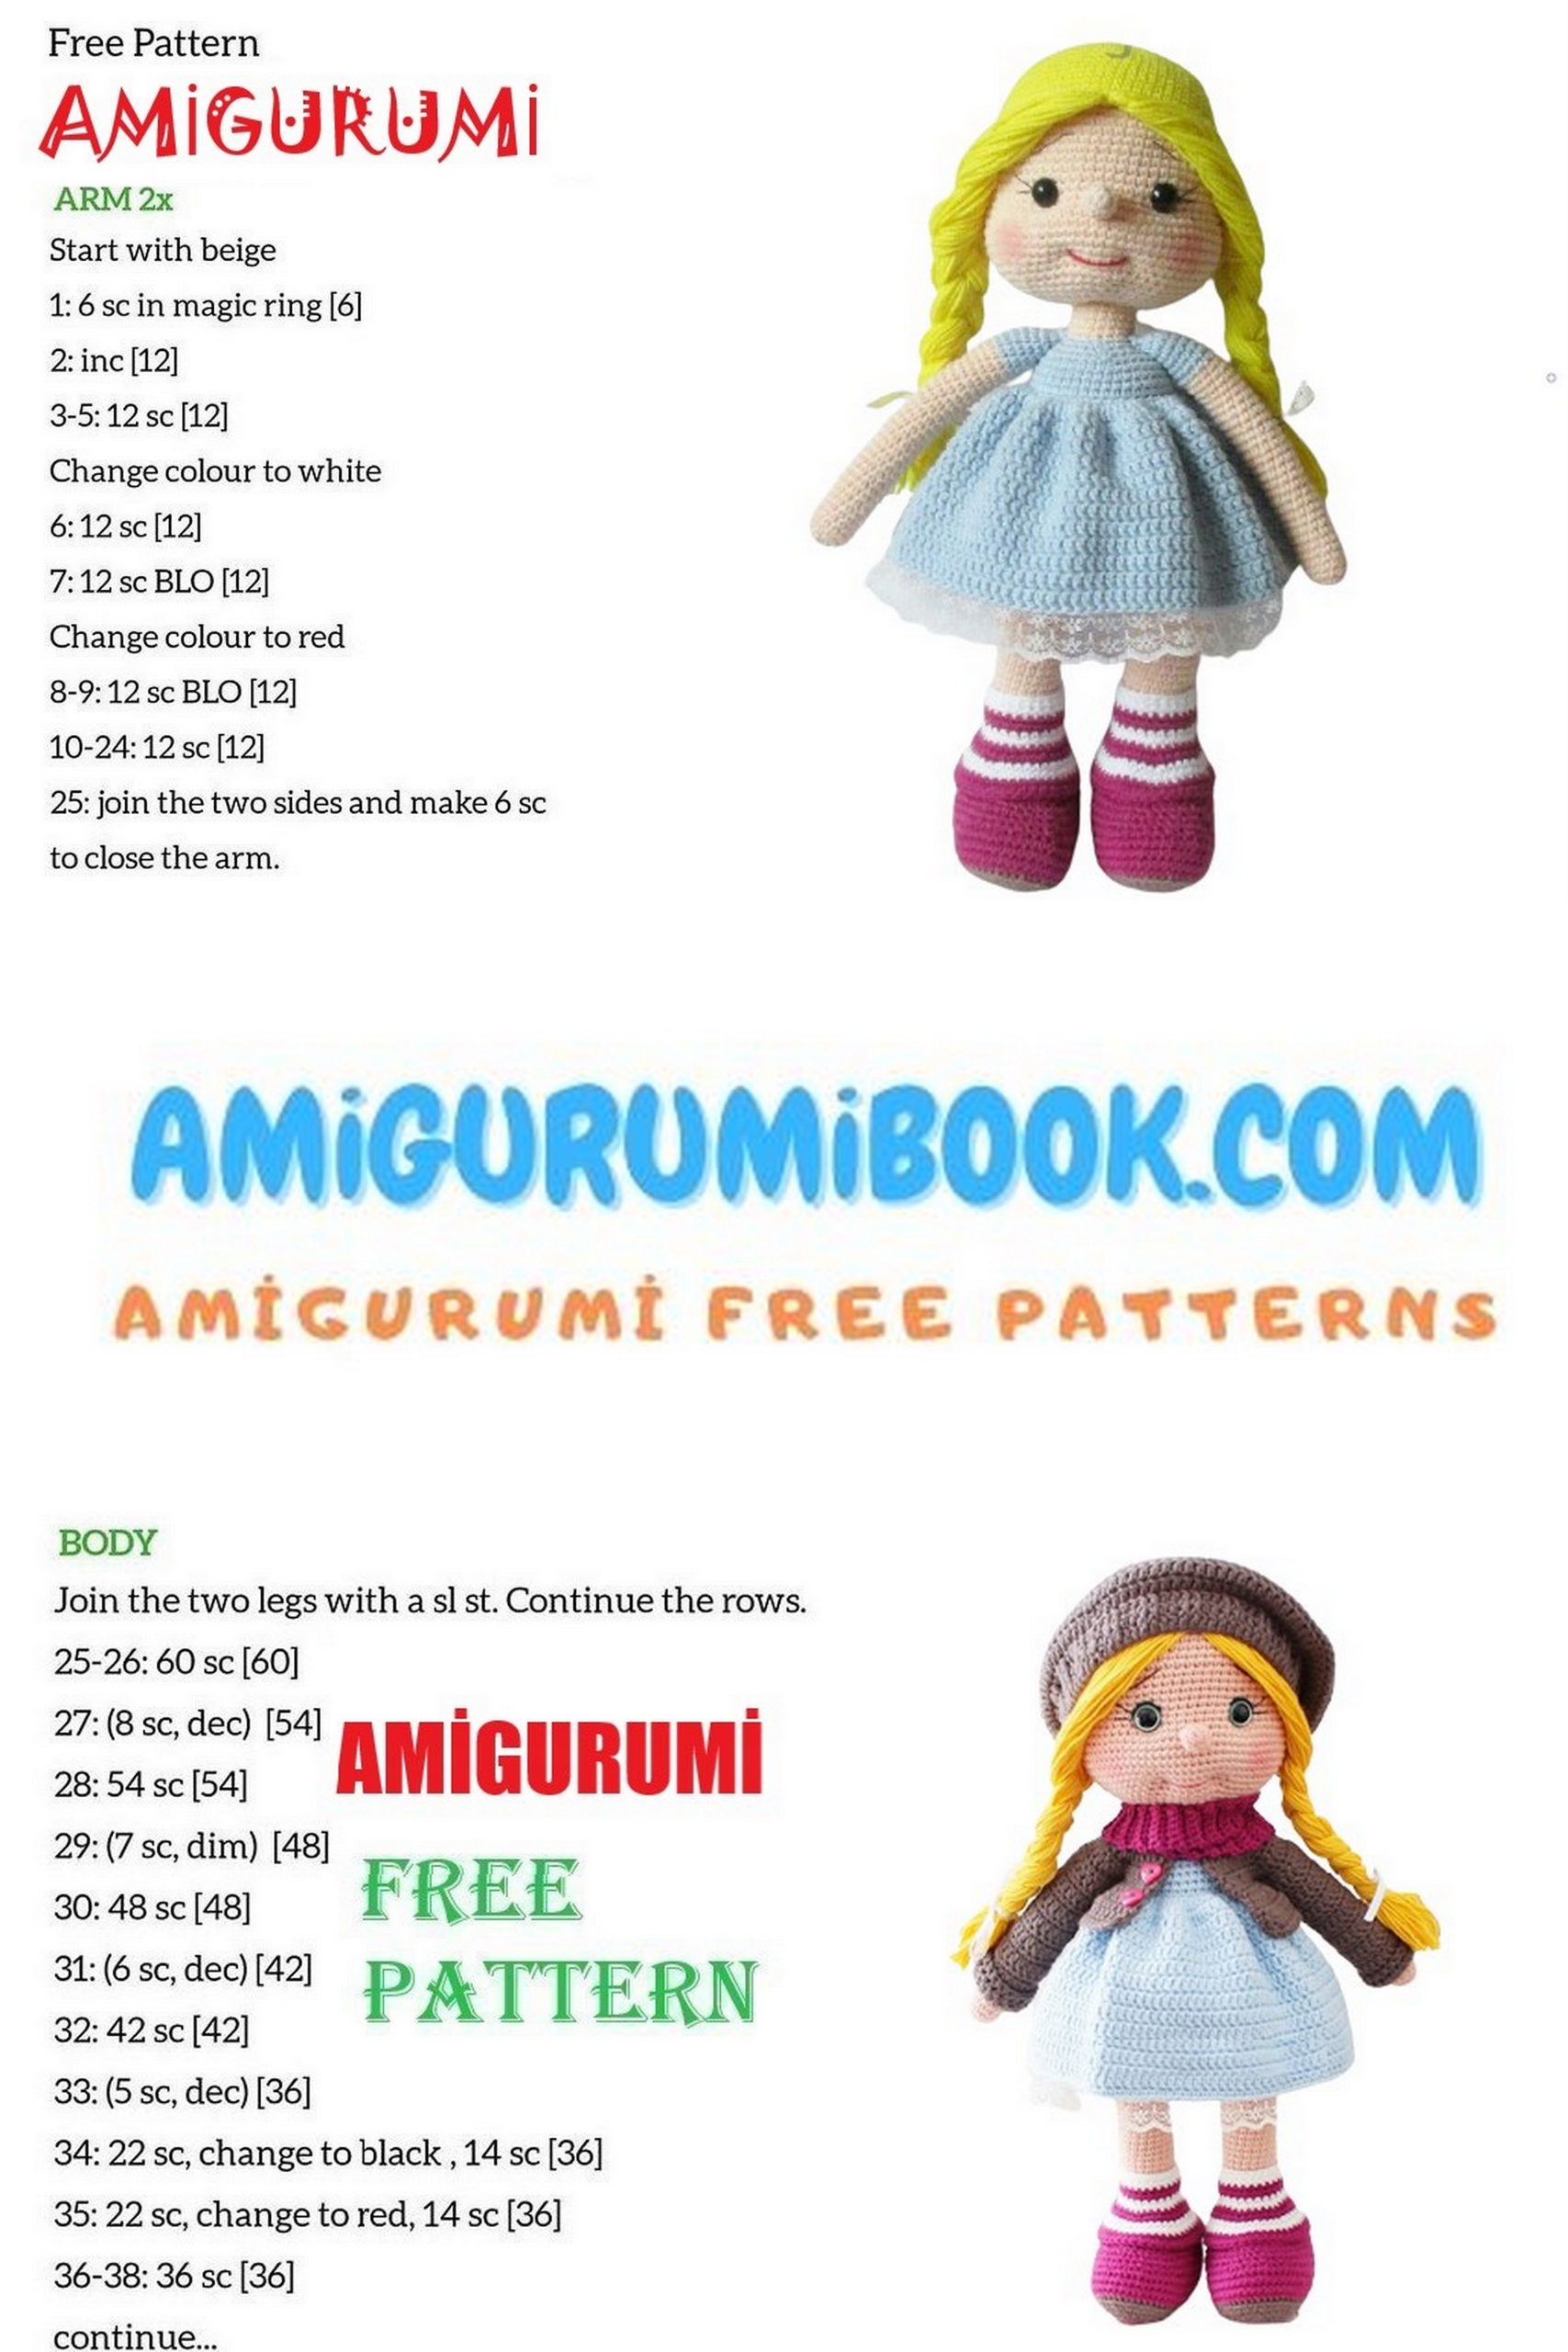
Torso
Start by joining the legs.
40: Attach white yarn to any leg.
7 sc, ch 7, join to the second leg,
20 sc, 7 sc in chain, 20 sc, 7 sc in chain (54)
Place a marker.
41–42: 54 sc
43: (8 sc, inc) x6 (60)
44–50: 60 sc (7 rows)
51: (8 sc, dec) x6 (54)
52–53: 54 sc
54: (7 sc, dec) x6 (48)
55–59: 48 sc (5 rows)
60: (6 sc, dec) x6 (42)
61–65: 42 sc (5 rows)
Change yarn to gray
66: 42 sc
67: 42 sc in BLO
68–70: 42 sc
71: (5 sc, dec) x6 (36)
72: (4 sc, dec) x6 (30)
73: (3 sc, dec) x6 (24)
Change yarn to white
74: (4 sc, dec) x4 (20)
75–78: 20 sc (4 rows)
Fasten off and cut the yarn.
Skirt
Return to round 67 (BLO row) and attach gray yarn.
Work into the front loops (FLO) counter-clockwise.
1: Ch 3, dc in each stitch around, finish with sc (82 dc)
2: Ch 3, (sc, inc) repeat to end, finish with sc (124 sc)
3–20: 124 sc (18 rows)
Each row: ch 3 at the beginning, finish with sc in first stitch
Fasten off and hide the yarn.
Add lace along the edge of the skirt if desired.
Underskirt
Create the underskirt following your preferred decorative pattern.
Arms (2 pieces)
Crochet with white yarn.
1: 6 sc in MC (6)
2: 6 inc (12)
3–6: 12 sc
Change yarn to gray
7–36: 12 sc (30 rows)
37: 6 dec (6)
Lightly stuff if needed, then fasten off leaving a tail for sewing.
Bolero
Crochet with dark gray yarn.
1: Ch 40. Starting from the 11th ch from hook:
sc, ch 3, 4 dc, 3 dc in next st,
5 dc, 3 dc in next st,
8 dc, 3 dc in next st,
5 dc, 3 dc in next st,
4 dc, turn
2: Ch 3, 5 sc, 3 sc in next st,
7 sc, 3 sc in next st,
10 sc, 3 sc in next st,
7 sc, 3 sc in next st,
5 sc, turn
3: Ch 2, 6 dc, 3 dc in next st,
9 dc, 3 dc in next st,
12 dc, 3 dc in next st,
9 dc, 3 dc in next st,
6 dc, turn
4: Ch 1, 7 sc, 3 sc in next st,
11 sc, 3 sc in next st,
14 sc, 3 sc in next st,
11 sc, 3 sc in next st,
7 sc, turn
5: Ch 2, 8 dc, 3 dc in next st,
13 dc, 3 dc in next st,
16 dc, 3 dc in next st,
13 dc, 3 dc in next st,
8 dc, turn
6: Ch 1, 9 sc, 3 sc in next st,
15 sc, 3 sc in next st,
18 sc, 3 sc in next st,
15 sc, 3 sc in next st,
9 sc, turn
7: Ch 2, (dc, inc) x5, skip 19 sts,
(dc, inc) x10, skip 19 sts,
(inc, dc) x5, turn
8: Ch 1, 60 sc
9: Ch 2, 60 dc
10: Ch 1, 60 sc
Fasten off and cut the yarn.
Bolero Sleeves
Crochet with gray yarn.
1: Ch 2, 19 sc in round, sl st (19)
2: Ch 2, 19 sc, sl st (19)
3–17: Alternate:
• one row sc
• one row dc
18: 19 sc in FLO, sl st (19)
19: Ch 2, 19 dc, sl st (19)
Fasten off and cut the yarn.
Finishing
Sew 3 buttons onto the bolero.

Head
Start with flesh-colored yarn.
1: 6 sc in MC (6)
2: 6 inc (12)
3: (1 sc, inc) x6 (18)
4: (2 sc, inc) x6 (24)
5: (3 sc, inc) x6 (30)
6: (4 sc, inc) x6 (36)
7: (5 sc, inc) x6 (42)
8: (6 sc, inc) x6 (48)
9: (7 sc, inc) x6 (54)
10: (8 sc, inc) x6 (60)
11: (9 sc, inc) x6 (66)
12–24: 66 sc
25: (10 sc, inc) x6 (72)
26: (11 sc, inc) x6 (78)
27–31: 78 sc
32: (11 sc, dec) x6 (72)
33: (10 sc, dec) x6 (66)
34: (9 sc, dec) x6 (60)
35: (8 sc, dec) x6 (54)
36: (7 sc, dec) x6 (48)
37: (6 sc, dec) x6 (42)
38: (5 sc, dec) x6 (36)
39: (4 sc, dec) x6 (30)
40: (3 sc, dec) x6 (24)
41: (2 sc, dec) x6 (18)
Place the eyes between rounds 23–24, leaving 10 stitches between them.
Hair
(Same structure as the head)
1: 6 sc in MC (6)
2: 6 inc (12)
3: (1 sc, inc) x6 (18)
4: (2 sc, inc) x6 (24)
5: (3 sc, inc) x6 (30)
6: (4 sc, inc) x6 (36)
7: (5 sc, inc) x6 (42)
8: (6 sc, inc) x6 (48)
9: (7 sc, inc) x6 (54)
10: (8 sc, inc) x6 (60)
11: (9 sc, inc) x6 (66)
12–24: 66 sc
25: (10 sc, inc) x6 (72)
26: (11 sc, inc) x6 (78)
27–31: 78 sc
32: (11 sc, dec) x6 (72)
33: (10 sc, dec) x6 (66)
34: (9 sc, dec) x6 (60)
35: (8 sc, dec) x6 (54)
36: (7 sc, dec) x6 (48)
37: (6 sc, dec) x6 (42)
38: (5 sc, dec) x6 (36)
39: (4 sc, dec) x6 (30)
40: (3 sc, dec) x6 (24)
41: (2 sc, dec) x6 (18)
Attach the hair to the head at the last round.
Hat
Ch 80 and join to form a circle.
1: Ch 3, 80 sc, sl st (80)
2–3: Ch 3, (2 sc, 2 dc in same st) repeat to end
4: Ch 3, (9 sc, inc) x8, sl st (88)
5–7: Ch 3, 88 sc, sl st
8: Ch 3, (9 sc, dec) x8, sl st (80)
9: Ch 3, (8 sc, dec) x8, sl st (72)
10: Ch 3, (7 sc, dec) x8, sl st (64)
11: Ch 3, (6 sc, dec) x8, sl st (56)
12: Ch 3, (5 sc, dec) x8, sl st (48)
13: Ch 3, (4 sc, dec) x8, sl st (40)
14: Ch 3, (3 sc, dec) x8, sl st (32)
15: 16 dec (16)
Fasten off.
Scarf
Ch 7
1: Starting from the 2nd ch from hook, 6 sc, turn
2–102: Ch 1, 6 sc in BLO, turn (101 rows)
Fasten off and hide the yarn.
Assembly
- Sew the legs and body securely together
- Attach the arms evenly on both sides of the body
- Sew the head firmly onto the body
- Attach the hair to the head and adjust as desired
- Place the hat on the head and secure it if needed
- Wrap the scarf around the neck
- Add final details such as facial features and decorations