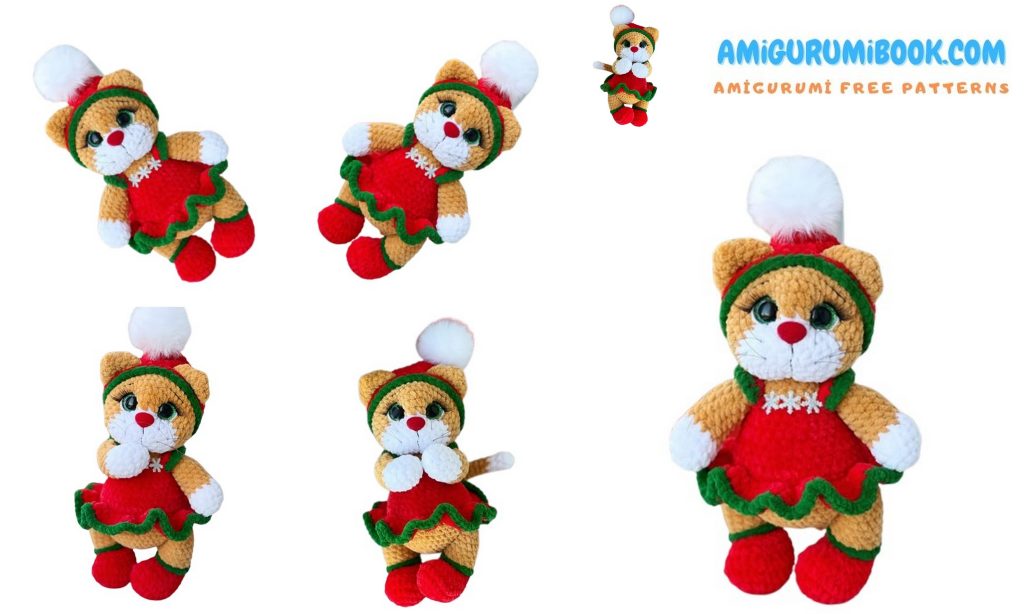
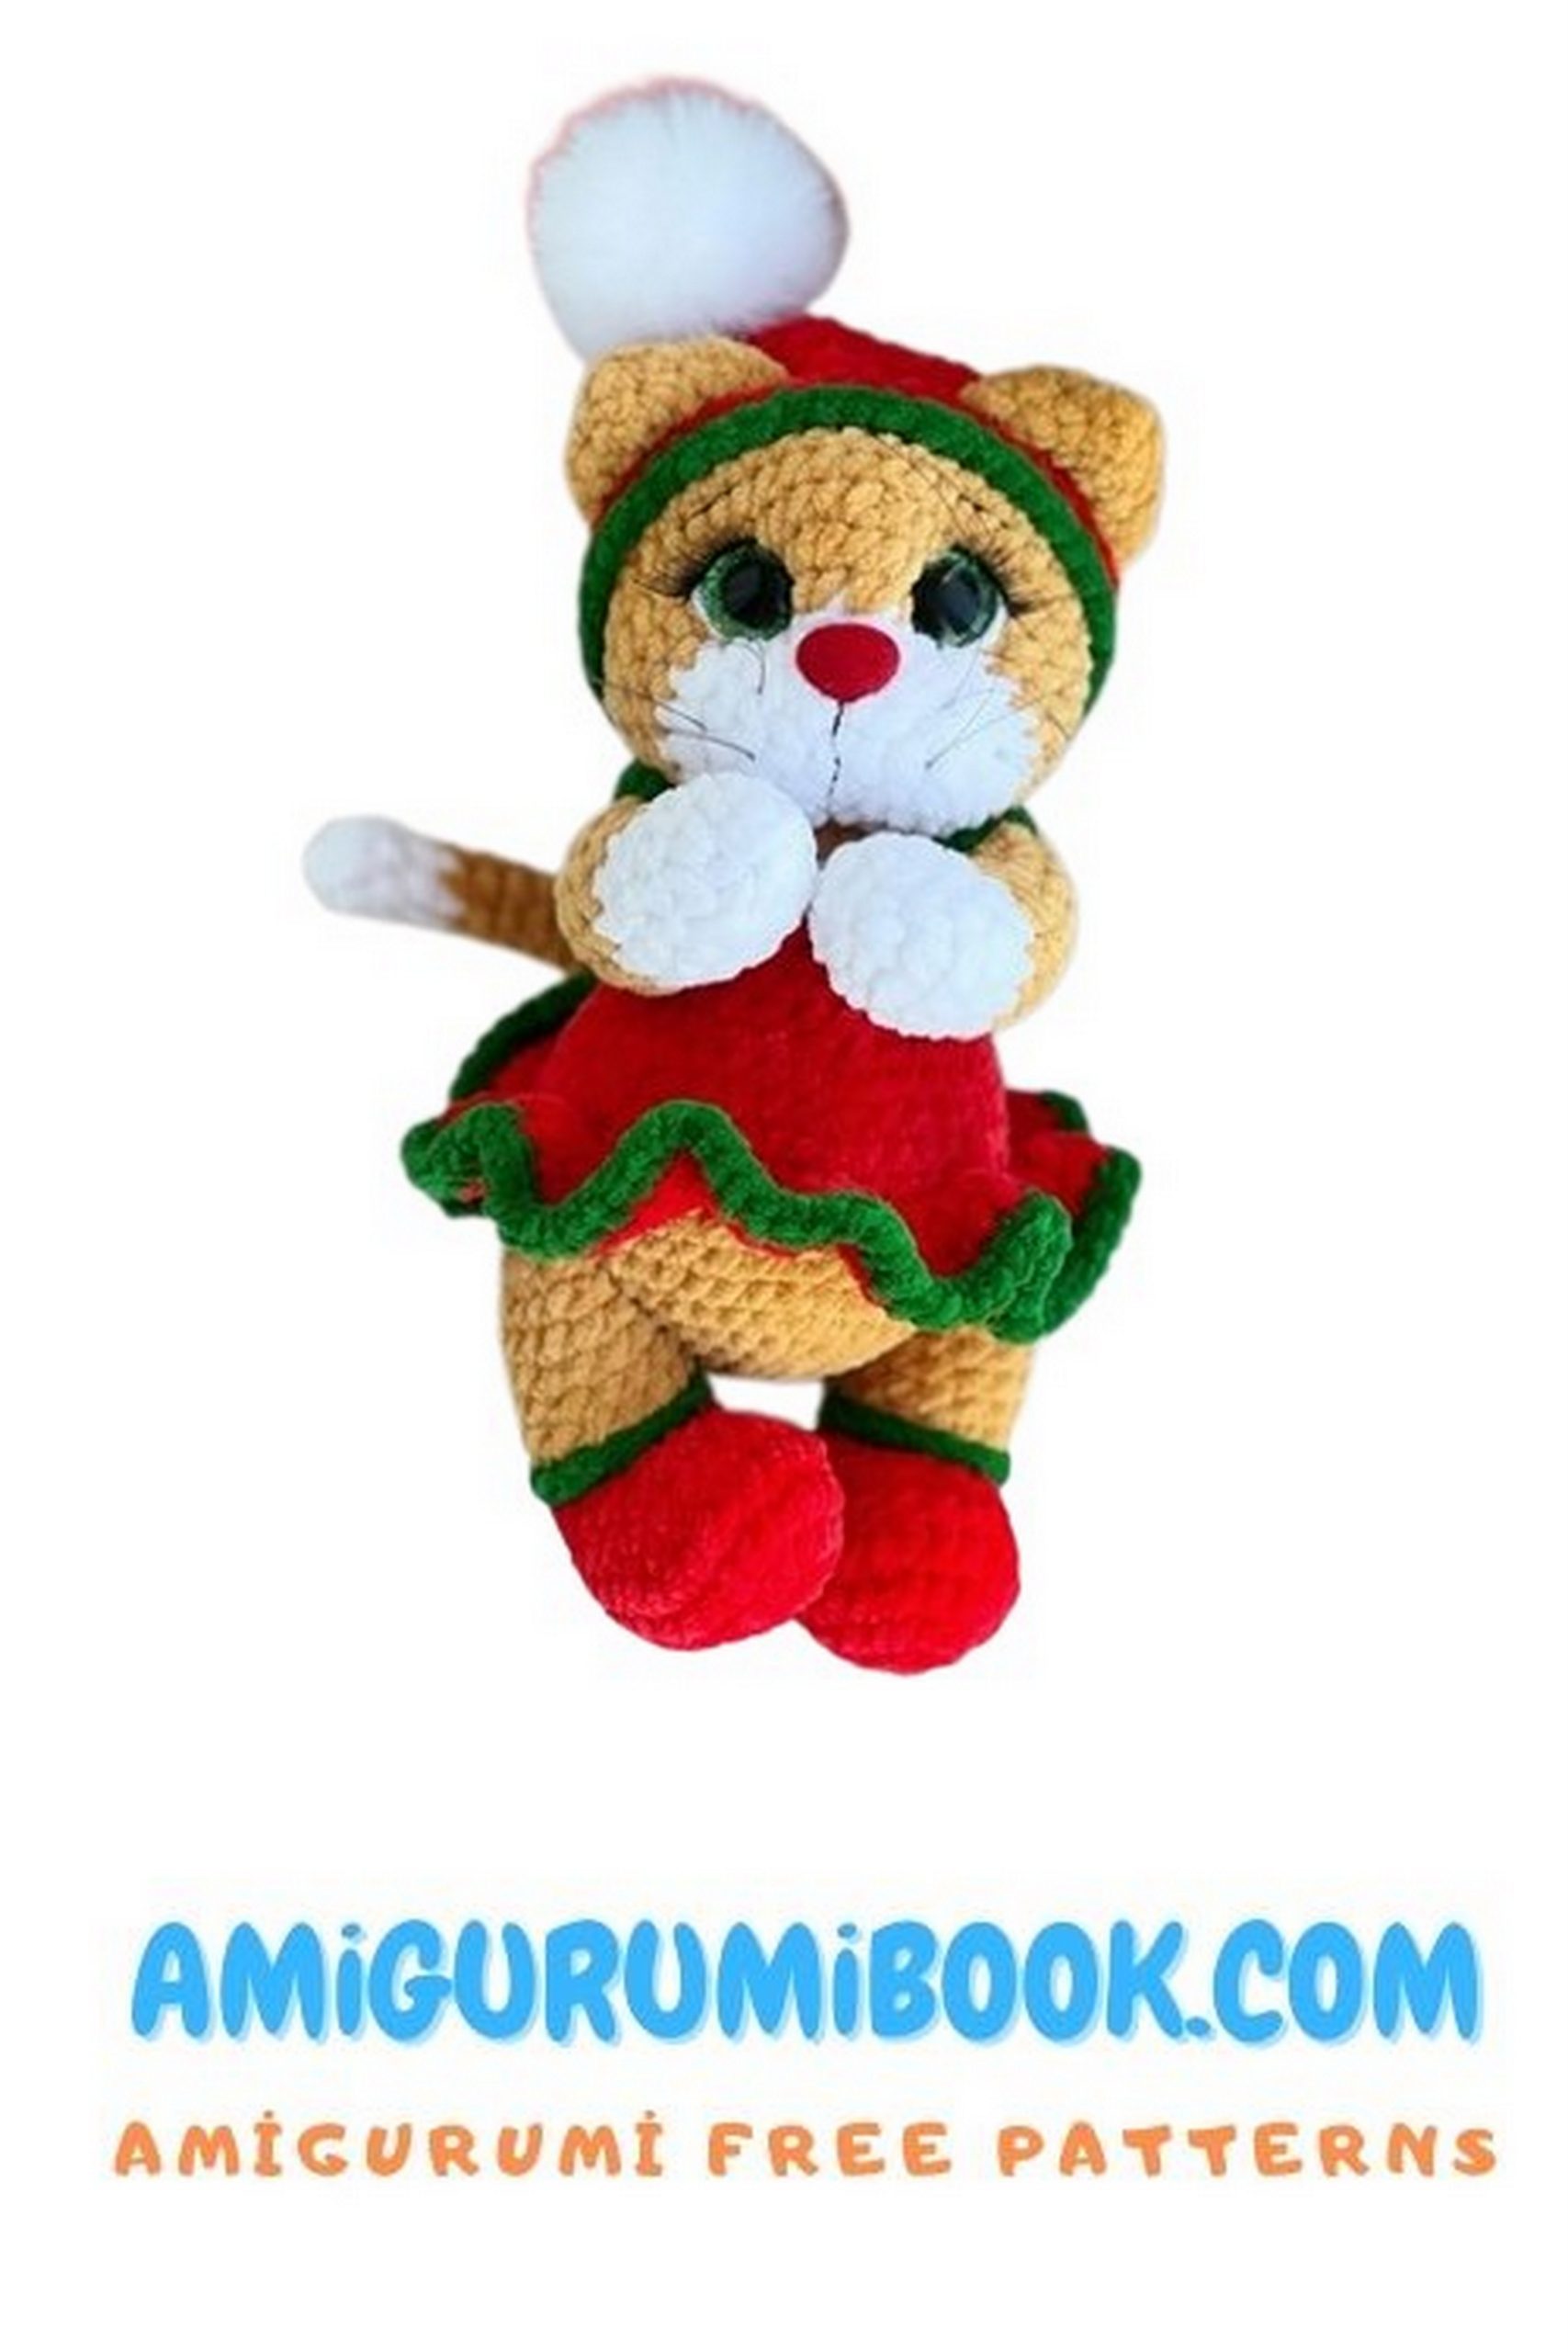
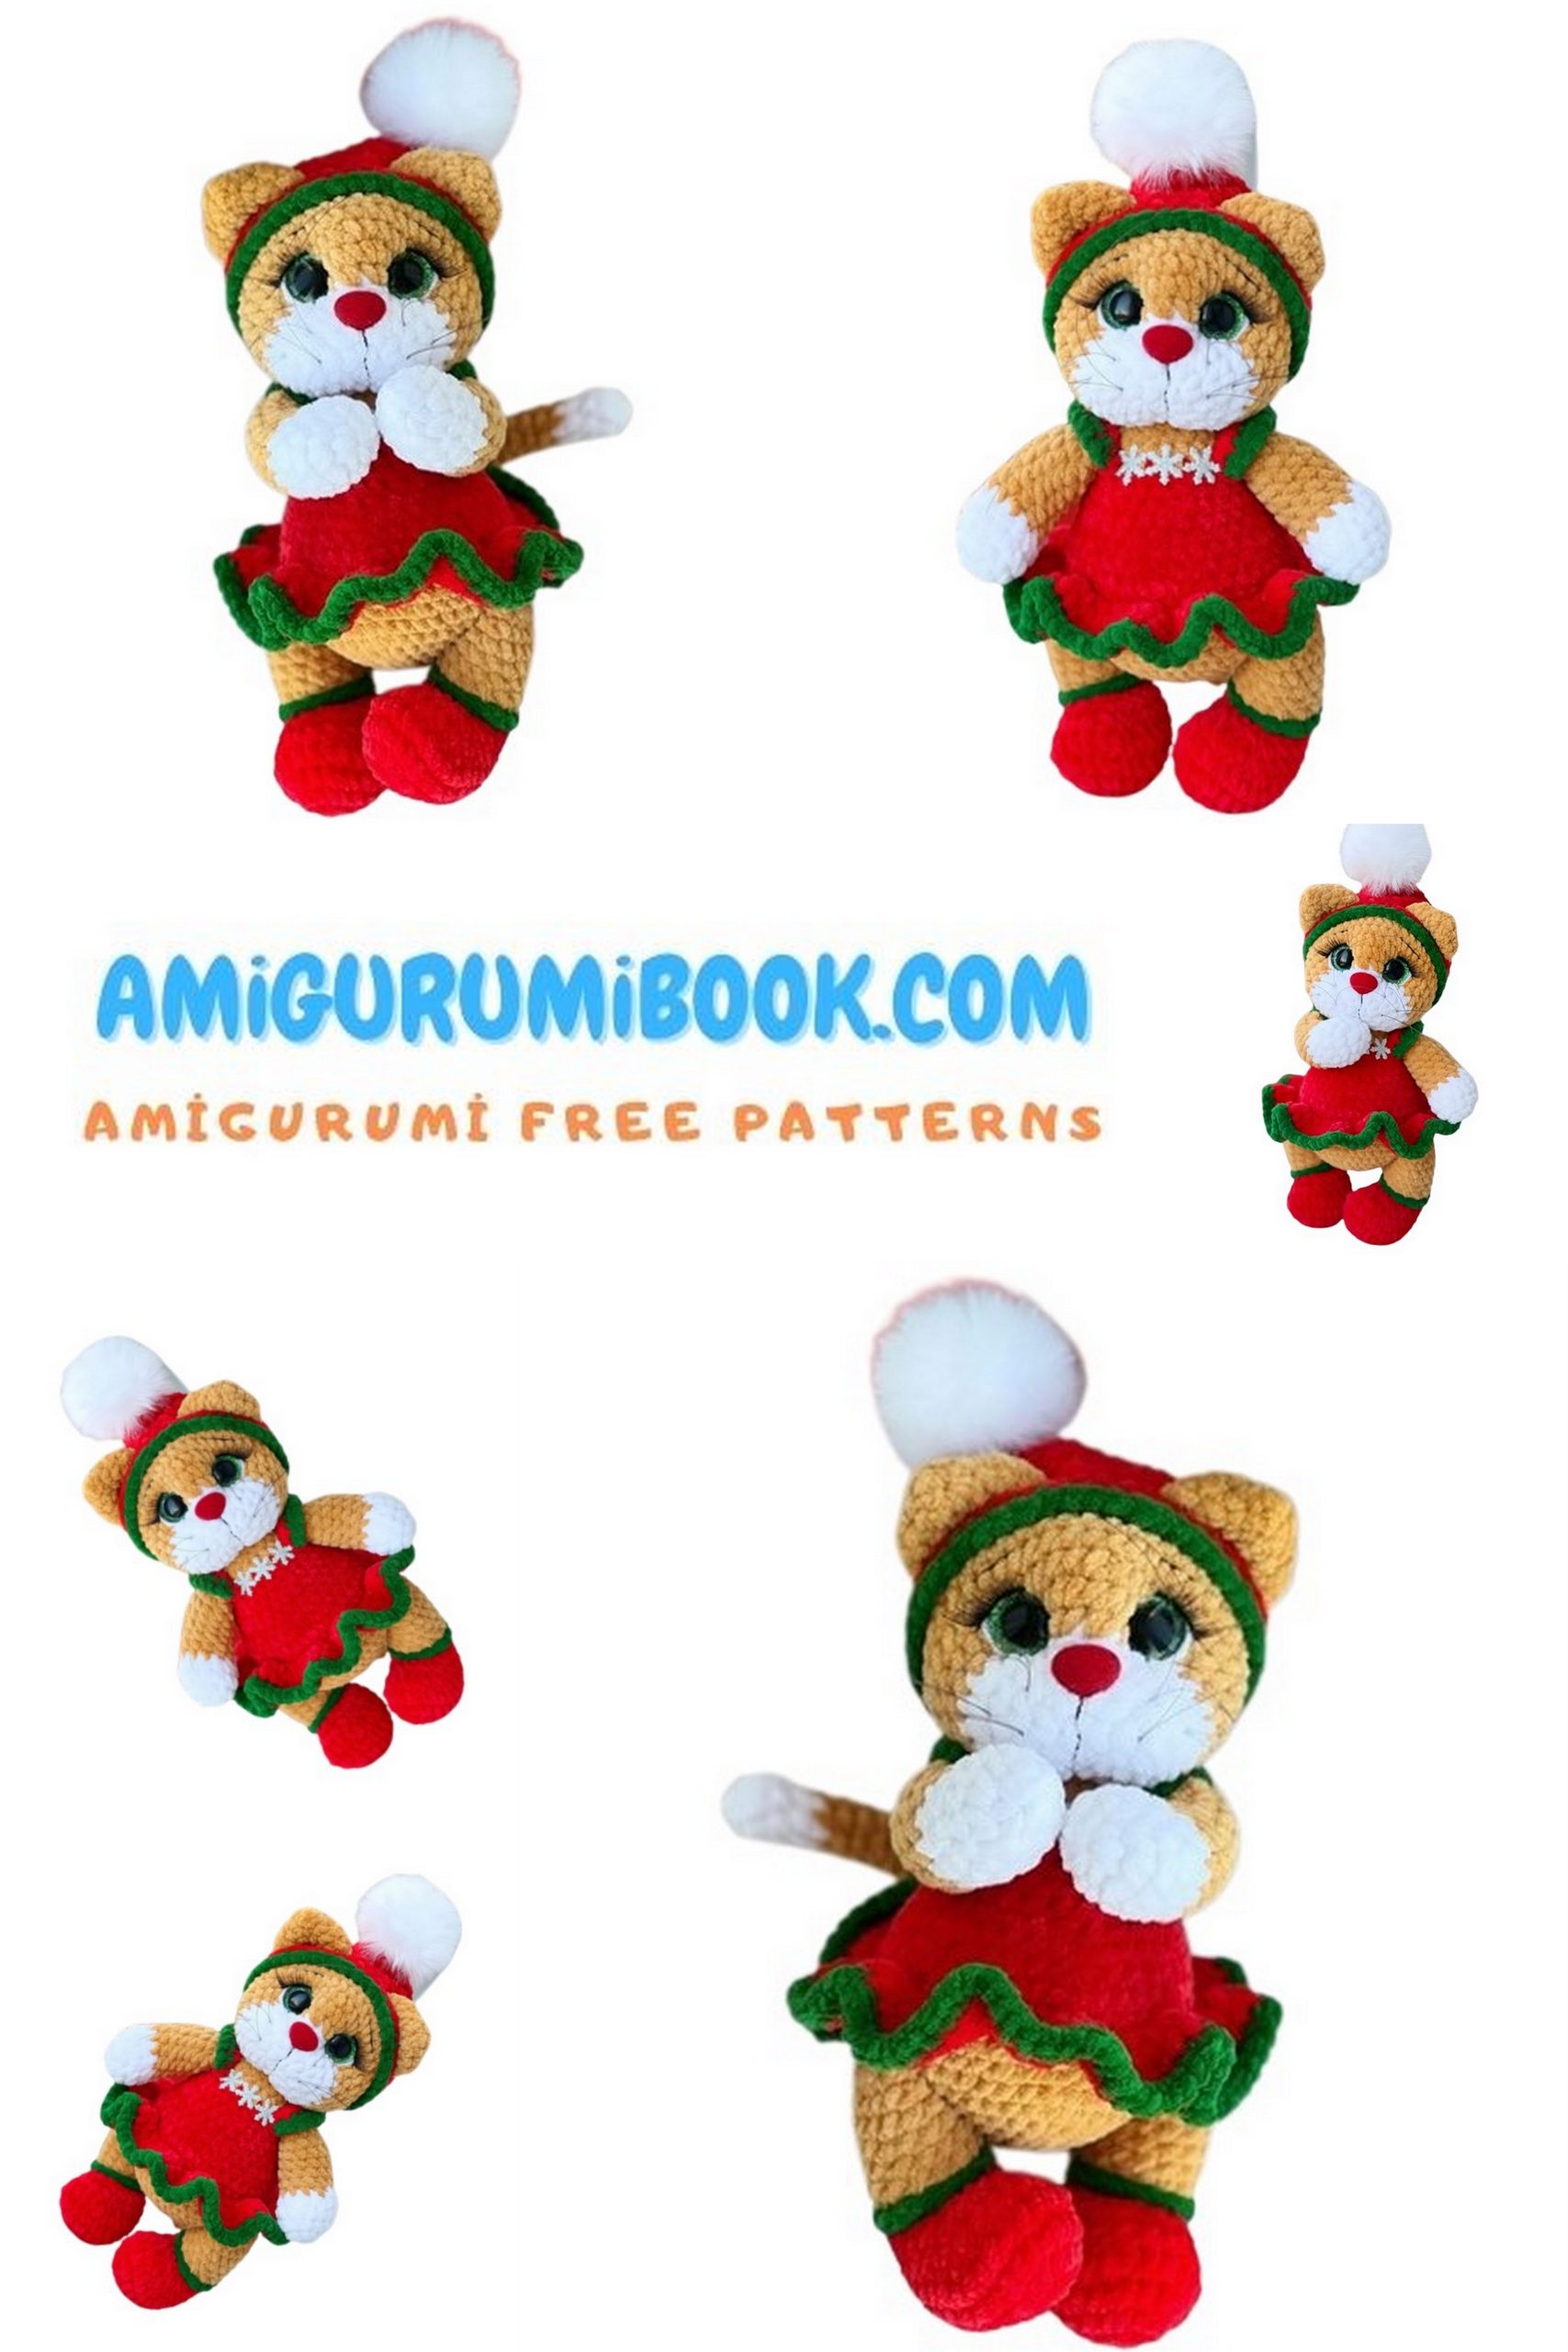
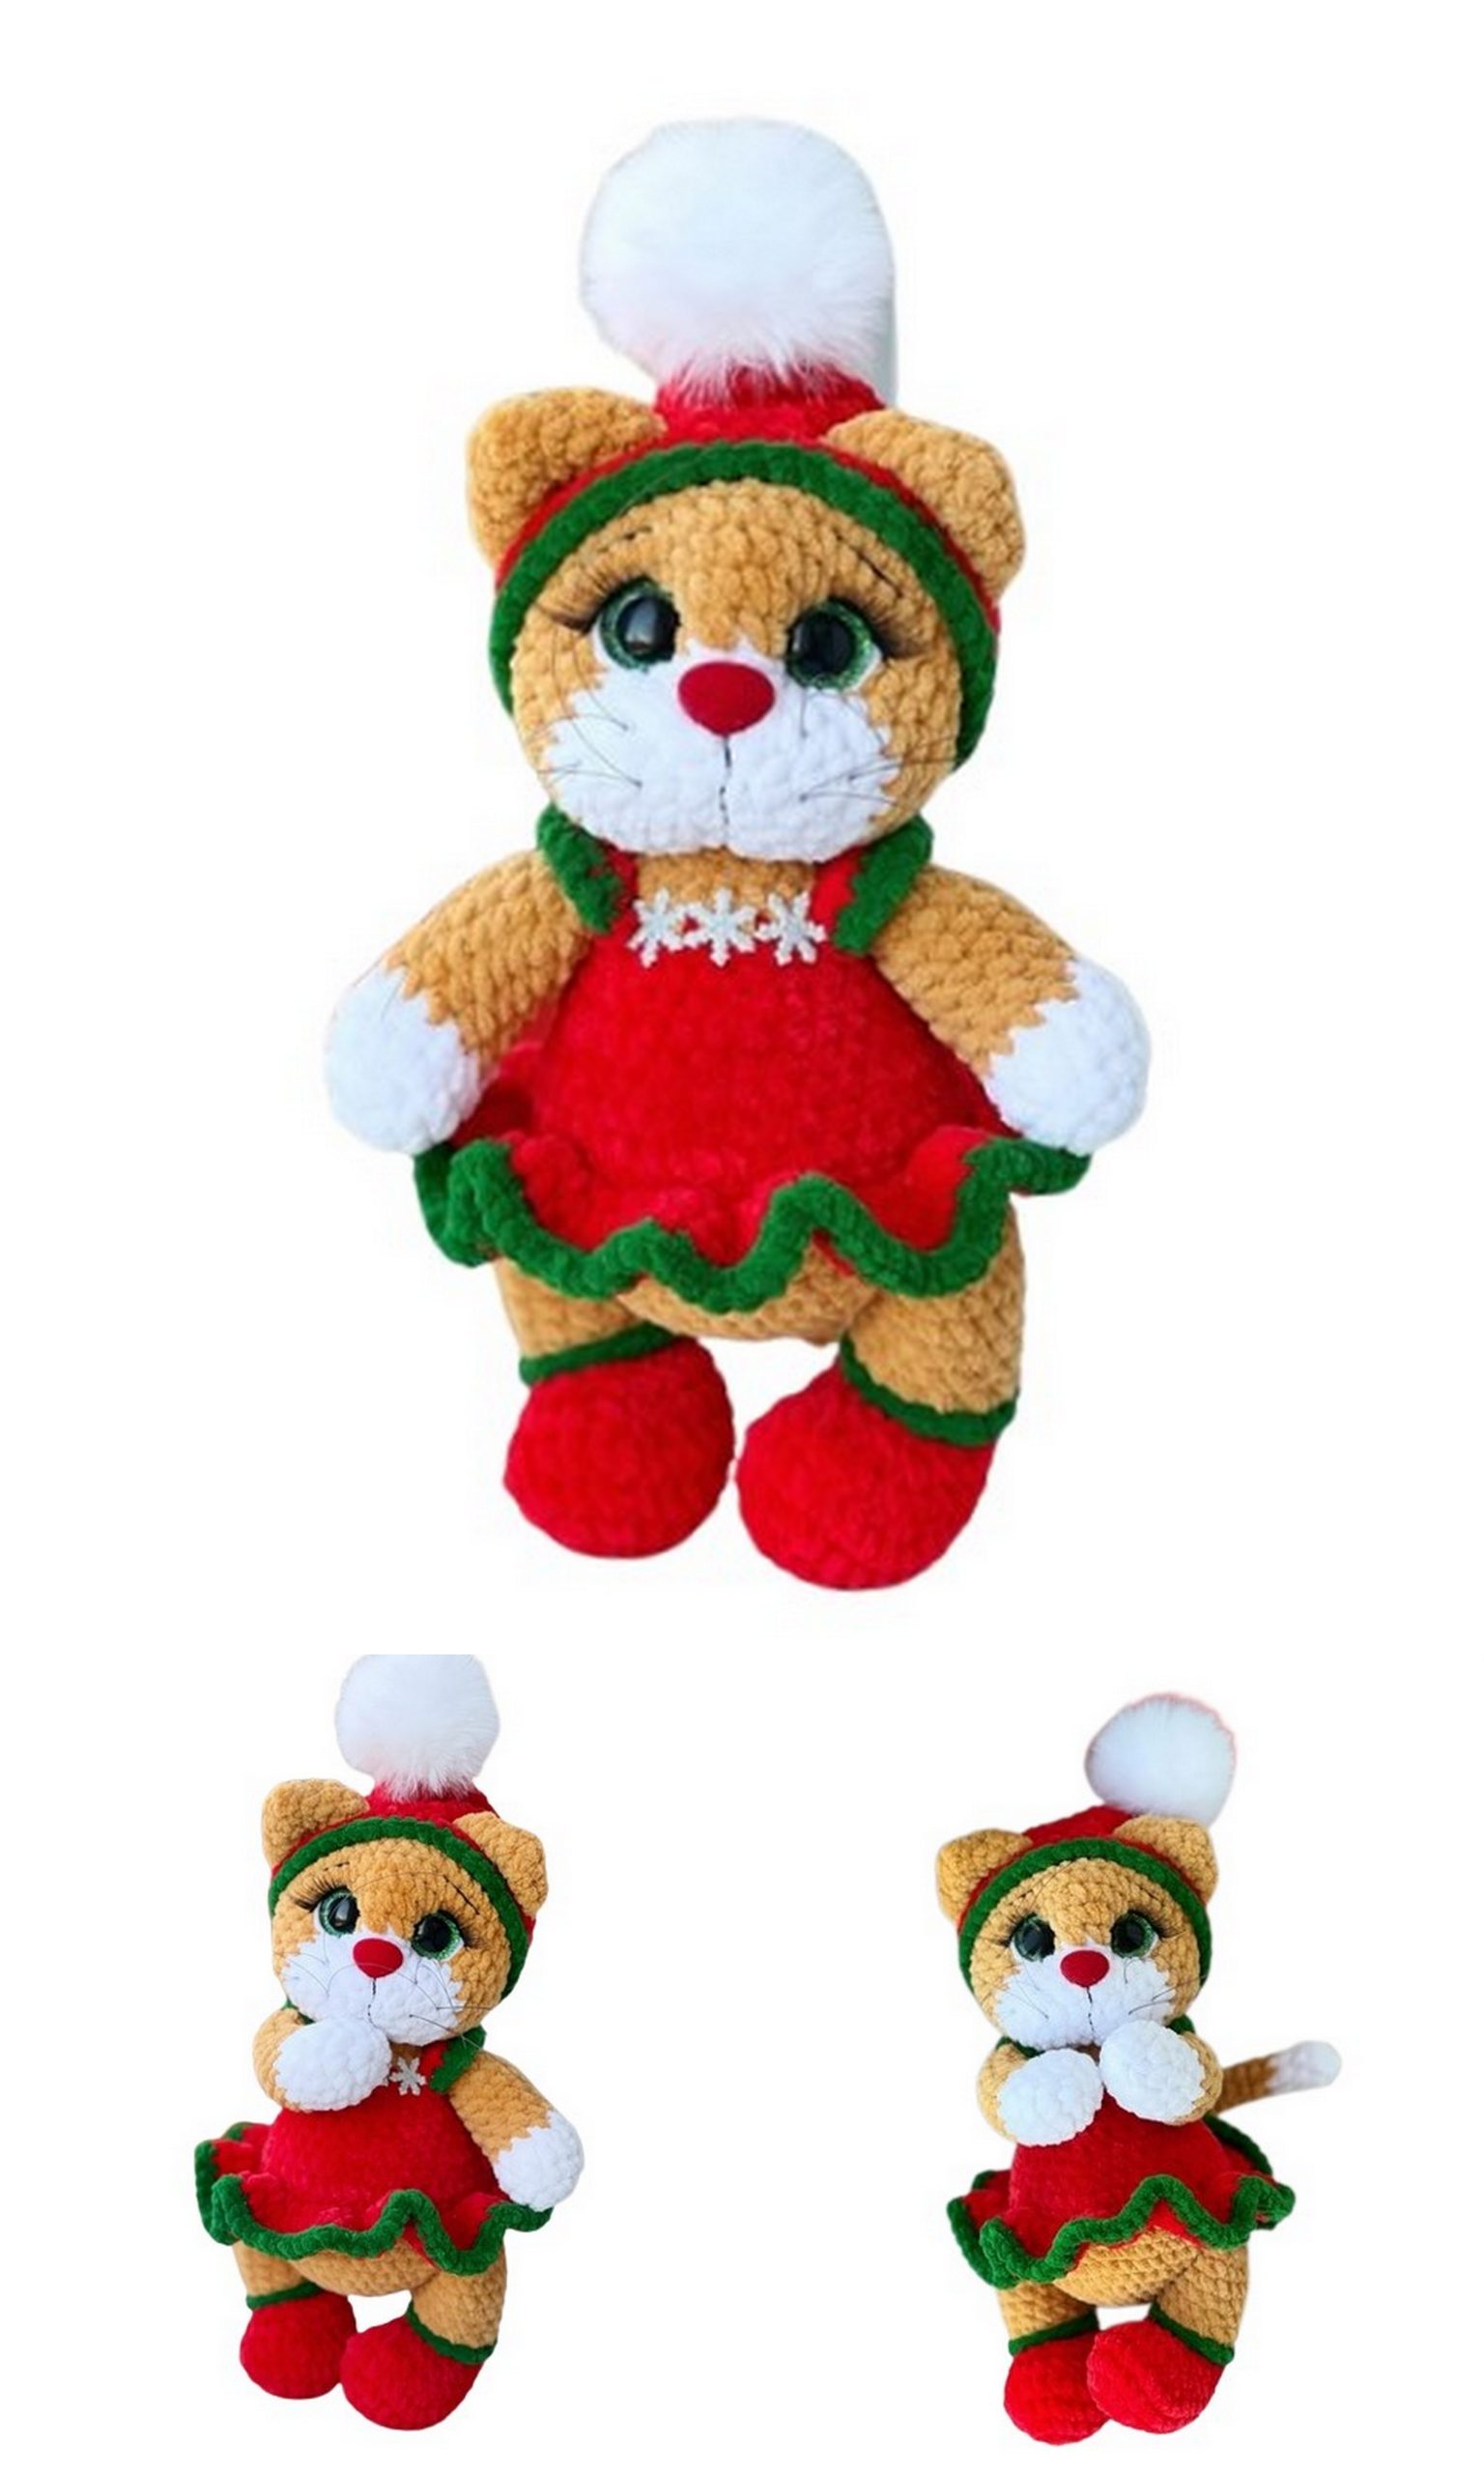
Celebrate the holiday season with a charming Velvet Christmas Cat Amigurumi, a delightful handmade toy that adds a cozy and festive touch to your decorations. This free pattern is perfect for crafters of all skill levels looking to create a unique and adorable Christmas gift. free crochet patterns
You may also like more amigurumi patterns.
If you’re looking for a handmade gift that will bring warmth and cheer to your home this holiday season, the “Velvet Christmas Cat Amigurumi” is just what you need! This free crochet pattern walks you through creating an adorable Christmas cat made with soft velvet yarn. This cute amigurumi will be a wonderful addition to your Christmas tree or tabletop decorations.
A amigurumi free crochet pattern for the specially designed Velvet Christmas Cat Amigurumi for the holidays. Make this adorable Christmas cat yourself and bring the holiday joy to your home.
Materials:
1 skein of Himalaya Dolphin Baby yarn in the main color.
20g of Himalaya Dolphin Baby yarn in additional colors.
Yarn for the dress (any cotton yarn, I use YarnArt Jeans).
16mm safety eyes.
18/14mm safety nose.
Thin black thread for details.
0.5mm fishing line for whiskers.
Eyelashes (optional).
Crochet hooks № 4 and № 2.
Needle.
Stuffing.
Abbreviations:
MR – Magic Ring
sc – single crochet
inc – increase
dec – decrease
sl st – slip stitch

PATTERN
Legs:
Begin with additional color yarn.
Row 1: Ch 8, starting from the second chain from the hook, sc 6, 3 sc in the last chain, sc 5 on the opposite side, inc (16).
Row 2: Inc, sc 5, 3 inc, sc 5, 2 inc (22).
Row 3: Sc 1, inc, sc 5, (sc 1 + inc) repeat 3 times, sc 5, (sc 1 + inc) repeat 2 times (28).
Row 4: Sc 28.
Row 5: Sc 5, dec 3 times, sc 4, dec 3 times, sc 7 (22).
Row 6: Sc 6, dec 4 times, sc 8 (18).
Row 7: Sc 4, dec 4 times, sc 6 (14).
Change to the main color yarn, cut the additional color yarn.
Rows 8-13: 6 rows of 14 sc each. Stuff the leg as you go.
Row 14: (Sc 5 + dec) repeat twice (12).
At the end of Row 14, if necessary, work the displacement loops (I had 1), then fold the leg in half and sc 6. Fasten off and cut the yarn. Do not overstuff the last 3-4 rows.
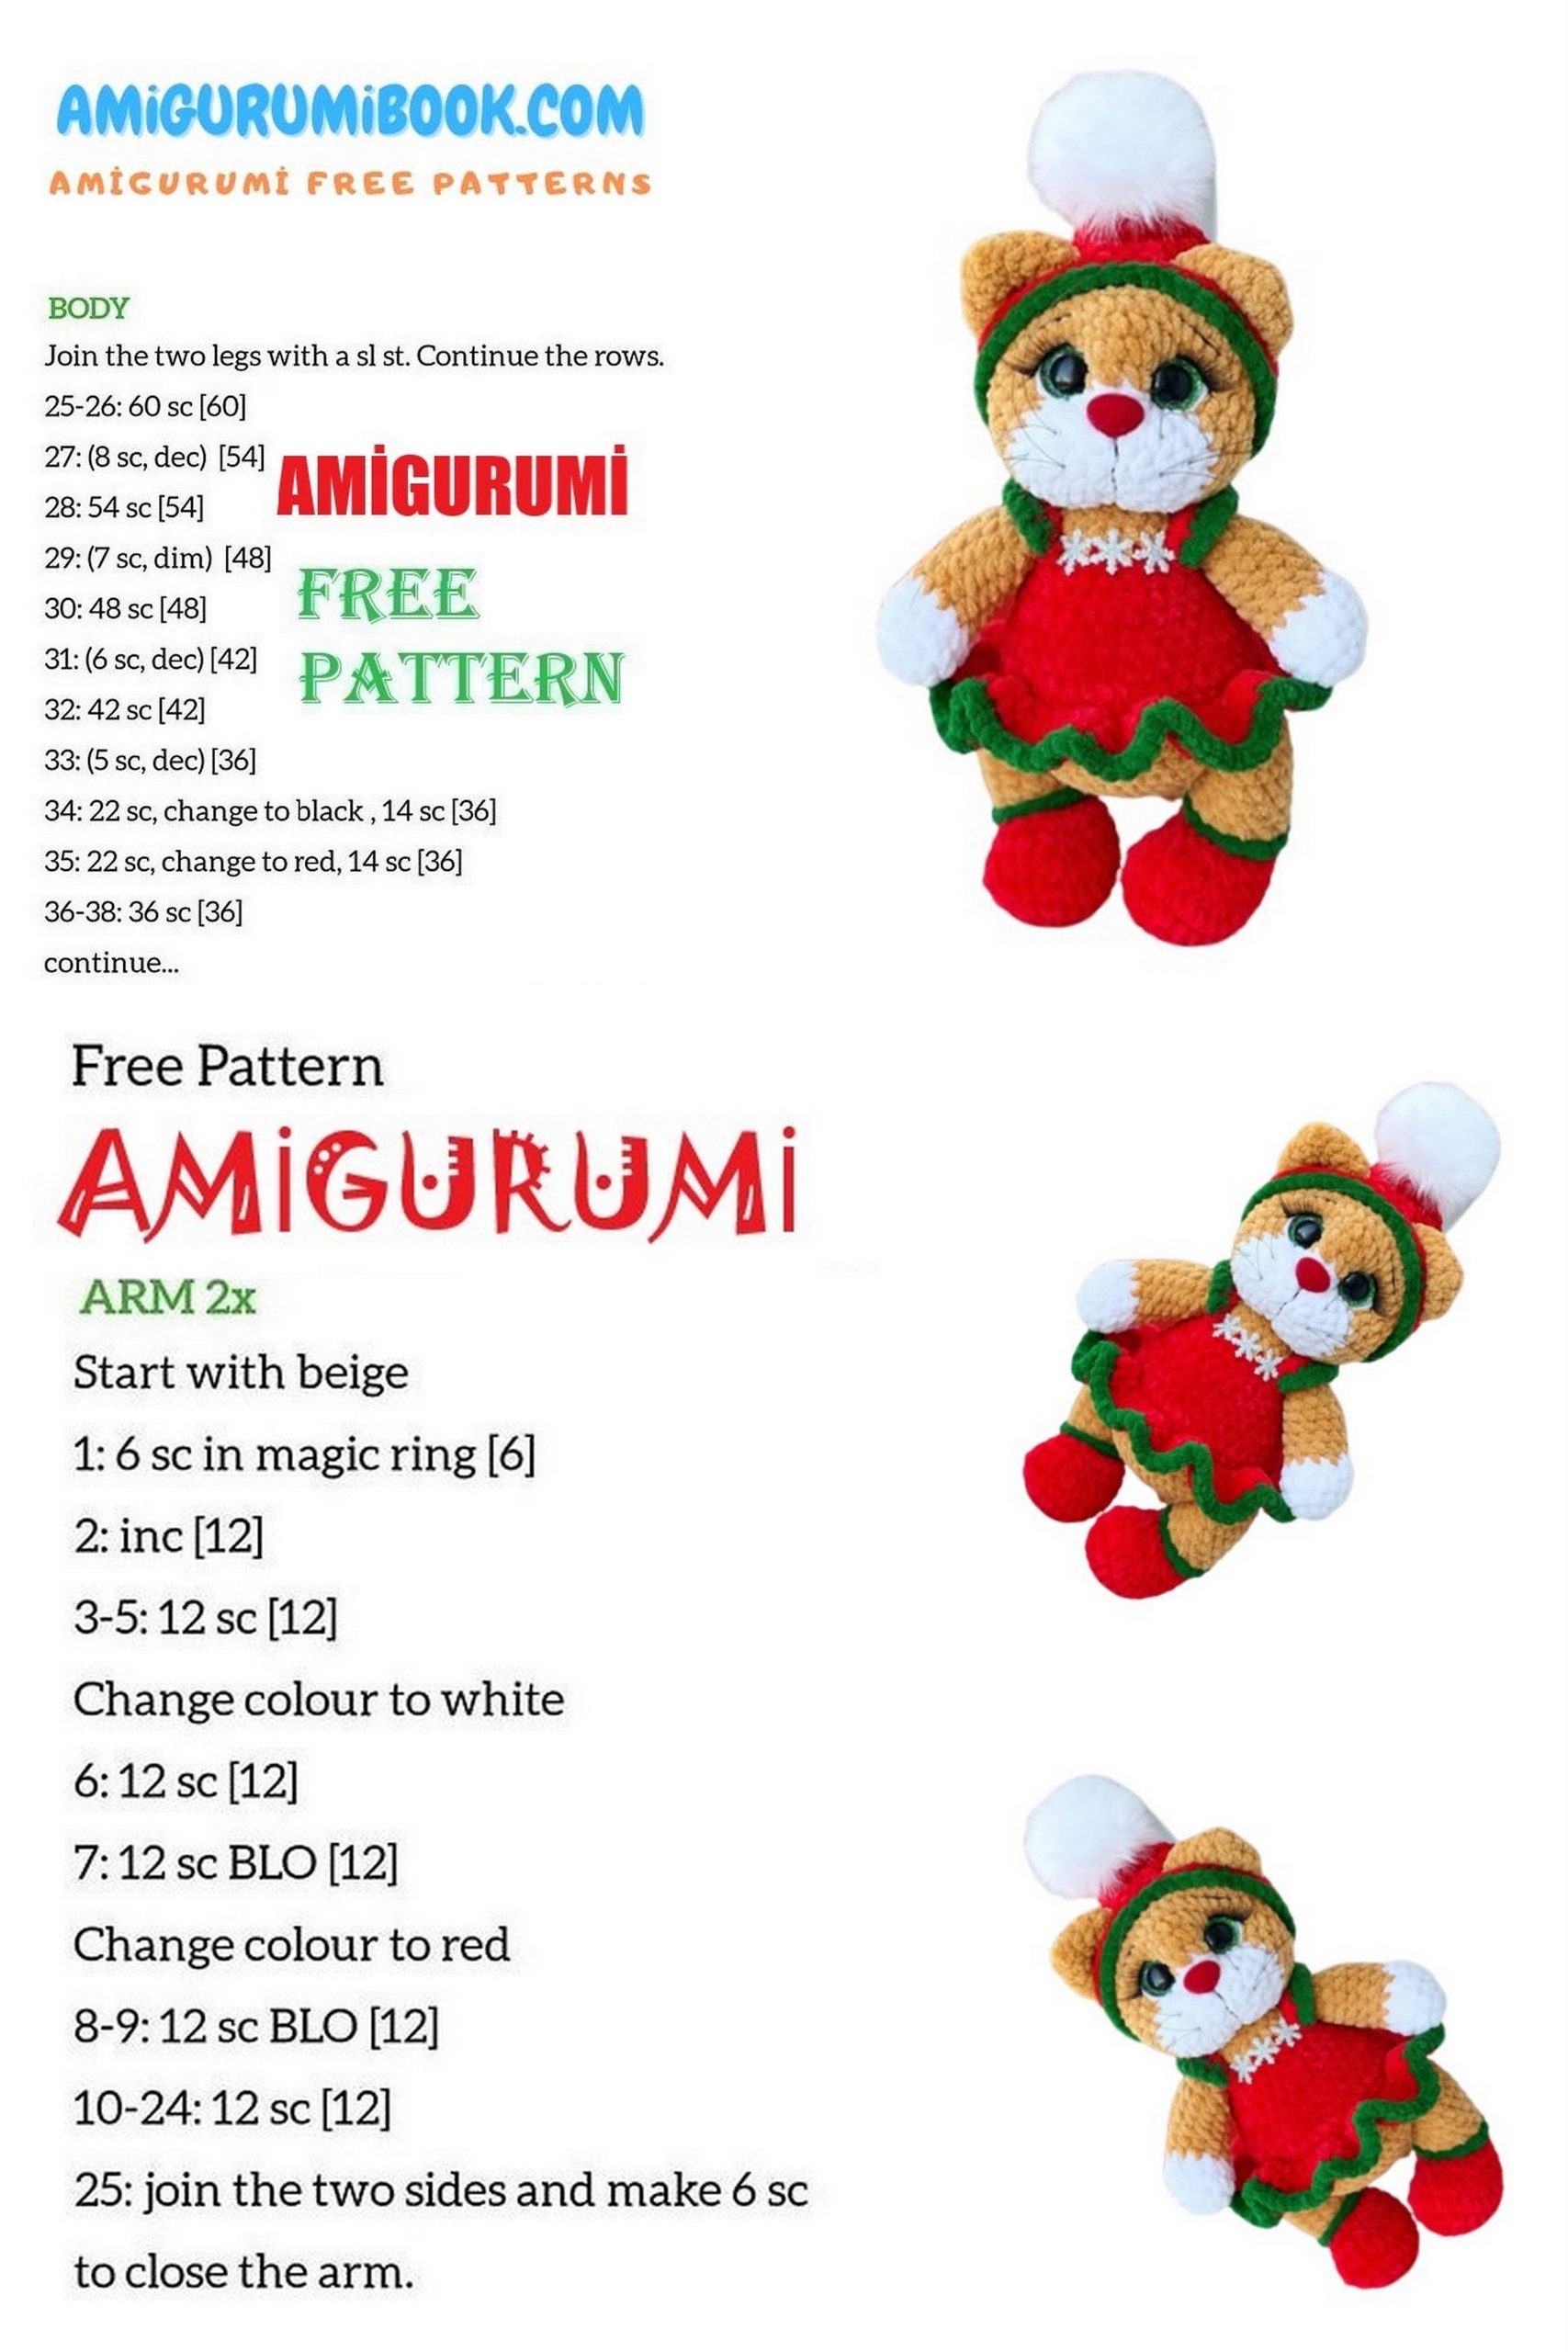
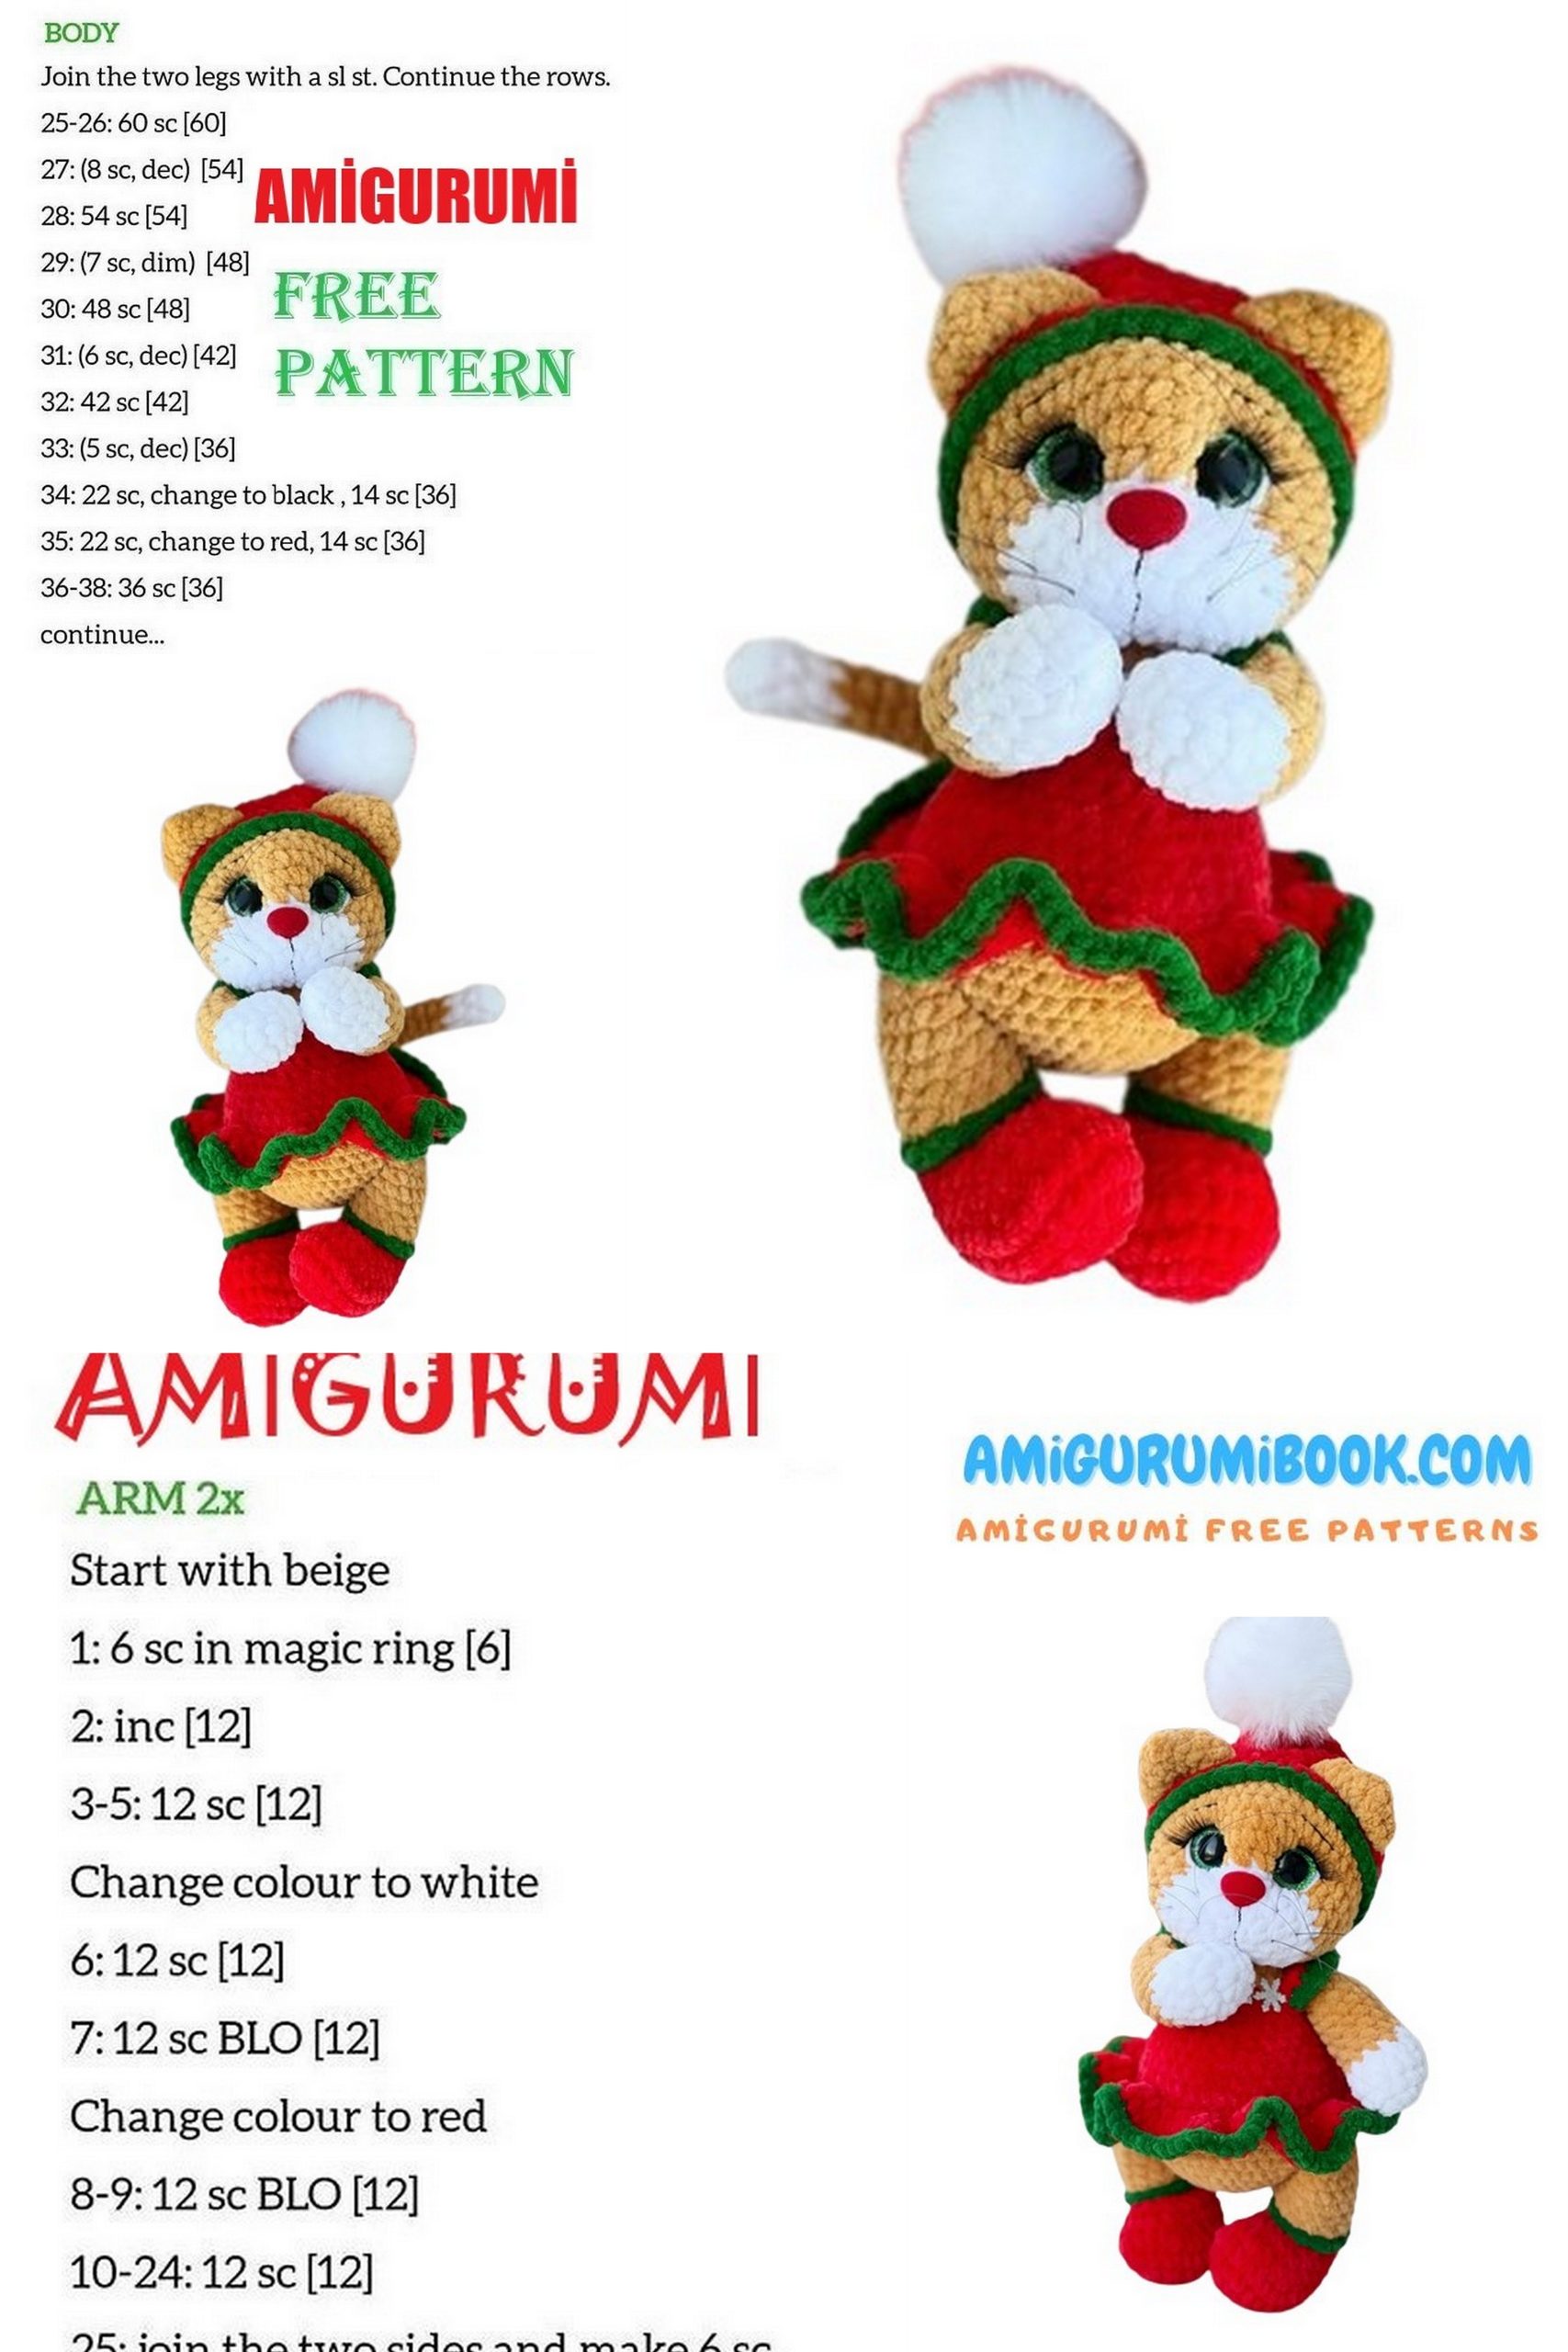
Arms:
Begin with additional color yarn.
Row 1: 7 sc in MR (7).
Row 2: 7 inc (14).
Rows 3-4: 2 rows of 14 sc each.
Row 5: Dec 2, 10 sc (12).
Change to the main color yarn, cut the additional color yarn.
Rows 6-12: 7 rows of 12 sc each.
At the end of Row 12, if necessary, work the displacement loops (I had 4), then fold the arm in half and sc 6. Fasten off and cut the yarn. Do not overstuff the last 3-4 rows.


Head:
Begin with additional color yarn.
Row 1: 6 sc in MR (6).
Row 2: 6 inc (12).
Row 3: (Sc 1 + inc) repeat 6 times (18).
Row 4: (Sc 2 + inc) repeat 6 times (24).
Row 5: (Sc 3 + inc) repeat 6 times (30).
Change to the main color yarn, cut the additional color yarn.
Row 6: 12 sc, 6 inc, 12 sc (36).
Row 7: (Sc 5 + inc) repeat 6 times (42).
Rows 8-13: 6 rows of 42 sc each.
At this stage, you can attach the eyes and nose.
Row 14: (Sc 5 + dec) repeat 6 times (36).
Row 15: (Sc 4 + dec) repeat 6 times (30).
Row 16: (Sc 3 + dec) repeat 6 times (24).
Stuff the head as you go, ensuring the face is firmly stuffed.
Row 17: (Sc 2 + dec) repeat 6 times (18).
Row 18: (Sc 1 + dec) repeat 6 times (12).
Row 19: Dec 6 times (6).
Pull the hole closed and hide the thread.
Ears:
Row 1: 6 sc in MR (6).
Row 2: 6 sc (6).
Row 3: 6 inc (12).
Row 4: (Sc 1 + inc) repeat 6 times (18).
Row 5: 18 sc (18).
Fasten off and cut the yarn, leaving a tail for sewing.
Tail:
Begin with additional color yarn.
Row 1: 6 sc in MR (6).
Rows 2-5: 4 rows of 6 sc each.
Change to the main color yarn, cut the additional color yarn.
Rows 6-17: 12 rows of 6 sc each.
Fold the piece in half and sc 3. Fasten off and cut the yarn. Do not stuff the tail.
Body:
Row 1: 6 sc in MR (6).
Row 2: 6 inc (12).
Row 3: (Sc 1 + inc) repeat 6 times (18).
Row 4: (Sc 2 + inc) repeat 6 times (24).
Row 5: (Sc 3 + inc) repeat 6 times (30).
Row 6: (Sc 4 + inc) repeat 6 times (36).
Row 7: (Sc 5 + inc) repeat 6 times (42).
Row 8: 42 sc (42).
In the next row, you will attach the legs.
Row 9: 7 sc, 6 sc with the left leg, 15 sc, 6 sc with the right leg, 8 sc (42).
In the next row, you will attach the tail.
Row 10: 40 sc, 2 sc with the tail (42).
Row 11: 1 sc with the tail, 41 sc (42).
Row 12: 42 sc (42).
Row 13: (Sc 5 + dec) repeat 6 times (36).
Row 14: 36 sc (36).
Row 15: (Sc 4 + dec) repeat 6 times (30).
Rows 16-17: 2 rows of 30 sc each.
Row 18: (Sc 3 + dec) repeat 6 times (24).
Row 19: 24 sc (24).
In the next row, you will attach the arms.
Row 20: 5 sc, 6 sc with the left arm, 7 sc, 6 sc with the right arm. The arms should be directly above the legs.
Row 21: (Sc 2 + dec) repeat 6 times (18).
Row 22: 18 sc (18).
Fasten off and cut the yarn, leaving a tail for sewing.
Assembly and Finishing:
Secure the eyes (see photo).
Attach the ears between Rows 12-13, with 7 sc in between the ears.
Attach the head and sew on the whiskers.
Subscribe and watch the tutorials on Instagram for additional guidance.
Dress:
Chain 37 (adjust to fit the toy’s neck), starting from the second chain from the hook, work turn rows.
Row 1: 36 sc + 1 ch.
Row 2: (Sc 5 + inc) repeat 6 times (42).
From here on, work only sc stitches.
Now create a buttonhole.
Row 3: Ch 4, skip 2 sc from the previous row, sc in the 3rd sc (this creates the buttonhole), 5 sc, 5 inc, (2 sc + inc) twice, 6 sc, (inc + 2 sc) twice, 5 inc, 7 sc (56) + 2 ch.
Row 4: 53 sc, 3 sc in the buttonhole.
Now create armholes.
Row 5: 2 ch, 7 sc, ch 7, skip 12 sc from the previous row, and sc in the 13th sc, 18 sc, ch 7, skip 12 sc, and sc in the 13th sc, then sc to the end of the row.
Row 6: 2 ch, 7 sc, 7 sc in the armhole loop, 18 sc, 7 sc in the second armhole loop, 7 sc (46).
Row 7: 2 ch, 6 sc, inc, 7 sc, inc, 16 sc, inc, 7 sc, inc, 6 sc (50).
Check the dress on the toy.
Row 8: (4 sc + inc) repeat 10 times (60). You can use a different color for this row if you like.
Create 2 button loops in the next row.
Row 9: 4 ch, skip 2 sc from the previous row, and sc in the 3rd sc, 58 inc (116).
Row 10: 2 ch, 116 sc, 4 sc in the button loop.
Rows 11-14: 4 rows of 120 sc each (add more rows if you want the dress longer).