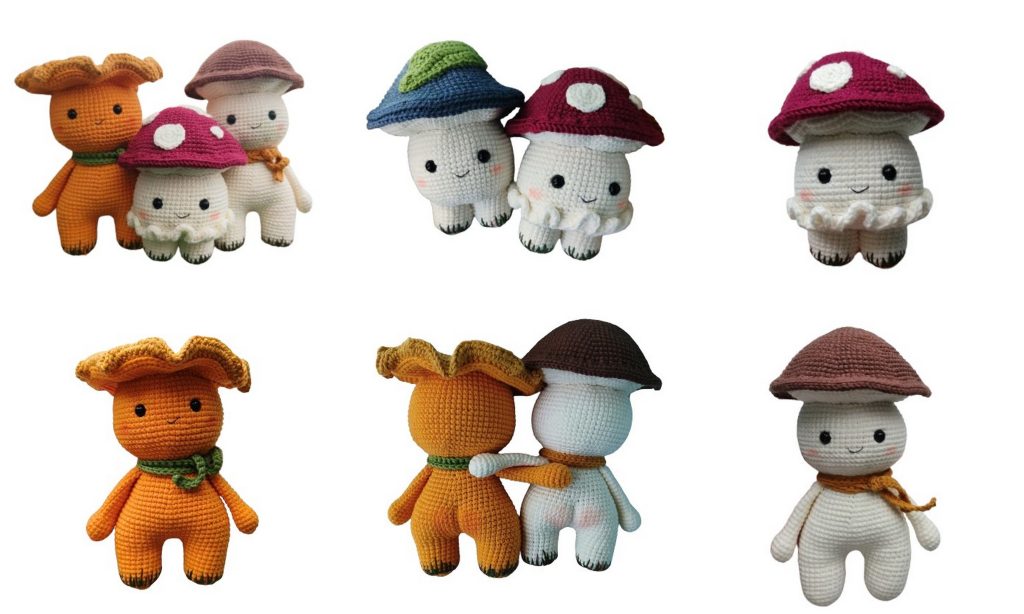
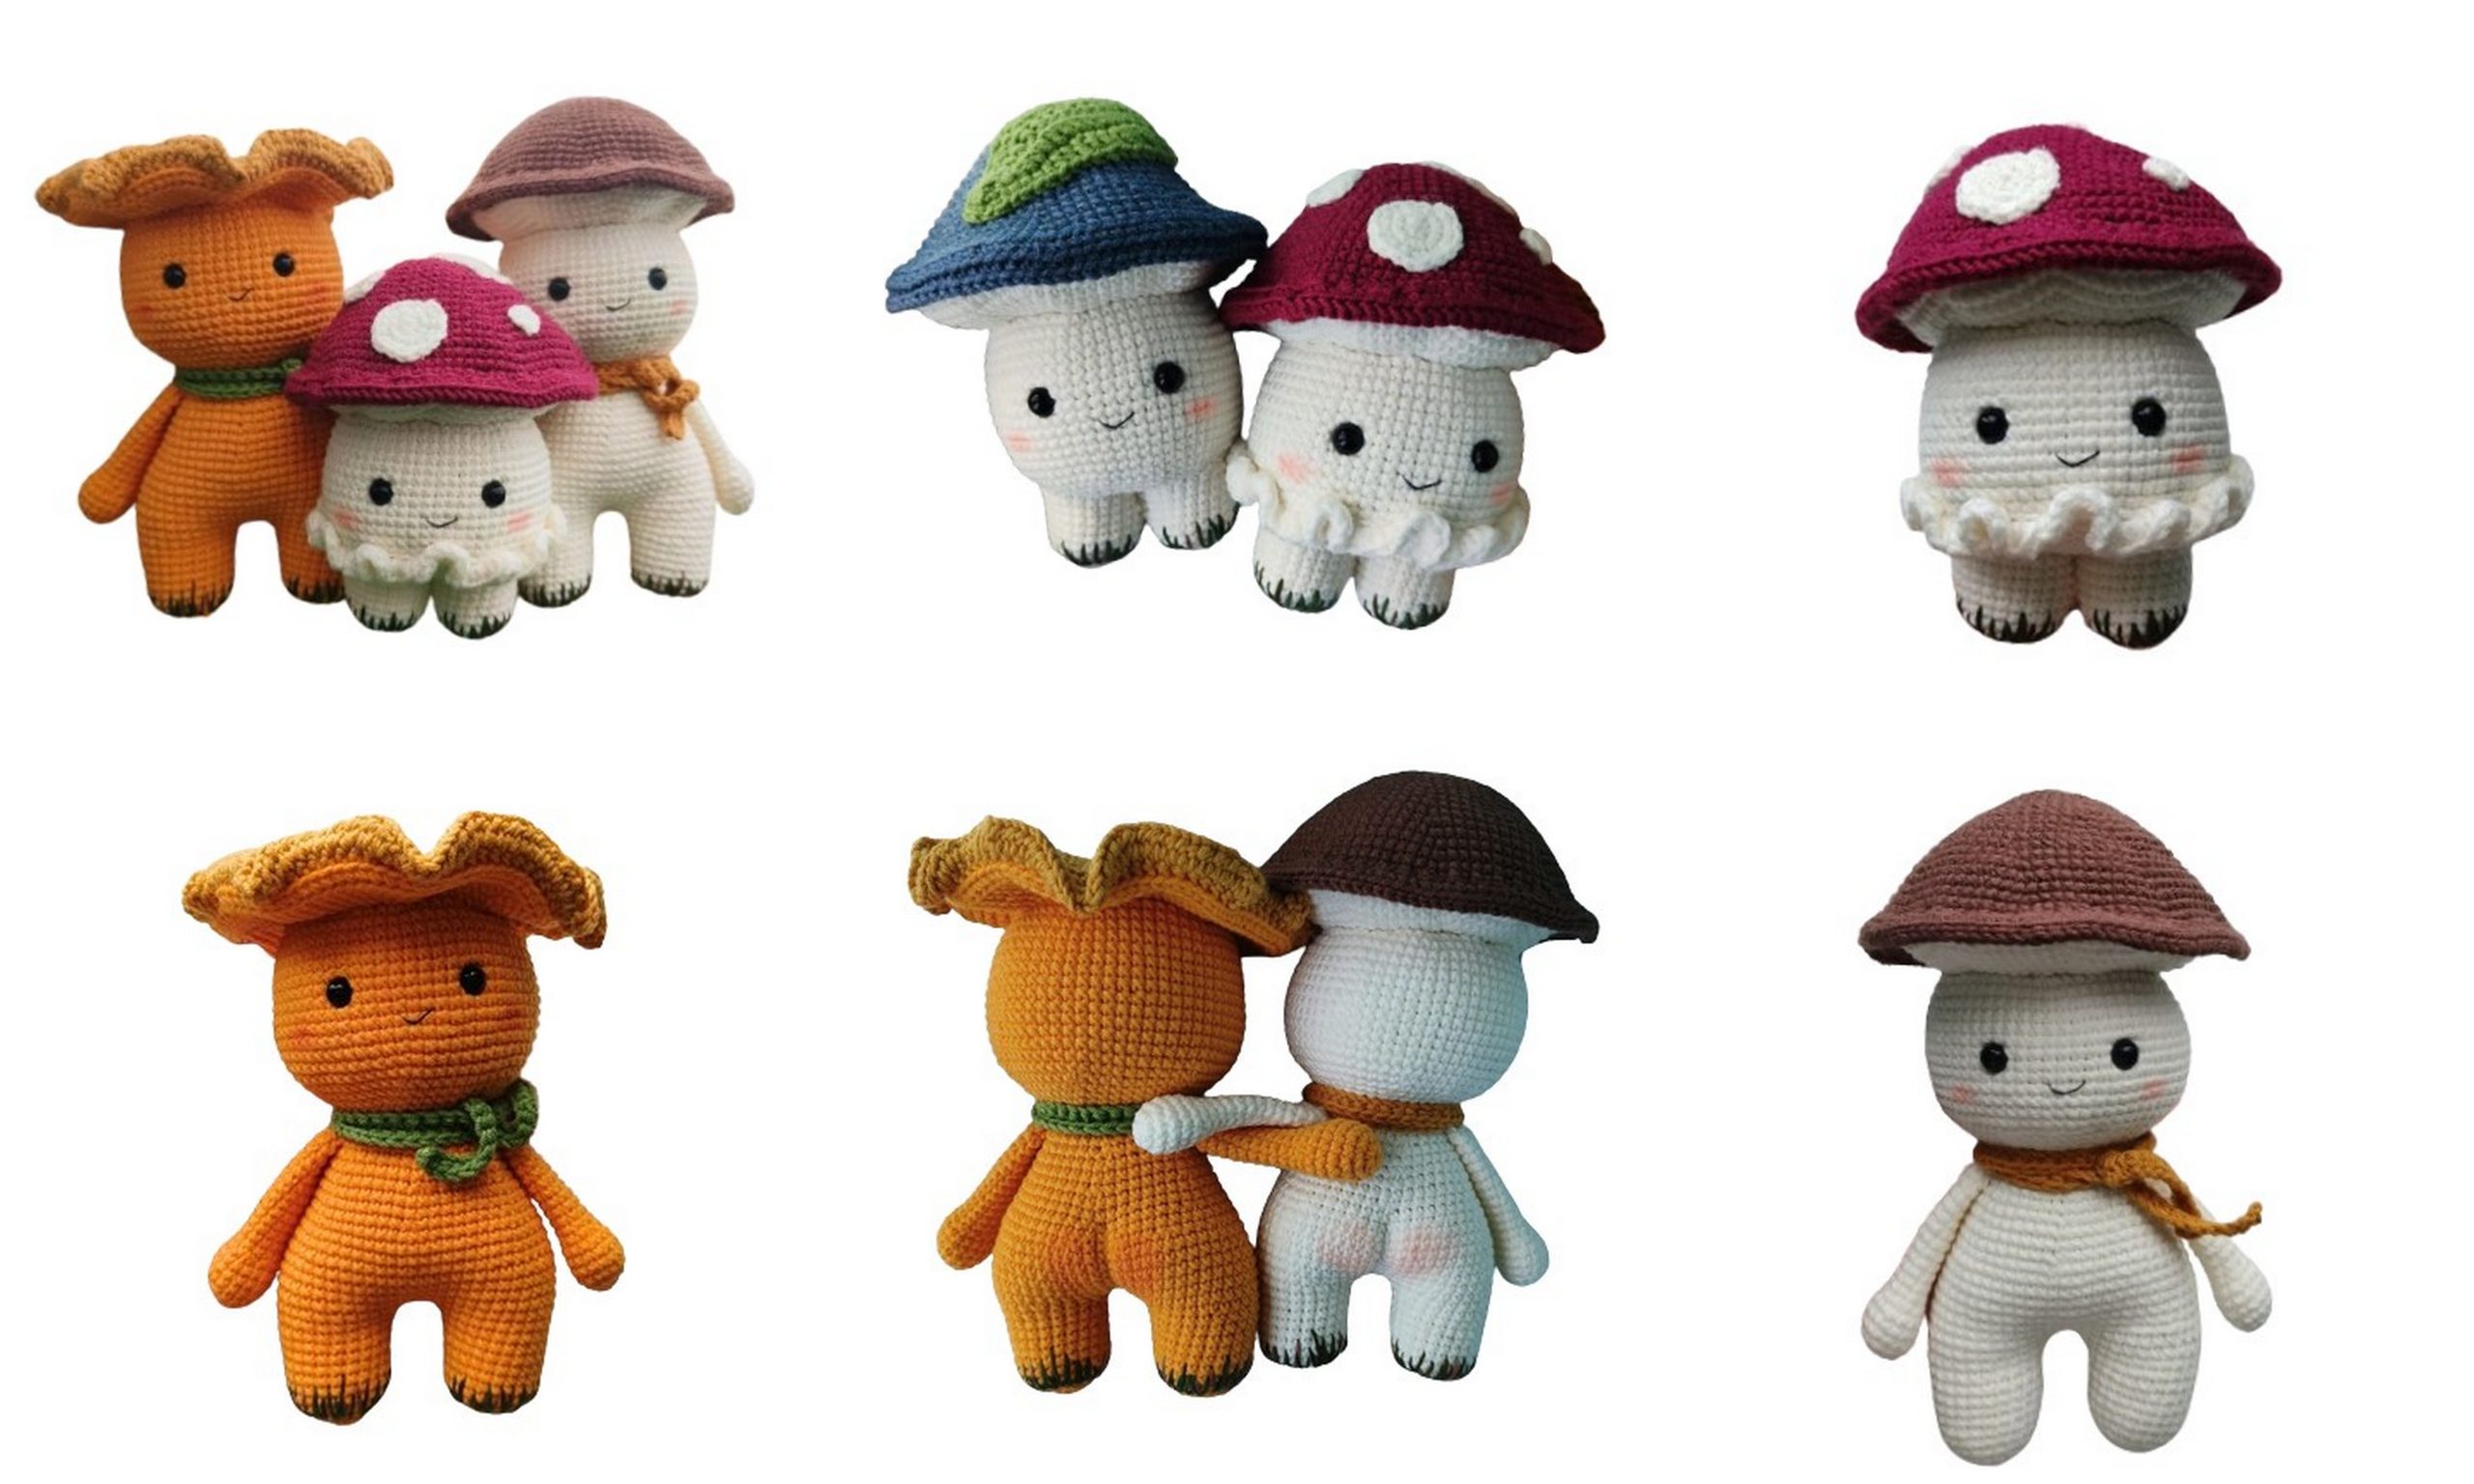
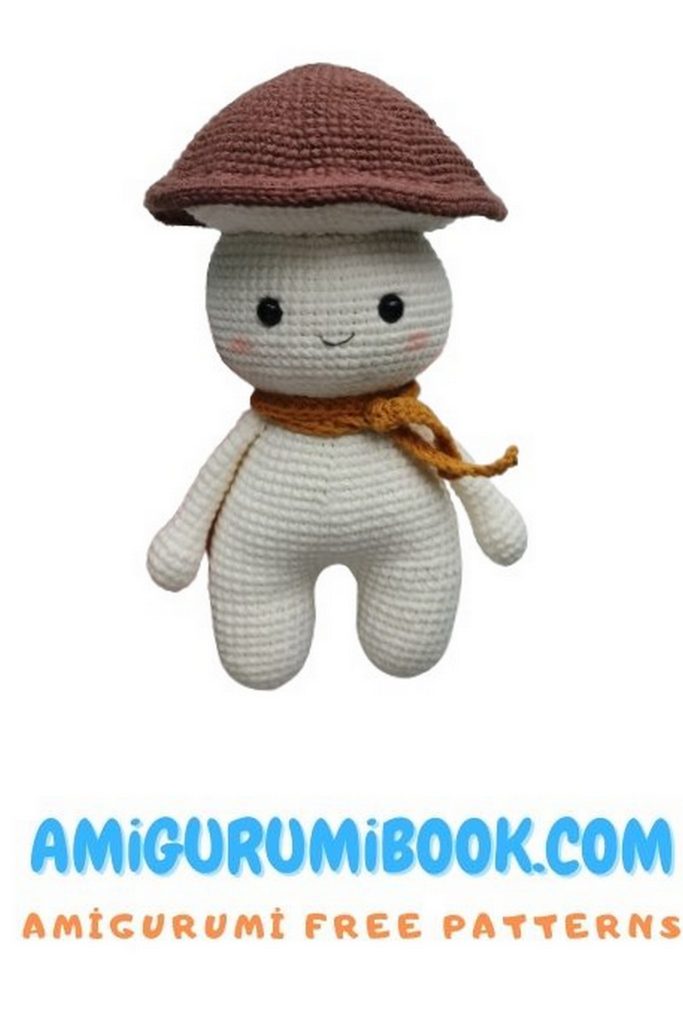
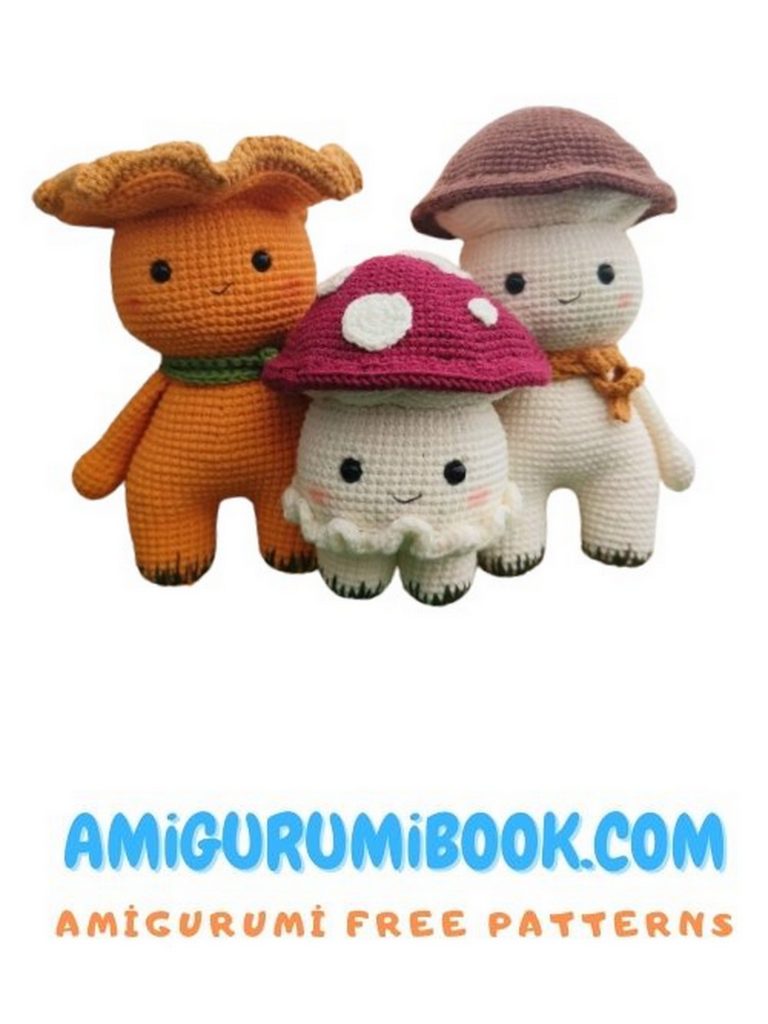
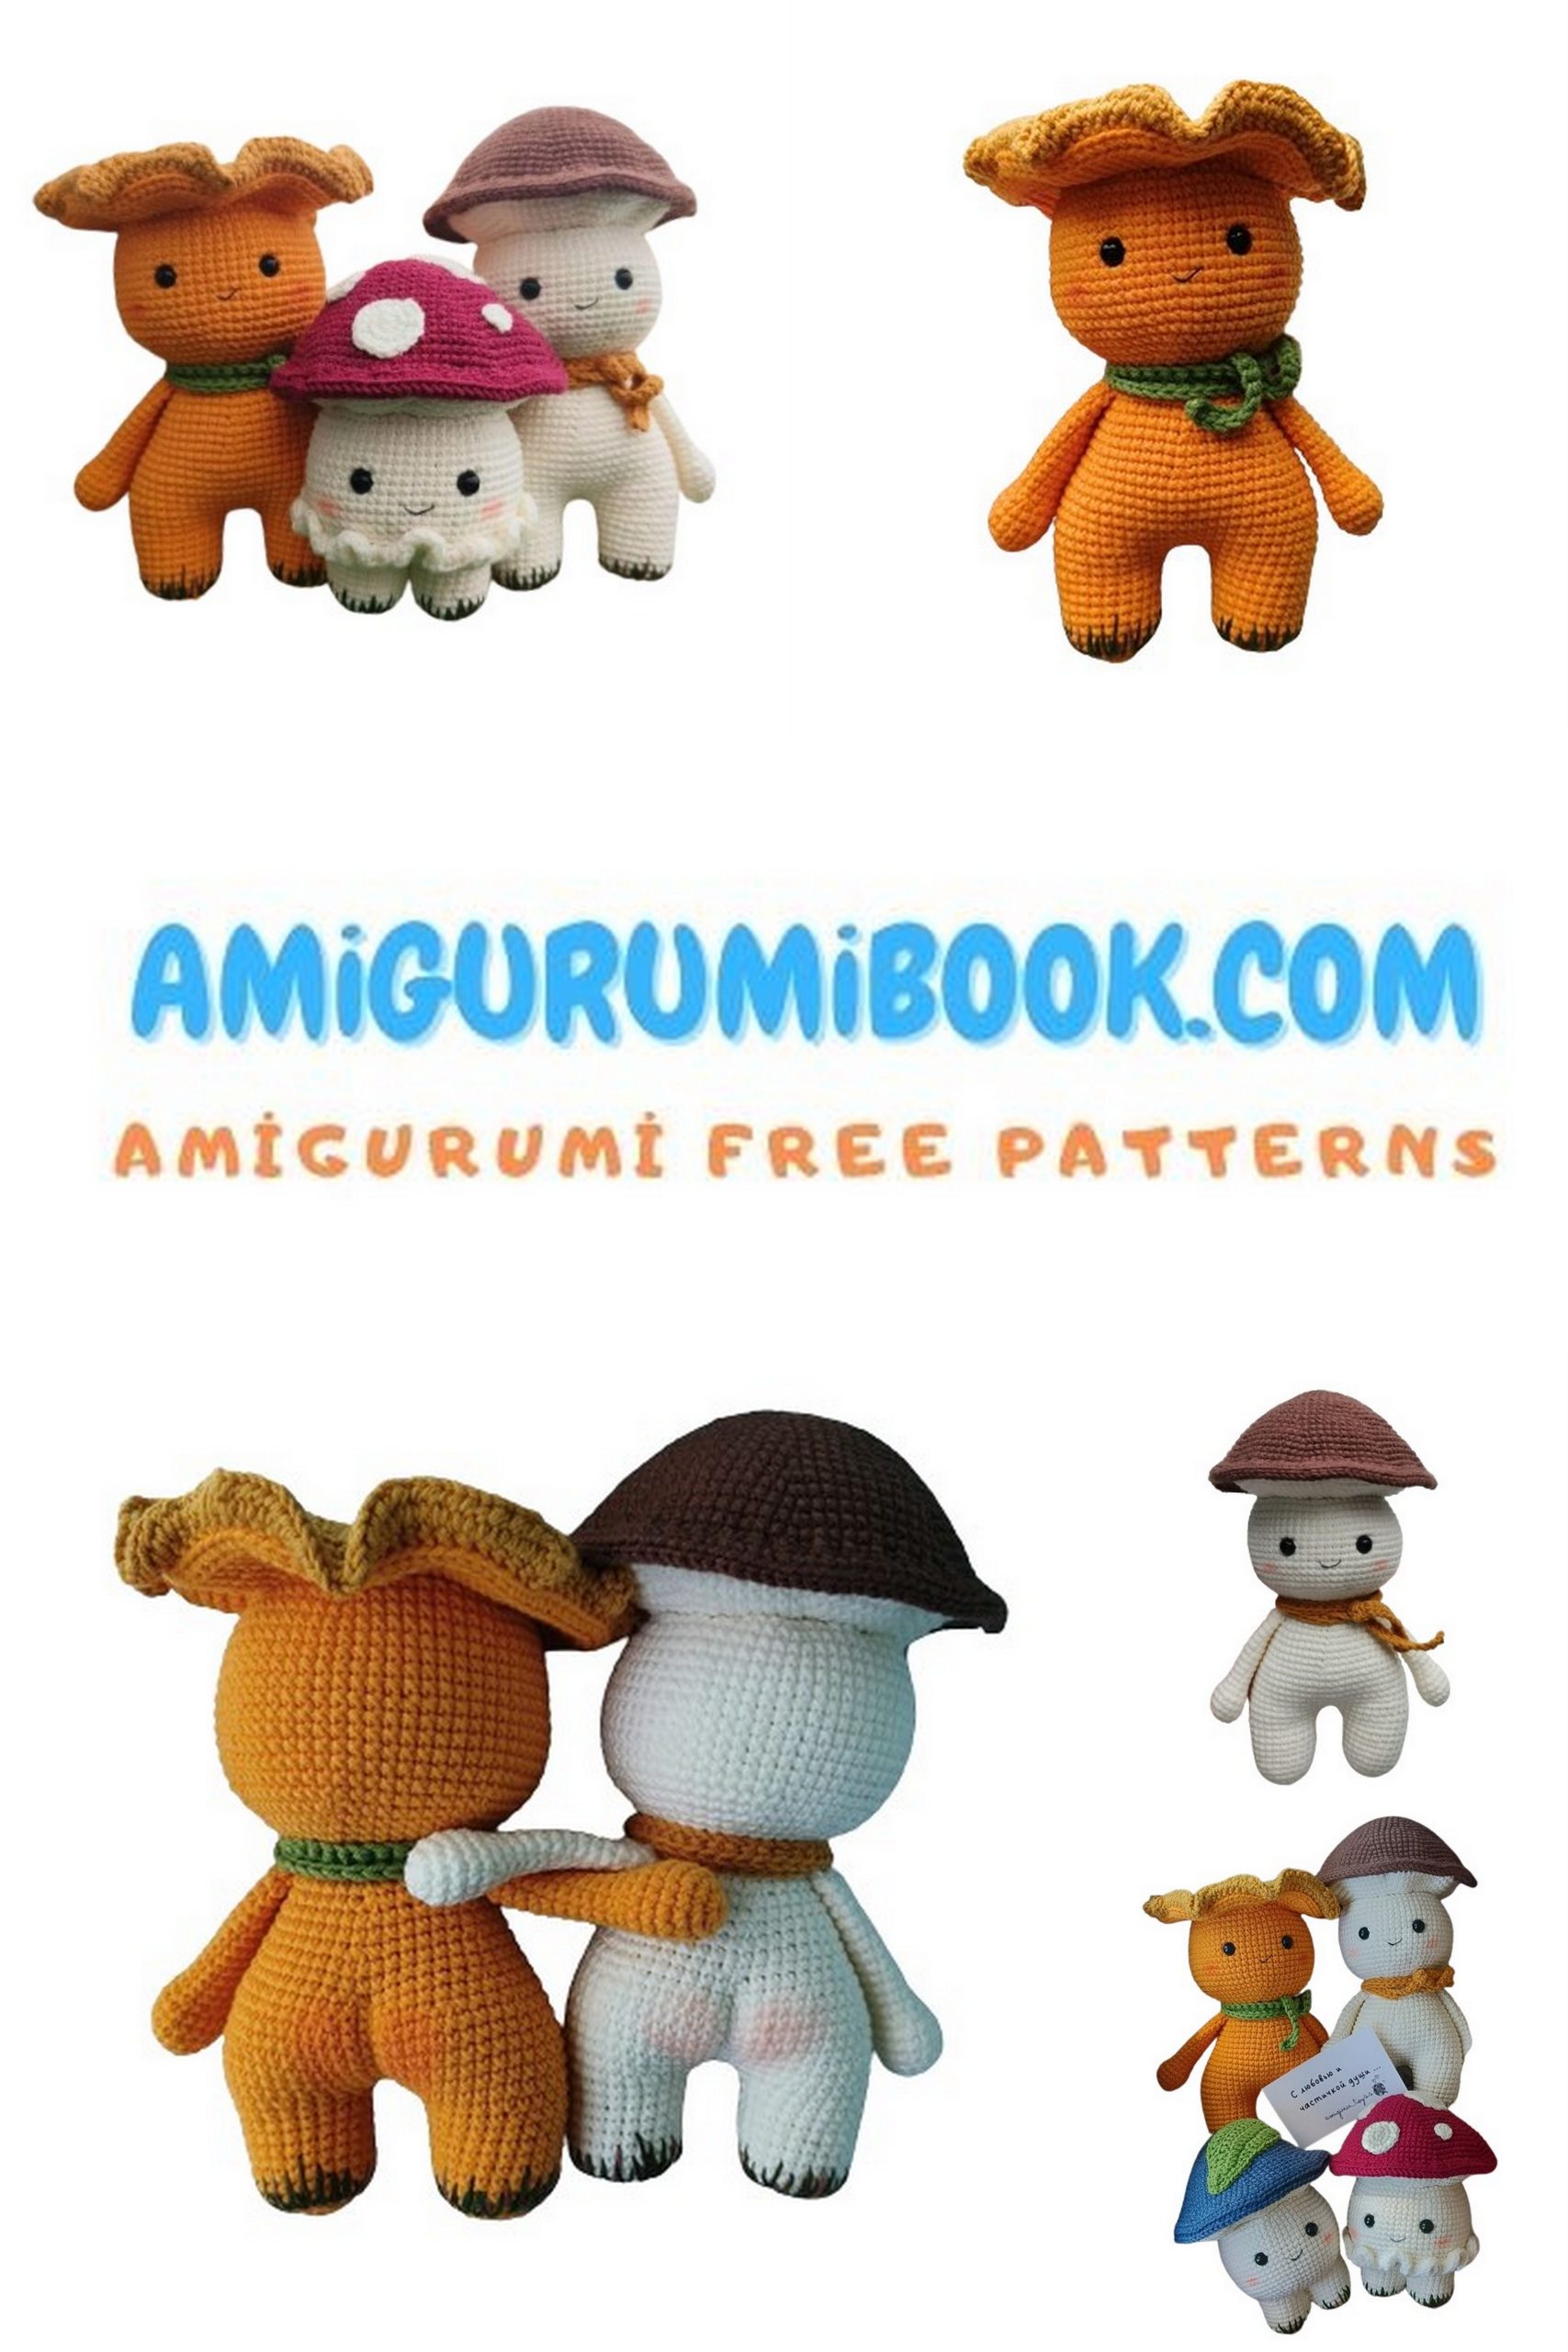
Step into the enchanting world of crochet with our charming amigurumi free pattern for little mushroom amigurumi! Whether you’re a seasoned crafter or a beginner looking for a fun project, these whimsical mushrooms are sure to delight. With simple stitches and clear instructions, crafting your own adorable mushrooms has never been easier. Spruce up your home decor, add a touch of magic to a child’s room, or gift them to fellow crochet enthusiasts. Let your creativity flourish as you bring these tiny treasures to life with your crochet hook!
Attention
This master class does not contain crochet tutorials. Basic crochet skills are assumed. This item is crocheted in a cross stitch style. Note that the size may vary when crocheting with ticks.
If you want to access 1000+ free amigurumi patterns, you can download our application from this link!
Materials needed:
1: Crochet hook № 2.5
2: Hollowfiber stuffing
3: Safety eyes with 8 mm attachment
4: Short needle with a wide eye (5-6 cm), long and sharp needle with a wide eye (10 cm), pins.
5: Brown and green embroidery floss for leg decoration
6: Stitch marker, if unavailable, a brightly colored thread can be used.
7: Marvy Fabric Brush №722 or dry pastel in a soft pink color, brush for shading.
Abbreviations:
MR – magic ring
CH – chain stitch
SC – single crochet
INC – increase (2 SC in one stitch)
DEC – decrease (crochet 2 SC together)
SS – slip stitch
HDC – half double crochet
DC – double crochet
TR – treble crochet
FO – fasten off
PATTERN
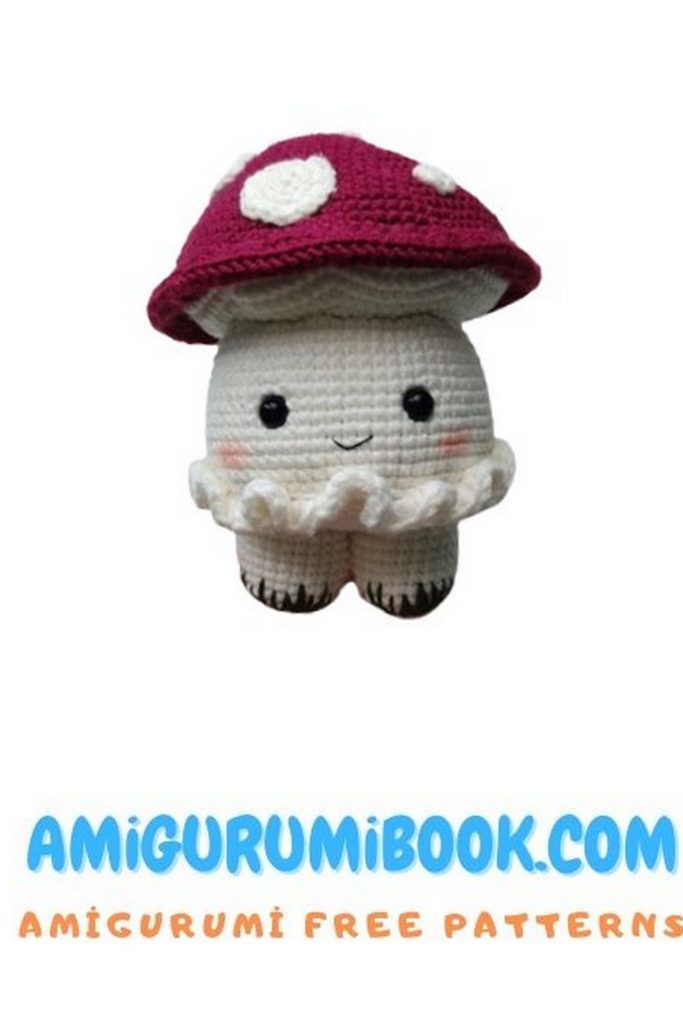
Head -Whimsical Little Mushrooms
Main color
All mushroom heads are crocheted the same way.
Place a marker between rows 17 and 18, this is where our eyes will go.
1: 6 in MR (6)
2: 6 INC (12)
3: (1 SC, INC) x 6 (18)
4: (2 SC, INC) x 6 (24)
5: (3 SC, INC) x 6 (30)
6: (4 SC, INC) x 6 (36)
7: (5 SC, INC) x 6 (42)
8: (6 SC, INC) x 6 (48)
9: (7 SC, INC) x 6 (54)
10: (8 SC, INC) x 6 (60)
11: (9 SC, INC) x 6 (66)
12: – 24: (66)
25: (9 SC, DEC) x 6 (60)
26: (8 SC, DEC) x 6 (54)
27: (7 SC, DEC) x 6 (48)
Insert eyes 10 SC apart from each other.
28: (6 SC, DEC) x 6 (42)
29: (5 SC, DEC) x 6 (36)
30: (4 SC, DEC) x 6 (30)
Start stuffing
31: (3 SC, DEC) x 6 (24)
32: (2 SC, DEC) x 6 (18)
33: (1 SC, DEC) x 6 (12)
34: 6 DEC (6)
Stuff tightly, pull the hole closed and fasten off.
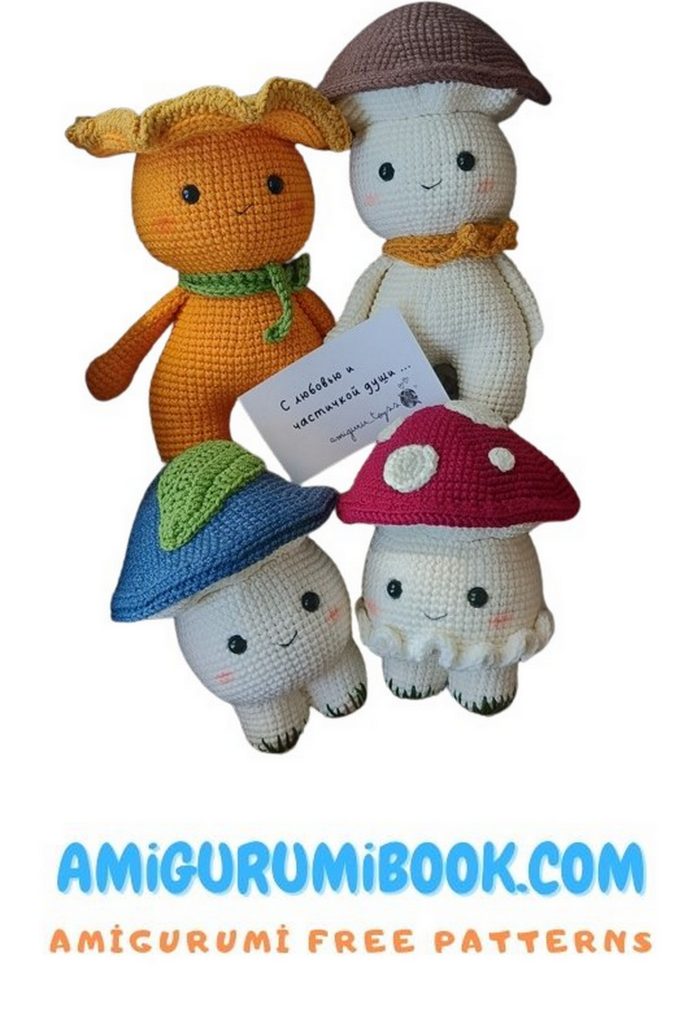

Body -Whimsical Little Mushrooms
Main color
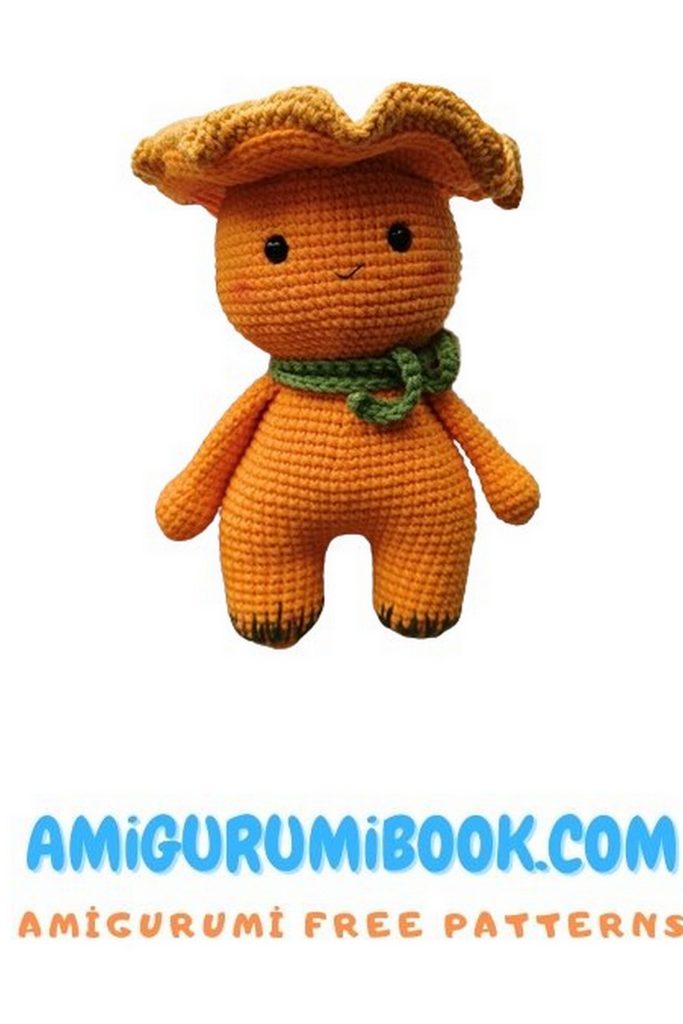
If you are making a small mushroom, crochet only two legs from row 1 to 11 (inclusive) and leave a thread for sewing. The body is only needed for large mushrooms with arms.
Legs (2 pieces)
1: 6 in MR (6)
2: 6 INC (12)
3: (1 SC, INC) x 6 (18)
4: (2 SC, INC) x 6 (24)
5:– 11: (24)
On the first leg, cut the thread and tie off. On the second leg, make 4 CH and join with the first leg using SS, then continue crocheting.
Body -Whimsical Little Mushrooms
Main color
If you are making a small mushroom, crochet only two legs from row 1 to 11 (inclusive) and leave a thread for sewing. The body is only needed for large mushrooms with arms.
Legs (2 pieces)
12: 24 SC, 4 SC (in a chain), 24 SC on the other leg, 4 SC (in a chain) (56)
13: 17 SC, INC, (4 SC, INC) x 4, 18 SC (61)
14: – 17: (61)
18: 13 SC, DEC, 27 SC, DEC, 17 SC (59)
19: (59)
20: 15 SC, (DEC, 3 SC) x 4, DEC, 22 SC (54)
21: (54)
Start stuffing
22: (7 SC, DEC) x 6 (48)
23: – 24: (48)
25: (6 SC, DEC) x 6 (42)
26: – 27: (42)
28: (5 SC, DEC) x 5 (36)
29: – 30: (36)
Leave a thread for attaching the head.
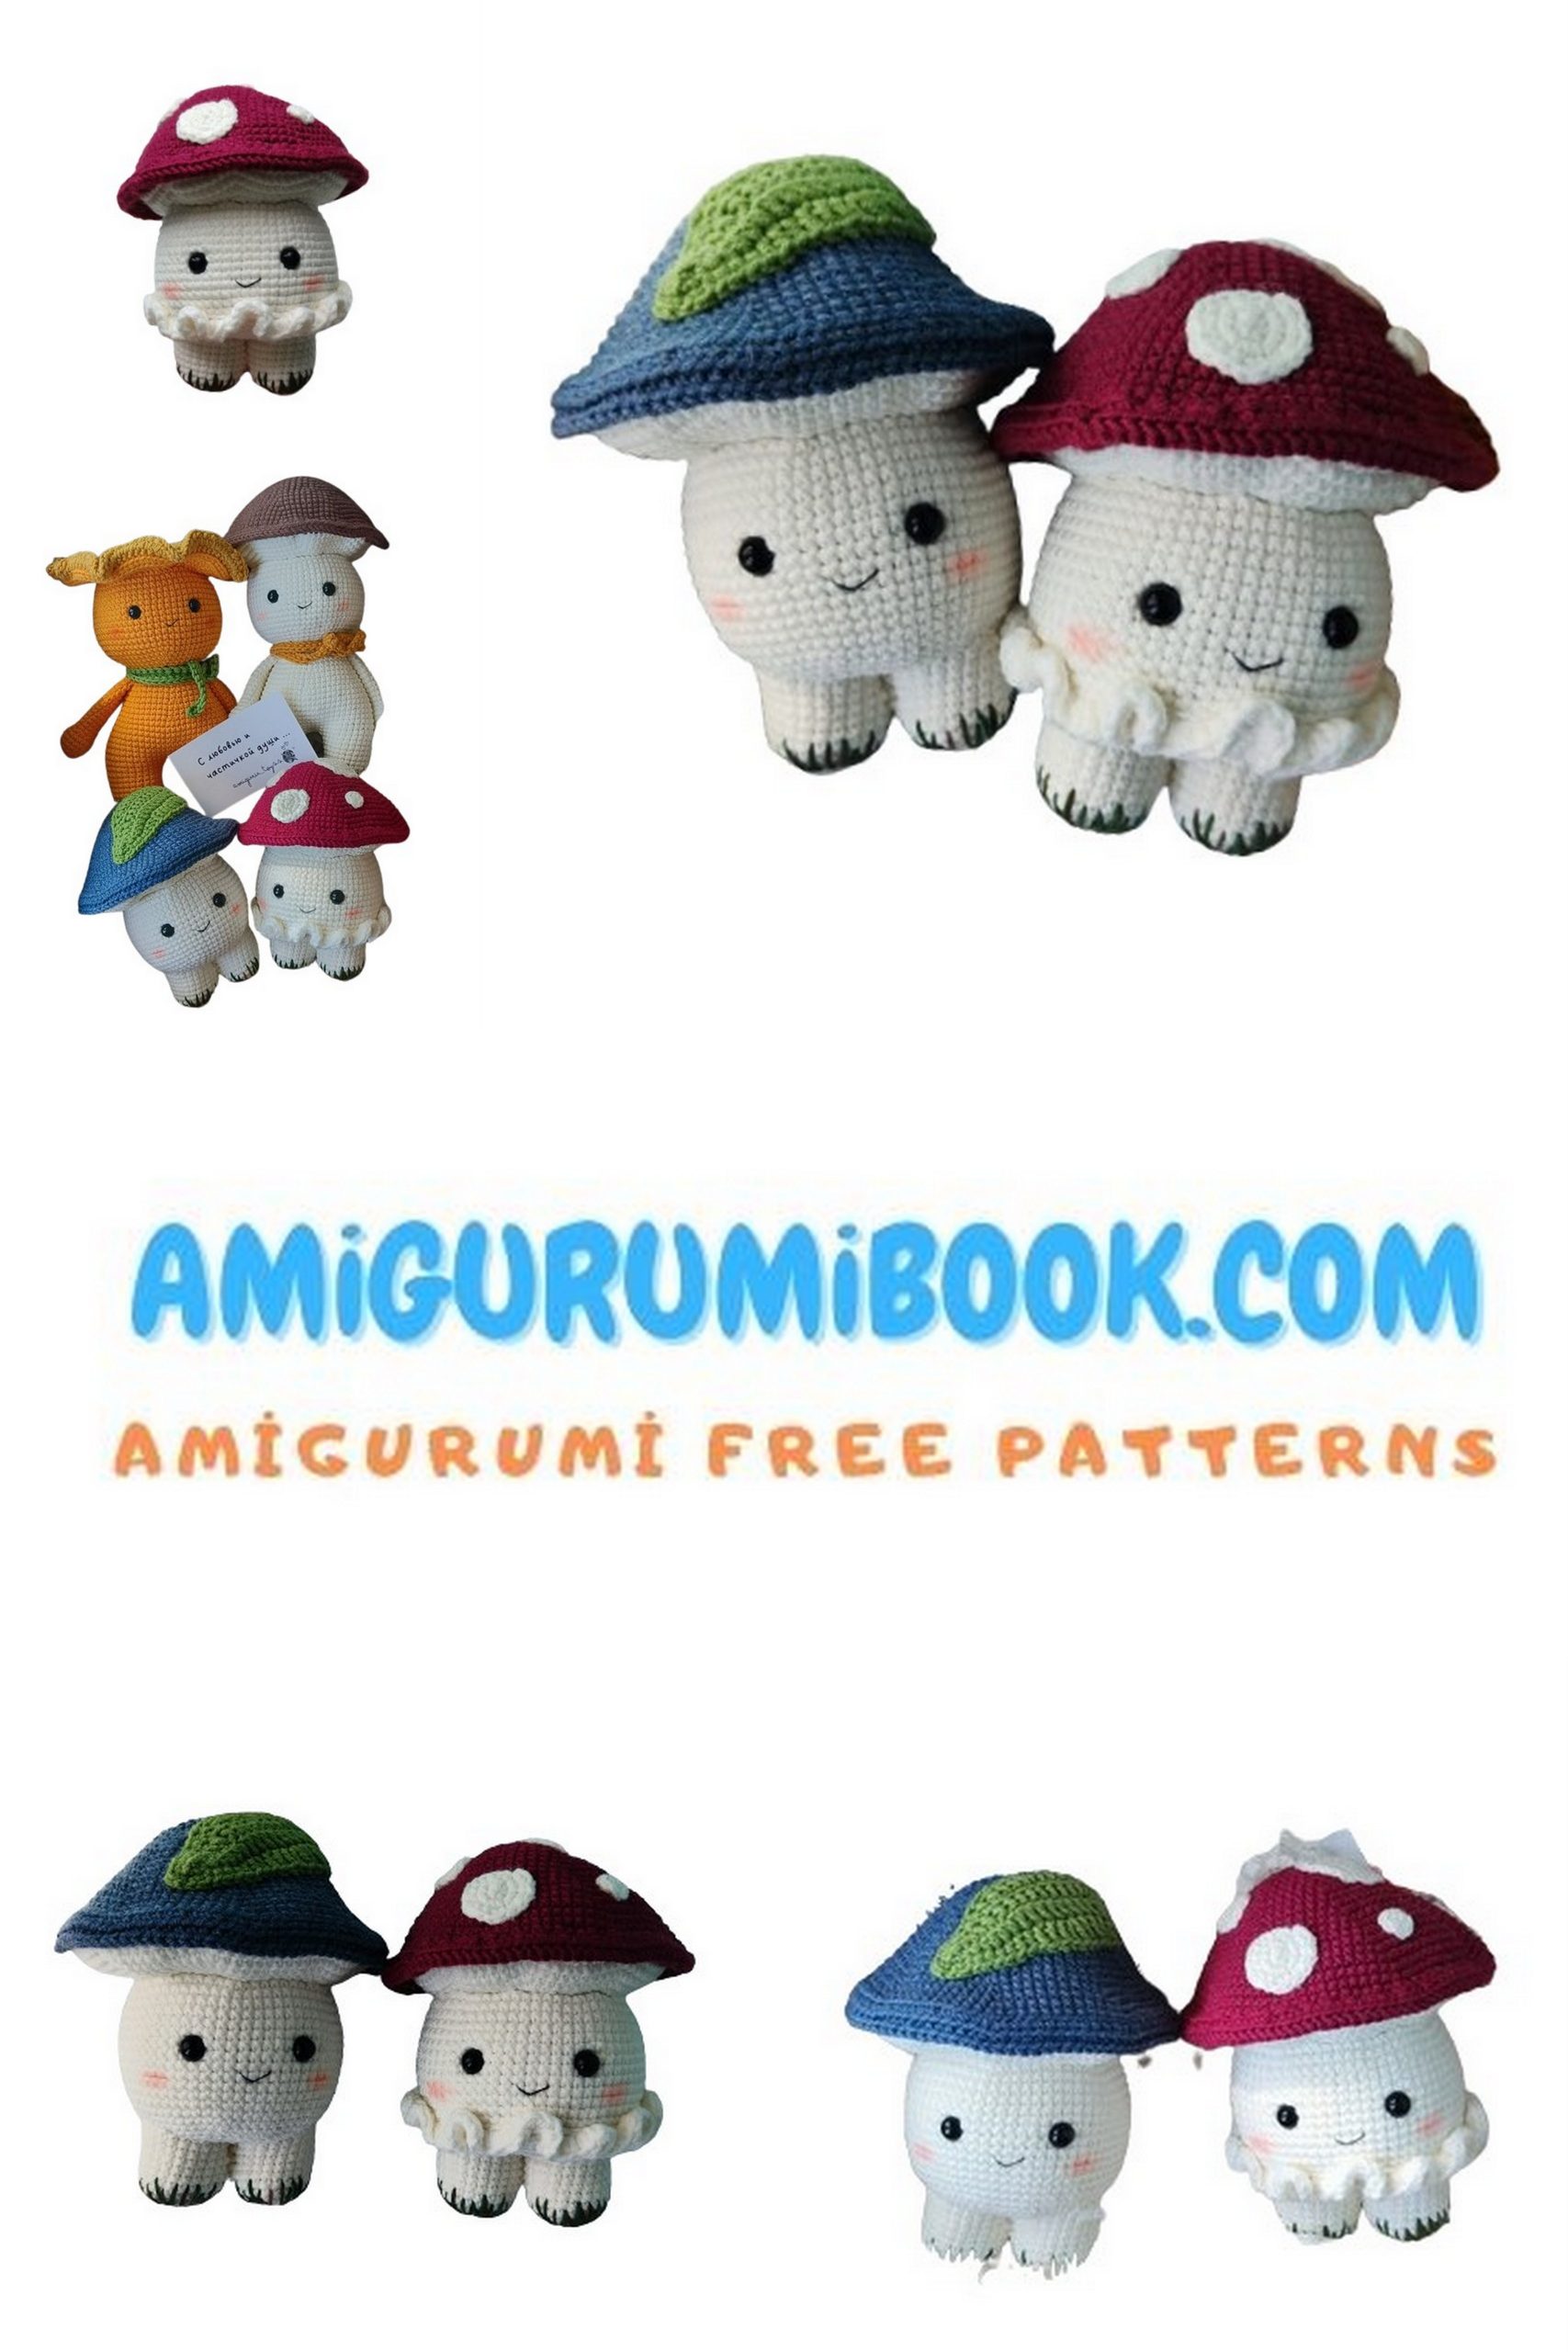
Cap -Whimsical Little Mushrooms
The bottom of the mushroom cap is crocheted with the main yarn, but IF YOU ARE MAKING A FOX, ONLY TWO BOTTOM CAP PARTS OF DIFFERENT COLORS NEED TO BE MADE.
1: 8 in MR (8)
2: 8 INC (16)
3: (1 SC, INC) x 8 (24)
4: (2 SC, INC) x 8 (32)
5: (3 SC, INC) x 8 (40)
6: (4 SC, INC) x 8 (48)
7: (5 SC, INC) x 8 (56)
8: (6 SC, INC) x 8 (64)
9: (7 SC, INC) x 8 (72)
10: (8 SC, INC) x 8 (80)
11: (9 SC, INC) x 8 (88)
12: (88)
13: (10 SC, INC) x 8 (96)
14: (11 SC, INC) x 8 (104)
ATTENTION! If you are making a fox, in the last row you need to crochet in the back loops, and in the second one (parts of a different color), in the front loop.
15: (104)
In the last row, you can change the color to match the top of the cap, or you can leave it as is =)
Cap -Whimsical Little Mushrooms
If you are making a fly agaric or white mushroom, fasten off and cut the thread.
But if you’re making a fox, don’t cut the thread after the second part, continue crocheting using the head “Fox Assembly”.
Cap Top
The color of the cap top is unique for each mushroom (note that the cap top is not necessary for the fox).
1: 8 in MR (8)
2: 8 INC (16)
3: (1 SC, INC) x 8 (24)
4: (2 SC, INC) x 8 (32)
5: (32)
6: (3 SC, INC) x 8 (40)
7: (40)
8: (4 SC, INC) x 8 (48)
9: (48)
10: (5 SC, INC) x 8 (56)
11: (6 SC, INC) x 8 (64)
12: (64)
13: (7 SC, INC) x 8 (72)
14: (72)
15: (8 SC, INC) x 8 (80)
16: (9 SC, INC) x 8 (88)
17: (88)
18: (10 SC, INC) x 8 (96)
19: (96)
20: In the back loop (11 SC, INC) x 8 (104)
Sew the bottom of the cap with the right side facing to the head. Attach the top of the cap with the wrong side facing down and crochet around it using regular SCs in the back loops, gradually stuffing with hollowfiber.


Handles (2 pieces) -Whimsical Little Mushrooms
Main yarn
1: 6 in MR (6)
2: 6 INC (12)
3: (1 SC, INC) x 6 (18)
4:– 6: (18)
7: (1 SC, DEC) x 6 (12)
8:– 19: (12)
Fold together and crochet 4 SC across both sides.
Fasten off and leave a thread for sewing.
If you are making a large white mushroom, you can assemble all the parts by sewing the head and handles.
Scarf
Chain 90-100 and single crochet back to the end.
Fox Assembly
Place cap details together with the wrong sides facing each other and crochet around them using the back loops of an additional color and the front loop of the main color, around 104 SC.
Next, chain 1 and single crochet in each stitch around, finishing with a slip stitch.
Sew on the head, body, and handles.
Face Detailing
You will only need a single strand of embroidery floss or regular black thread. Insert the needle, preferably sharp, into our head and bring it out at point A, insert it into point B. Then bring it out from point V, STRICTLY IN THE MIDDLE OF THE STITCH, hence the need for a sharp needle. Catch the thread between points A and B, adjust the smile with tension and insert it back into point B. Bring out the thread at the same point where you initially inserted it, secure it by tying both ends into a knot, and hide it in the crochet.
Sewing Legs to Small Mushrooms
Secure the legs to the mushrooms with pins and sew them on.
Embellishment with Embroidery Floss
Embellishment -Whimsical Little Mushrooms
Buttocks
Insert a long needle with the main color behind the legs and bring it out, approximately, in the middle of the back. Then insert it back between the legs, through a row from where you inserted the needle, and bring it out where you started. Tighten the thread well to create a buttock. Tie a knot and hide it in the piece.
If you are making a small mushroom, sew the legs together with a couple of stitches.
Fly Agaric
Chain 60 and in the third from the hook, single crochet 3 HDC in each, and so on to the end.
Sew on our skirt. It can be sewn slightly above the buttocks.
Fly Agaric
Embellish the cap with amigurumi rings in the main color. Make them different sizes and as many as you like.
Leaf YarnArt Jeans №69
Sew our leaf as desired.
Use a marker or pastel to blush the buttocks and cheeks.
And our little mushrooms are ready!