
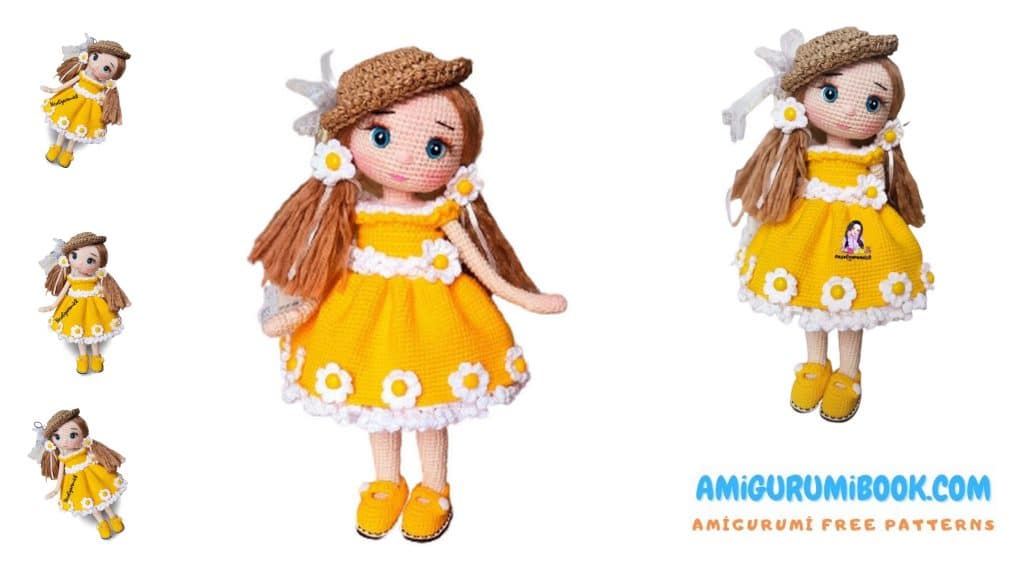
The Sweet Daisy Doll Amigurumi is a charming handmade crochet project perfect for both beginners and experienced crafters. This free pattern guides you step-by-step to create an adorable, soft doll that makes a lovely gift or a delightful addition to your collection. free crochet patterns – Snowman in Top Hat Amigurumi Free Pattern
You may also like more amigurumi patterns.
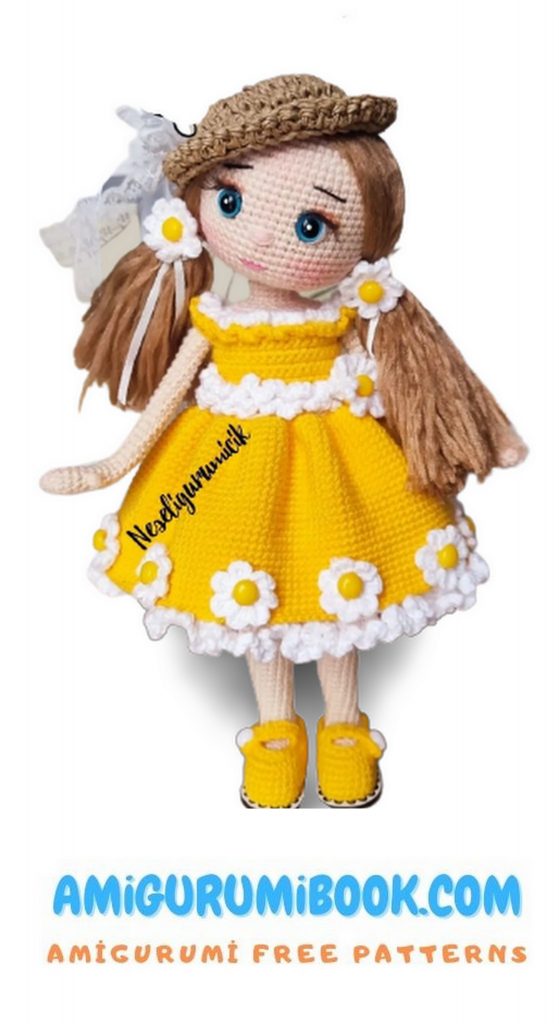
I continue to share amigurumi free patterns. In this article, daisy doll amigurumi free pattern is waiting for you.
Abbreviations
Ch- Chain
inc- increase
DEC- decrease
(…)*6
repeat as many as
Knit from the back of the BLO loop
Knit from the front of the FLO loop
Sl-st- slip stitch
HDC- half double crochet
DC double crochet
Dcinc- double crochet increase
En- Triple crochet
W- (increase) 3 sc into the same loop
M- (decrease) 3 stitches reduction
If similar materials are used, the finished toy will be approximately 27 cm tall.

MATERIALS
10mm BLUE Eye
Wooden Base 5cm
15pcs bonbons yellow Button
3 white bonbons
button
Wire 1.50 cm 1.5
Lash brown color
Fiber
Glue
40 cm tulle scallop
baby hair
Peria 36 2 Pieces
Gazzal baby coton 3417 1 piece
Gazzal baby coton 3432 1 piece
Paper rope 20 gr
It will be knitted with the cross technique.
PATTERN


FOOT LEG
hook NO 1.75mm WIRE 38CM.
from 6 ch 2
1. 4sc,inc,3sc,inc 11
2. inc,4sc,inc,5sc 13
3. inc,6sc,inc,5sc 15
4-7. 15sc 15
8. Turn 9sc 1ch
9. turn 7sc
10. turn 7sc
11. turn 7sc
12. Skip 1sc, turn 6sc
13. Skip 1sc, turn 5sc
14. Insert 5sc pointer
15. 5sc side,8sc front,5sc side,4sc heel 22
16. 3sc,dec,6sc,dec,4sc,dec,sc,dec 18
17.3sc,dec,2sc,dec,sc,dec,3sc,dec,sc 14
18.2sc,dec,4sc,dec,4sc 12
Shape and tape the 38 cm wire according to our feet and
insert press fill
19…21.12sc 12
22.11sc, inc 13
23.13sc 13
24.12sc,inc 14
25.13sc,inc 15
26.15sc 15
27.14sc,inc 16
28.16sc 16
29.15sc,inc 17
30.17sc 17
31.16sc,inc 18
32…35.18sc(4row) 18
36.7sc,dec,7sc,dec 16
37.15sc marker stone 15
38.dec,6sc,3inc,5sc 18
39.inc,17sc 19
40.19sc 19
41.sc,inc,6sc,3dec,5sc 17
42.17sc 17
43.2sc,inc,14sc 18
44.3sc,inc,14sc 19
45.46.19sc 19
47.4sc,inc,14sc 20
48..52.20sc 20
53.20sc 20 with white color
54. entire row blo 20sc 20
Cut 55.1 sc of yarn
on the second leg
55.10sc 2ch 1. Join pointer back to leg
will be in the section
Note :54 . Next, let’s decorate the flo part with 1ch sl-st.


ARM
WIRE25cm hook 1.75mm
1.Magic ring into 6 sc 6
2.(1sc,inc)*3 9
3.(2sc,inc)*3 12
4.5.6.12sc 12
7(dec,2sc)*2 (3 popcorn). 3sc 10
8.10sc 10
9.6sc,dec,2sc 9
10..33.9sc (24 rows) 9
Let’s put our wire in the arms, filling
don’t do


BODY
hook NO 1.75MM
1.20sc, (2sc over (2ch) ,20sc, (2sc over 2ch) insert marker
2.44sc 44
3.(2sc,inc)*3, 24sc,(inc,2sc)*3, 2sc 50
4..12. 50sc (9 rows) 50
13.(10sc,dec)*4 ,2sc 46
Switch to tan color
14. as blo 10sc,dec,21sc,dec,10sc 44
15.22sc,dec,18sc,dec 42
16.42sc 42
17.(5sc,dec)*6 36
18…26.36sc (9row) 36
27.(5sc,inc)*6 42
28.42sc 42
29.12sc,(size with 3sc sleeve) 18sc (size with 3sc sleeve),6sc
30.12sc,(6sc arm circumference) 18sc (6sc arm circumference) 6sc 48
Let’s put our wire in our arms
31.48sc 48
32.(3sc,dec)*2 (sc,dec)*3 (7sc,dec)*2 (sc,dec)*2 3sc, dec 38
33.(5sc,dec)*5 sc, dec 32
34.(6sc,dec)*4 28
35.(3,dec)*5 sc, dec 28
36.(3sc,dec)*4 2sc 18
37..40.18SC 18
In the 14th row, decorate the FLO part with 1ch sl-st until the end
HEAD
hook NO 1.75 MM
1.Magic ring into 6sc
2.6in 12
3.(1sc,inc)*6 18
4.1sc,inc,(2sc,inc)*5 1sc 24
5.(3sc,inc)*6 30
6.2sc,inc,(4sc,inc)*5 2sc 36
7.(5sc,inc)*6 42
8.3sc,inc,(6sc,inc)*5 3sc 48
9.(7sc,inc)*6 54
10.4sc,inc,(8sc,inc)*5 4sc 60
11.18.sc 60sc 60 in each row
19.25sc(skip 1ch 1 sc) 8sc,(skip 1ch 1 sc) 25sc
20.25sc,(over 1sc ch) 8sc,(over 1sc ch),25sc
21.26. sc 60sc 60 in each loop
27.4sc,dec,(8sc,dec)*5 4sc 54
28.2sc,dec,(7sc,dec)*5 5sc 48
29.(6sc,dec)*6 42
30.3sc,dec(5sc,dec)*5 2sc 36
31.1sc,dec,(4sc,dec)*5 3sc 30
32.(3sc.dec)*6 24
33.1sc,dec,(2sc,dec)*5 1sc 18
Kas 14.15th row
4sc versus 5sc
Nose 21st row 2sc
7 windings will be made
Lip to 25th row
2sc or 4sc
as will be
process
CAP
hook 3MM
1.Magic ring into 8 sc
2.8in 16
2.(1sc,inc)*8 24
3.(2sc,inc)*8 32
4.5.6.32sc 32
7.(1sc,inc)*16 48
8.48sc 48
finished
NOTE: LET’S REMOVE THE SCLERS FROM THE REVERSE OF OUR CHAIN
DRESS
hook 1.75mm
61 ch from 8.ch
Return 1.54sc 1ch
Return 2.54sc 1ch
3.10sc,4 chain 8sc skip 18sc 4 chain 8sc skip 10sc 46 1ch turn
4..12.46sc 46 1ch turn
13.46sc join both ends with sl-st
14. 46inc 92 as flo
15.(1sc,inc)*46 sl-st 1ch 138
16.41.(26 rows) sl-st 1ch 138
Let’s work as a net with white thread on the blo part of the 14th part of the inner part of our dress.
1.dc 2 chain dc
2.12. 46 cages
13.14 4 chain sc in each cage to end of row
15. 3ch sc 3ch sc on top of each chain
White thread on the BLO part of the collar of our dress and 3 chains in each loop at the end of the sl-st row.
until .
With our yellow color on the FLO part, 3 ch sl-st in each loop until the end of the row.
Let me complete our dress between the rows of 14.15 and make a sl-st with white color.
daisy and belt
CROCHET 2mm
1. Combine yellow thread with MAGIC RING INTO 7SC , sl-st cut the thread
2. Fix 3 chains with white thread in the same loop with 2dc 3 chains in the same loop with sl-st
Switch to the side loop with sl-st and repeat the same process, the number of sheets will be 7
BELT
1. Chain up to the baby’s waist 68 ch From the 8th ch on each loop 6 ch sl-st chains
Complete it in this way. Same process on the opposite side.
daisy numbers
2 buckles, 11 skirts, 1 belt, 1 hat
SHOE
SHOES SOLE
(2.no hook)
1 in each hole 23 sl-st HIDE THE THREAD IN THE INSIDE
SHOES UPPER SECTION
1 inc,8sc,5inc,6sc,3inc sl-st1ch 32
2.6. sc 32sc sl-st1ch 32 in each loop
7.10sc,7a,8sc sl-st finish
BELT or LUGGAGE SECTION
fix the rope after the 6th stitch remove 2SC complete 7 rows 7
pull chain, end with sl-st for buttonhole
COMPLETE TWO SHOES IN THE FOLLOWING WAY
SEW BUTTONS AND FINISH