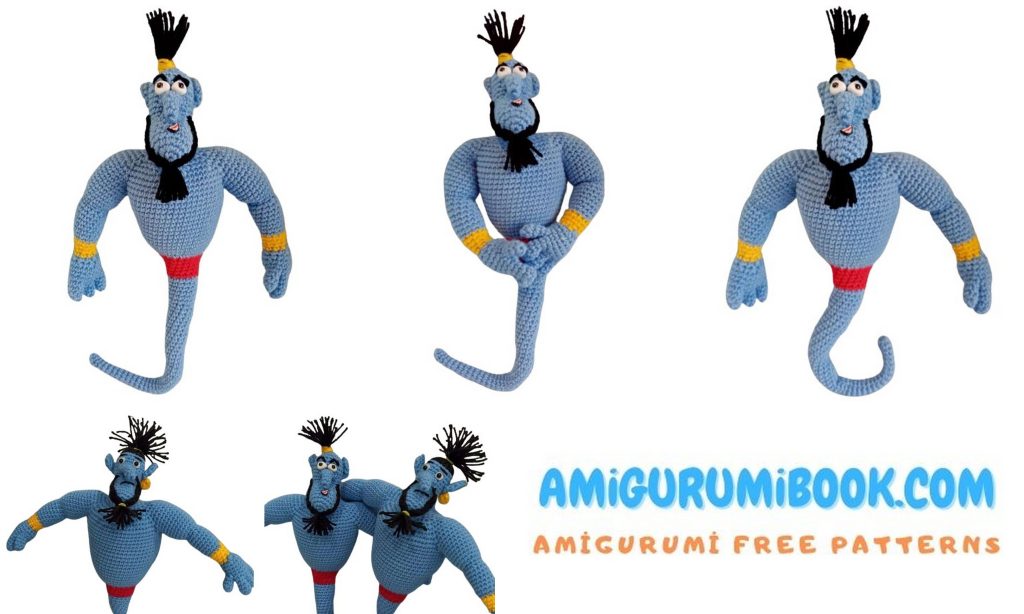
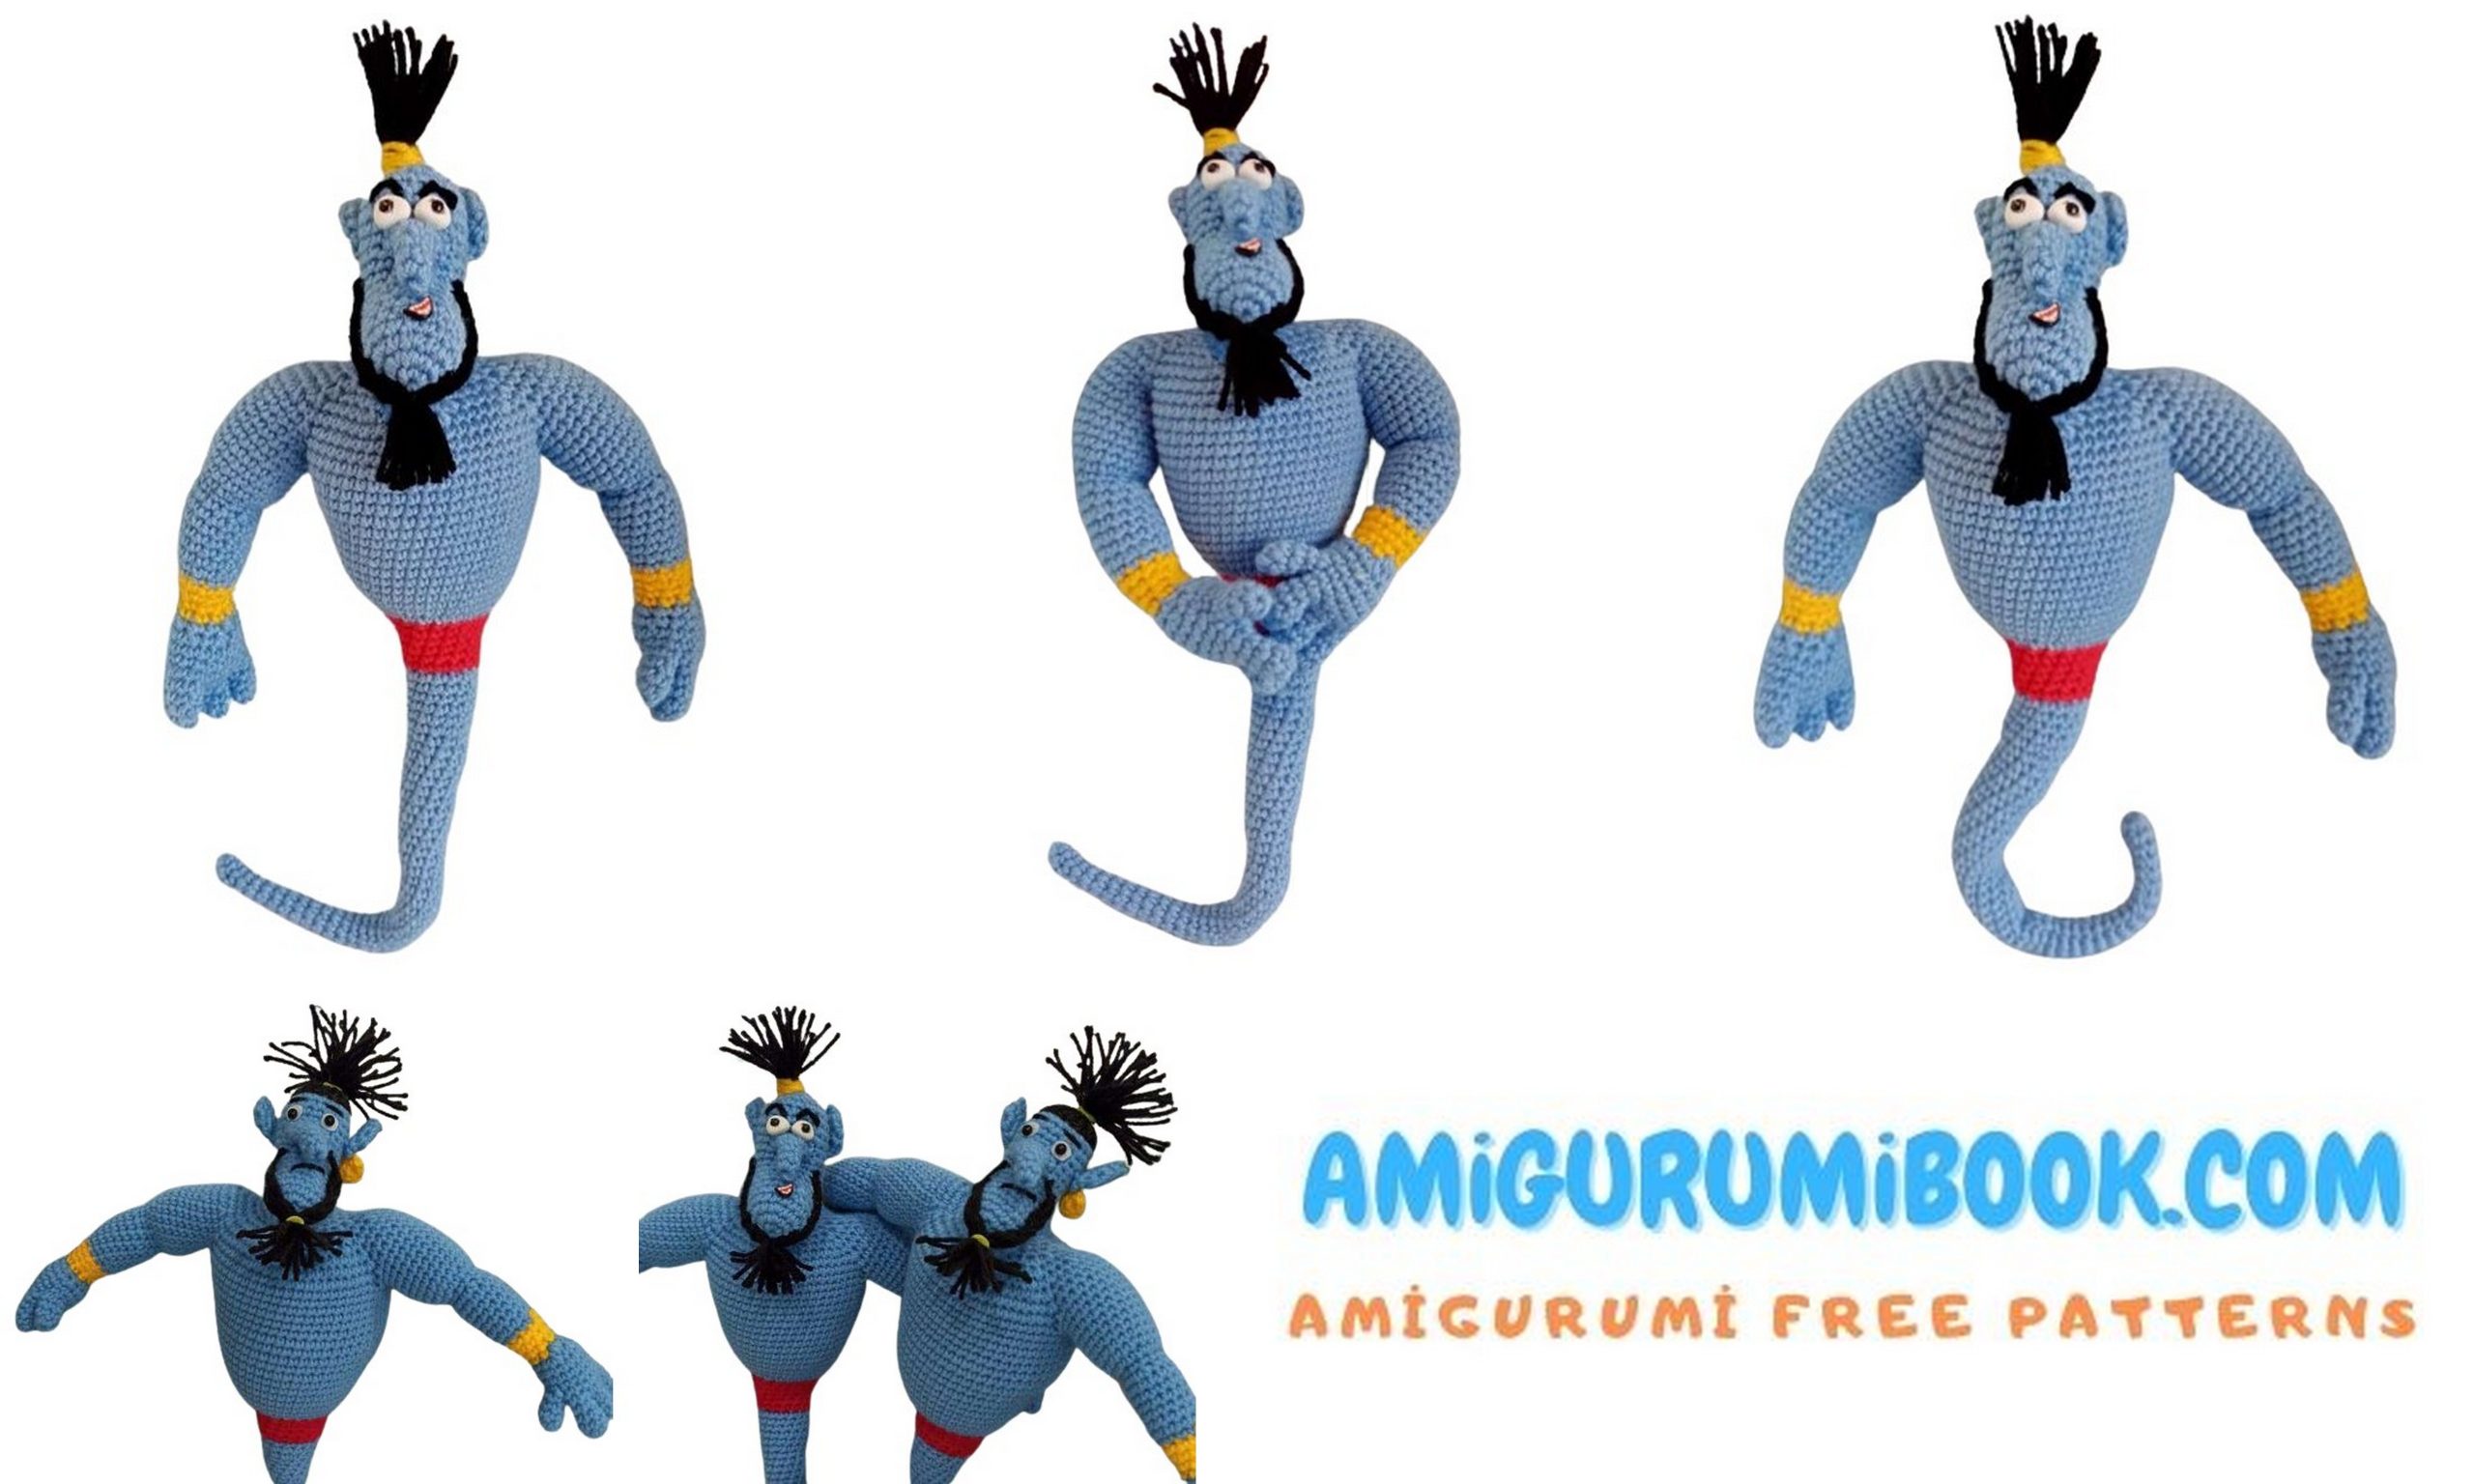
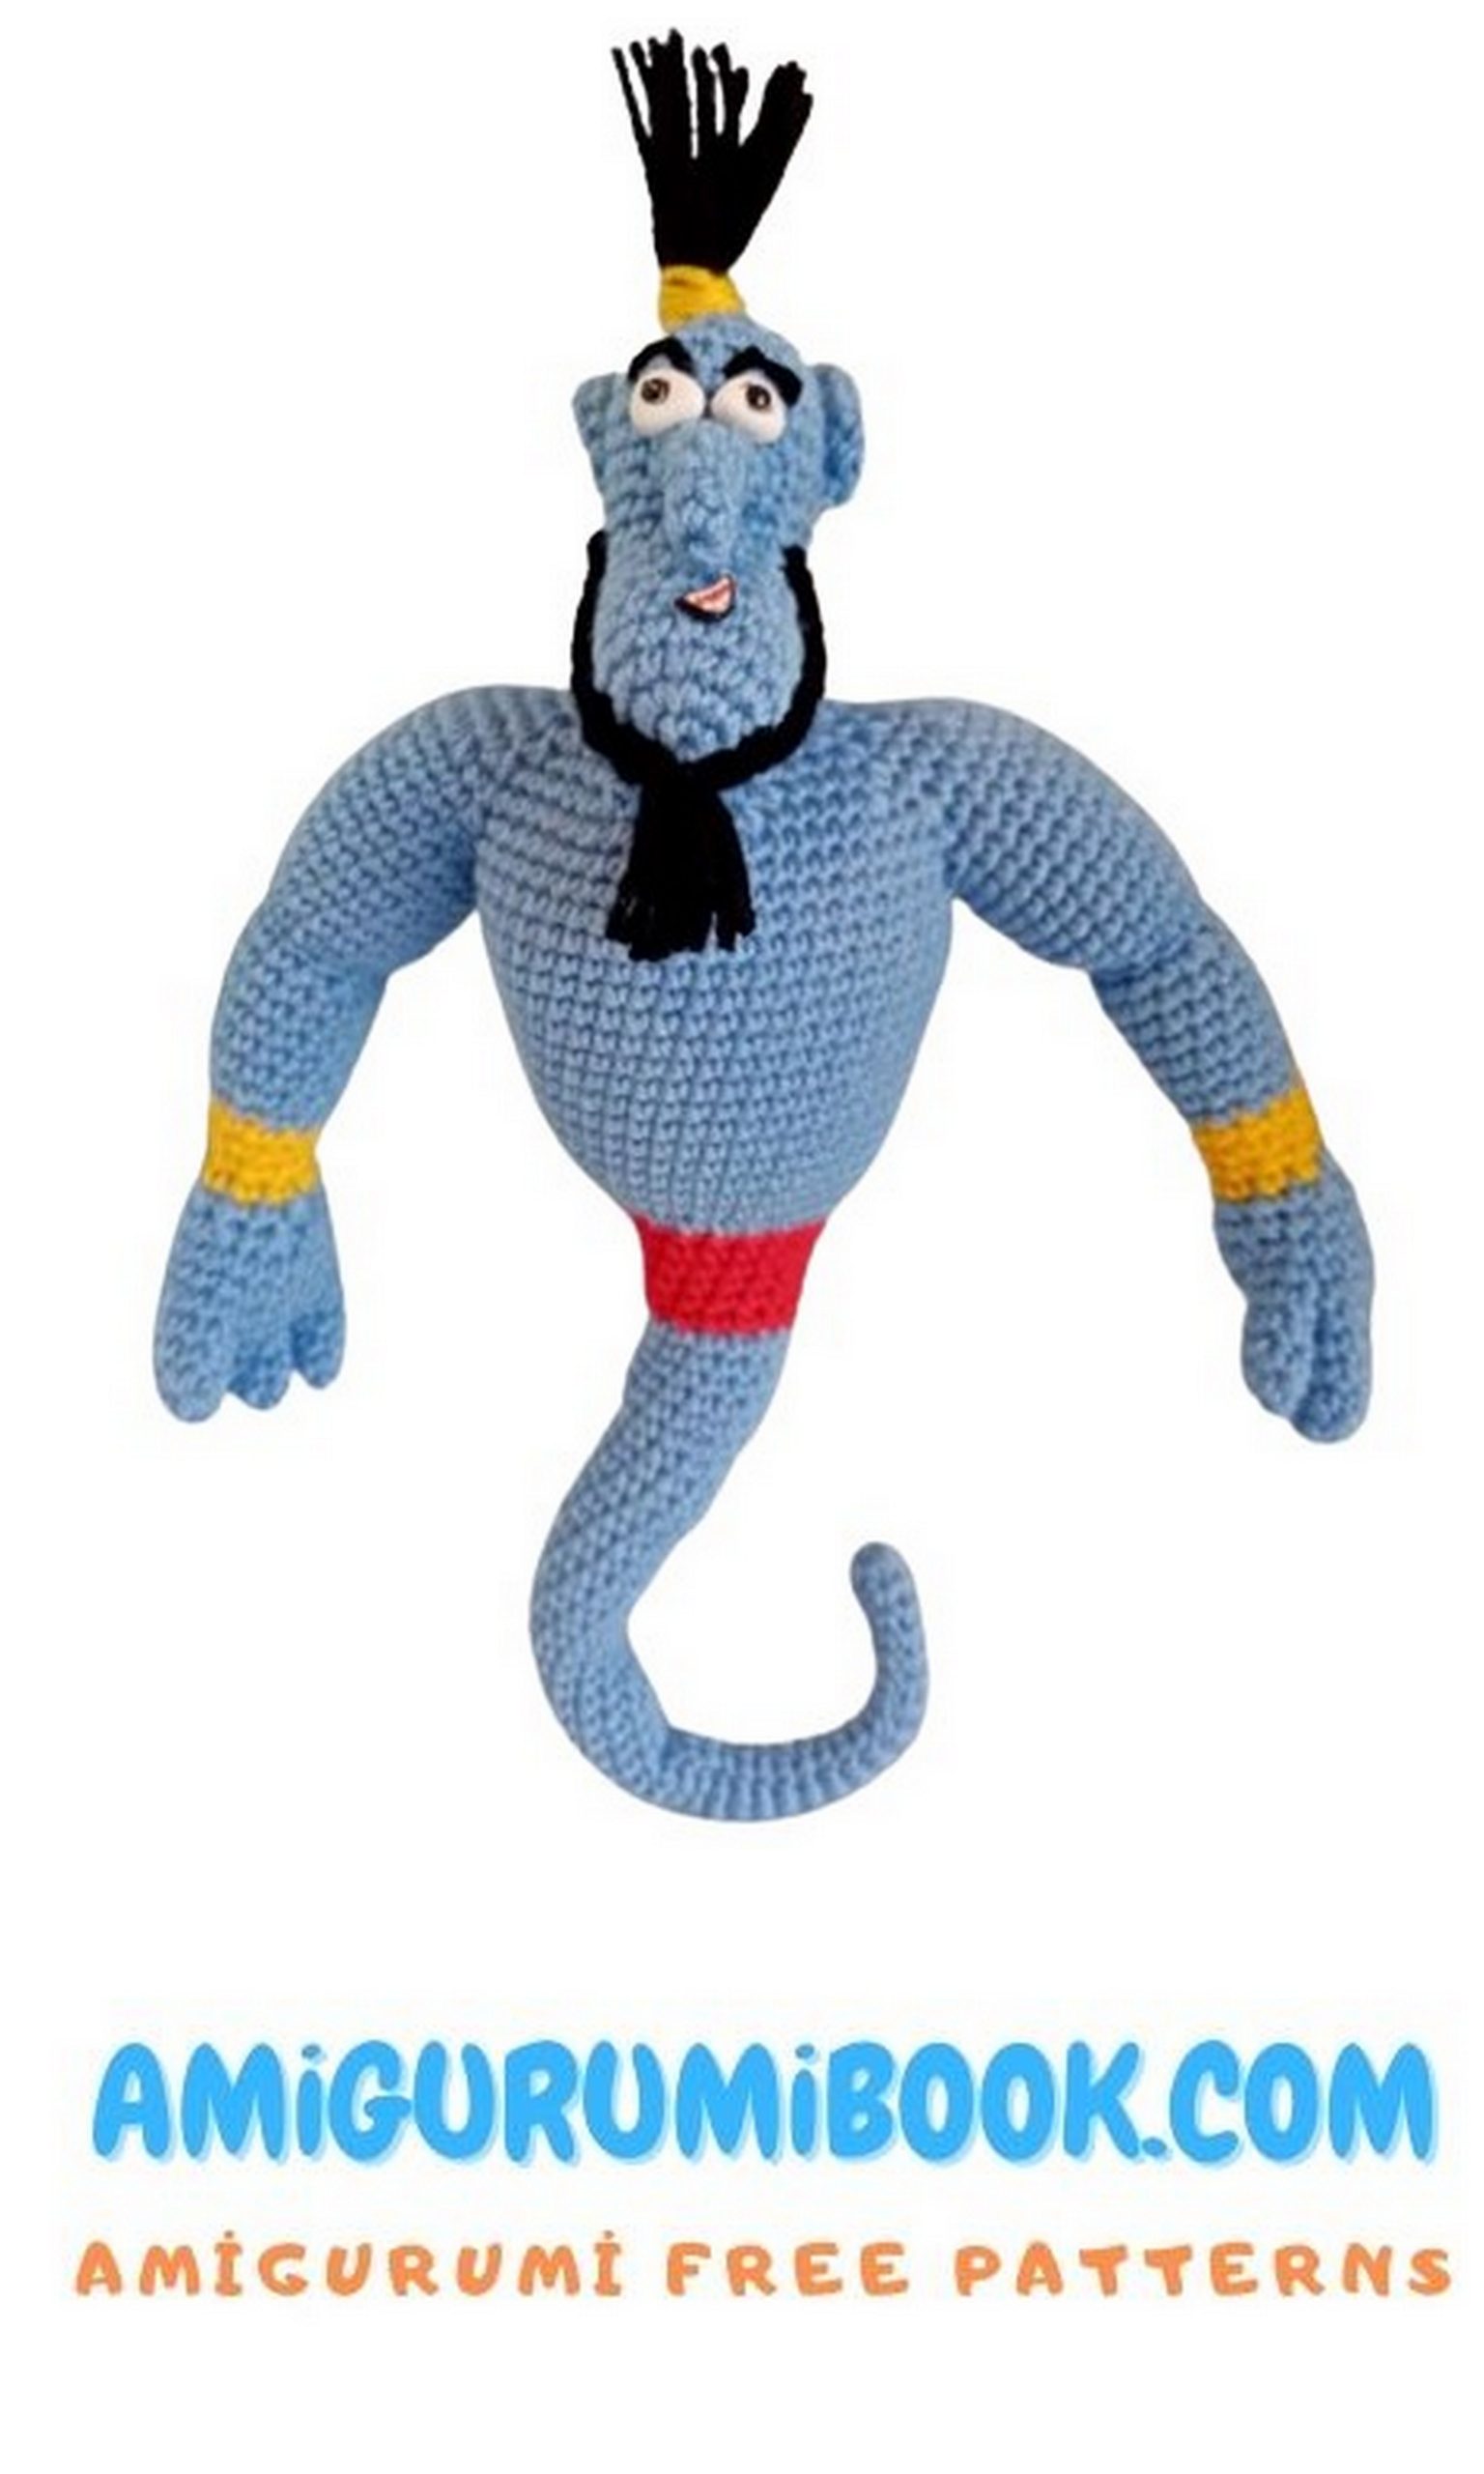
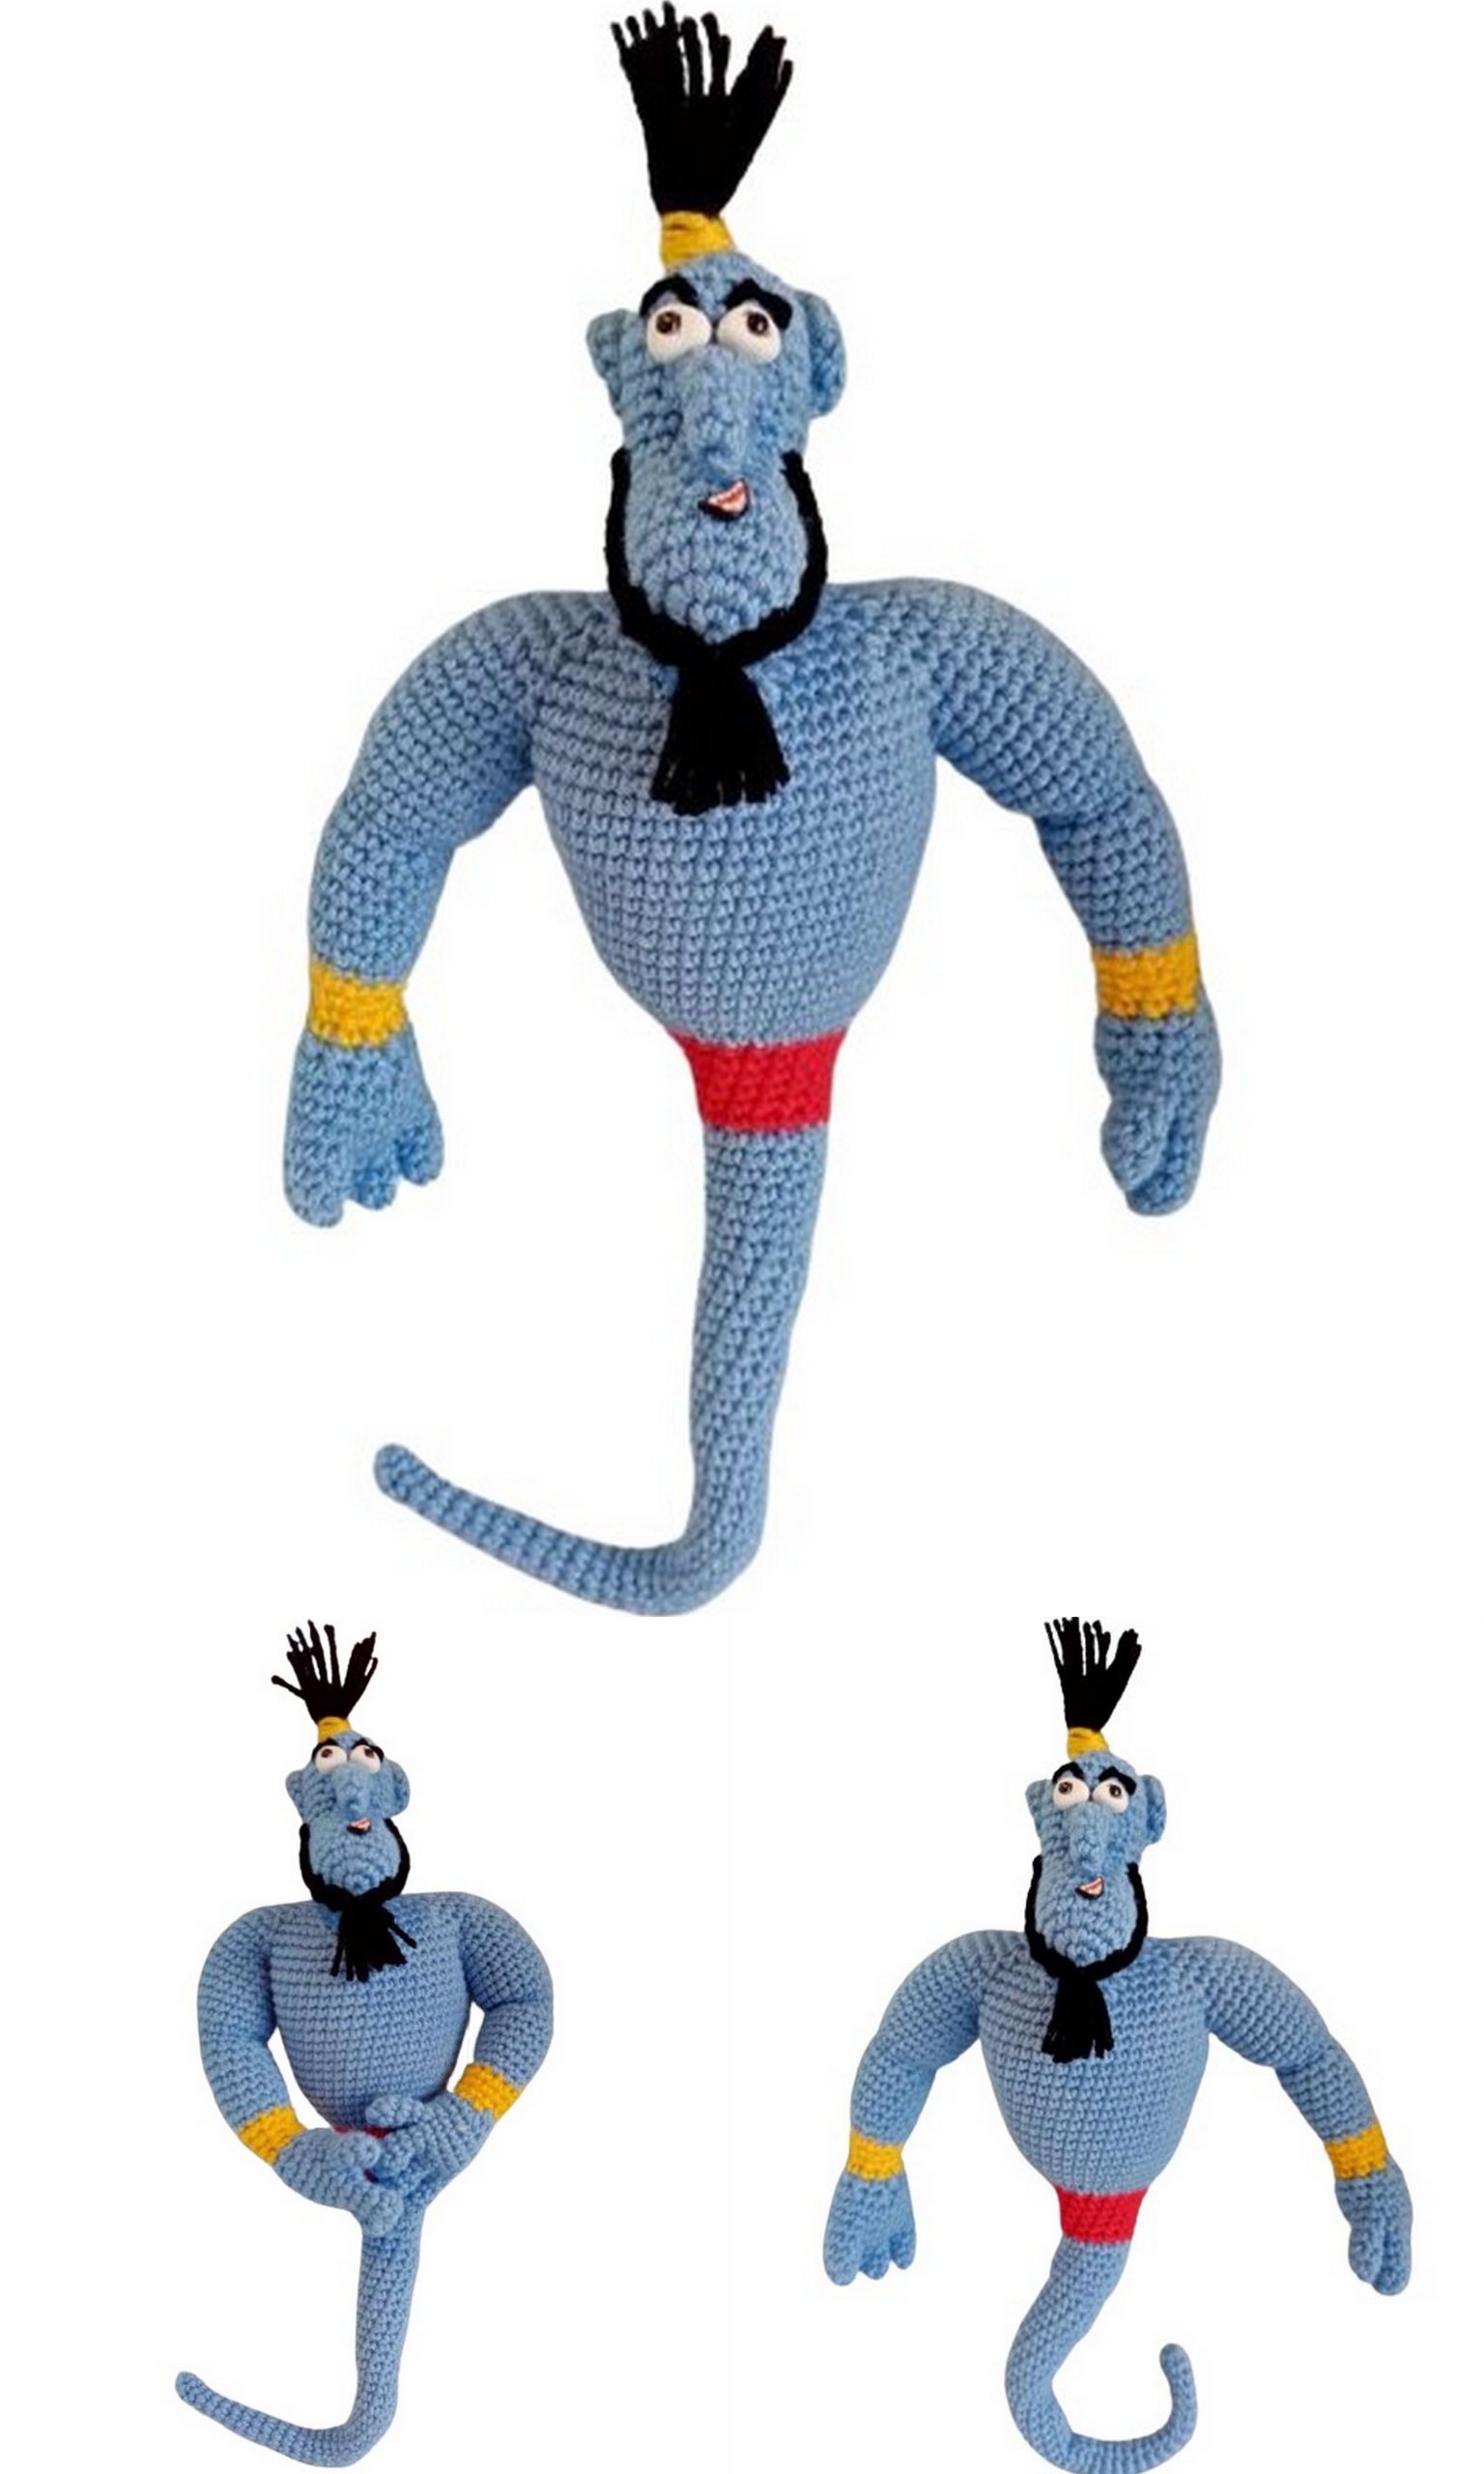
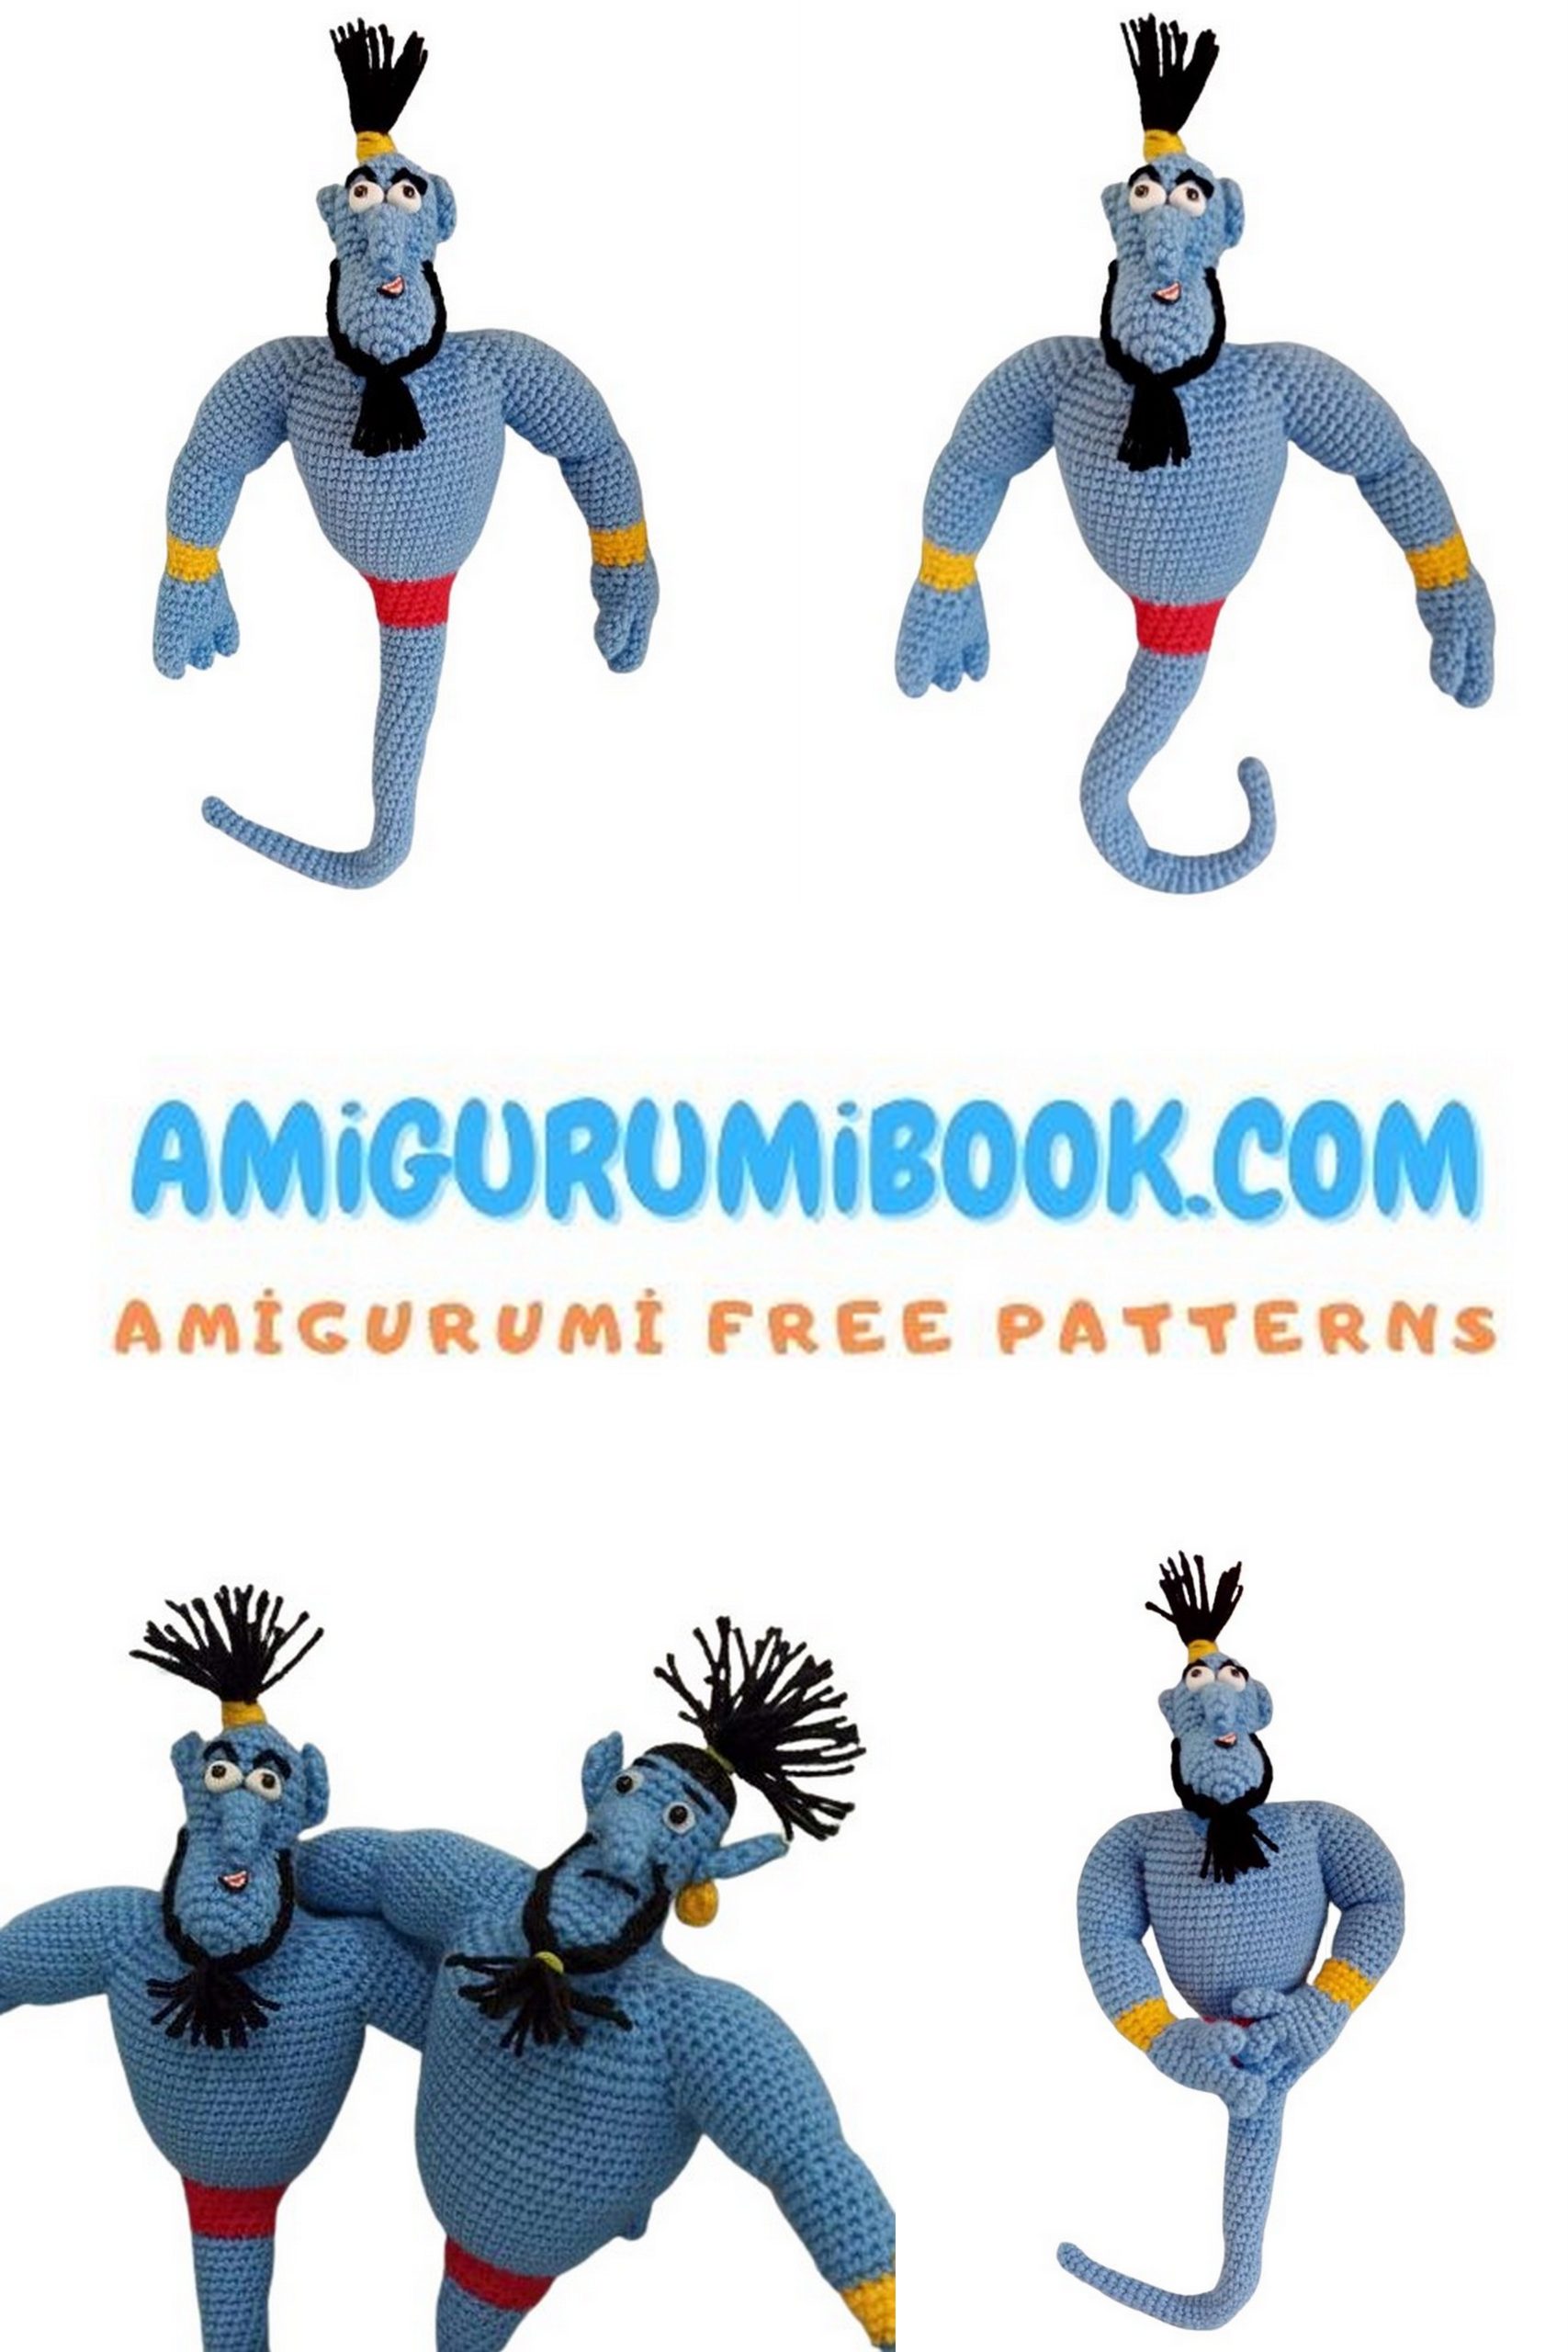
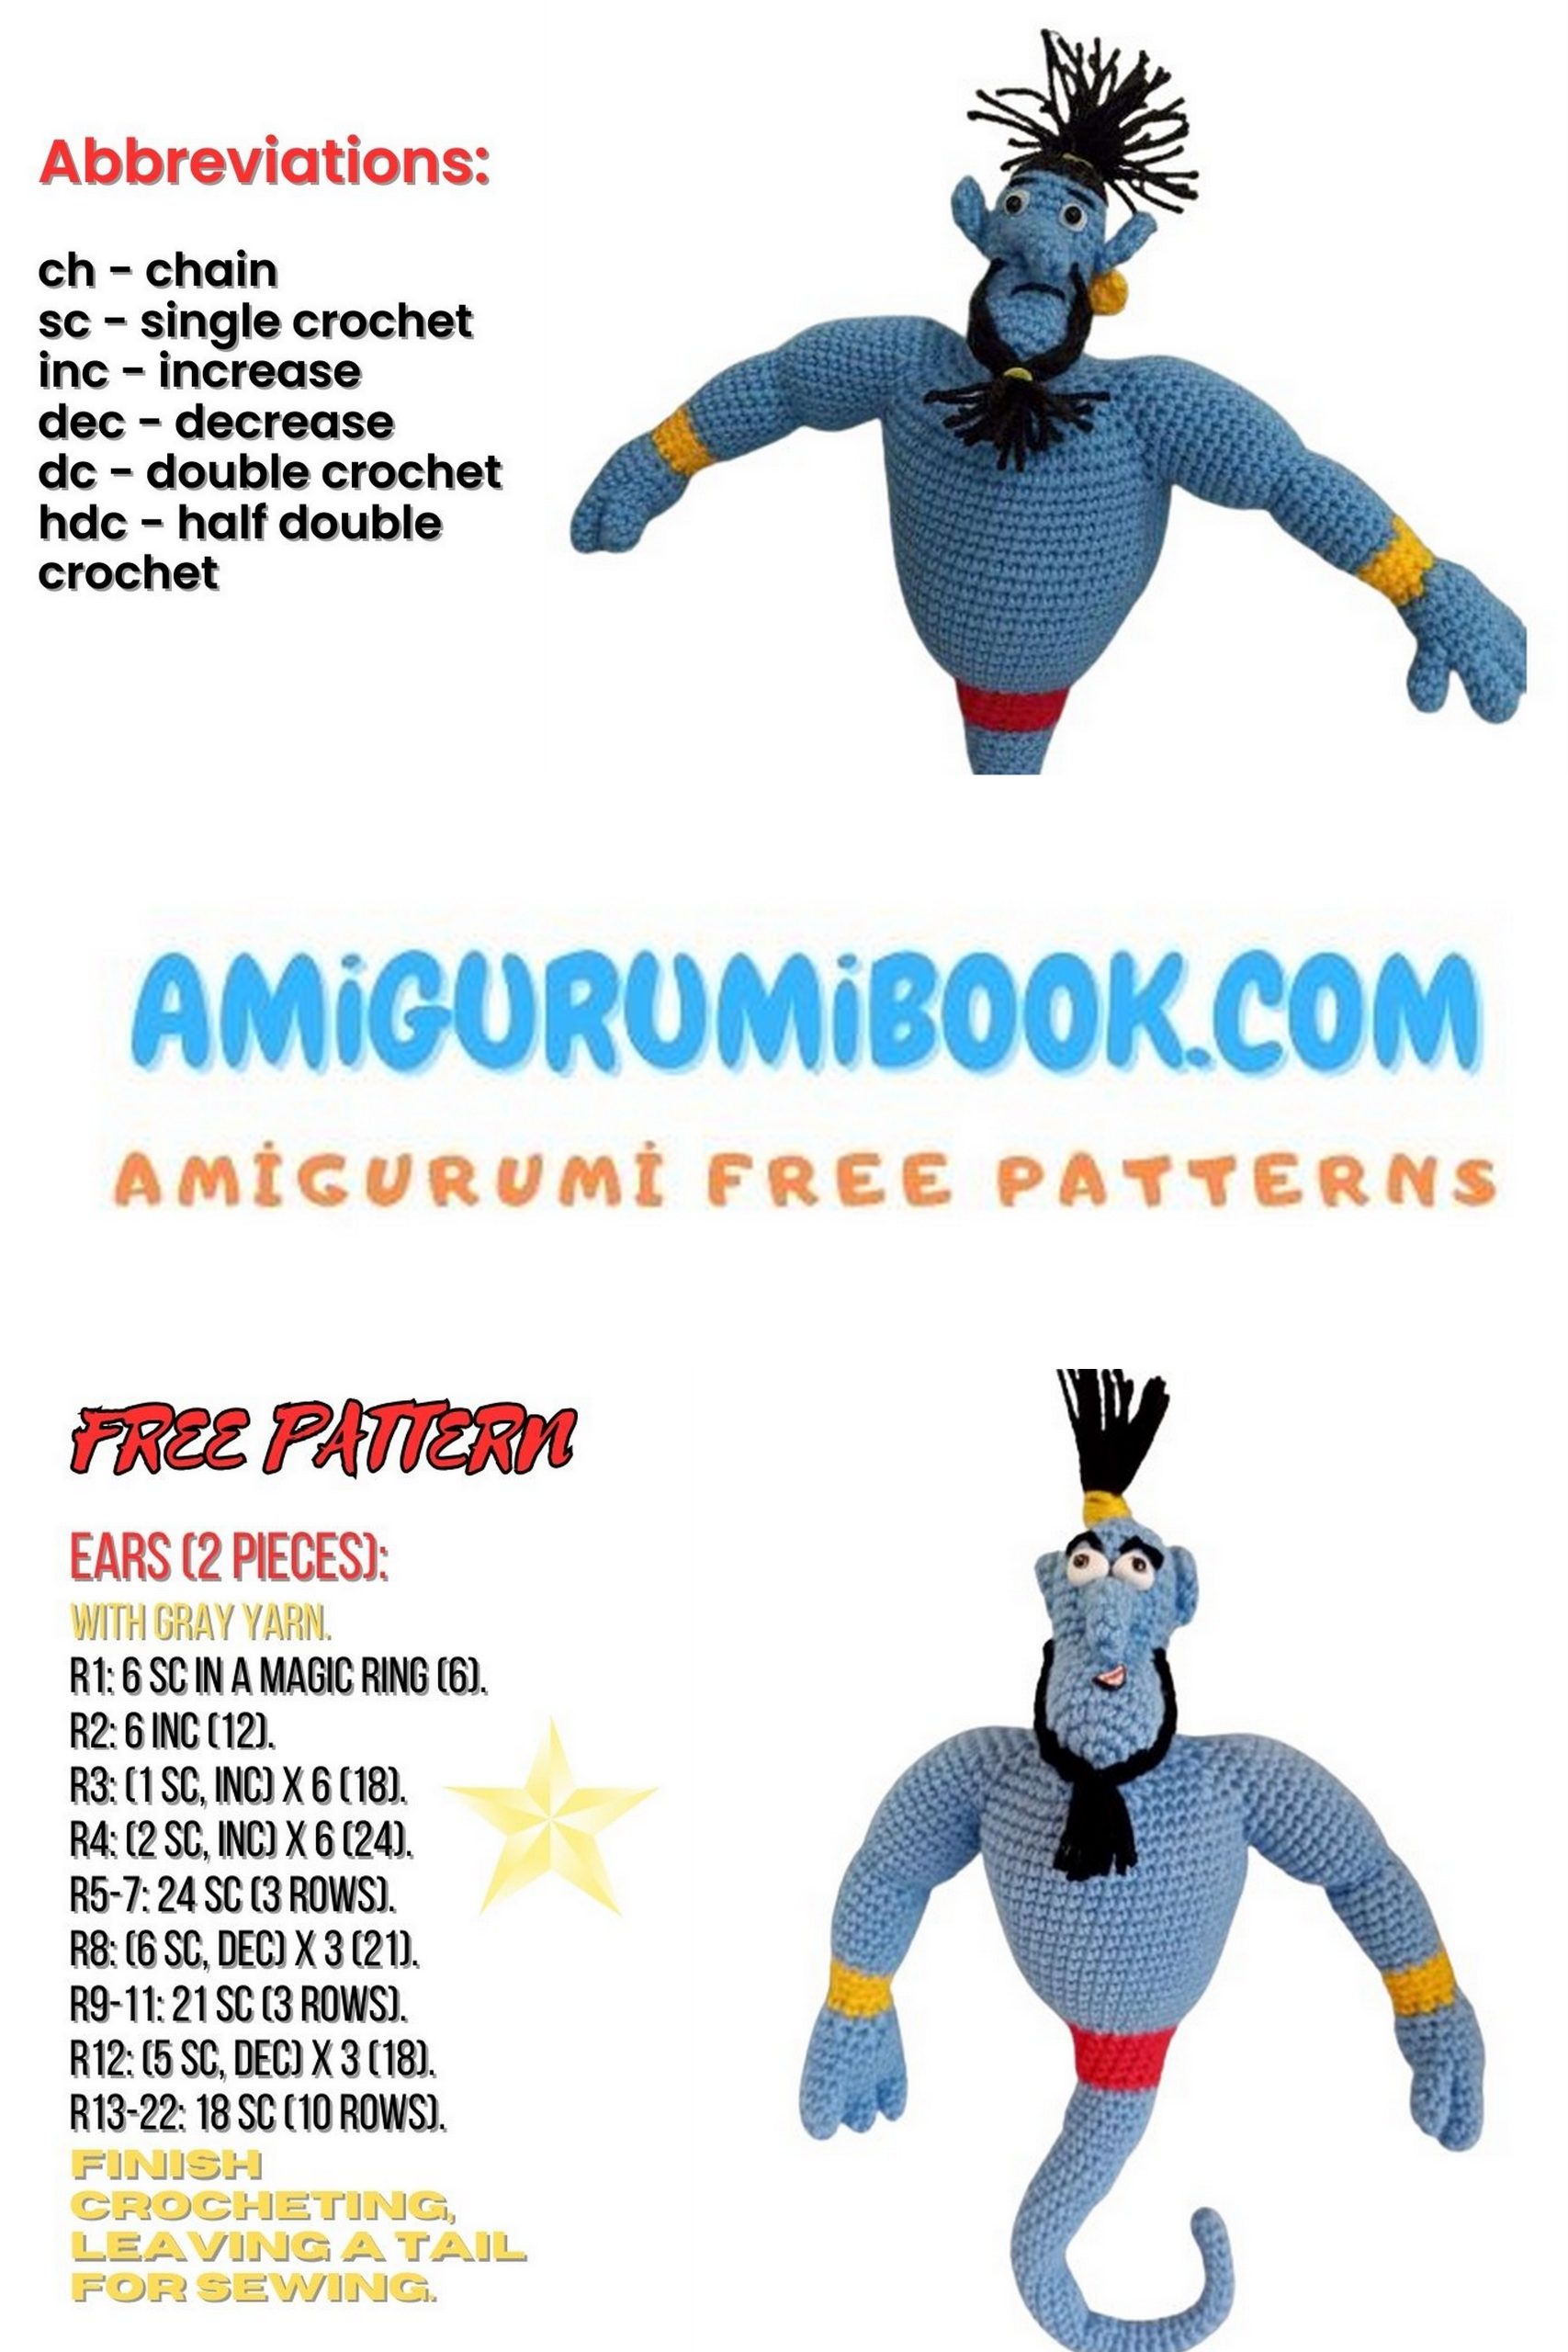
Welcome to a whole new world of crochet magic! If you’re a fan of Disney’s Aladdin and adore the mischievous yet lovable Genie character, you’re in for a treat. With our free amigurumi pattern, you can create your own miniature version of the Genie, complete with his iconic blue hue and mischievous grin.
Whether you’re an experienced crocheter or just starting out, this pattern is perfect for all skill levels. Just imagine the joy of having your own Genie to grant your crafting wishes! So grab your crochet hook, some yarn, and let’s embark on a magical crafting journey together. Get ready to bring a touch of Arabian Nights into your home with your very own crocheted Genie from Aladdin!
If you love the amigurumi cartoon character like me, you should also see the super sonic amigurumi pattern.
If you want to access 1000+ free amigurumi patterns, you can download our application from this link!
Materials
a)Yarn Pekhorka “Volume Kids” color blue (400 m, 100 g) – 1/3 skein
b)Yarn Pekhorka “Kids New” color yellow (200 m, 50 g) – a bit for making bracelets
c)Yarn Pekhorka “Kids New” color red (200 m, 50 g) – a bit for making a belt
d)Yarn Pekhorka “Kids New” color black (200 m, 50 g) – a bit for decorating eyes, eyebrows, hair, and beard
Crochet hook 1.75
Stuffing
Safety eyes or half-beads with a diameter of 3-4 mm – 2 pieces
Scissors
Glue Moment “Crystal”
Abbreviations
ch – chain stitch
sl st – slip stitch
sc – single crochet
inc – increase (work 2 sc in one stitch)
dec – decrease (work 2 sc together)
hdc – half double crochet
dc – double crochet
ch 1 – chain 1
Toy is worked in a spiral unless otherwise specified.
Even stitches to all loops!
PATTERN
Ears (2 pieces) Aladdin’s Genie
Let’s crochet with blue color
1 – 6 sc into magic ring
2 – 6 inc (12)
Do not stuff!!!
Fold in half and crochet 6 sc. Fasten off, leaving a small end of yarn for sewing.
Nose – Aladdin’s Genie
Let’s crochet with blue color
1 – 6 sc into magic ring
2-4 – 6 sc
5 – 3 sl st, 3 hdc (6)
6 – (1 sc, 1 inc)*3 (9)
Stuff with stuffing.
Fasten off, cut yarn, hide end of yarn, the nose will be embroidered during head crocheting.
Chin – Aladdin’s Genie
Let’s crochet with blue color
1 – 6 sc into magic ring
2 – 6 inc (12)
3 – (1 sc, 1 inc)*6 (18)
4-5 – 18 sc
6 – (1 dec, 7 sc)*2 (16)
7 – (1 dec, 6 sc)*2 (14)
8 – 14 sc
Stuff with stuffing. Fasten off, cut yarn, hide end of yarn, the chin will be embroidered during head crocheting.
Arms (2 pieces) – Aladdin’s Genie
Let’s crochet with blue color.
First, crochet fingers (4 for each hand)
1 – 6 sc in MR
2-4 – 6 sc (6)
Then in Row 5, join 3 fingers together
5 – 3 sc for finger 1, 3 sc for finger 2, 6 sc for finger 3, 3 sc for finger 2, 3 sc for finger 1 (18)
6 – 18 sc
Continuation of Arms (2 pieces)
Next, the next 2 rows are worked differently for each arm. On these rows, we crochet 4 fingers. For the left arm:
7 – Crochet 3 sc together with 3 sc of finger 4, 15 sc (18)
8 – 3 sc for finger 4, 15 sc (18)
For the right arm:
7 – 6 sc, crochet 3 sc together with 3 sc of finger 4, 9 sc (18)
8 – 6 sc, 3 sc for finger 4, 9 sc (18)
Continuation of Arms (2 pieces)
Next, both arms are crocheted the same way
9 – 18 sc
10 – (1 sc, 1 dec)*6 (12)
11 – (2 sc, 1 dec)*3 (9)
Change yarn to yellow color
12-13 – 9 sc
Do not forget to stuff the part with stuffing while crocheting.
14 – (2 sc, 1 inc)*3 (12)
15 – 12 sc
Change yarn to blue color
16 – 12 sc
17 – (3 sc, 1 inc)*3 (15)
18-22 – 15 sc
Do not forget to stuff the part with stuffing while crocheting.
23 – (3 sc, 1 dec)*3 (12)
24 – 12 sc
25 – (1 sc, 1 inc)*6 (18)
26 – (5 sc, 1 inc)*3 (21)
27-32 – 21 sc
33 – 21 sc, sl st
In Row 33, mark stitches on the left hand from 14 to 19, and on the right hand from 12 to 17 (these loops will be used to attach the arms)
Stuff with stuffing. Fasten off, cut yarn, hide end of yarn, the arms will be attached during body crocheting.
Continuation of Arms (2 pieces)
Body – Head : Aladdin’s Genie
Let’s crochet with blue color
1 – 6 sc into magic ring
2-6 – 6 sc
7 – 5 sc, 1 inc (7)
8-11 – 7 sc
12 – 6 sc, 1 inc (8)
13-16 – 8 sc
17 – 7 sc, 1 inc (9)
18-21 – 9 sc
22 – 8 sc, 1 inc (10)
23-27 – 10 sc
28 – 9 sc, 1 inc (11)
Continuation of Body – Head
29-34 – 11 sc
35 – 10 sc, inc (12)
36-41 – 12 sc
42 – (3 sc, 1 inc)*3 (15)
43-47 – 15 sc
Change yarn to red color
48 – 15 sc in front loops
49-50 – 15 sc
51 – (4 sc, 1 inc)*3 (18)
52 – 18 sc
53 – (5 sc, 1 inc)*3 (21)
Continuation of Body – Head
54 – 21 inc (42)
55 – 42 sc
56 – (20 sc, 1 inc)*2 (44)
57 – 44 sc
58 – (21 sc, 1 inc)*2 (46)
59 – 46 sc
60 – (22 sc, 1 inc)*2 (48)
61 – 48 sc
62 – (23 sc, 1 inc)*2 (50)
63 – 50 sc
64 – (24 sc, 1 inc)*2 (52)
65 – 52 sc
Do not forget to stuff the part with stuffing while crocheting.
66 – (25 sc, 1 inc)*2 (54)
67 – (26 sc, 1 inc)*2 (56)
68 – (27 sc, 1 inc)*2 (58)
Now do 5 sc offset.
In Row 69, we will attach the arms:
69 – 21 sc, 6 sc together with 6 sc of the left arm (we marked these loops in Row 33), 23 sc, 6 sc together with 6 sc of the right arm (we marked these loops in Row 33), 2 sc (58)
70 – 21 sc, 15 sc for 15 sc of the left arm, 23 sc, 15 sc for 15 sc of the right arm, 2 sc (76)
71 – 20 sc, 1 dec, 13 sc, 1 dec, 21 sc, 1 dec, 13 sc, 1 dec, 1 sc (72)
72 – (10 sc, 1 dec)*6 (66)
73 – (4 sc, 1 dec)*11 (55)
74 – (3 sc, 1 dec)*11 (44)
Do not forget to stuff the part with stuffing while crocheting.
75 – 1 dec, 5 sc, 1 dec, 4 sc, 6 dec, 4 sc, 1 dec, 3 sc, 5 dec (30)
76 – (3 sc, 1 dec)*6 (24)
77 – (2 sc, 1 dec)*6 (18)
78-81 – 18 sc
Continuation of Body – Head
In Row 82, we will attach the chin:
82 – 12 sc, 5 sc together with 5 sc of the chin, 1 sc (18)
83 – 12 sc, 9 sc for 9 sc of the chin, 1 sc (22)
84 – (9 sc, 1 dec)*2 (20)
Do not forget to stuff the part with stuffing while crocheting.
85 – 20 sc
In Row 86, we will attach the nose:
86 – 14 sc, 4 sc together with 4 sc of the nose, 2 sc (20)
87 – 14 sc, 5 sc for 5 sc of the nose, 2 sc (21)
88-91 – 21 sc
92 – (1 sc, 1 dec)*7 (14)
93 – 7 dec
Stuff with stuffing.
Fasten off, cut yarn, close the hole, hide the end of the yarn.
Continuation of Body – Head
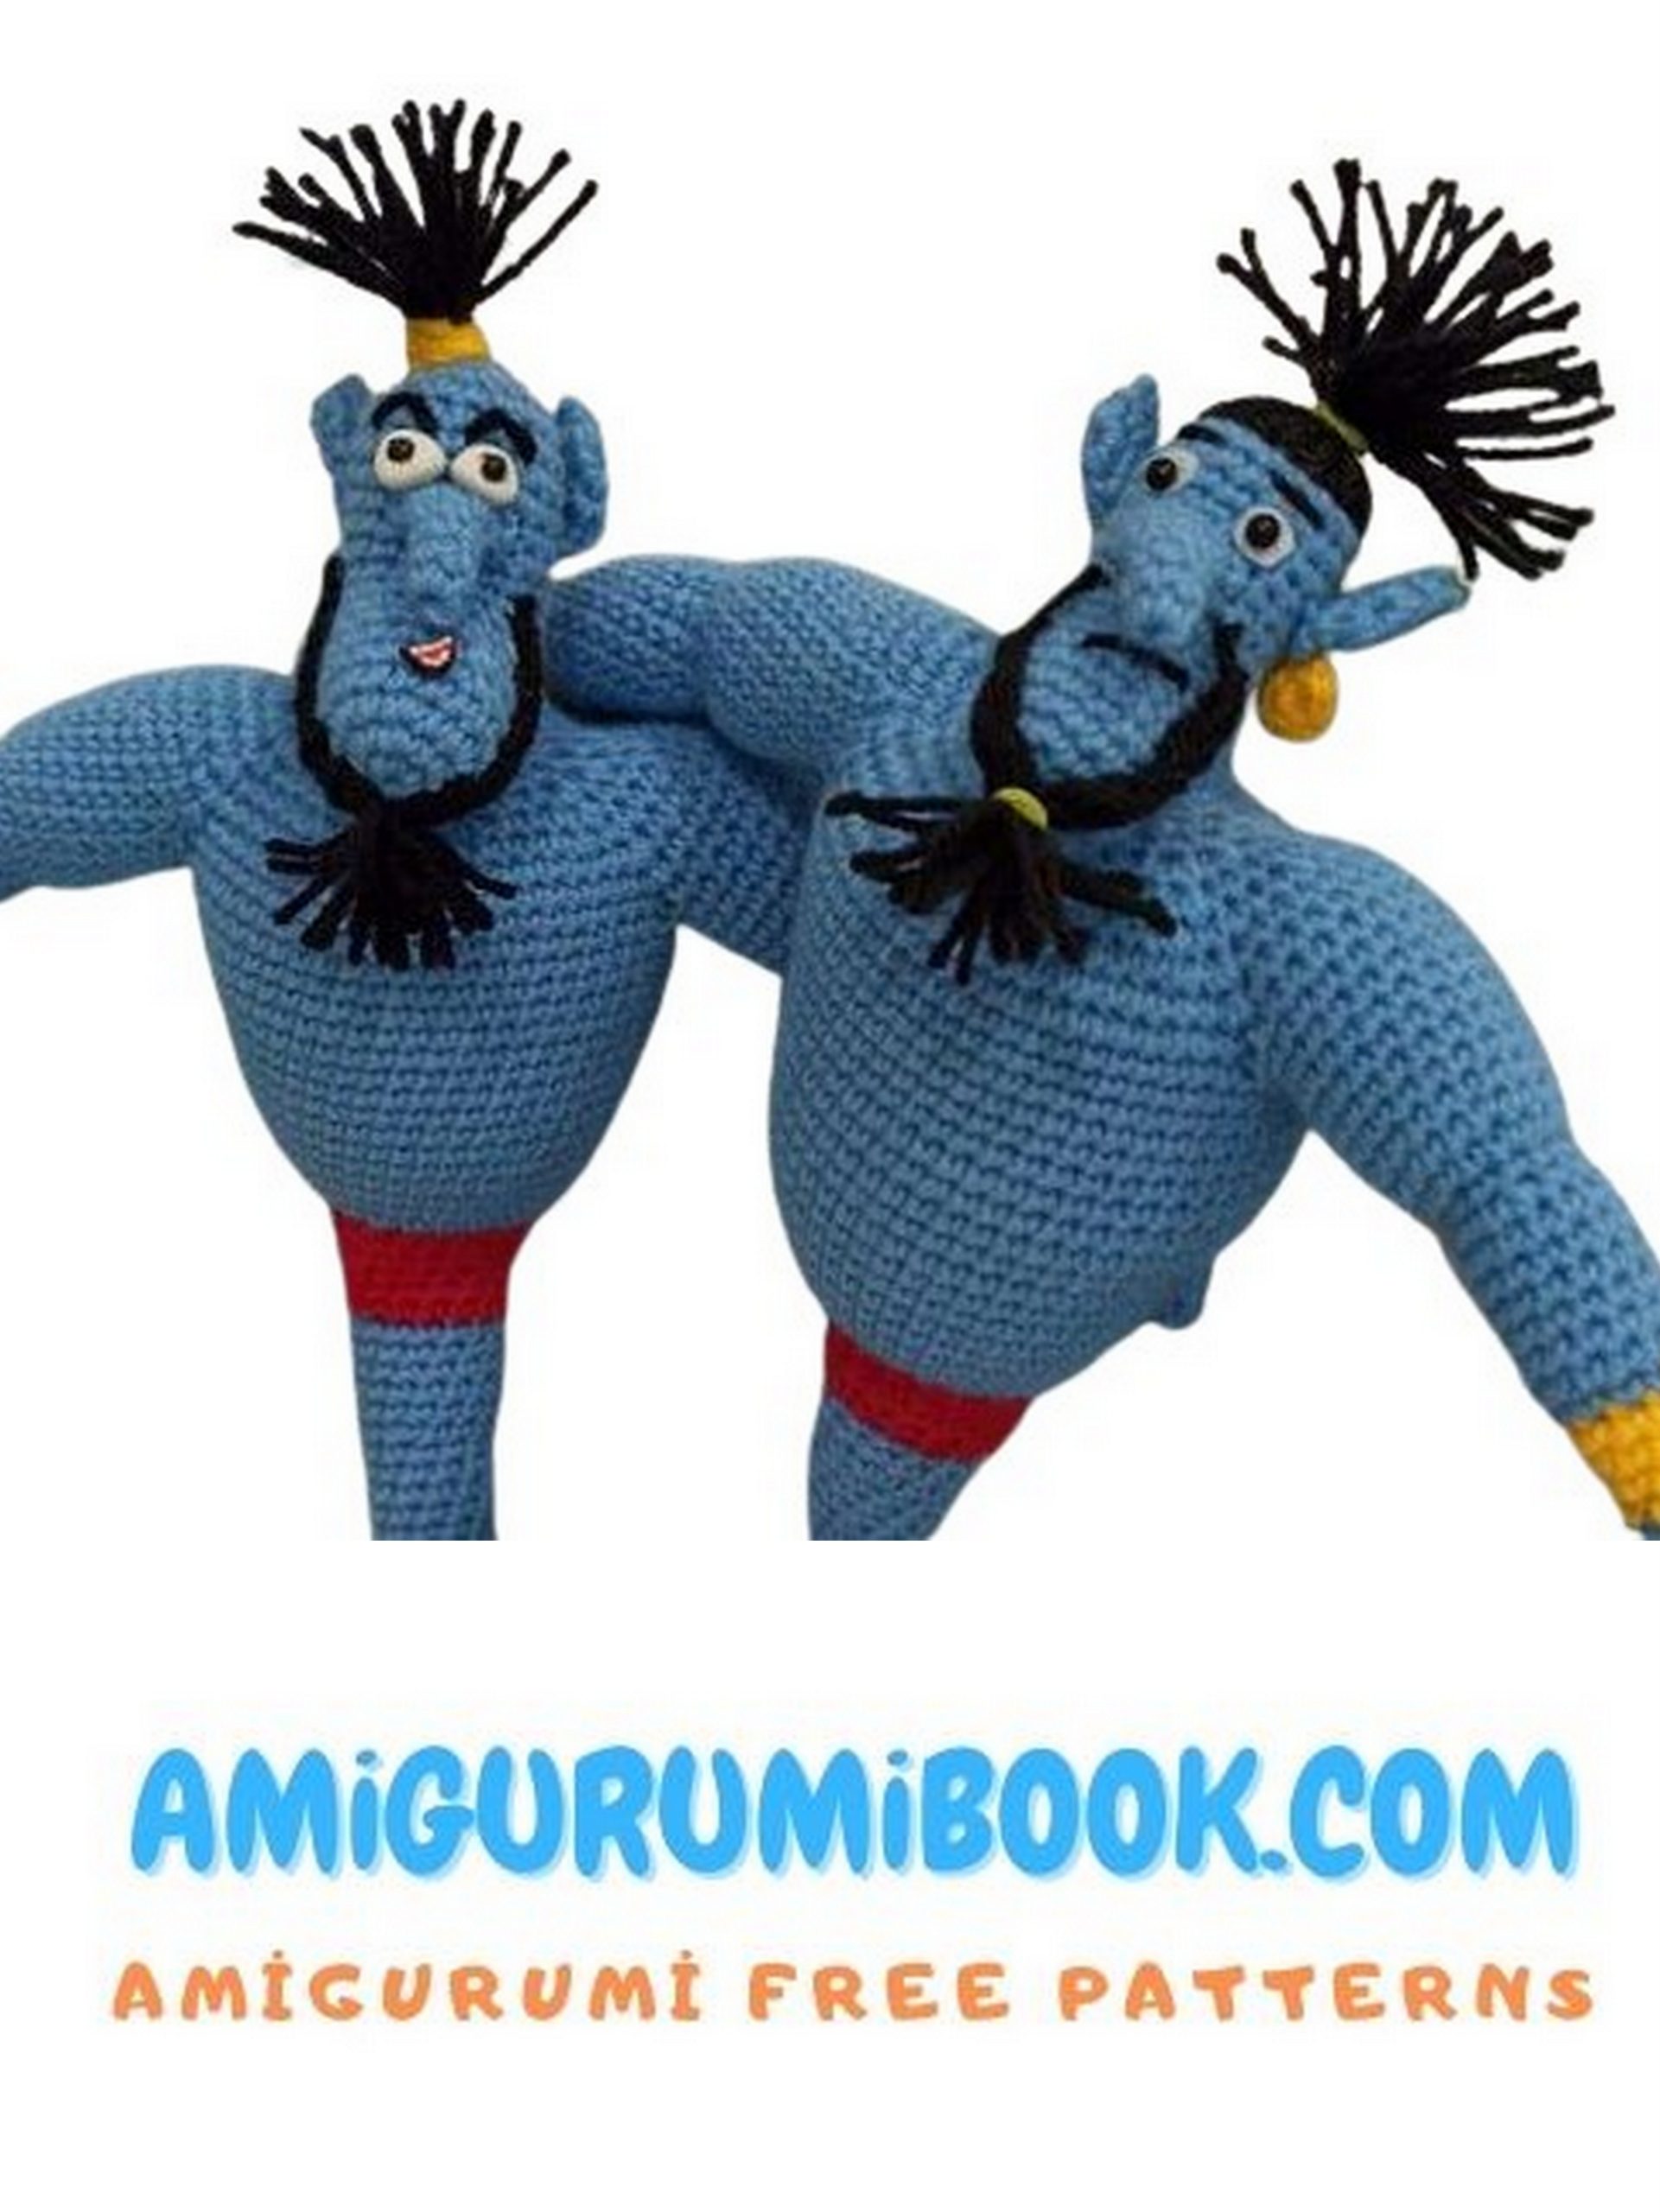
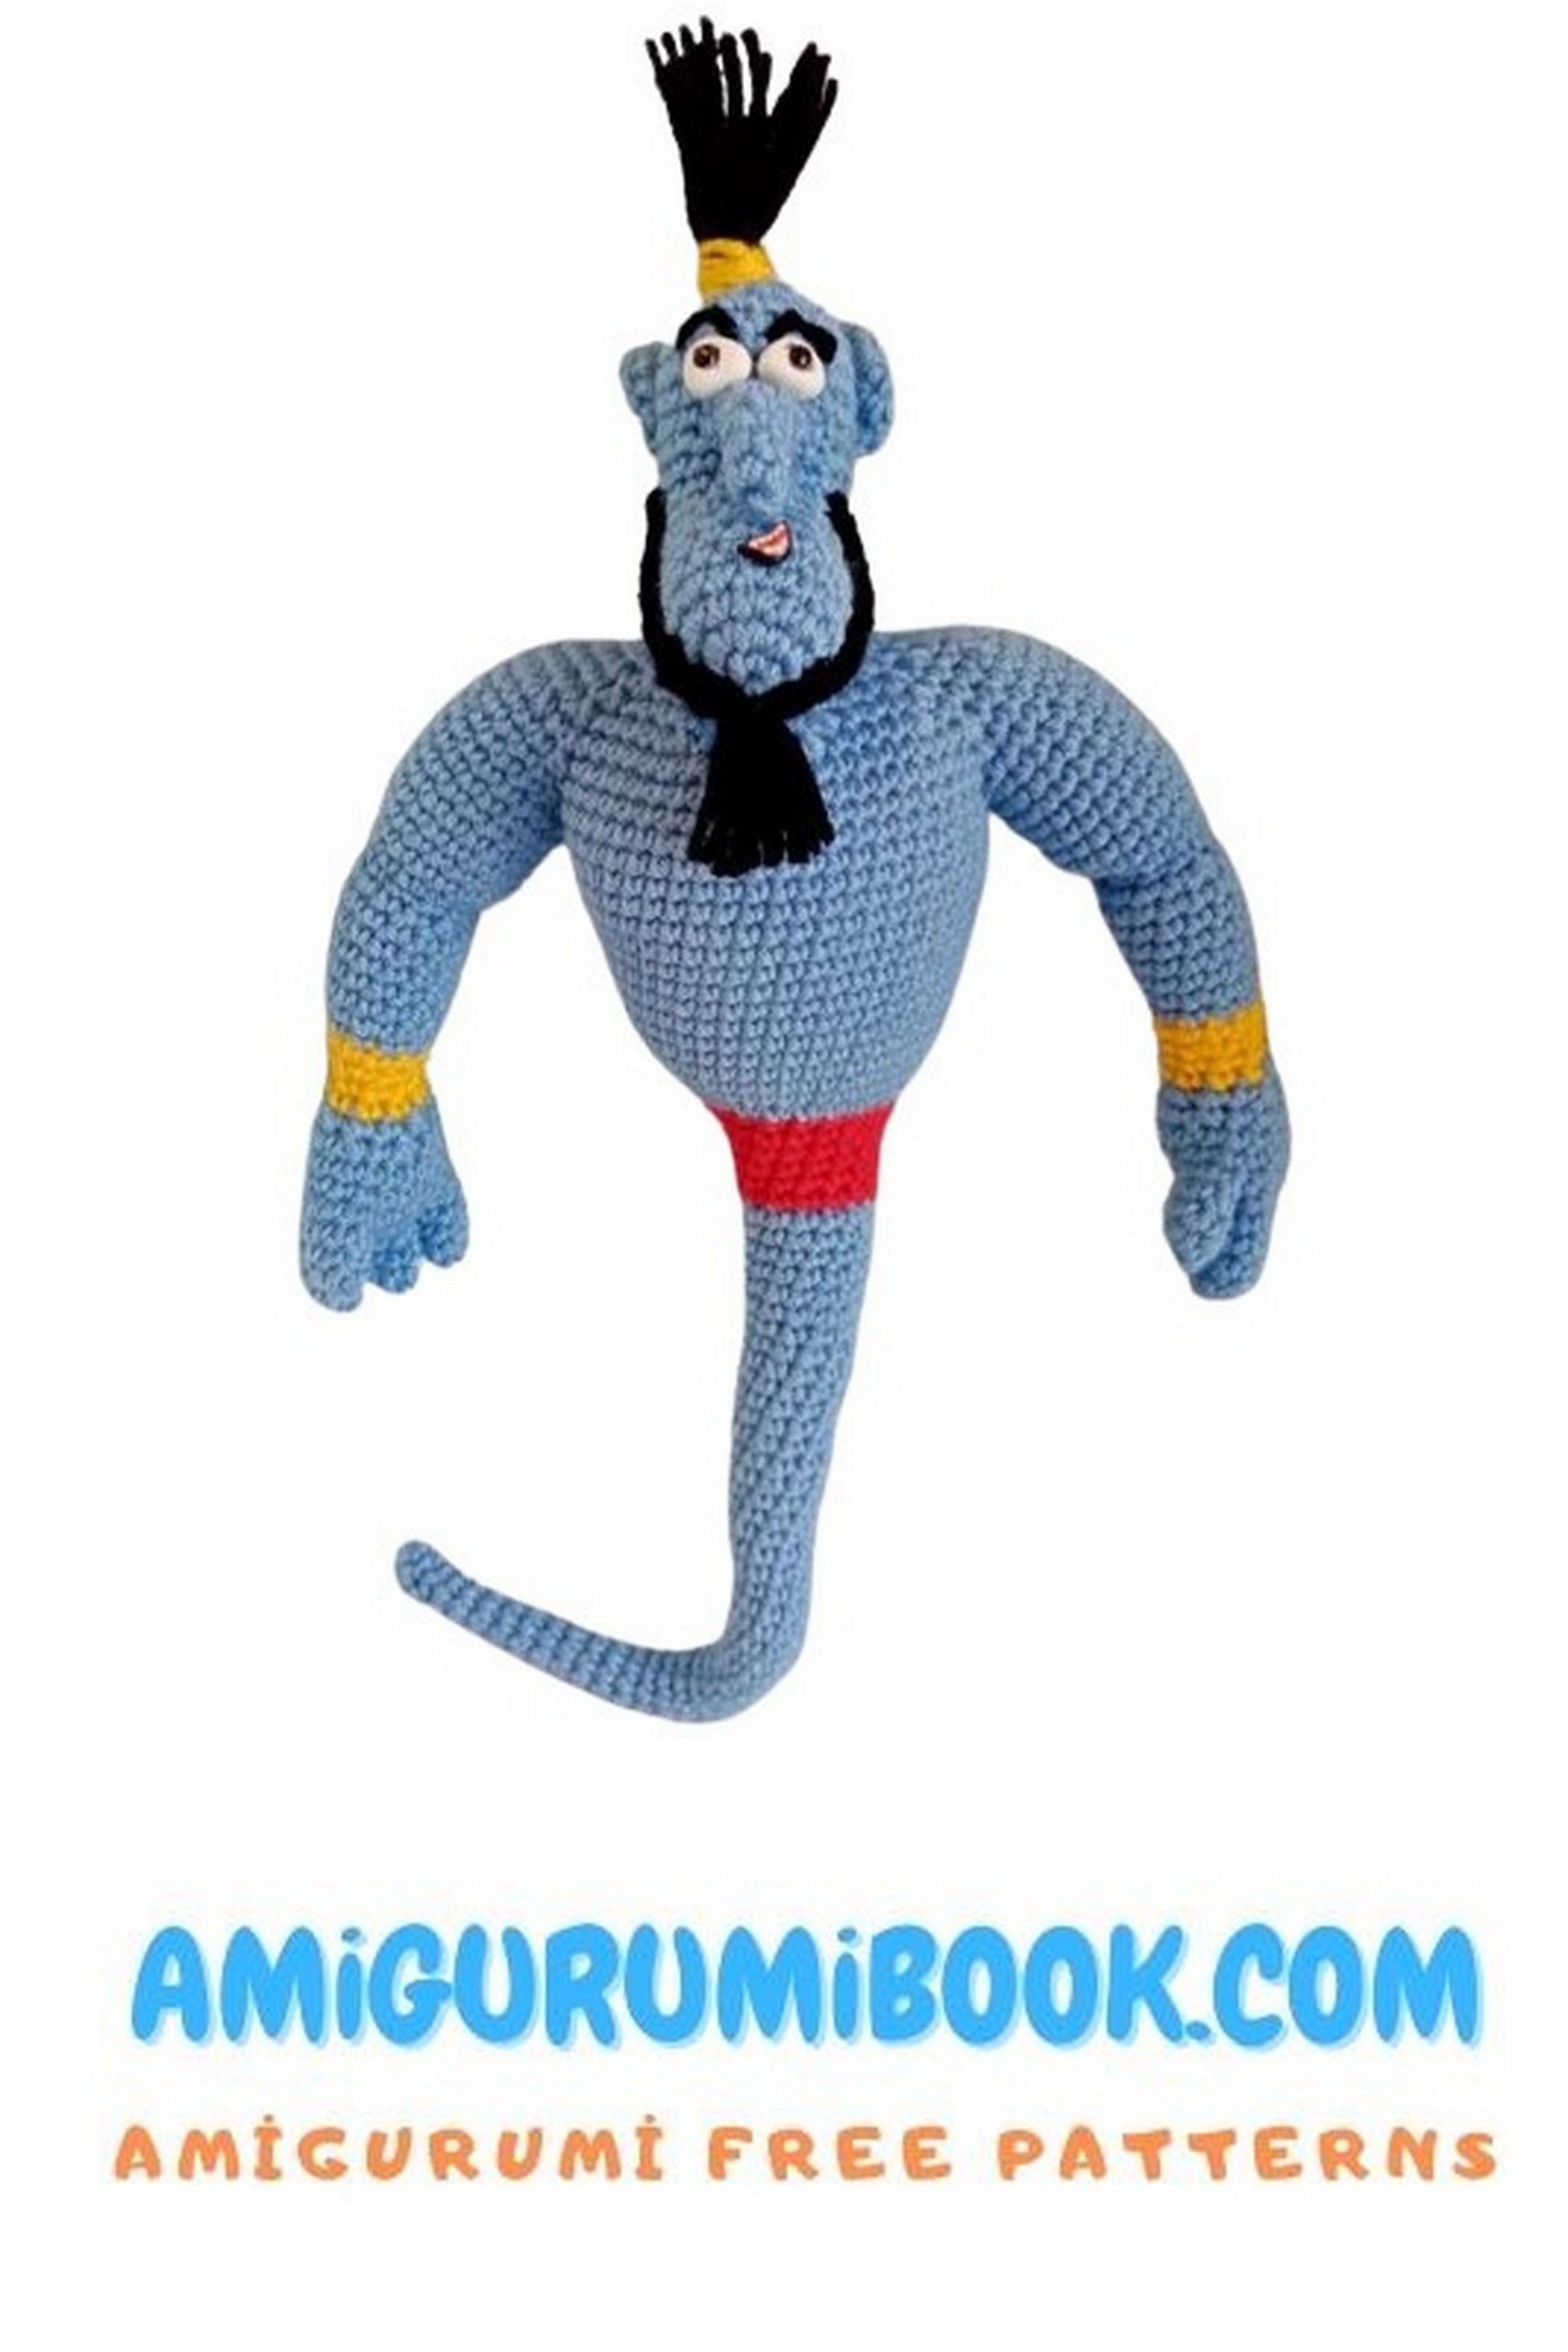
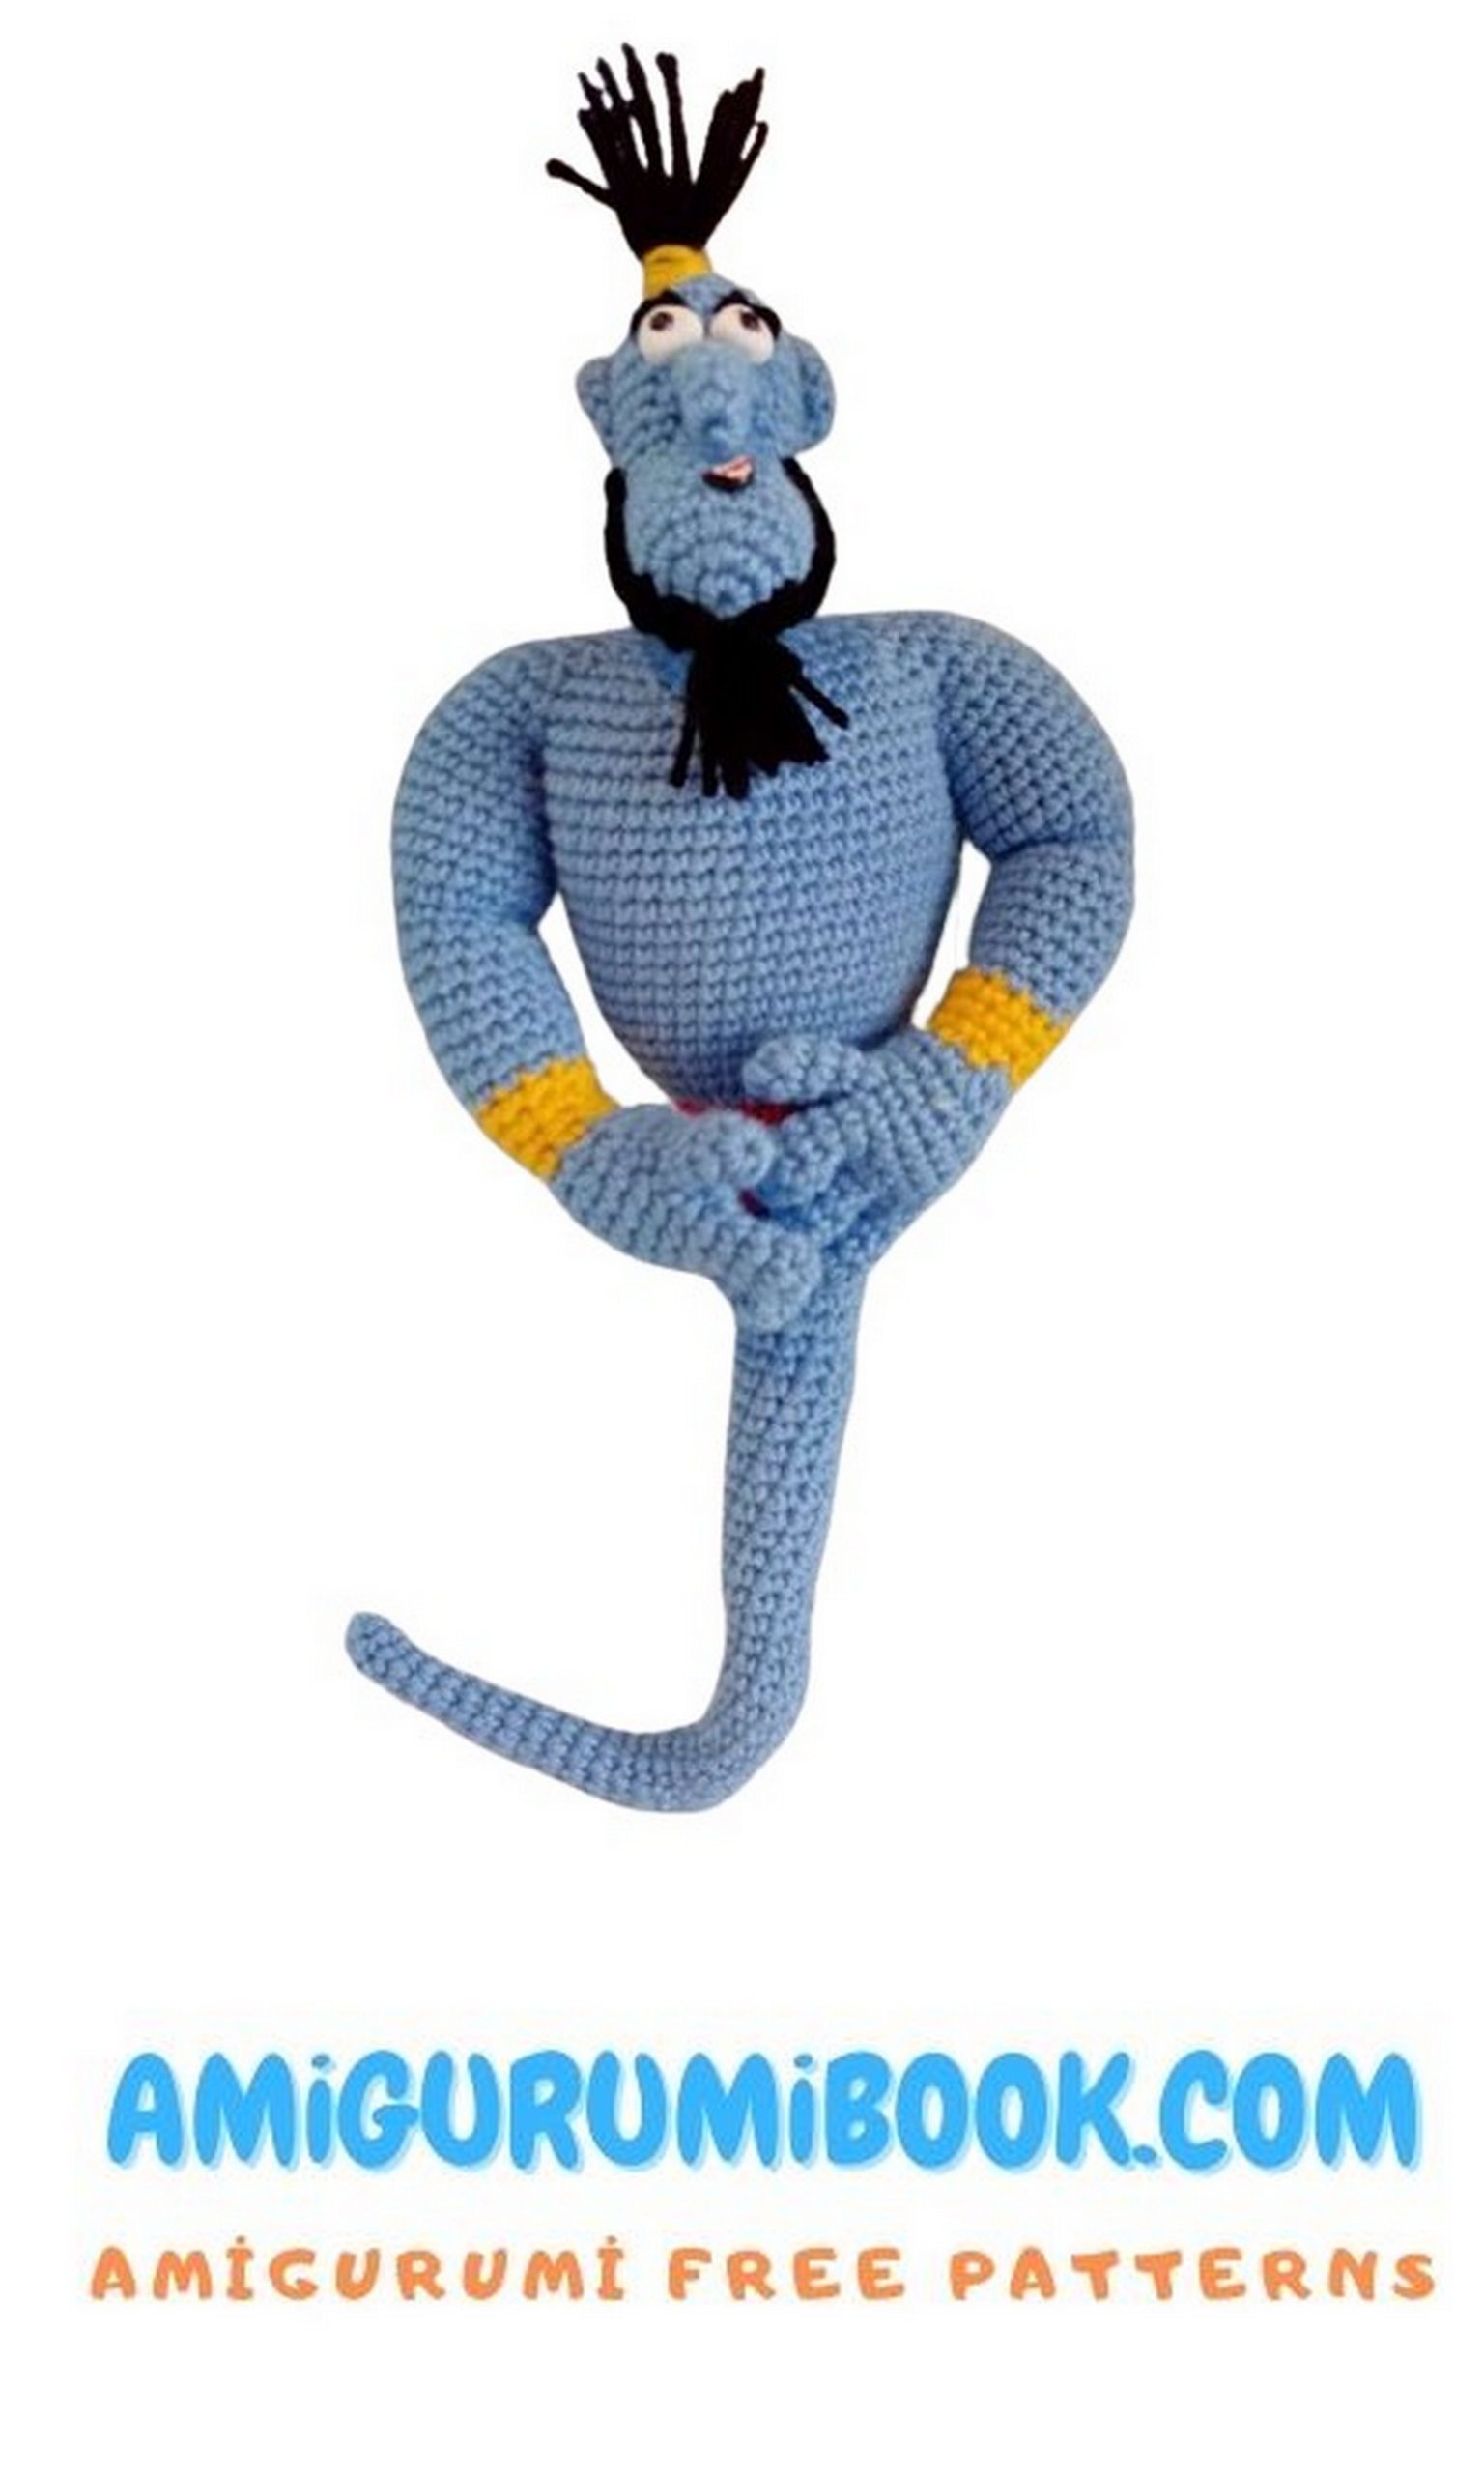
Sew on the ears.
For hair, cut threads 13 cm long and attach them to the head using the “knot” method (the attachment points are shown with pins in the photo). Make a tail and trim evenly.
For the beard, cut threads 10 cm long and attach them to the beard area using the “knot” method (the attachment points are shown with pins in the photo). Make a tail and trim evenly.
Glue on the eyes, embroider the mouth and eyebrows (I made the eyes and mouth from polymer clay).