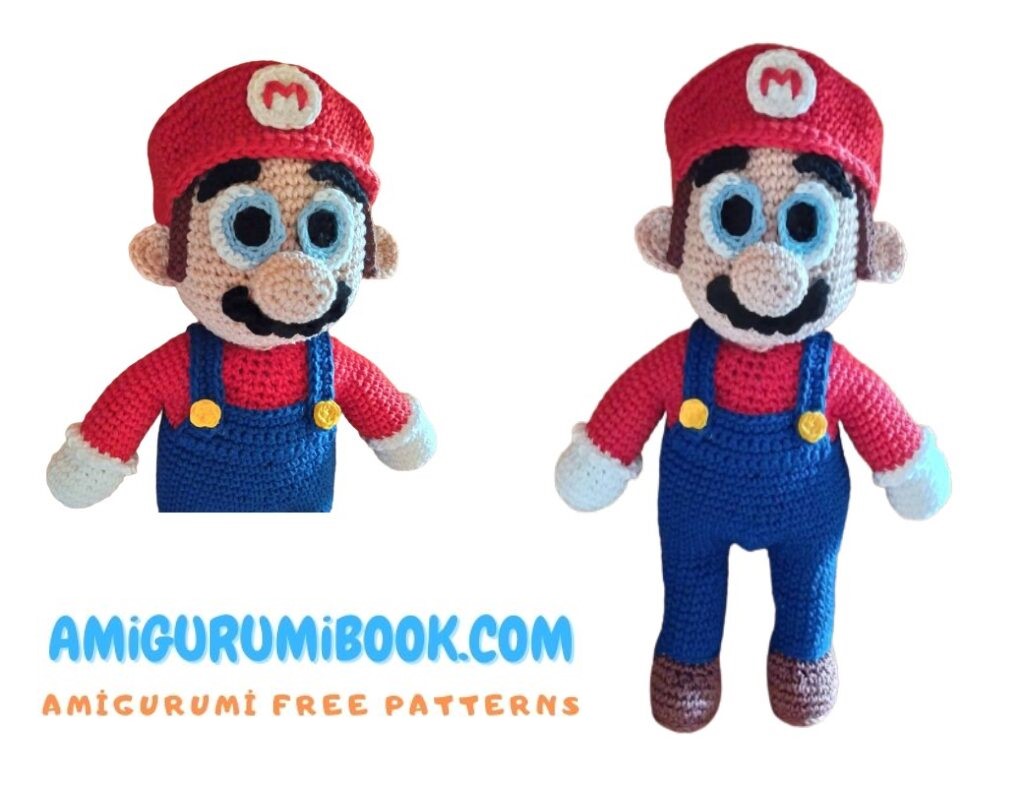
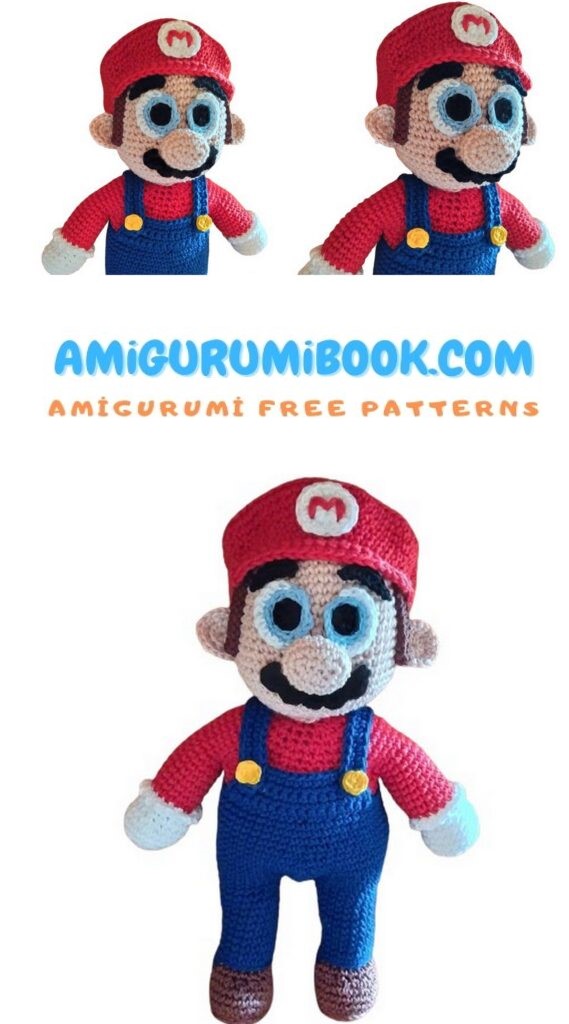
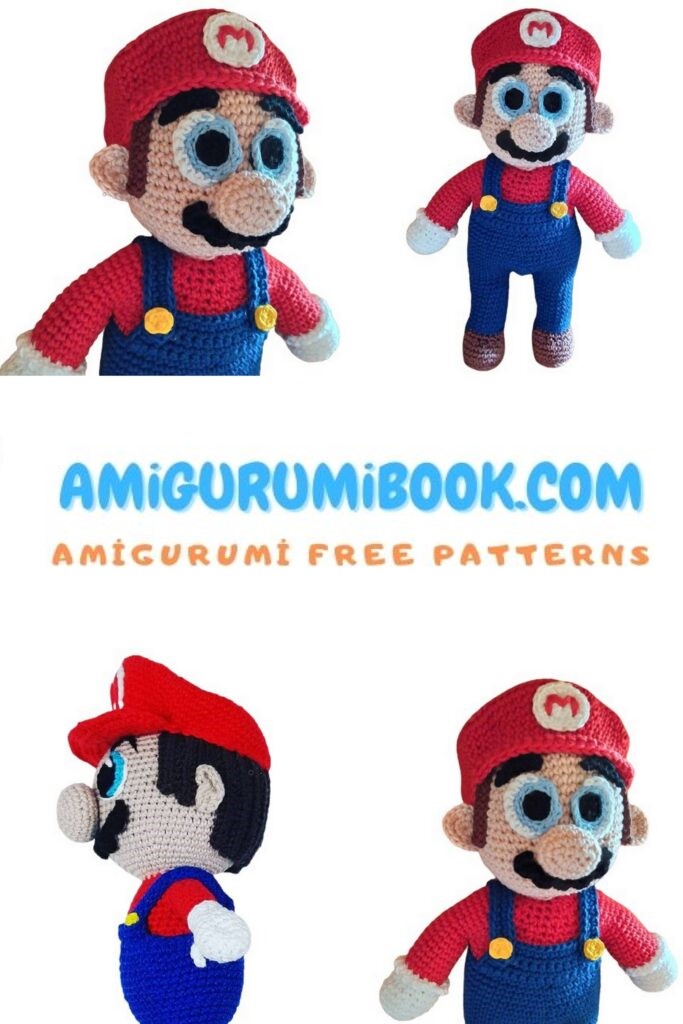
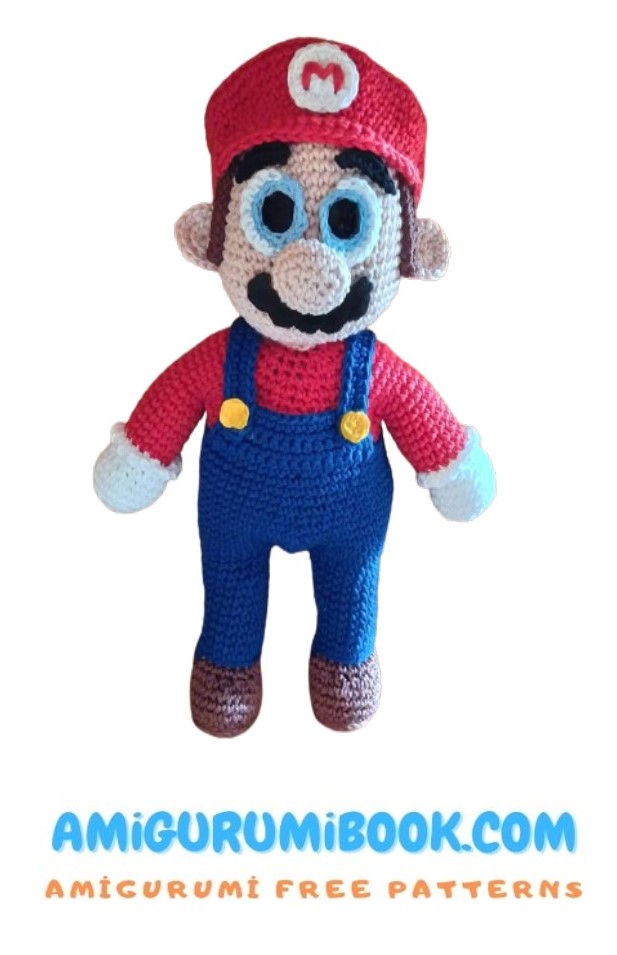
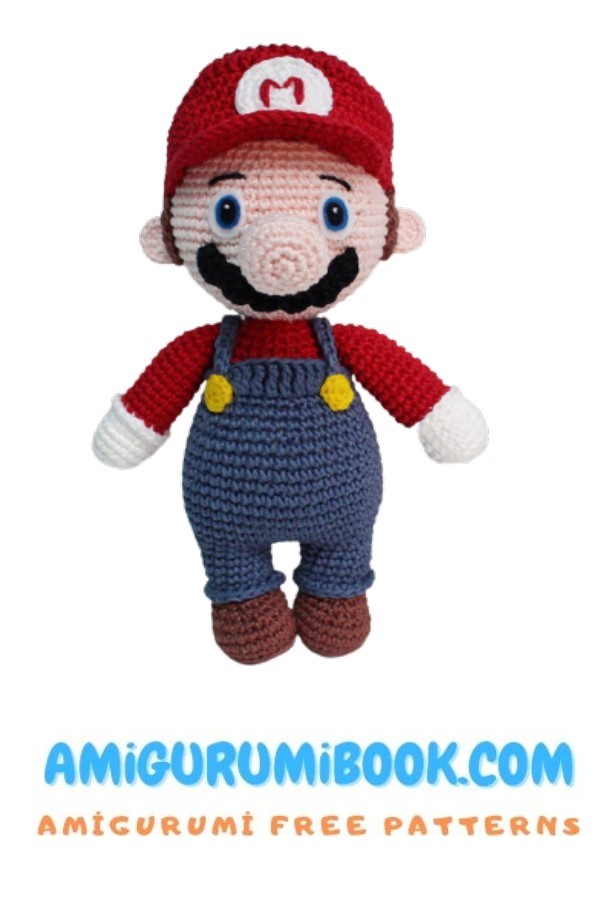
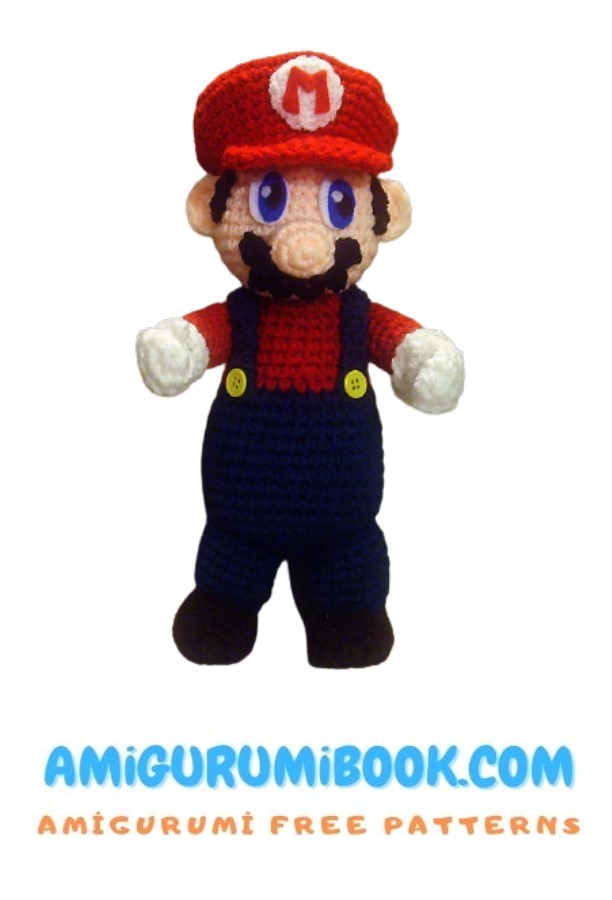
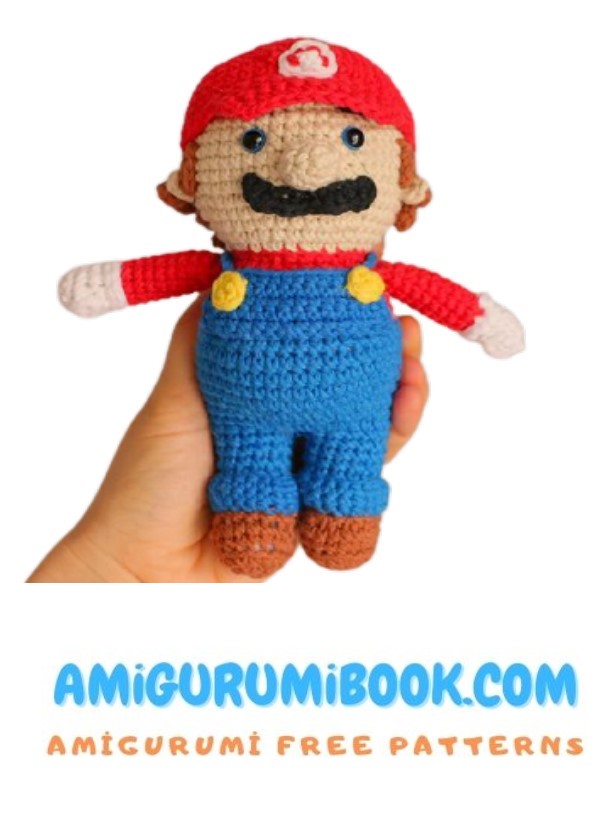
Super Mario amigurumi is a fun and creative way to bring the beloved video game character to life through crochet. This free pattern provides step-by-step instructions to help crafters of all skill levels create their own adorable Mario doll. free crochet patterns – Lily Doll Amigurumi Free Pattern
You may also like more amigurumi patterns.
We share wonderful amigurumi free patterns with you. In this article, amigurumi super mario free pattern is waiting for you.
MATERIALS:
WW yarn in blue, red, white, peach (or a skin color) and small amounts of black and brown
G Hook
Fiberfill
Yarn Needle
Felt in small amounts (white, blue, black)
2 small shirt buttons in yellow (or gold if you have it)
Sewing thread to match yarns and felts and a medium duty to heavy duty sewing needle
NOTES:
Gauge isn’t all that important, but your hook and yarn choices should result in a fairly tight stitch so that the stuffing won’t show through.
Numbers in ( ) at the end of each round or row indicate the total number of stitches for that round or row.
I recommend reading through the pattern before beginning, to familiarize yourself with the overall process of construction of the doll
ABBREVİATİONS
sc – single crochet
ch – chain
inc – increase
dec – decrease
sl-st – slip stitch
PATTERN
HEAD (using peach):
Rnd 1: 6 sc in Magic Ring (6)
Rnd 2: 2 sc in each sc around (12)
Rnd 3: sc in next sc, 2 sc in next sc around (18)
Rnd 4: sc in next 2 sc, 2 sc in next sc around (24)
Rnd 5: sc in next 3 sc, 2 sc in next sc around (30)
Rnd 6: sc in next 4 sc, 2 sc in next sc around (36)
Rnd 7-12: sc in each sc around (36)
Rnd 13: sc in next 4 sc, dec over next 2 sc around (30)
Rnd 14: sc in next 3 sc, dec over next 2 sc around (24)
Begin stuffing at this point if you haven’t already. Stuff head firmly while shaping as you go along.
Rnd 15: sc in next 2 sc, dec over next 2 sc around (18)
Rnd 16: sc in next sc, dec over next 2 sc around (12)
Rnd 17: dec over next 2 sc around (6)
F/O, leave a tail for closing. Add any bits of stuffing needed to finish shaping the head nicely. Weave tail through the final row and draw up tight to close. Secure and weave in ends.
NOSE (using peach):
Rnd 1: 6 sc in magic ring (6)
Rnd 2: 2 sc in each sc around (12)
Rnd 3: sc in each sc around (12)
Rnd 4: dec over next 2 sc around (6)
F/O weave in tail. Stuff and shape.
EARS:
(using peach, make 2)
Rnd 1: 3 sc in magic ring (do not join, do not ch 1) turn. (3)
Rnd 2: 3 sc in first sc, 2 sc in remaining 2 sc. Do not ch 1, turn (7)
Rnd 3: sl st in each sc across (7)
F/O and tie the 2 ends together creating a slight curve (ear shape)
MUSTACHE:
(using black)
Ch 7, slip stitch in 2nd ch from hook.
Ch 5, slip stitch in next ch
Ch 4, slip stitch in next ch
Ch 3, slip stitch in next ch
Ch 3, slip stitch in next ch
Ch 4, slip stitch in next ch
Ch 5, slip stich in last ch.
F/O weave in ends.
BODY (starting with blue):
Rnd 1: 8 sc in Magic Ring (8)
Rnd 2: 2 sc in each sc around (16)
Rnd 3: sc in next sc, 2 sc in next sc around (24)
Rnd 4: sc in next 2 sc, 2 sc in next sc around (32)
Rnd 5: sc in next 3 sc, 2 sc in next sc around (40)
Rnd 6-14: sc in each sc around (40)
Rnd 15: sc in next 3 sc, dec over next 2 sc around. In last stitch, change to red yarn (32)
Rnd 16: sc in each sc around (32)
Rnd 17: sc in next 2 sc, dec over next 2 sc, (24)
Rnd 18-21: sc in each sc around (24)
Rnd 22: sc in next 2 sc, dec over next 2 sc around (18)
Rnd 23: sc in each sc around (18)
Stuff and shape body firmly. Leave neck opening open.
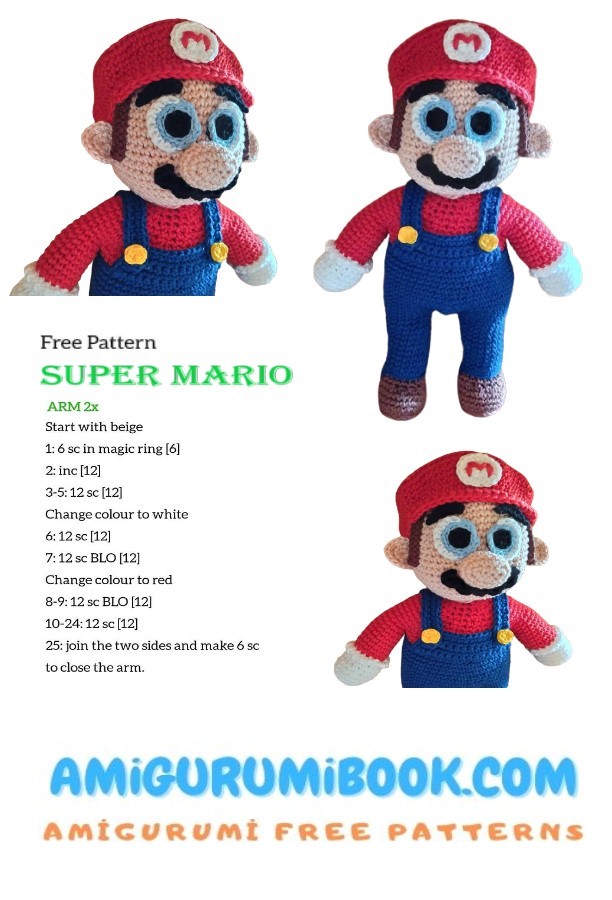
HANDS/ARMS (starting with white):
(hand/arm version with thumb, shown in photos)
Rnd 1: 8 sc in Magic Ring (8)
Rnd 2: sc in next 3 sc, 2 sc in next sc, sc in next 3 sc, 2 sc in next sc (10)
Rnd 3-4: sc in each sc around (10)
Rnd 5: sc in next 5 sc, ch 4, sc in 2nd ch from hook and next 2 chs. sc in next 5 sc (10 sc and one ‘thumb’)
Rnd 6: sc in each sc around (hold ‘thumb’ down in the front of work and sc behind it) (10)
Rnd 7: sc in next 3 sc, dec over next 2 sc (8)
Rnd 8: (working in front loops only for this round) sc in next sc, 2 sc in next sc around (12)
F/O white.
Attach red yarn to any of the ‘free loops’ inside of last round of stitches in hand.
Rnd 9: sc in next 3 free loops, 2 sc in next free loop, sc in next 3 free loops, 2 sc in last free loop (10)
Rnd 10-16: sc in each sc around (10)
Stuff arm moderately firm (leave hand unstuffed, but add stuffing in ‘wrist’ area and up to shoulder) Flatten the end matching up stitches and sc through all layers to close (5 sc across)
F/O weave in ends.
(alternate hand/arm version without thumb, not shown)
Rnd 1: 8 sc in Magic Ring (8)
Rnd 2: sc in next 3 sc, 2 sc in next sc, sc in next 3 sc, 2 sc in next sc (10)
Rnd 3-6: sc in each sc around (10)
Rnd 7: sc in next 3 sc, dec over next 2 sc (8)
Rnd 8: (working in front loops only for this round) sc in next sc, 2 sc in next sc around (12)
F/O white.
Attach red yarn to any of the ‘free loops’ inside of last round of stitches in hand.
Rnd 9: sc in next 3 free loops, 2 sc in next free loop, sc in next 3 free loops, 2 sc in last free loop (10)
Rnd 10-16: sc in each sc around (10)
Stuff arm moderately firm (leave hand unstuffed, but add stuffing in ‘wrist’ area and up to shoulder) Flatten the end matching up stitches and sc through all layers to close (5 sc across)
F/O weave in ends.
SUSPENDERS (using blue):
Row 1: ch 3, sc in 2nd ch from hook and last ch (2)
Row 2-28: sc in both sc (do not ch 2 to turn, it makes for a straighter edge) (2)
F/O Weave in ends.
LEGS/FEET:
Legs (using blue, make 2)
Rnd 1: 8 sc in magic ring (8)
Rnd 2: 2 sc in each sc around (16)
Rnd 3: (working in back loops only for this round) sc in each sc around (16)
Rnd 4-8: sc in each sc around. (16)
F/O stuff firmly and shape them both evenly. Don’t close the open end.
Feet (using brown, make 2)
Rnd 1: 6 sc in magic ring (6)
Rnd 2: 2 sc in each sc around (12)
Rnd 3: sc in next 5 sc, 2 sc in next sc, sc in next 5 sc, 2 sc in last sc (14)
Rnd 4-10: sc in each sc around (14)
Rnd 11: dec over next 2 sc around (7)
F/O stuff *lightly* and shape as desired. Weave end through final round and pull to close. Secure and weave in ends. Sew feet/shoes to ‘closed’ end of leg as shown (open end is attached to the body)
HAT:
(using red)
Rnd 1: 8 sc in Magic Ring (8)
Rnd 2: 2 sc in each sc around (16)
Rnd 3: sc in next sc, 2 sc in next sc around (24)
Rnd 4: sc in next 2 sc, 2 sc in next sc around (32)
Rnd 5: sc in next 3 sc, 2 sc in next sc around (40)
Rnd 6: sc in next 4 sc, 2 sc in next sc around (48)
Rnd 7: sc in next 7 sc, 2 sc in next sc around (54)
Rnd 8: sc in each sc around (54)
Rnd 9: sc in next 4 sc, dec over next 2 sc around (45)
Rnd 10: sc in each sc around (45)
Rnd 11: sc in next 3 sc, dec over next 2 sc around (36)
Rnd 12: sc in next 25 sc, leave remaining 11 stitches unworked. The 25 stitches will become the ‘front’ of the hat which is a little higher than the back of the hat. F/O (weave in end)
Rnd 13: Attach yarn to center (stitch number 6) of the unworked stitches of the round 11 (not the last 25 sc you worked) and then sc in each sc around. When you reach the section with the 25 sc from round 12, just continue to sc in each one the same as working in unjoined rounds. When you reach the last of the 25 sc, simply continue on to the sc from round 11. (36)
Rnd 14: sc in each sc around (36)
F/O and weave in ends.
Brim/bill of hat:
Row 1: Beginning from joining stitch of final round, count 12 stitches over, attach yarn in 13th sc, ch 1 and sc in same stitch as joining. sc in next 11 sc, turn (12)
Row 2: (working in front loops only for this row only), sc in each sc across (12)
Row 3-6: sc in each sc across (12)
Row 7: dec over first 2 sc, sc in remaining sc across to the last two sc, dec over the last 2 sc (10)
Do not turn.
Ch 1. slip stitch evenly around brim (one sc in end of each row for the sides). When you reach the corner where the brim meets the hat, put 2 sc in that corner and resume slip stitching in each st around until you reach the starting point. Join to first sl st and f/o. weave in ends
HAT LOGO:
Using white:
Rnd 1: 8 sc in magic ring (8)
Rnd 2: 2 sc in each sc around (16)
F/O weave in ends.
Cut an M from red felt (I recommend using paper first so that you can be sure you like the look and the size before cutting from felt, using the paper M as a pattern). Glue or sew the M to the center of white circle, sew the logo onto the center front of hat (be sure to center it with the bill of the hat)
SIDE BURNS:
(Using brown, make 2)
Row 1: Ch 3, sc in 2nd ch from hook and next ch (2)
Row 2: sc in both sc (2)
Row 3: skip first sc, sc in last sc (1)
F/O weave in ends.
HAIR:
(using black)
Row 1: ch 15, sc in 2nd ch from hook, ch 3, * sc in next ch, ch 3 * (repeat from * to * to end of chain) end with sc in last ch.
F/O
ASSEMBLY:
I highly recommend pinning all the pieces together before sewing anything to make sure you have all the pieces done right and that you get them in the positions you like best before sewing. It seems like alot of extra work, but this will save you ALOT of hassle.
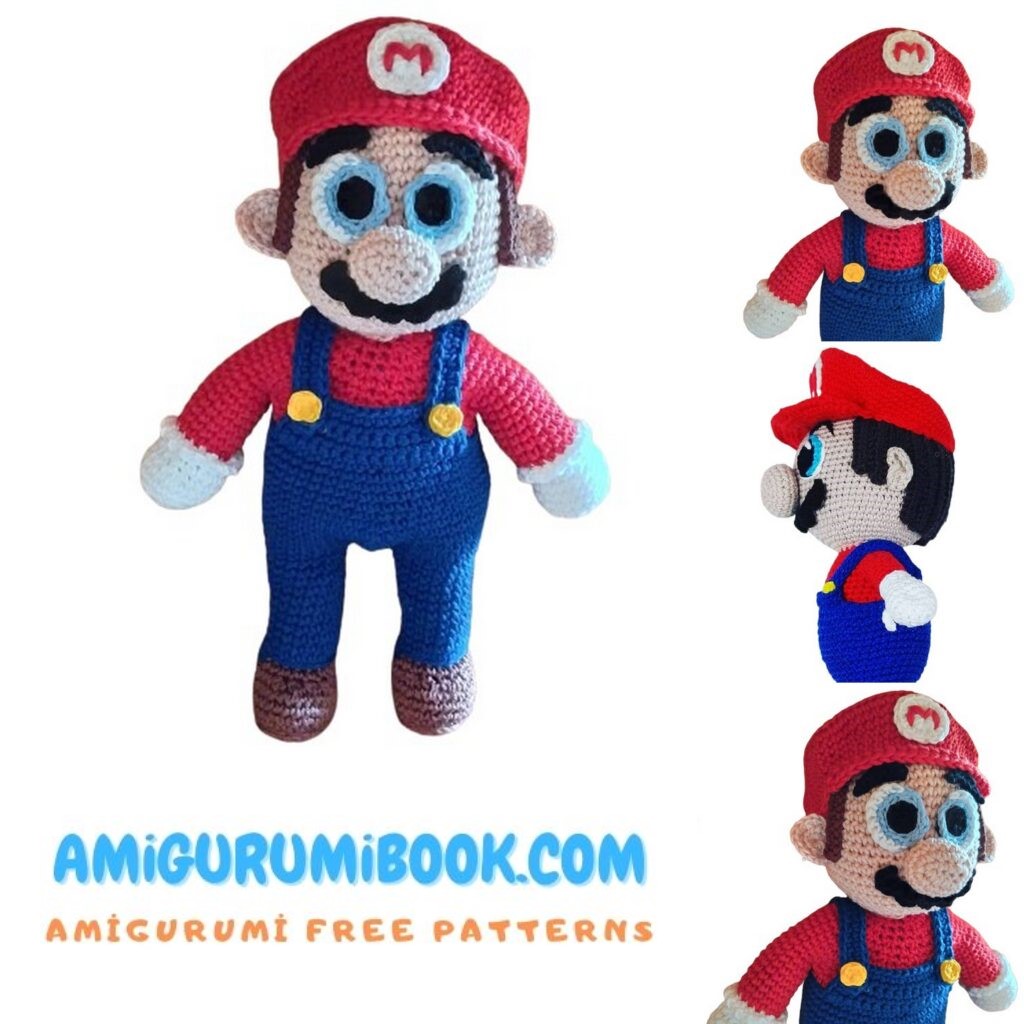
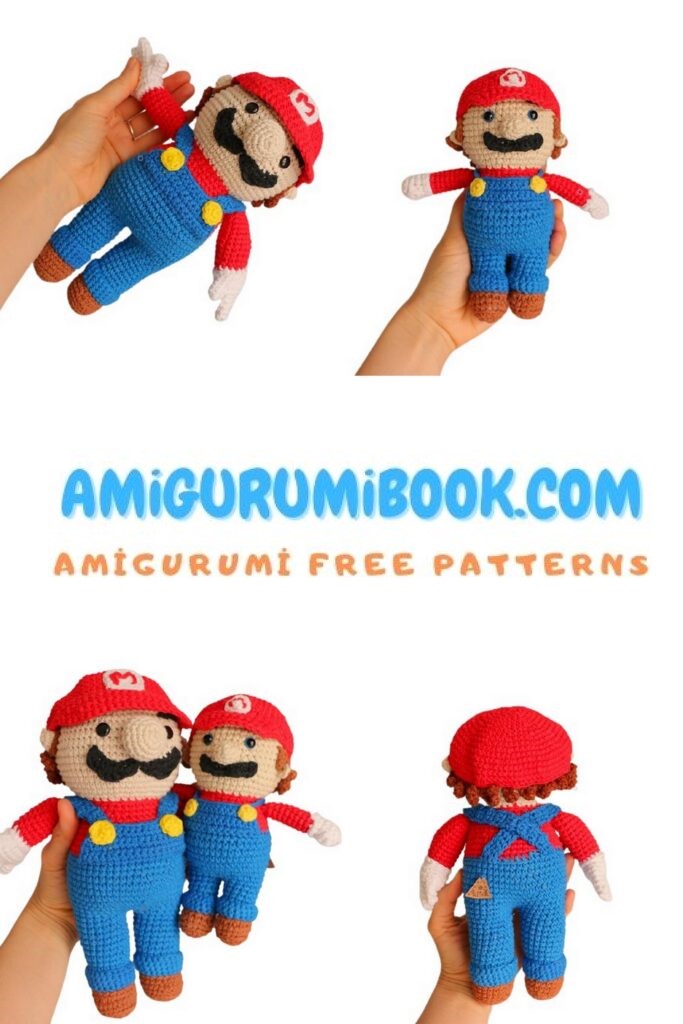
Sew head to neck opening. Sew hat to top of head as shown, giving a slight tilt backwards on the head. Sew the ‘hair’ to the bottom of the hat at the back (see the photos). Nose is sewn centered on the face with the brim of the hat, but a little lower on the face. Mustache is sewn under the nose much like the hair was at the back of the head.
Ears should be placed just at the base of the hat on the sides of the head. Experiment with the placement so that you can be sure you’re happy with how the ears look. Sideburns are sewn just in front of the ears as shown.
Arms are sewn to the sides of the upper body near the base of the head. If you made the version with the thumbs, be sure to pay attention to the position of the hands and that the thumb is in the right place. Hands should be slightly curved inwards. Suspenders are sewn on as shown (crossing them in the back). Add the two small yellow (or gold) buttons to the suspenders where they meet the ‘pants’.
Legs/feet are sewn to the bottom of the body as shown.
Eyes are constructed from a larger oval shape in white, with a smaller oval shape in blue and another even smaller oval shape in black (see photos). I also like to add a tiny white circle of felt as a catch light to the eyes to help give some dimention.