
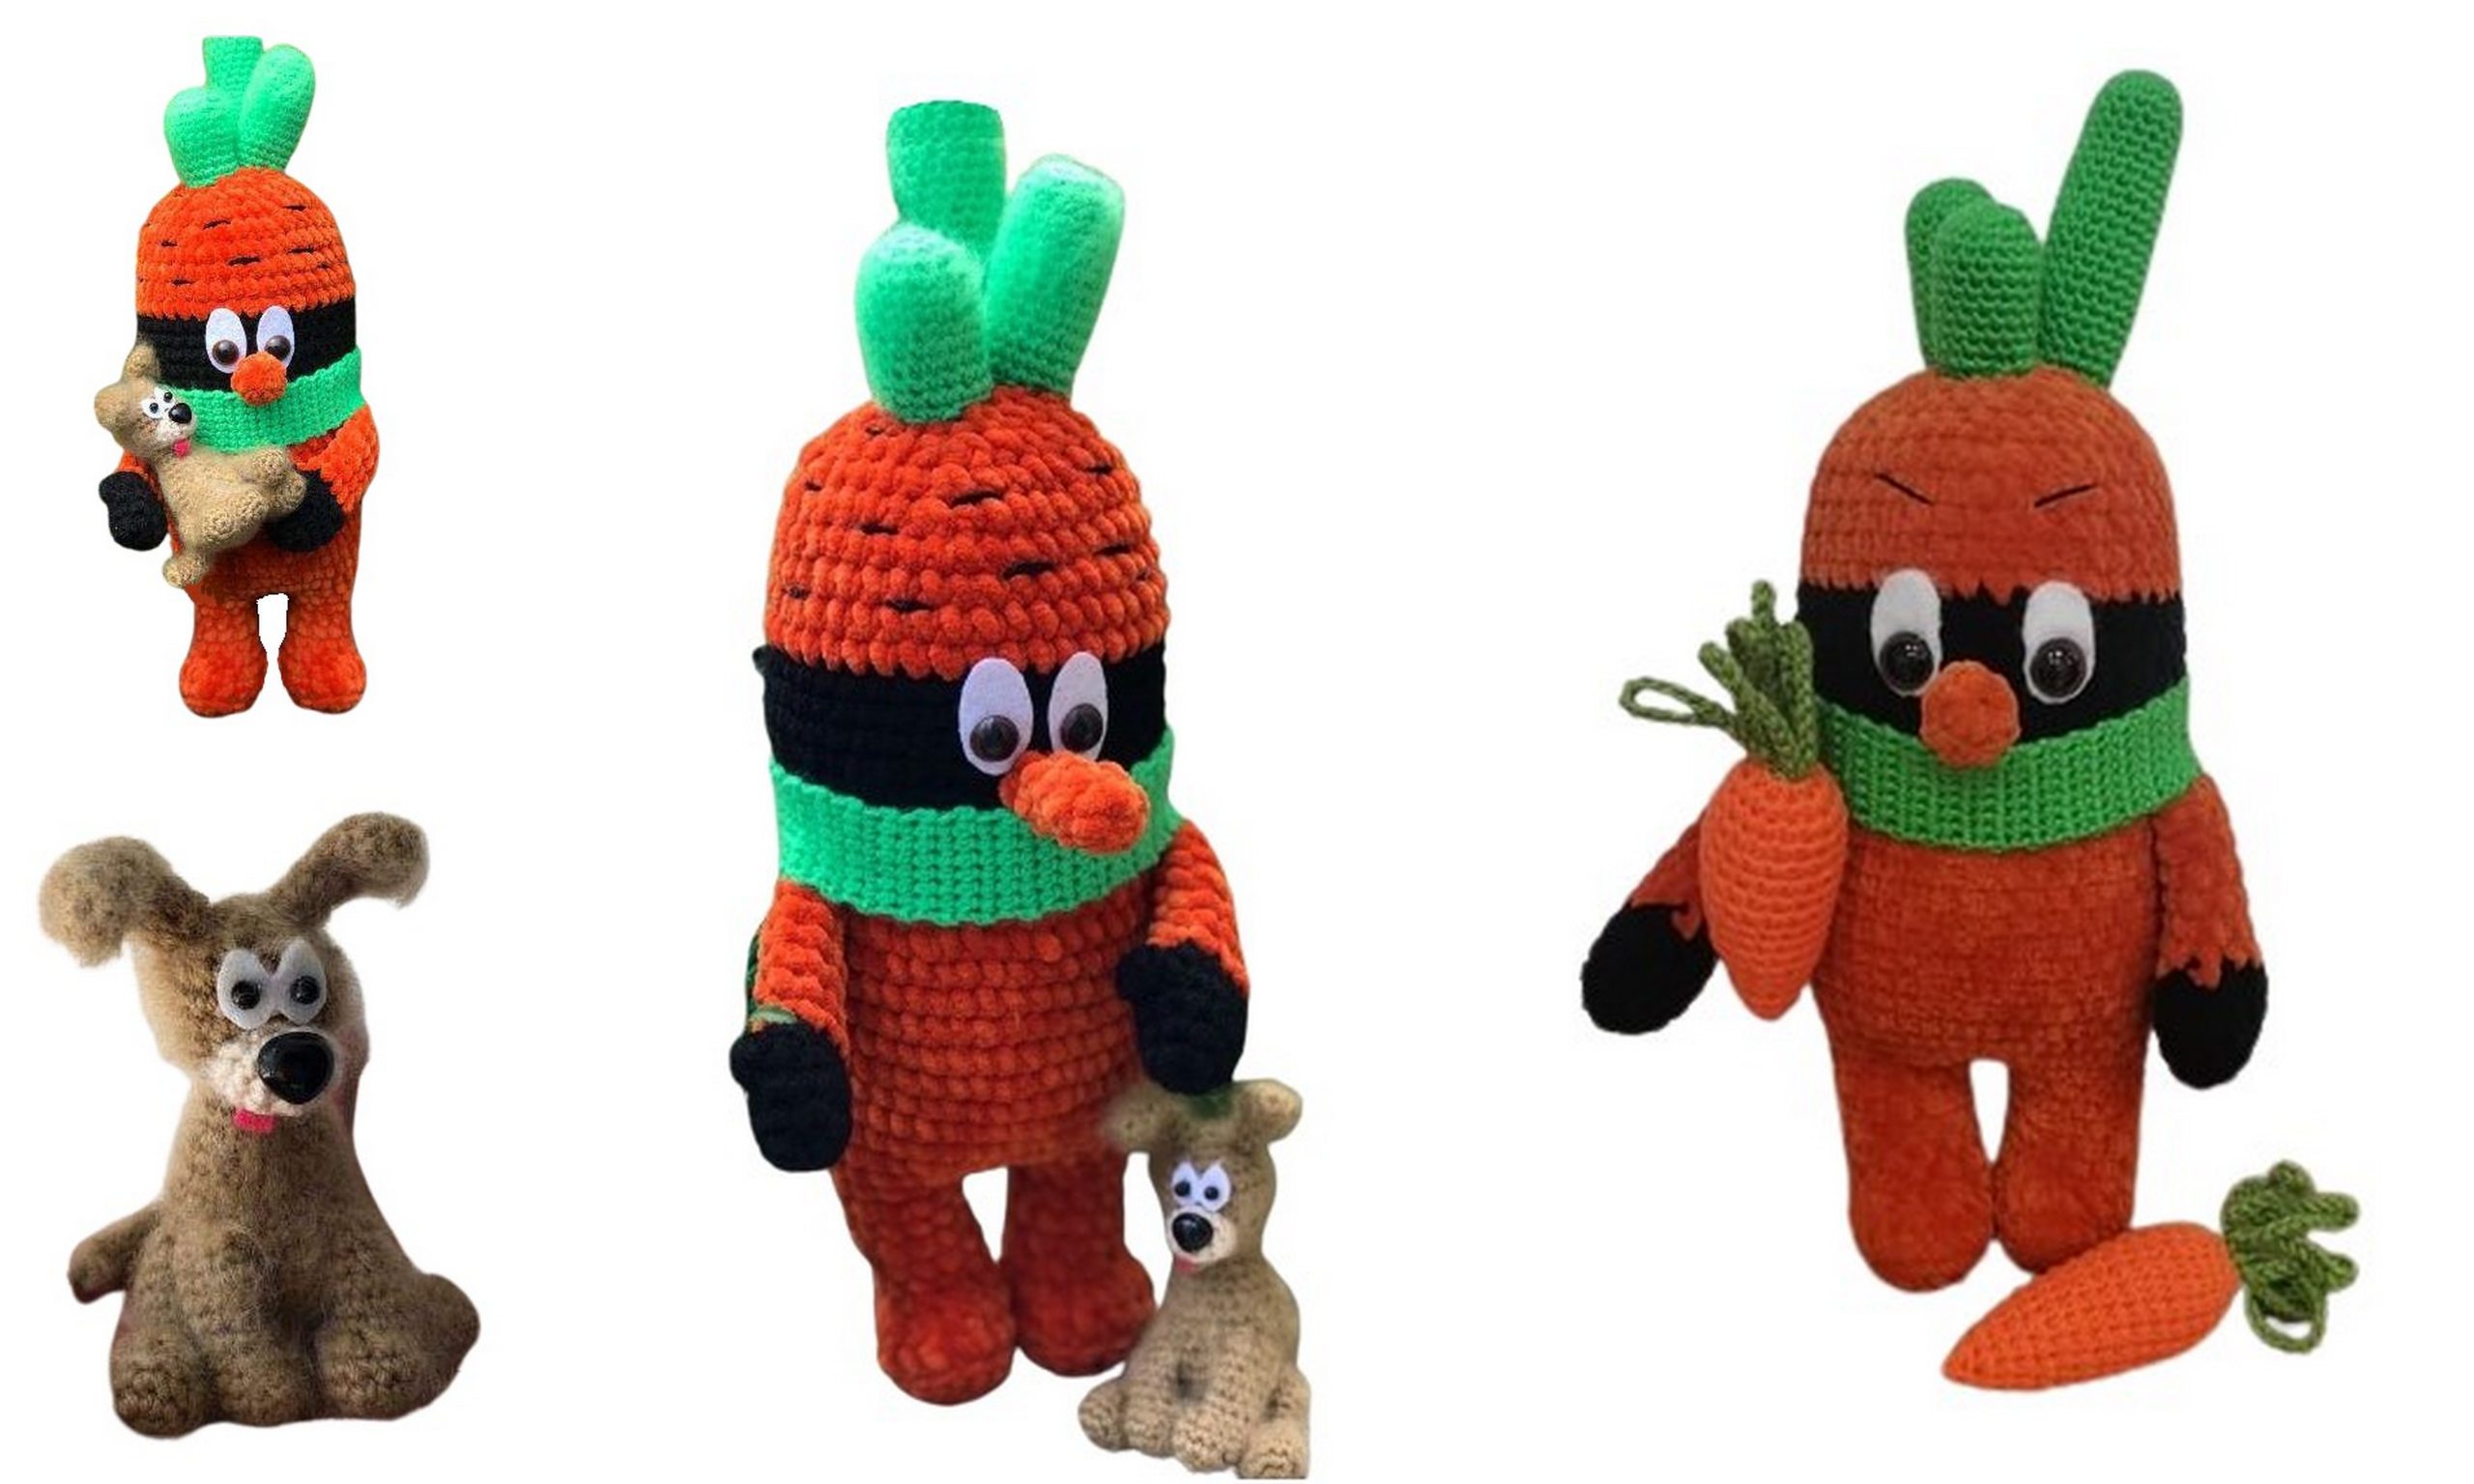
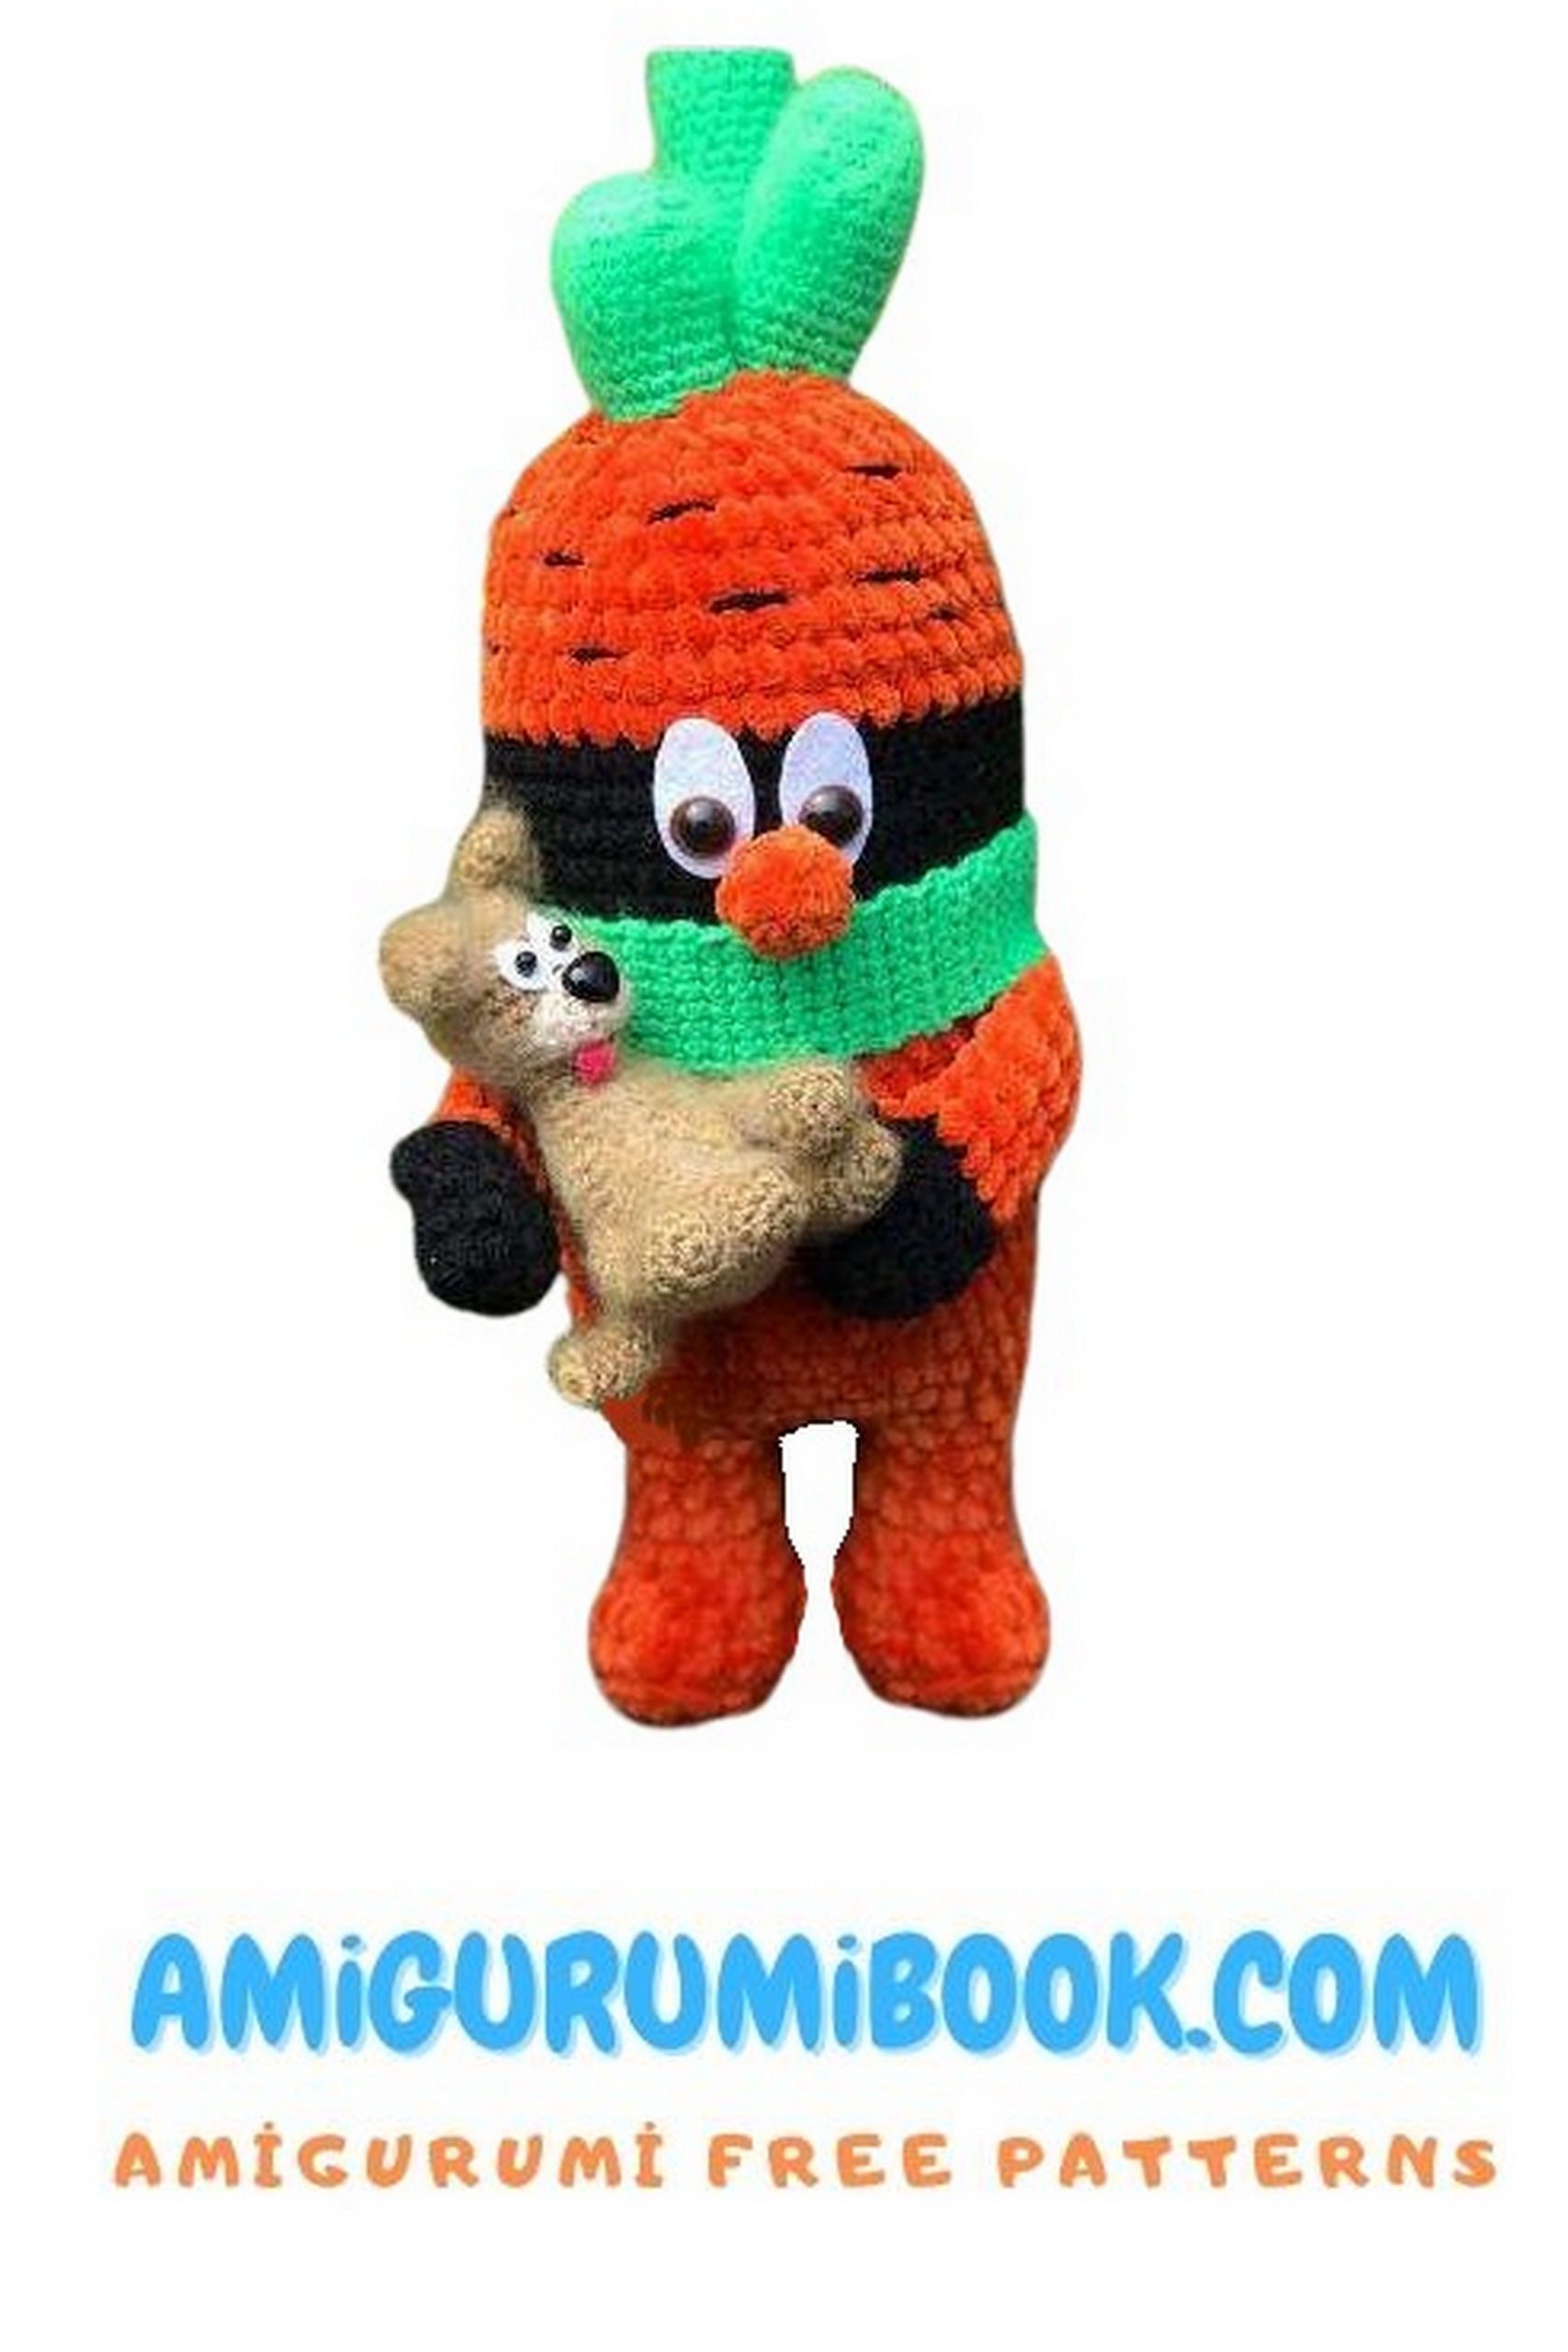
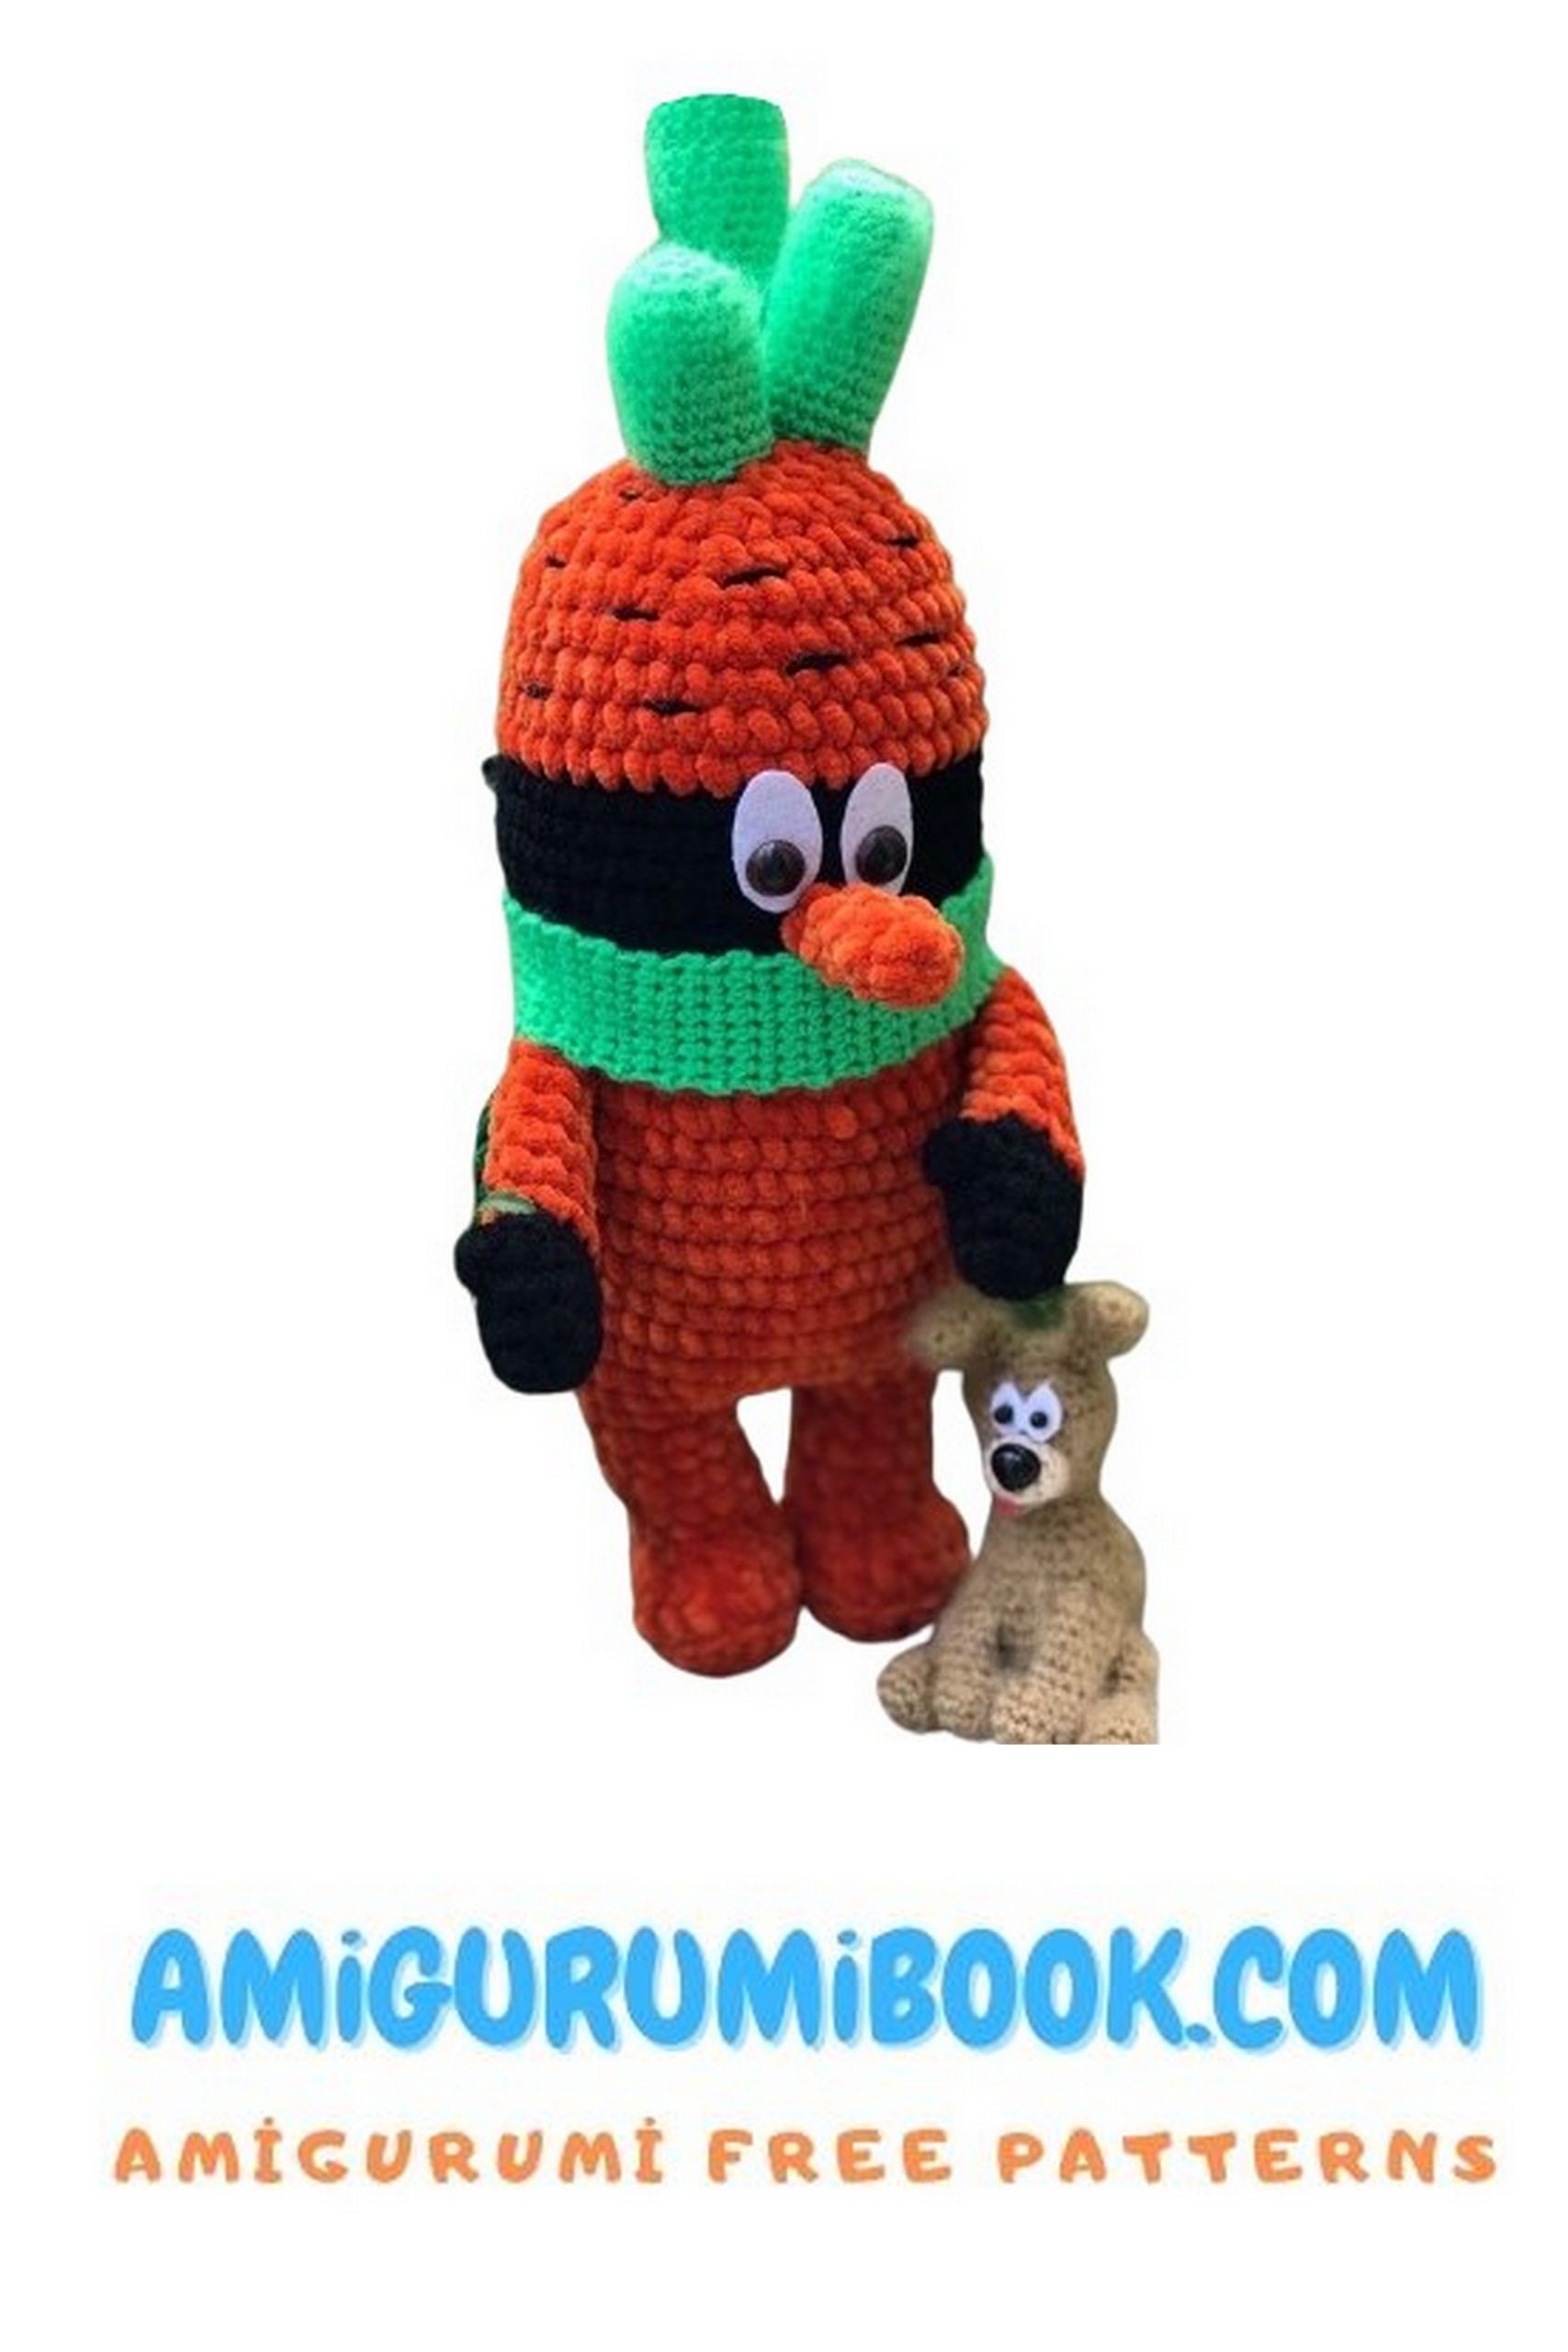
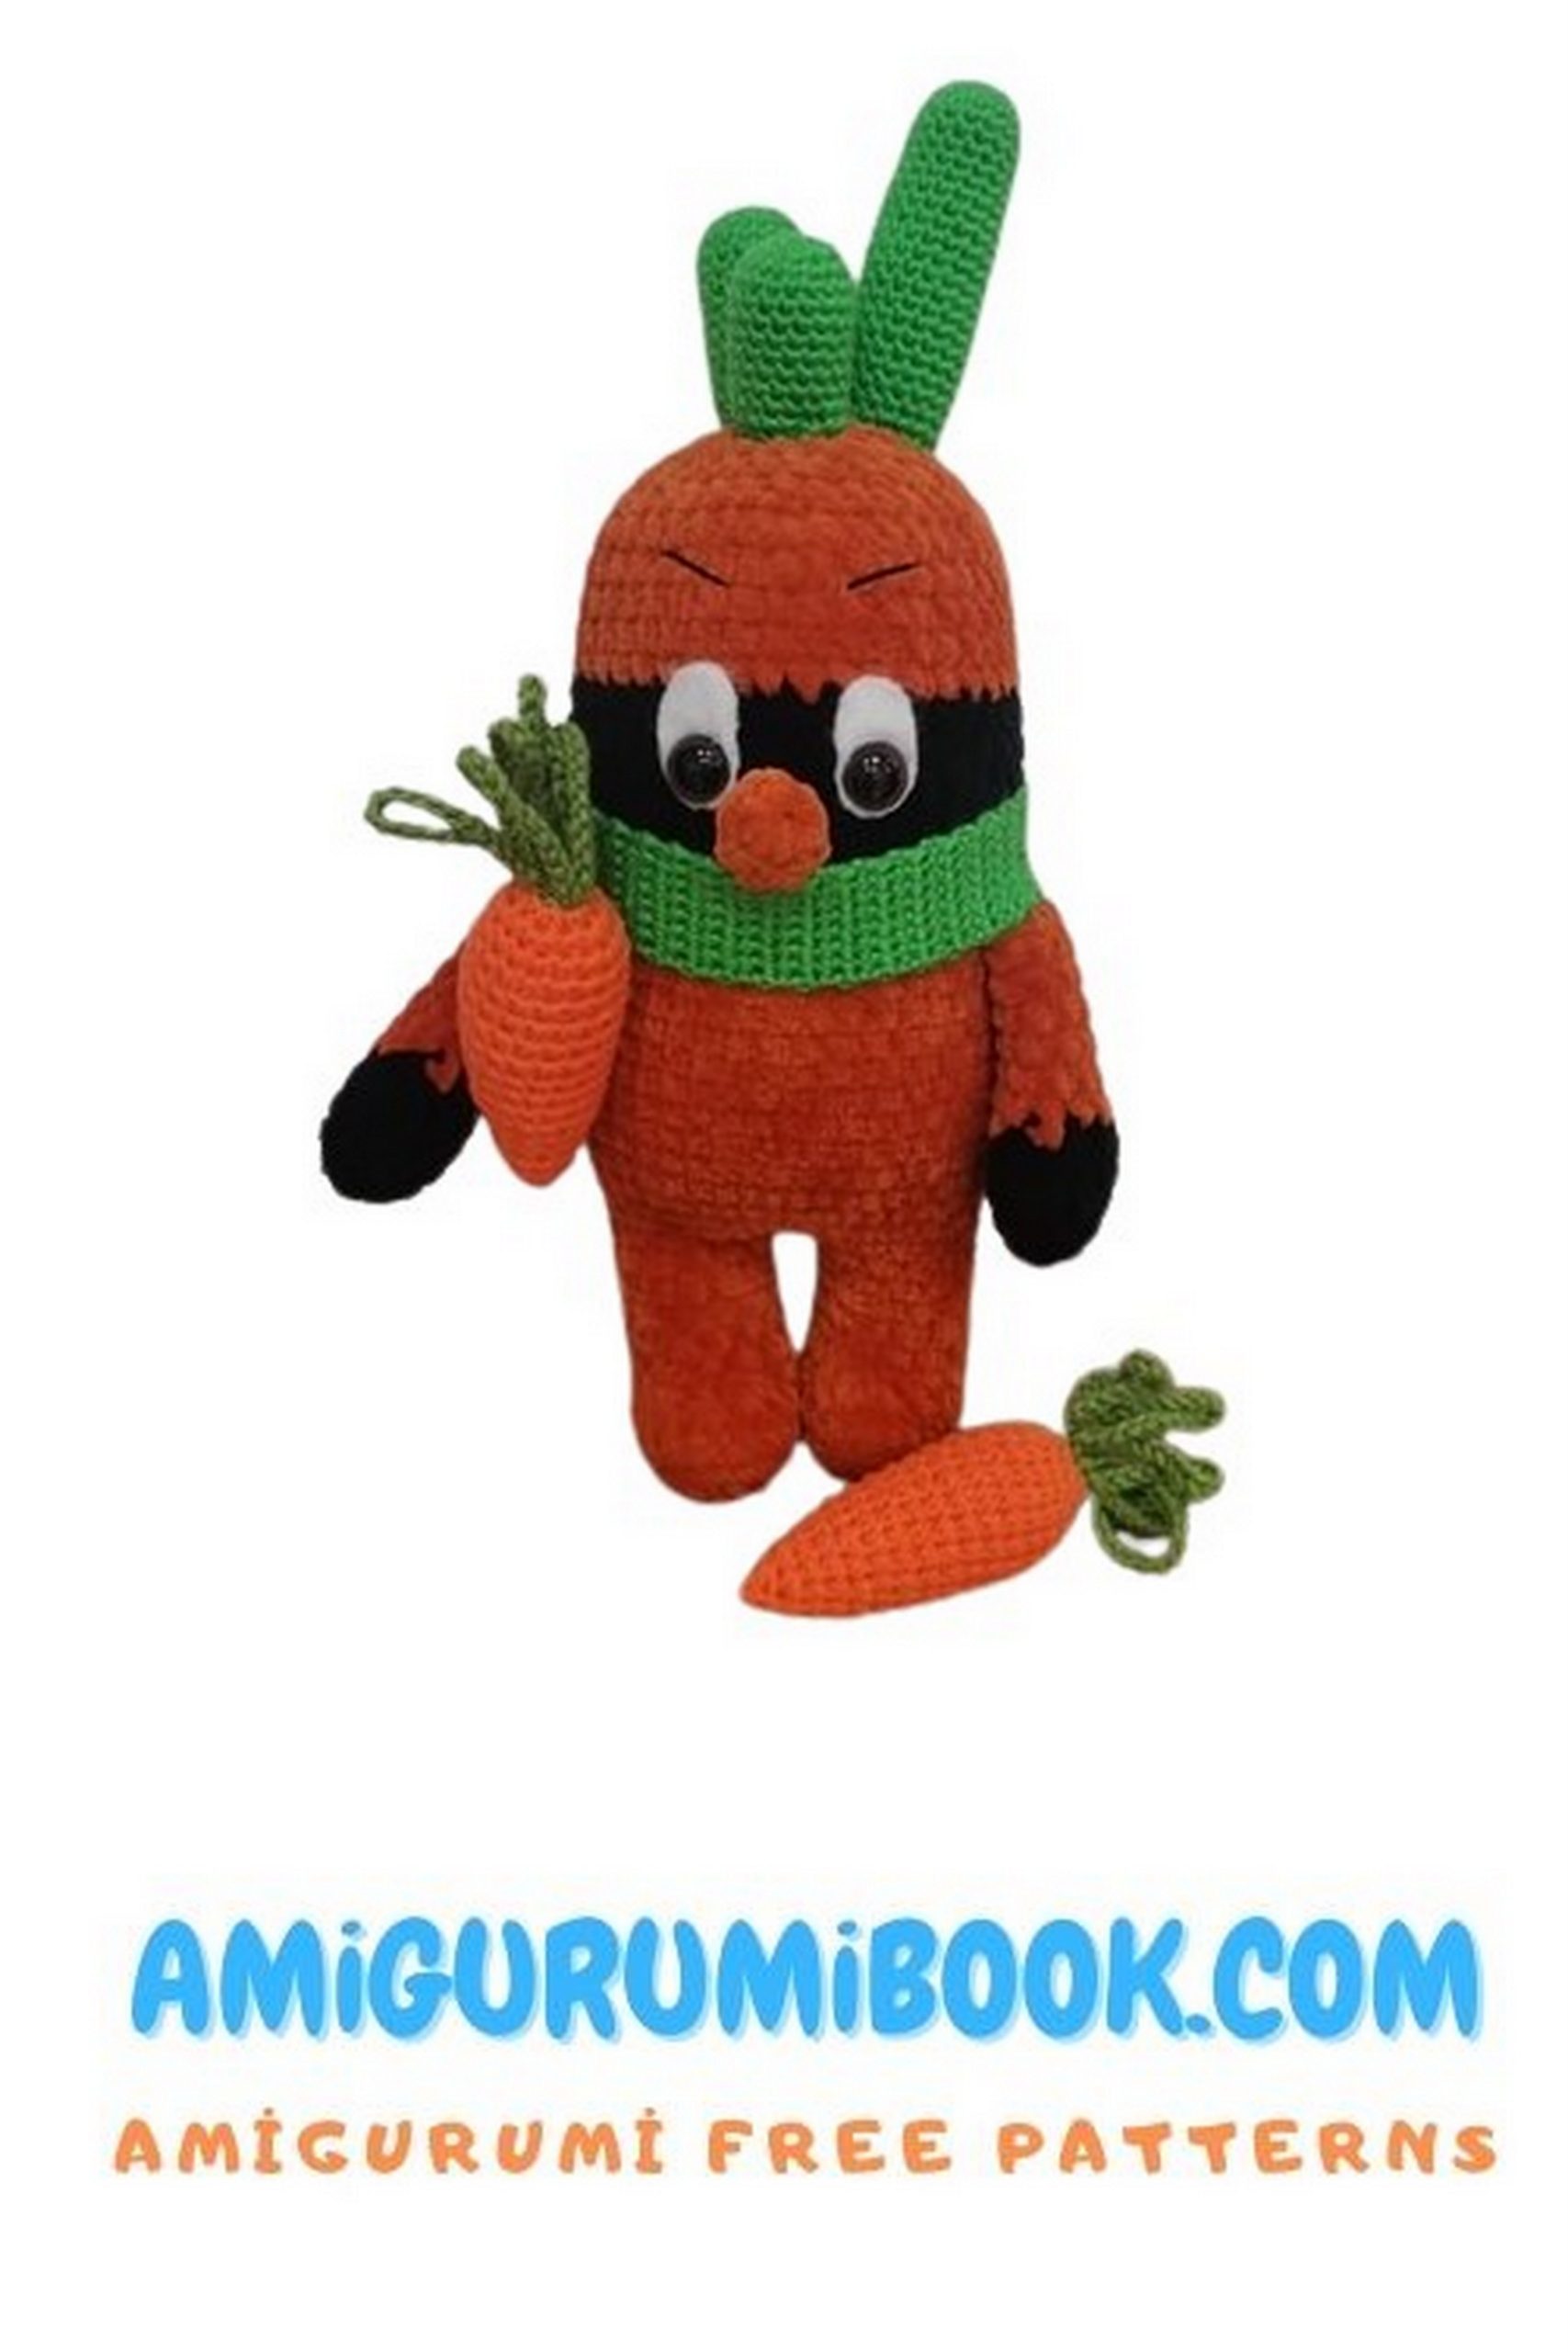
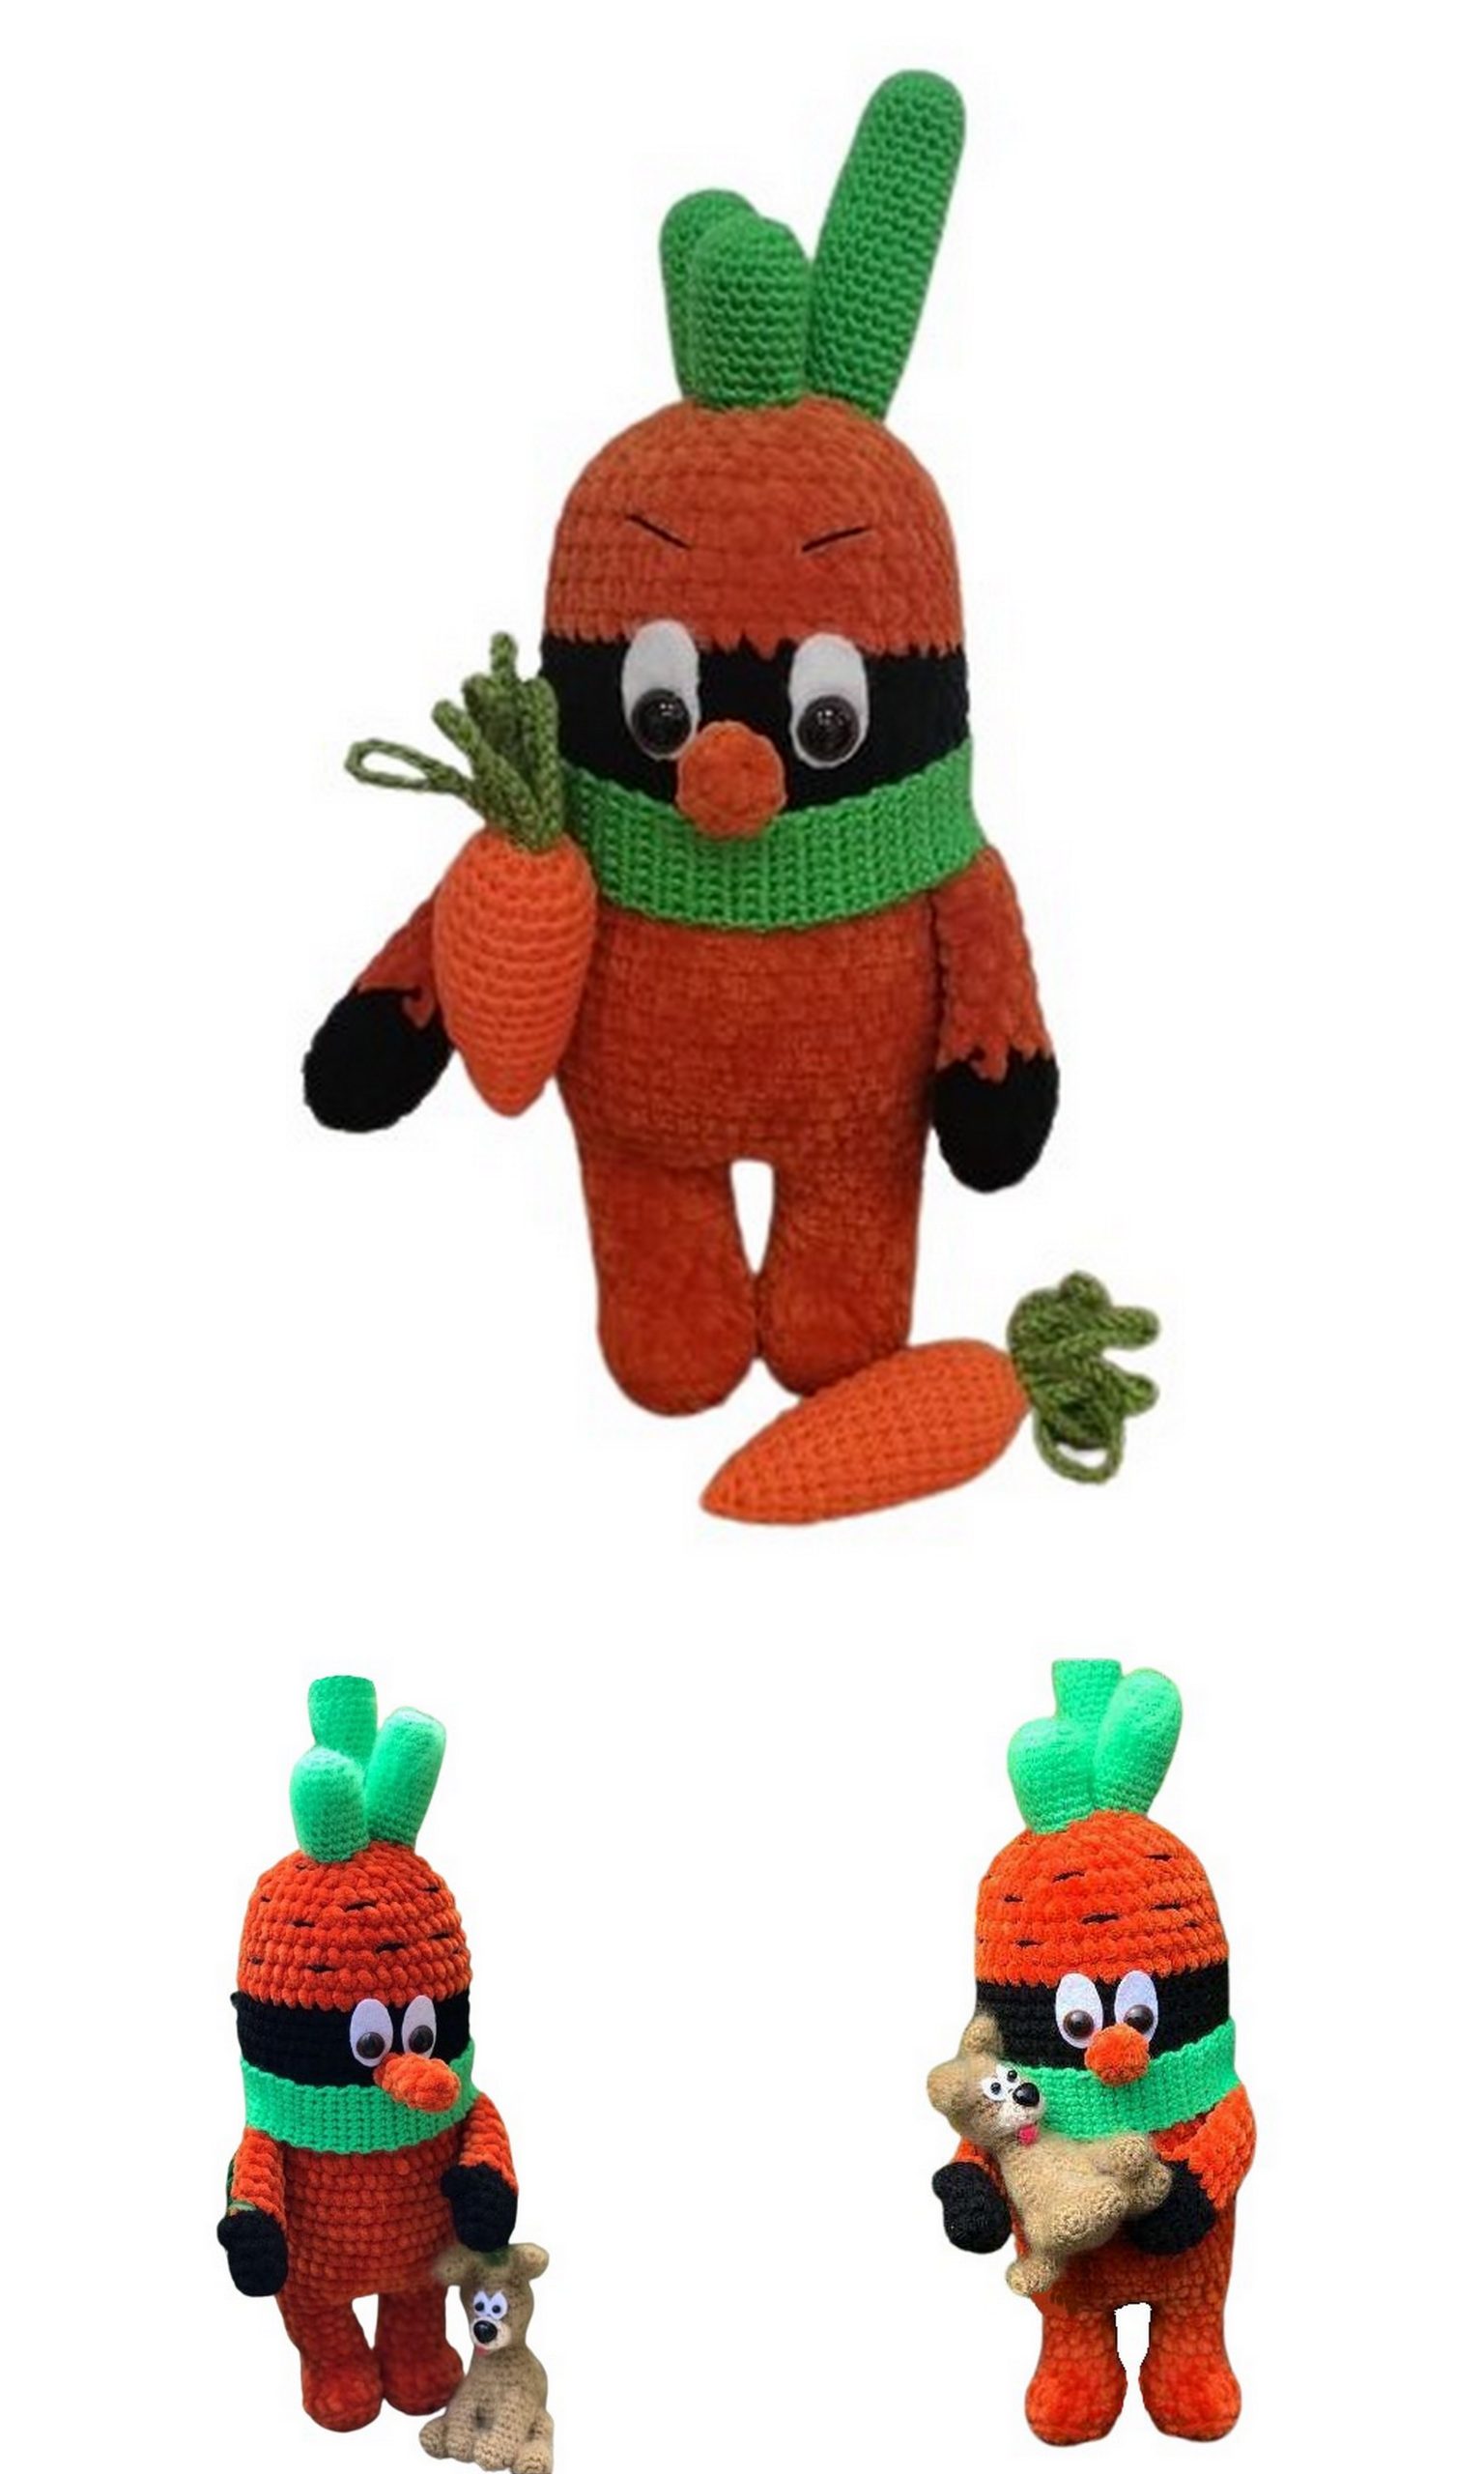
Get ready to embark on a delightful crafting adventure with our free Carrot Man Amigurumi pattern! Whether you’re an experienced crocheter or just starting out, this whimsical veggie friend is perfect for adding a touch of charm to your collection. With clear instructions and step-by-step guidance, you’ll enjoy bringing this adorable character to life. From his orange plush body to his cute green scarf, every detail is designed to spark joy. Let your creativity flourish as you crochet your way to creating your very own Carrot Man!
If you want to access 1000+ free amigurumi patterns, you can download our application from this link!
Materials
Yarn – DOLCE plush yarn in orange, a small amount of black.
Denim or novelty yarn in green and brown.
Hook No. 3 for plush yarn, and No. 1.5 for denim.
White felt for eyes.
Stuffing.
Needle and thread for weighting and sewing parts.
Eyes 1.2 cm, and beads for the puppy’s eyes.
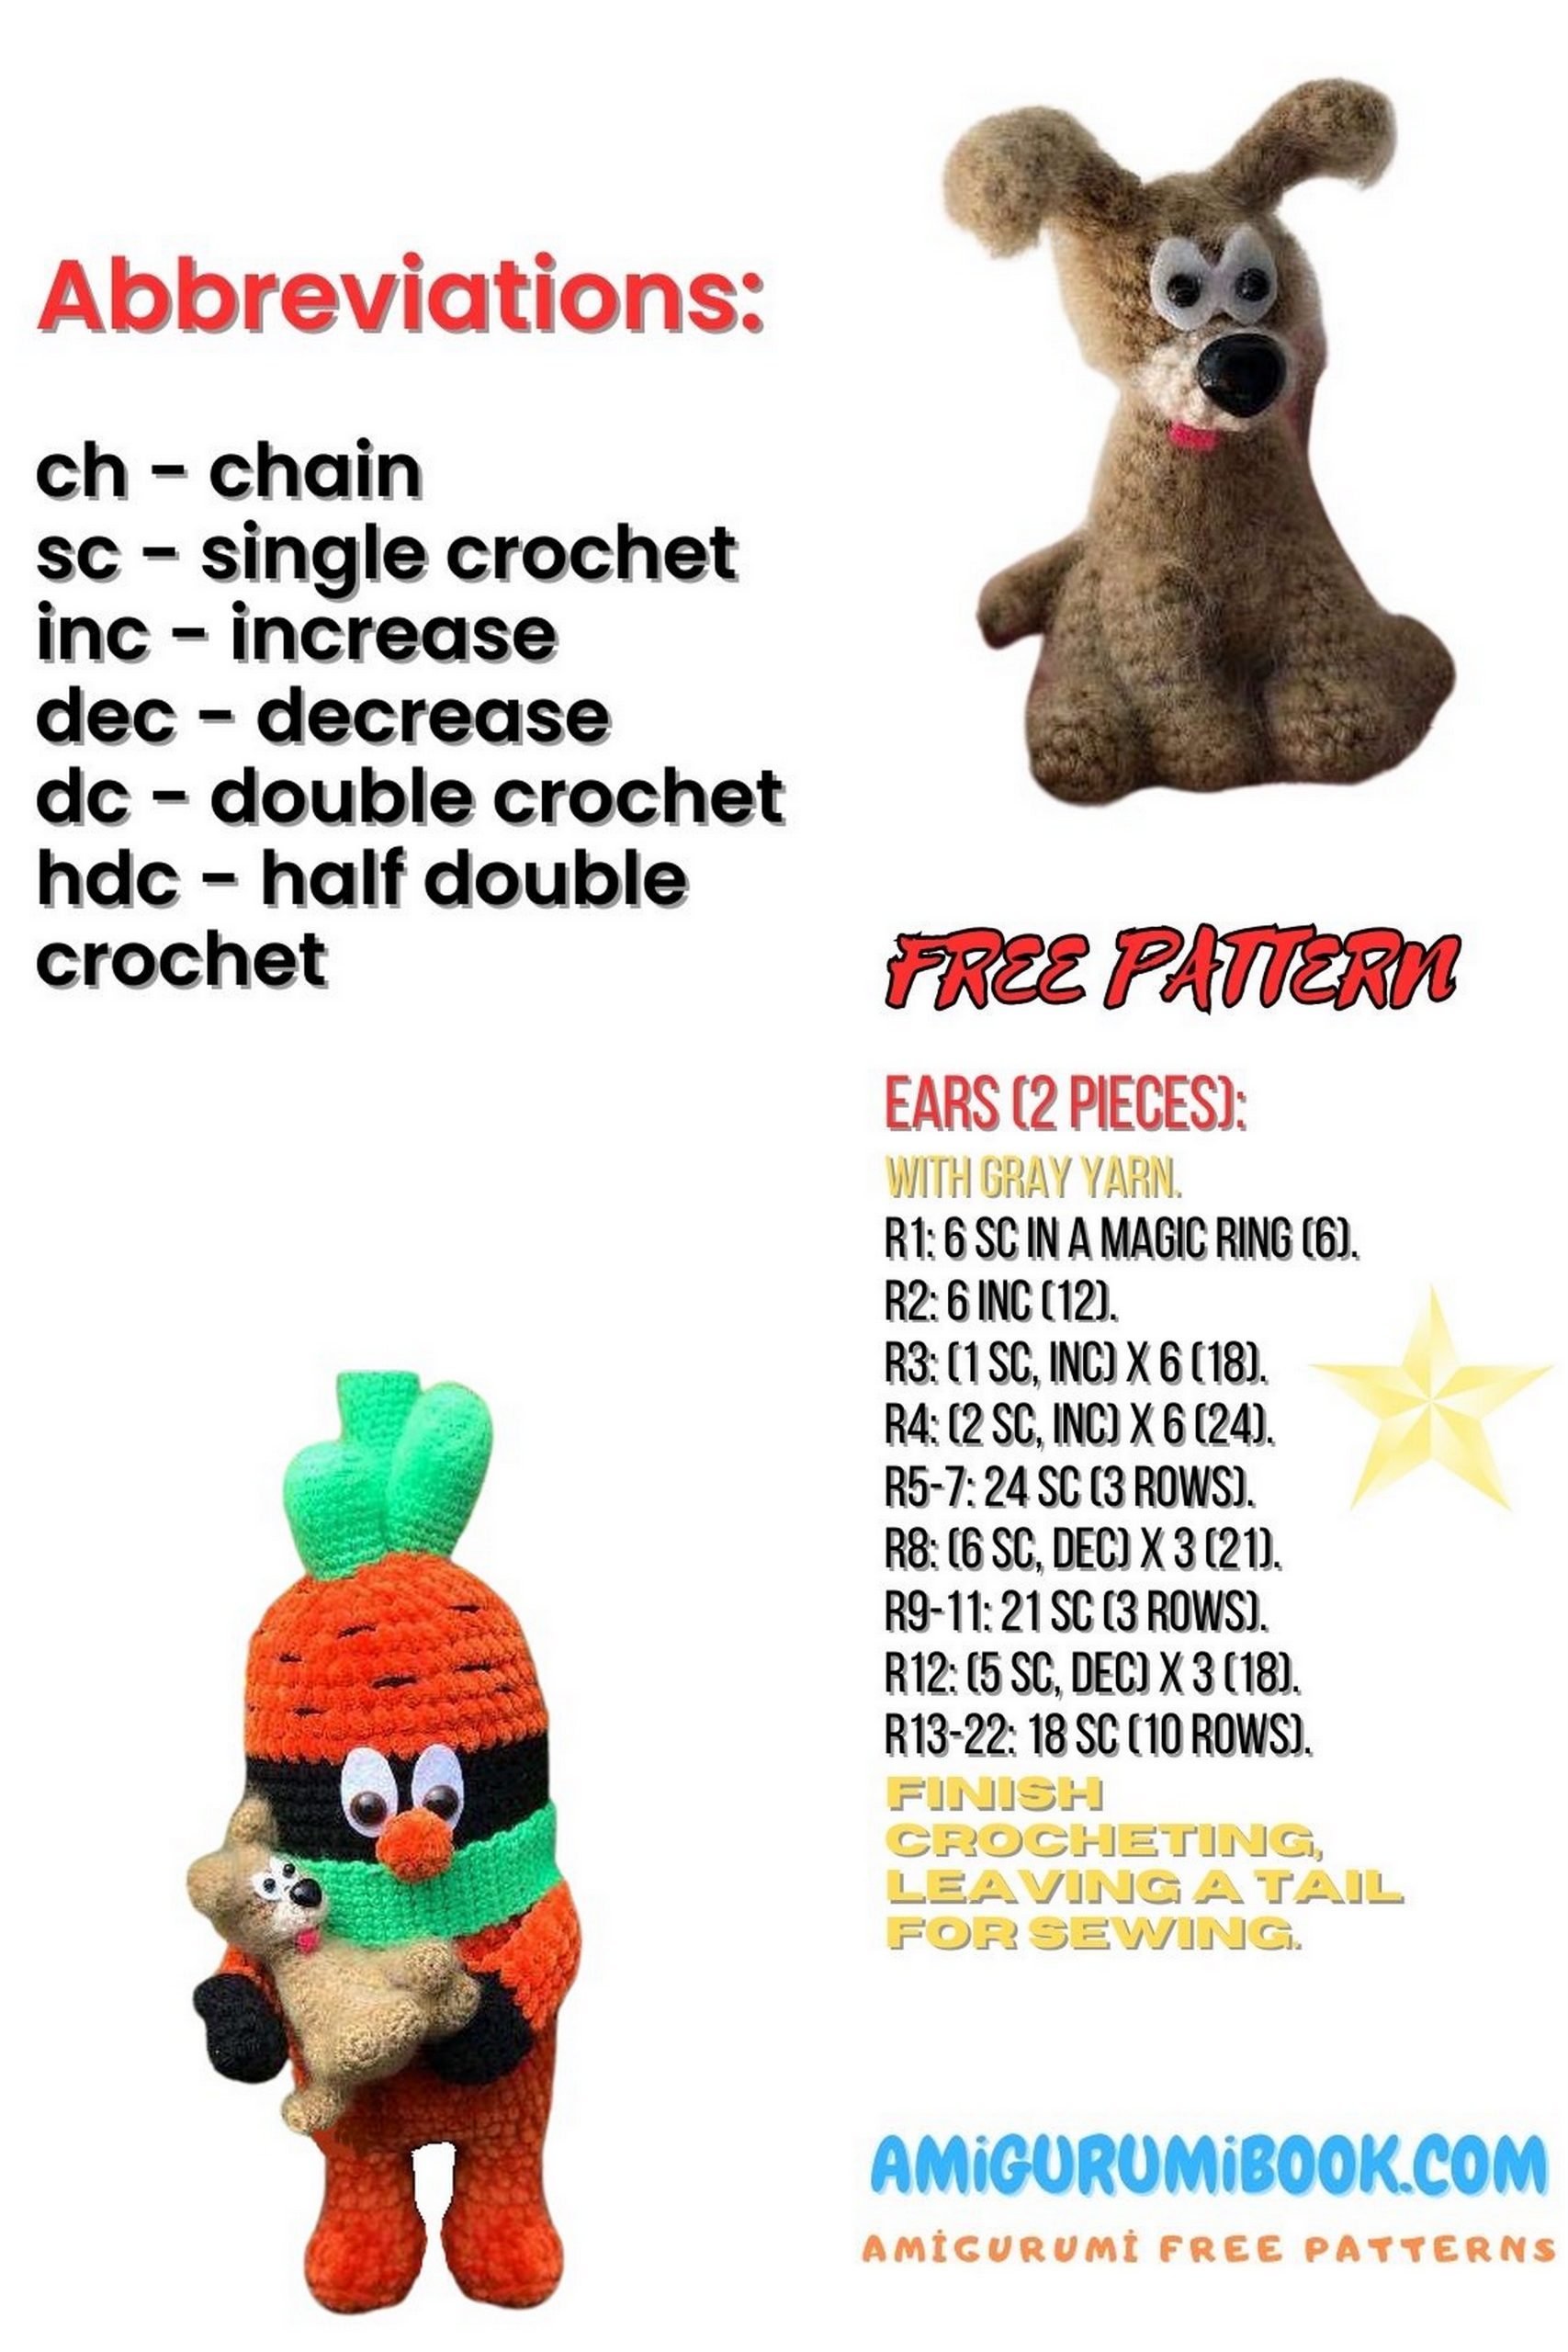
Abbreviations
MR – magic ring
Inc – increase
Dec – decrease
Ch – chain stitch
FPdc – front post double crochet
If a row specifies 1 sc, inc (18), then 1 sc, inc – repeat to the end of the row, the total number of stitches for the row is given in brackets.
PATTERN
Legs Body Head – Carrot Man
(first, knit 2 legs, then connect them and knit the body and head)
Start with orange yarn knitting legs
Chain 6
1: Starting from the second chain, inc, 3 sc in one stitch, 3 sc, inc (13)
2: 2 inc, 2 sc, 3 inc, 5 sc, inc (18)
3: Work 18 sc through the back loops
4: 7 sc, dec 3 times, 5 sc (15)
5: 6 sc, dec 3 times, 3 sc (12)
6-9: 6 sc, fasten off
10: Knit the second leg and chain 3, join with slip stitch to the first leg, work 12 sc along the first leg, 3 sc in the chain stitches, 12 sc along the second leg, 3 sc in the chain stitches, place marker, this is now the beginning of the row (30)
11: 30 sc
12: 3 inc, 9 sc, 6 inc, 9 sc, 3 inc (42)
13-24: 42 sc
25: Change color to black (to make the color transition not visible from the front side, work several sc in orange before reaching the back, then switch to black) 42 sc
26-30: 42 sc
31: Change color to orange (also from the back side) 42 sc
32-35: 42 sc
36: 5 sc, dec repeat to end of row (36)
37: 4 sc, dec repeat to end of row (24)
38: 3 sc, dec repeat to end of row (18)
39: 2 sc, dec repeat to end of row (12)
40: 1 sc, dec repeat to end of row (6)
Nose – Carrot Man
1: 6 sc in MR
2-5: 6 sc
Arms – Carrot Man
Start with black yarn
1: 6 sc in MR
2: 1 sc, inc (9)
3: 2 sc, inc (12)
4: 12 sc
5: FPdc (front post double crochet) 4 times, 3 sc, dec, 3 sc, dec, 1 sc (10)
6: Change color to orange, 10 sc
7-12: 10 sc
13: Fold in half, decrease through both sides
Stem 3 parts
Large part
1: 6 sc in MR
2: 6 inc (12)
3: (1 sc, inc)*6 (18)
4-24: 18 sc
Medium part
1: 6 sc in MR
2: 6 inc (12)
3: (1 sc, inc)*6 (18)
4-15: 18 sc
Small part
1: 6 sc in MR
2: 6 inc (12)
3: (1 sc, inc)*6 (18)
4-12: 18 sc
Scarf – Carrot Man
Green color
Chain 8
1: Starting from the second chain, 7 sc
2-95: 7 sc
You can adjust the length of the scarf by adding or removing rows
Assembly – Carrot Man
Cut the felt for eye base. Attach eyes between rows 4 and 5 in black.
a)Sew the nose in the middle under the eyes.
b)Sew arms under the black color.
c)Sew the stem in the middle, attach to the head.
Embroider black stripes on the top.
Tie the scarf.
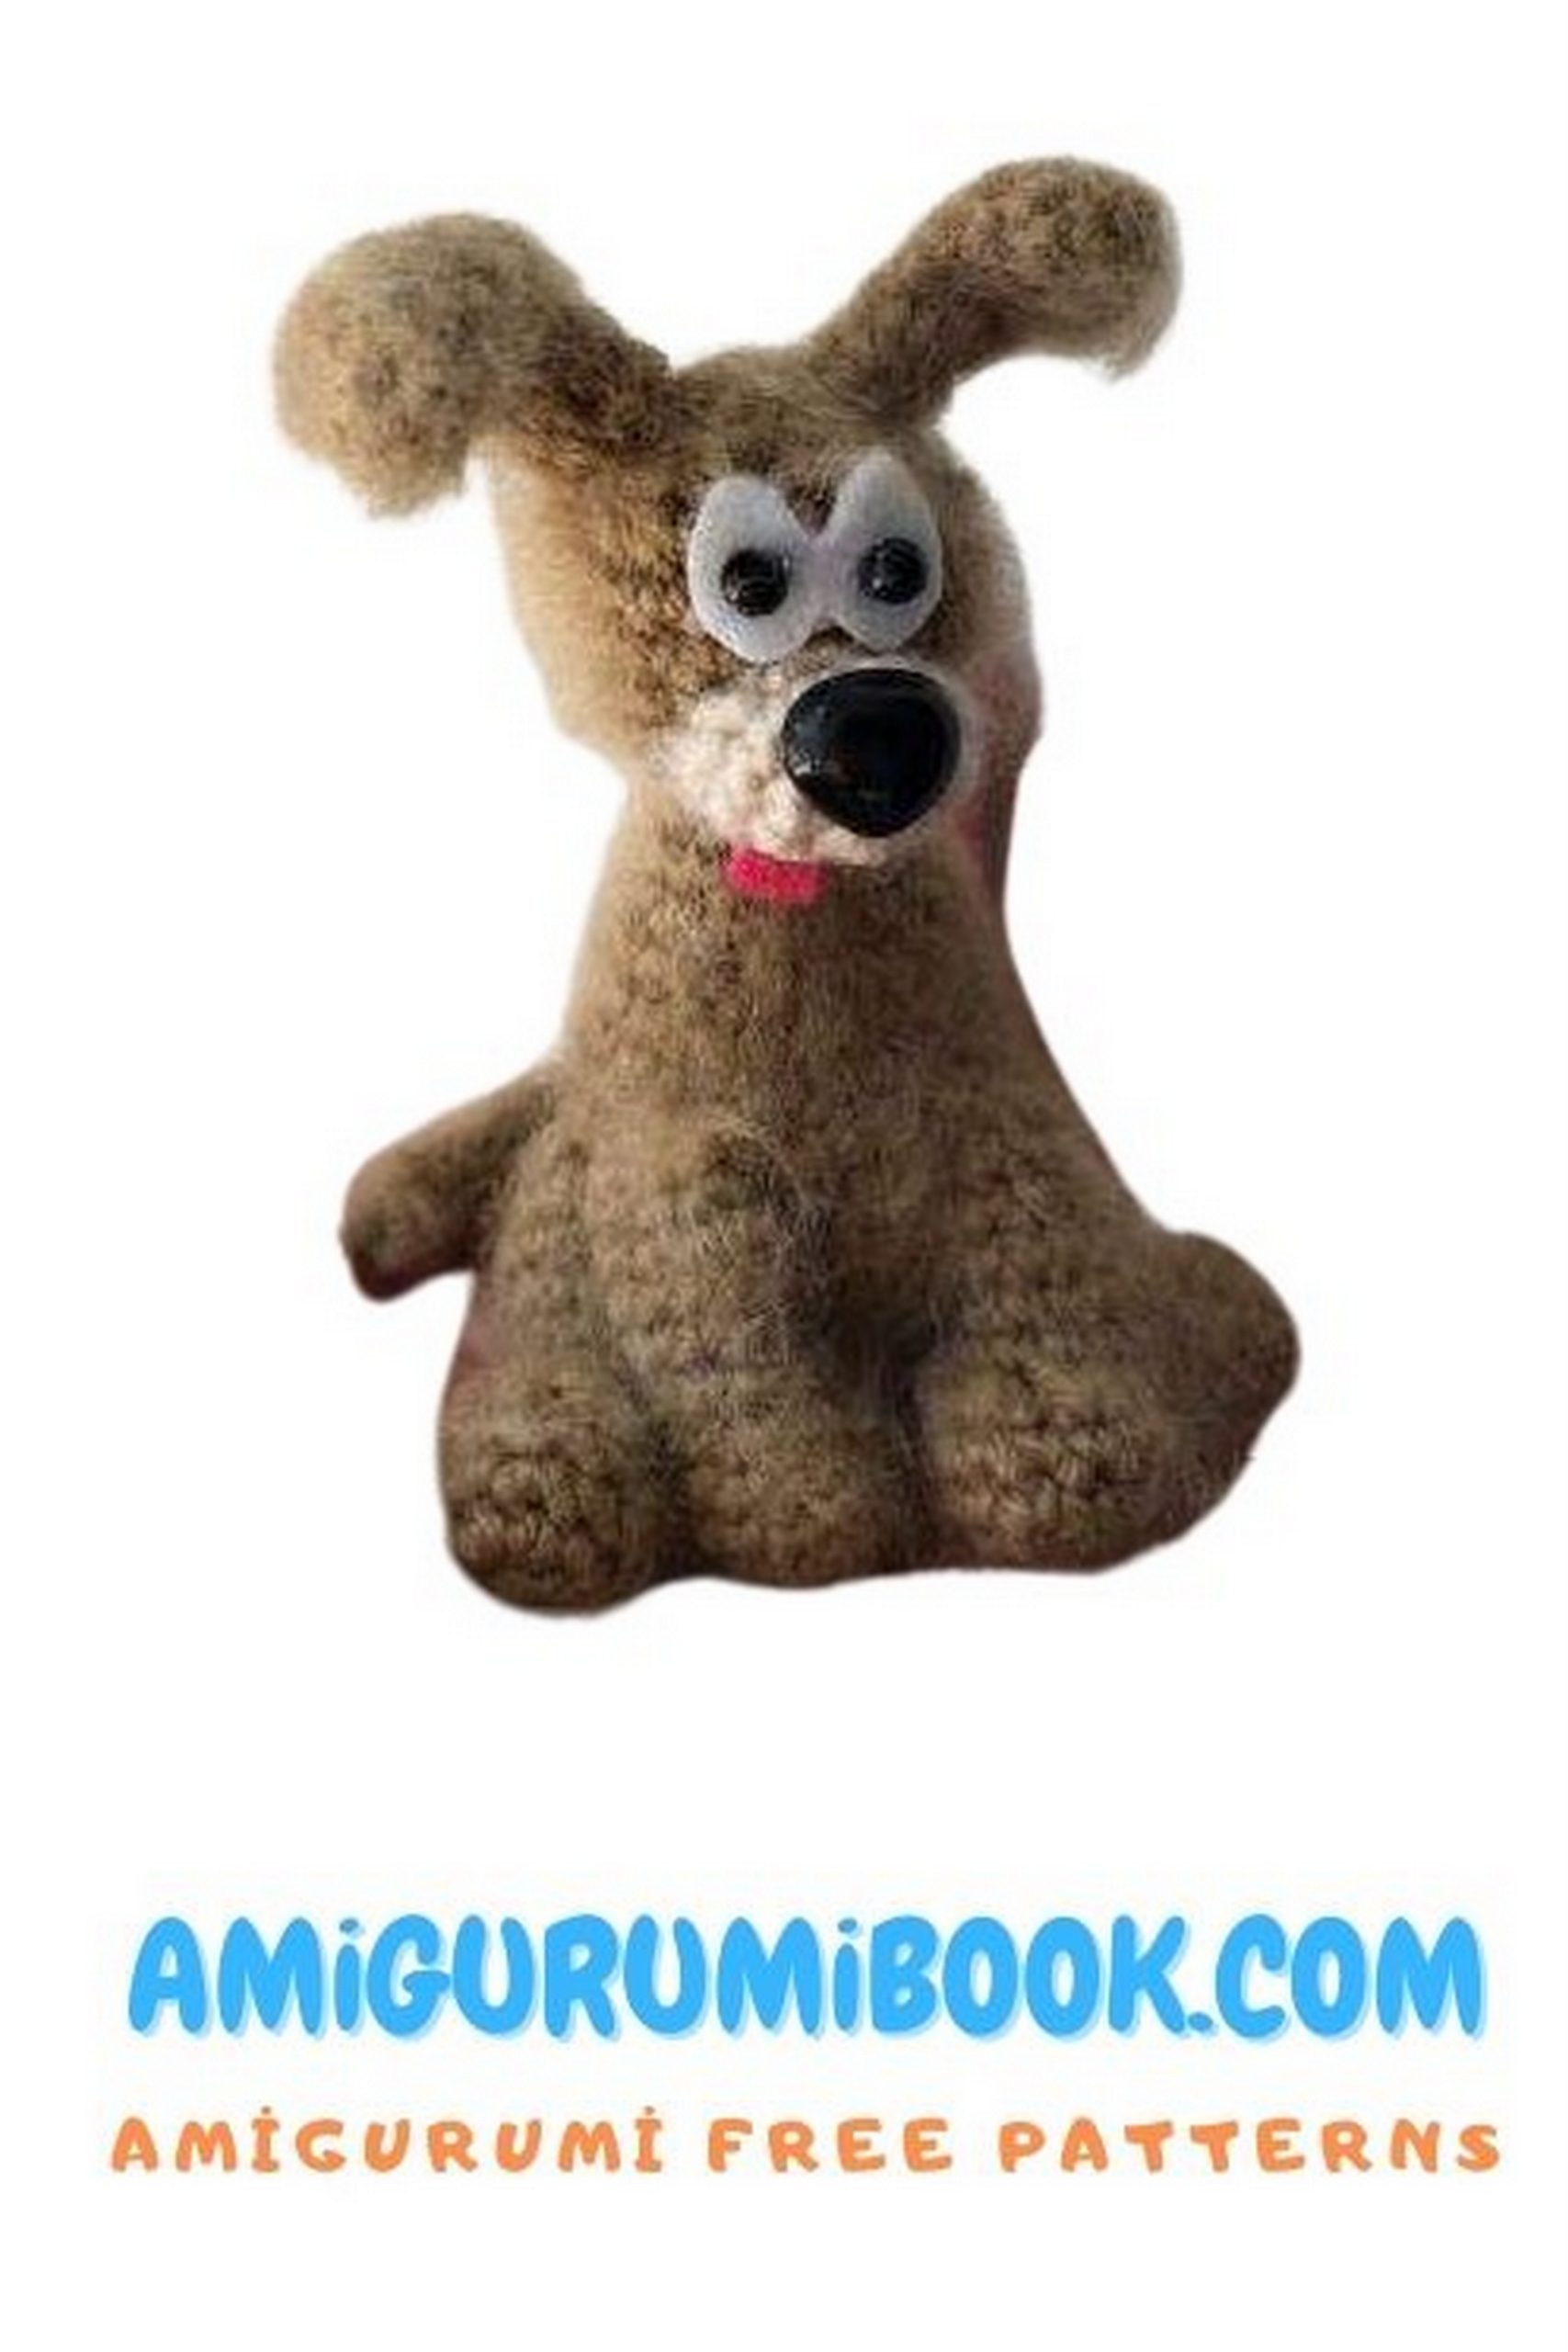
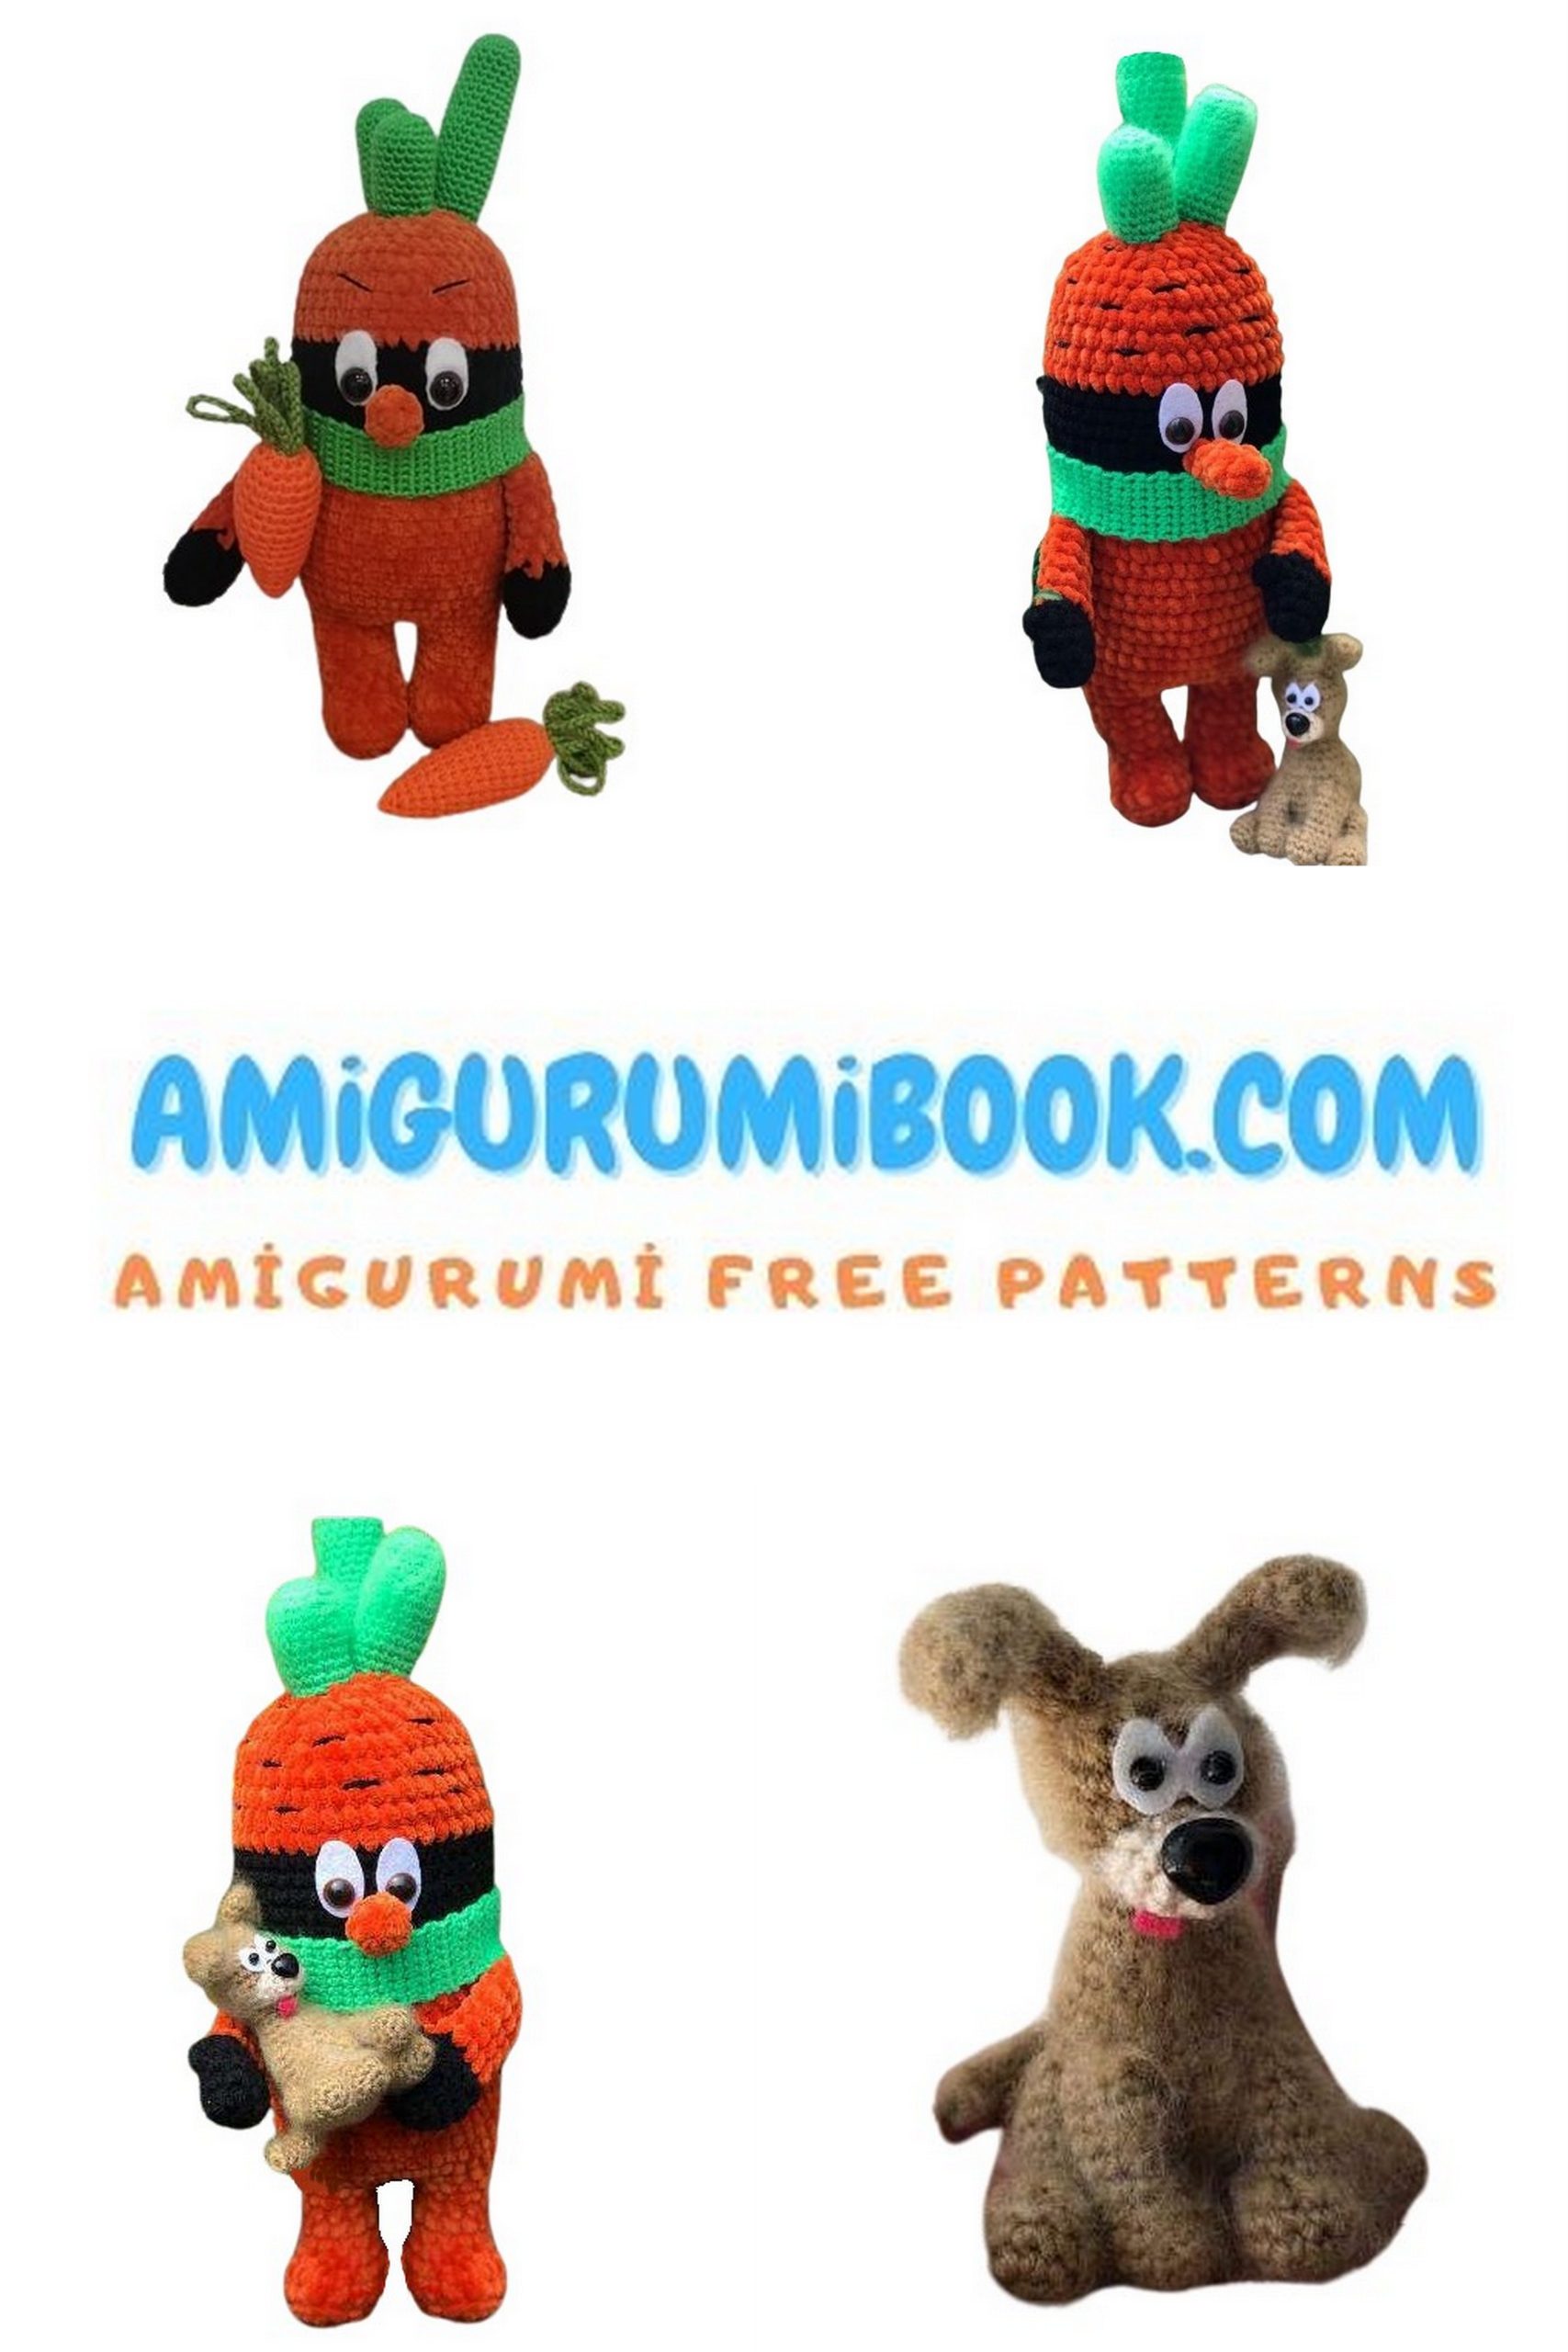
Dog
Head Body – Carrot Man
1: 6 sc in MR
2: 6 inc
3: 1 sc, inc (18)
4: 2 sc, inc (24)
5-6: 24 sc
7: 3 sc, inc (30)
8-9: 30 sc
10: 3 sc, dec (24)
11-12: 24 sc
13: 2 sc, dec (18)
14: 18 sc
15: 1 sc, dec (12)
16: 12 sc
17: 1 sc, inc (18)
18: 18 sc
19: 2 sc, inc (24)
20: 24 sc
21-22: 24 sc
23: 2 sc, dec (18)
24: 1 sc, dec (12)
25: 12 sc
26: 6 dec
Front Legs – Carrot Man
1: 6 sc in MR
2: 6 inc (12)
3-4: 12 sc
5: 3 dec, 6 sc (9)
6-10: 9 sc
Back Legs – Carrot Man
1: 6 sc in MR
2: 6 inc (12)
3-4: 12 sc
5: 3 dec, 6 sc (9)
6-7: 9 sc
8: 1 sc, 2 inc, 3 sc, 1 dec, 1 sc (10)
9: 2 sc, 2 inc, 6 sc (12)
10-11: 12 sc
12: 6 dec
Muzzle – Carrot Man
1: 6 sc in MR
2: 6 inc
3: 12 sc
Ears – Carrot Man
You can insert wire into the ears to bend them.
1: 6 sc in MR
2: 1 sc, inc (9)
3-4: 9 sc
5: 1 sc, dec (6)
6-8: 6 sc
Tail length can be adjusted by yourself.
1: 6 sc in MR
2-15: 6 sc
Assembly
Sew the muzzle and ears.
Decorate the muzzle.
Sew on legs, tail, and brush the dog.
The carrot and pet are ready.