
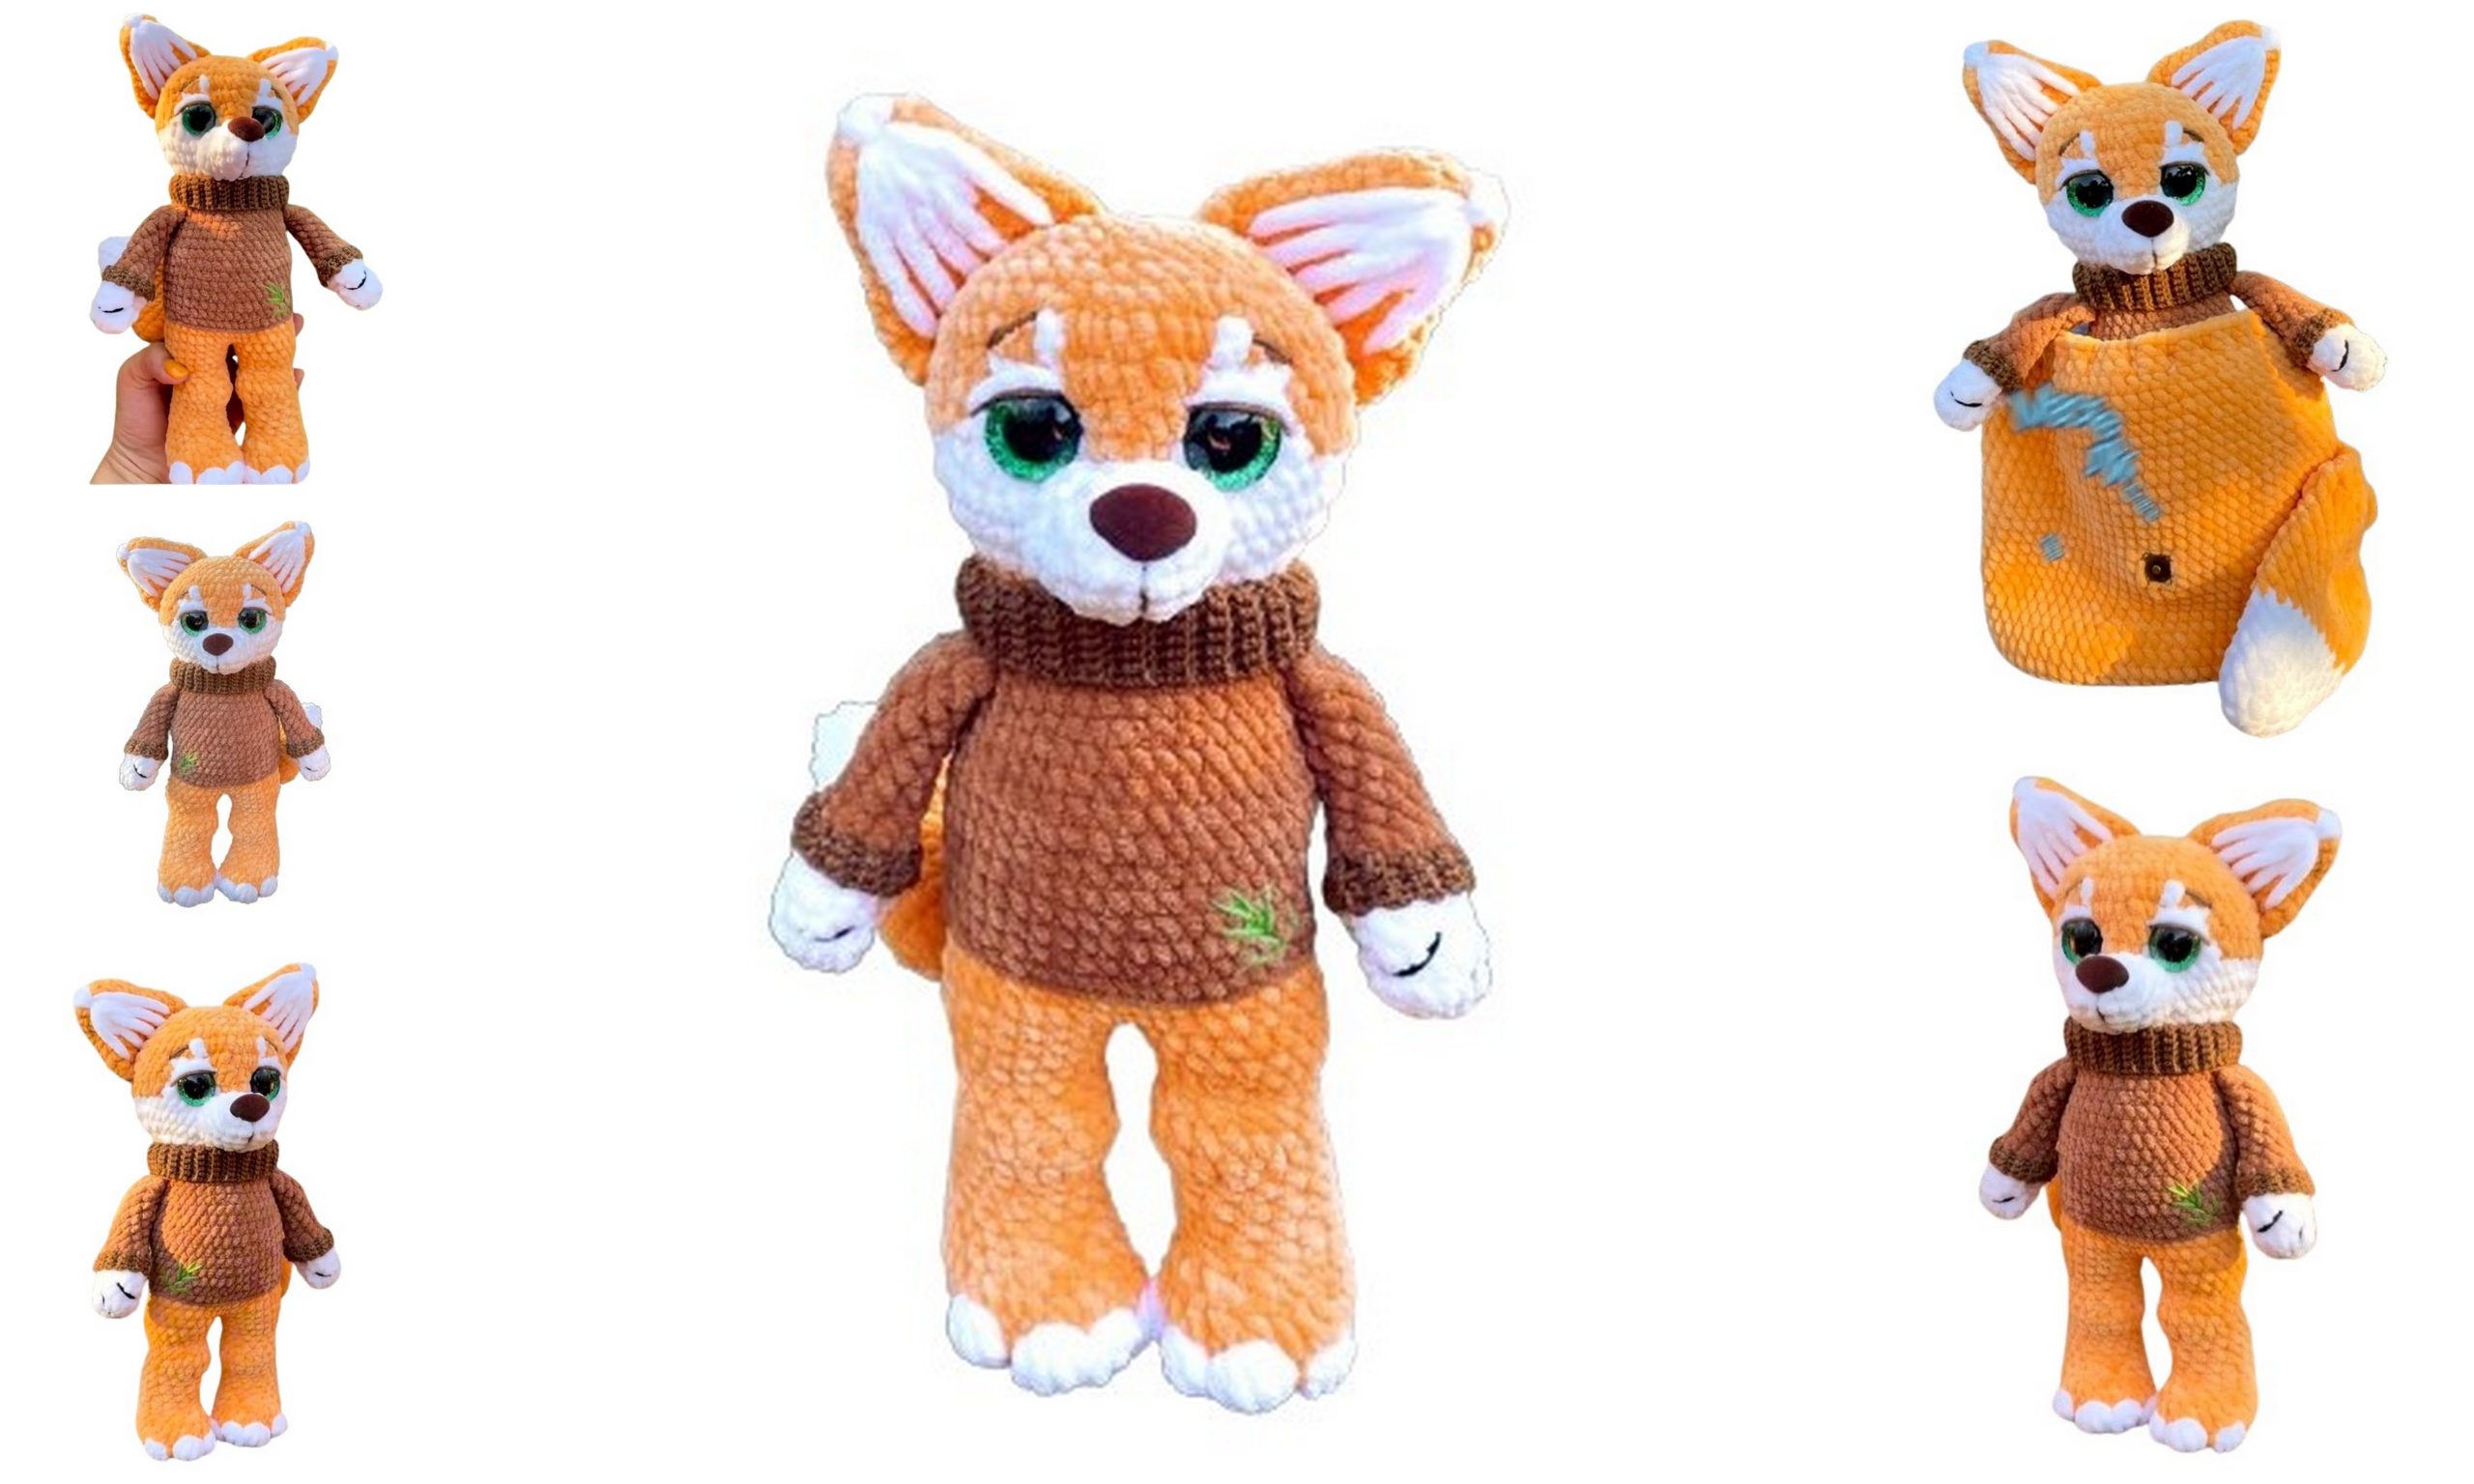
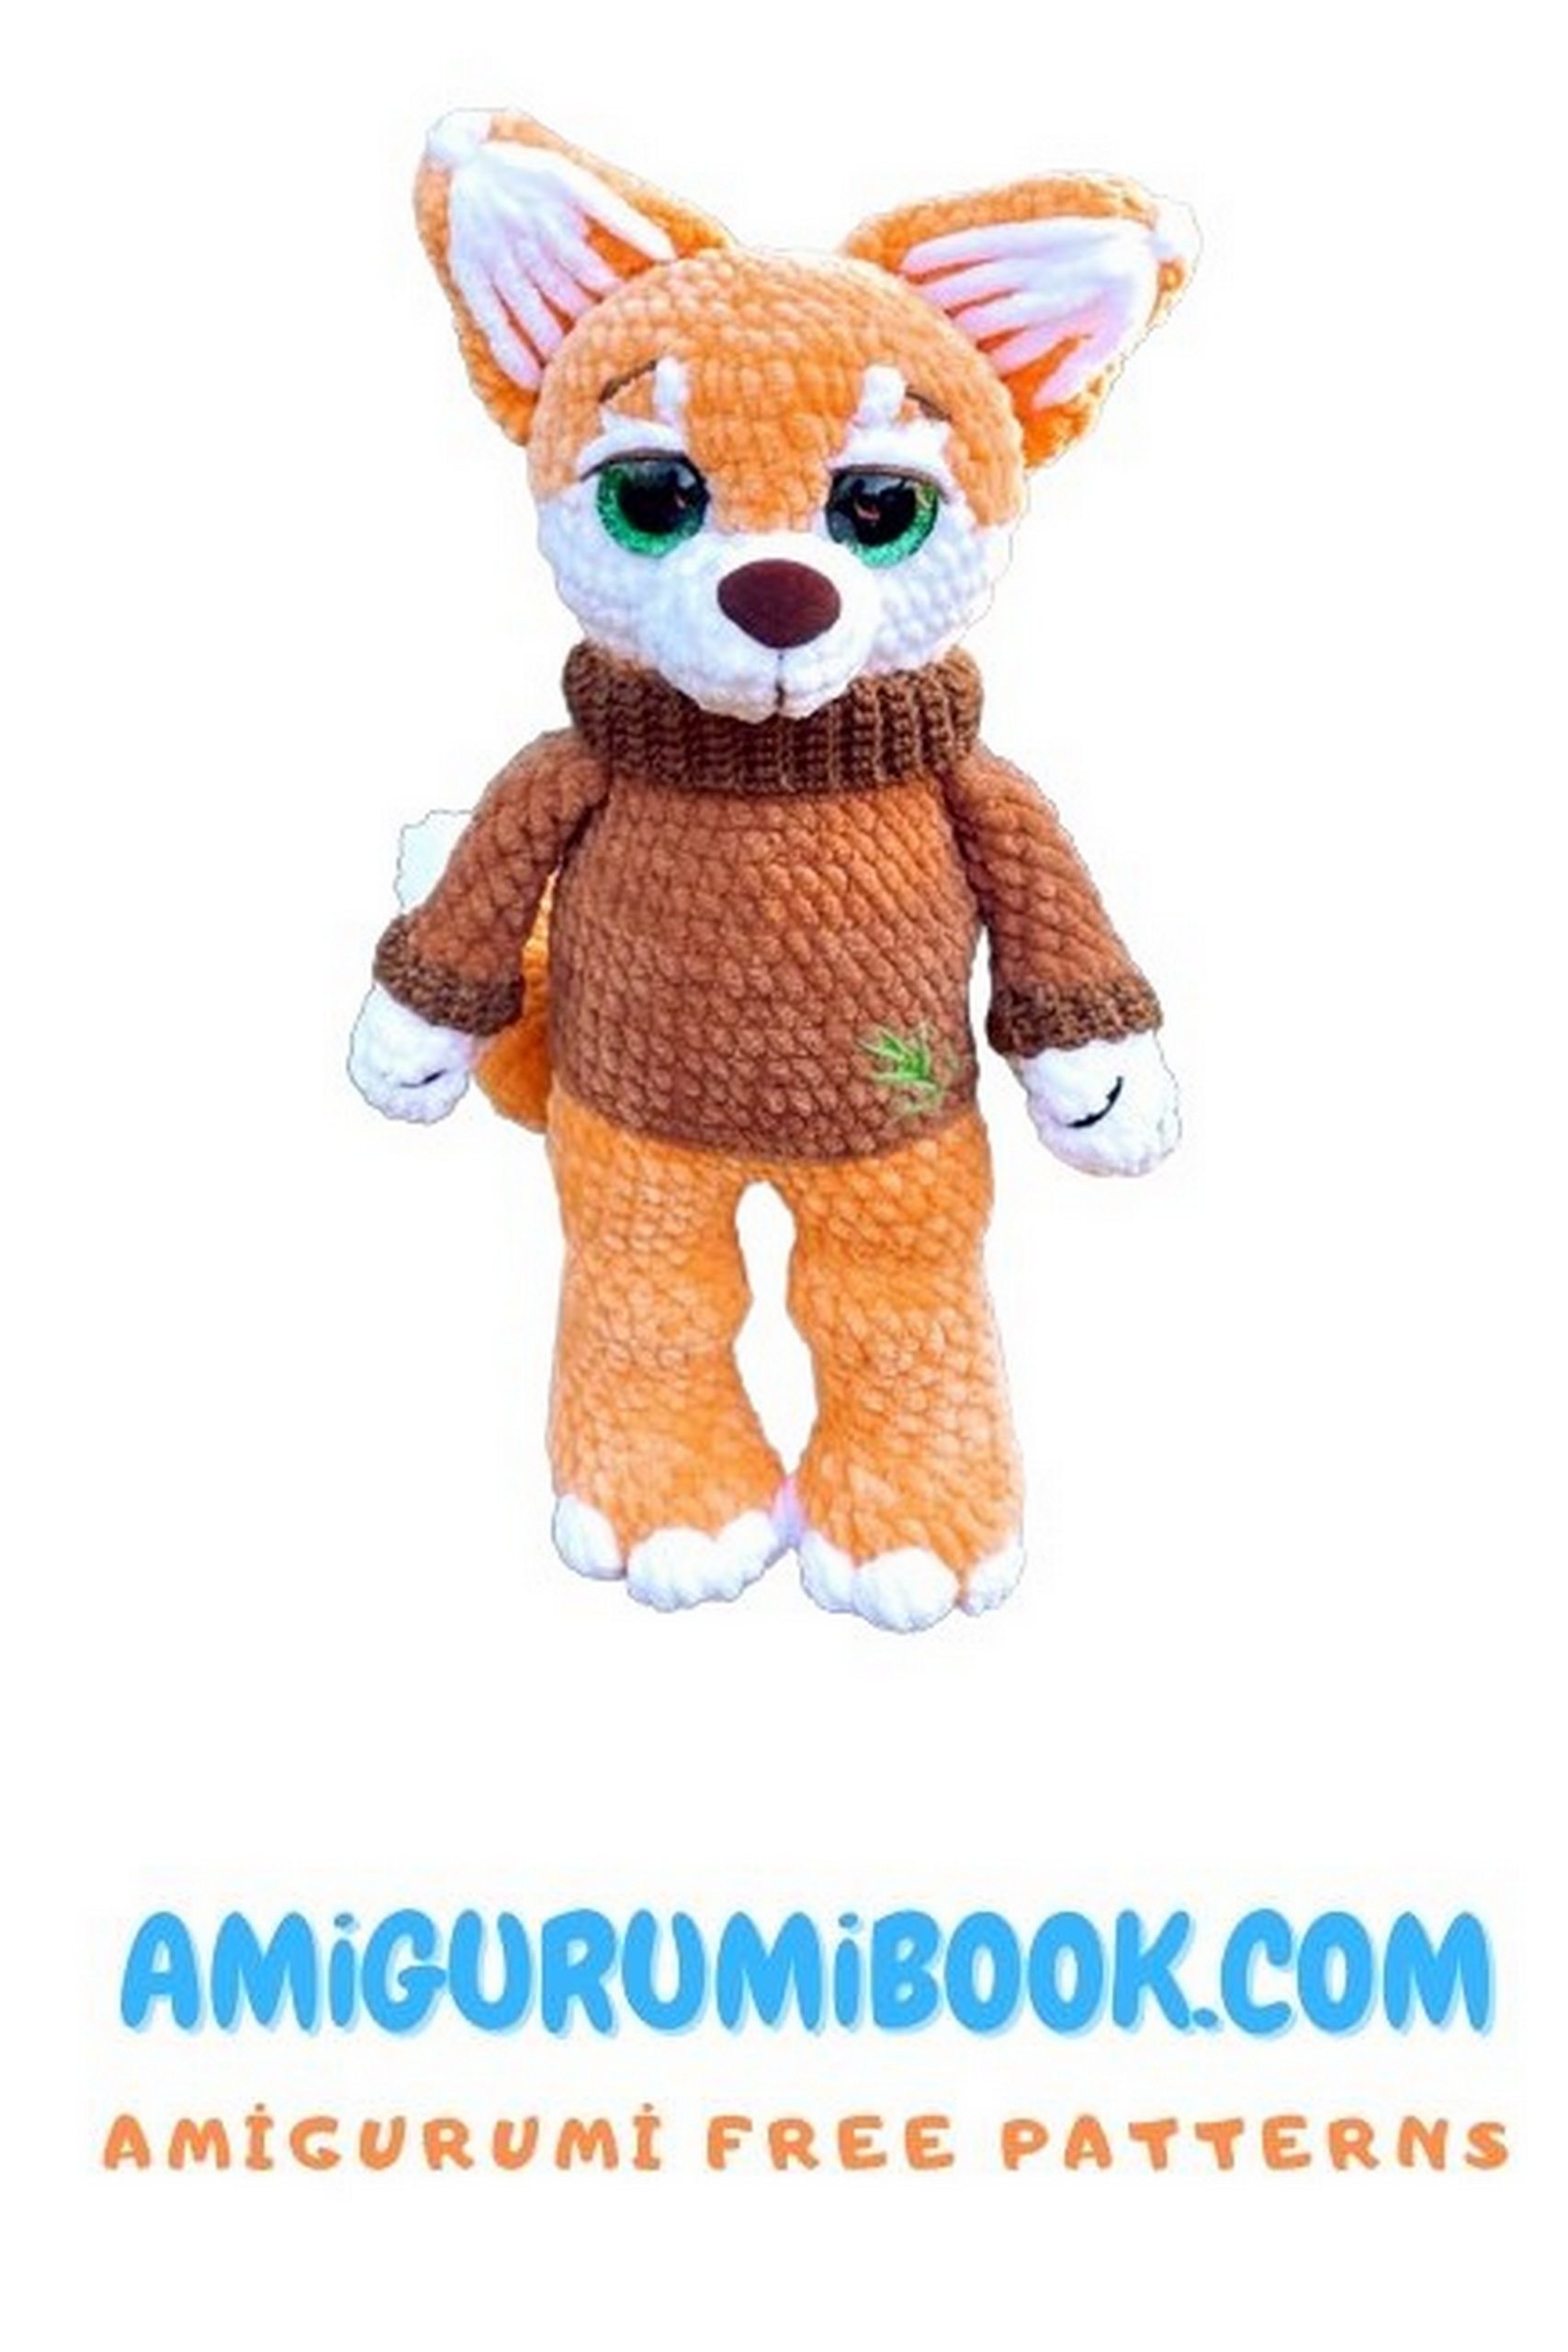
Unleash your creativity with the Free Fox Tom Amigurumi Pattern! Perfect for those who love the art of crafting, Fox Tom is a delightful and fun amigurumi project suitable for both beginners and experienced hobbyists. This free pattern provides step-by-step instructions that everyone can easily follow, from novice to skilled artisans.
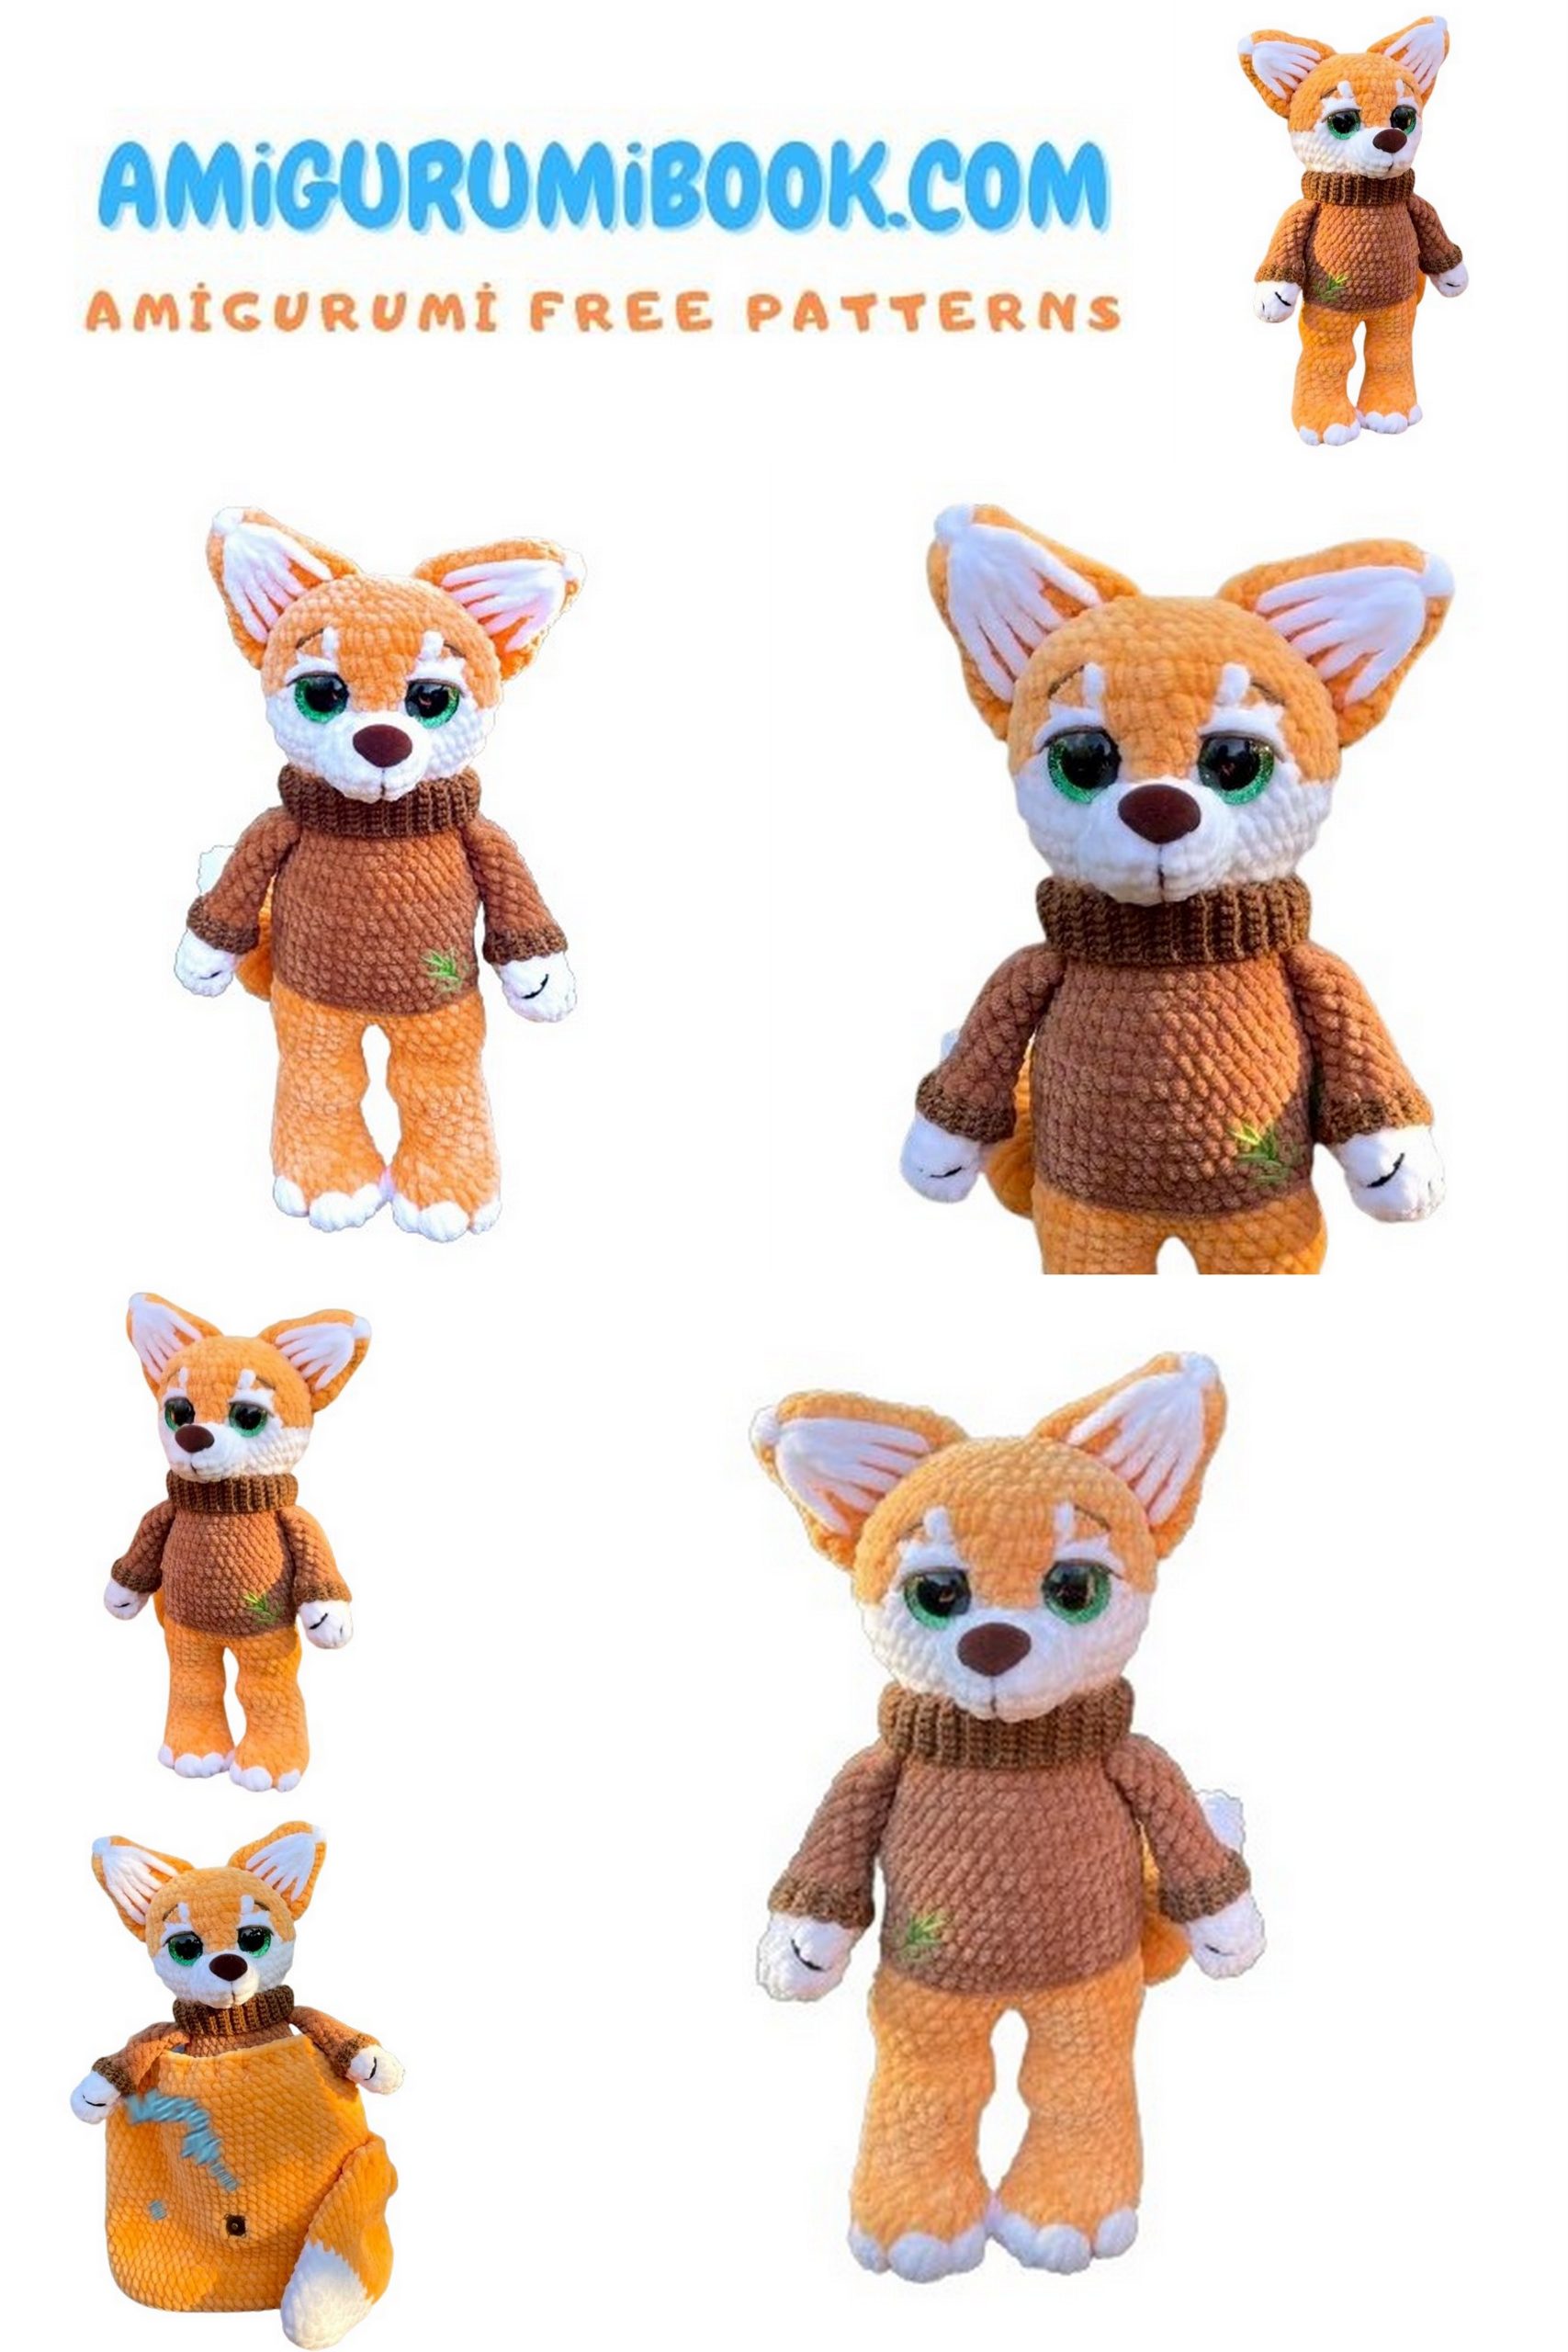
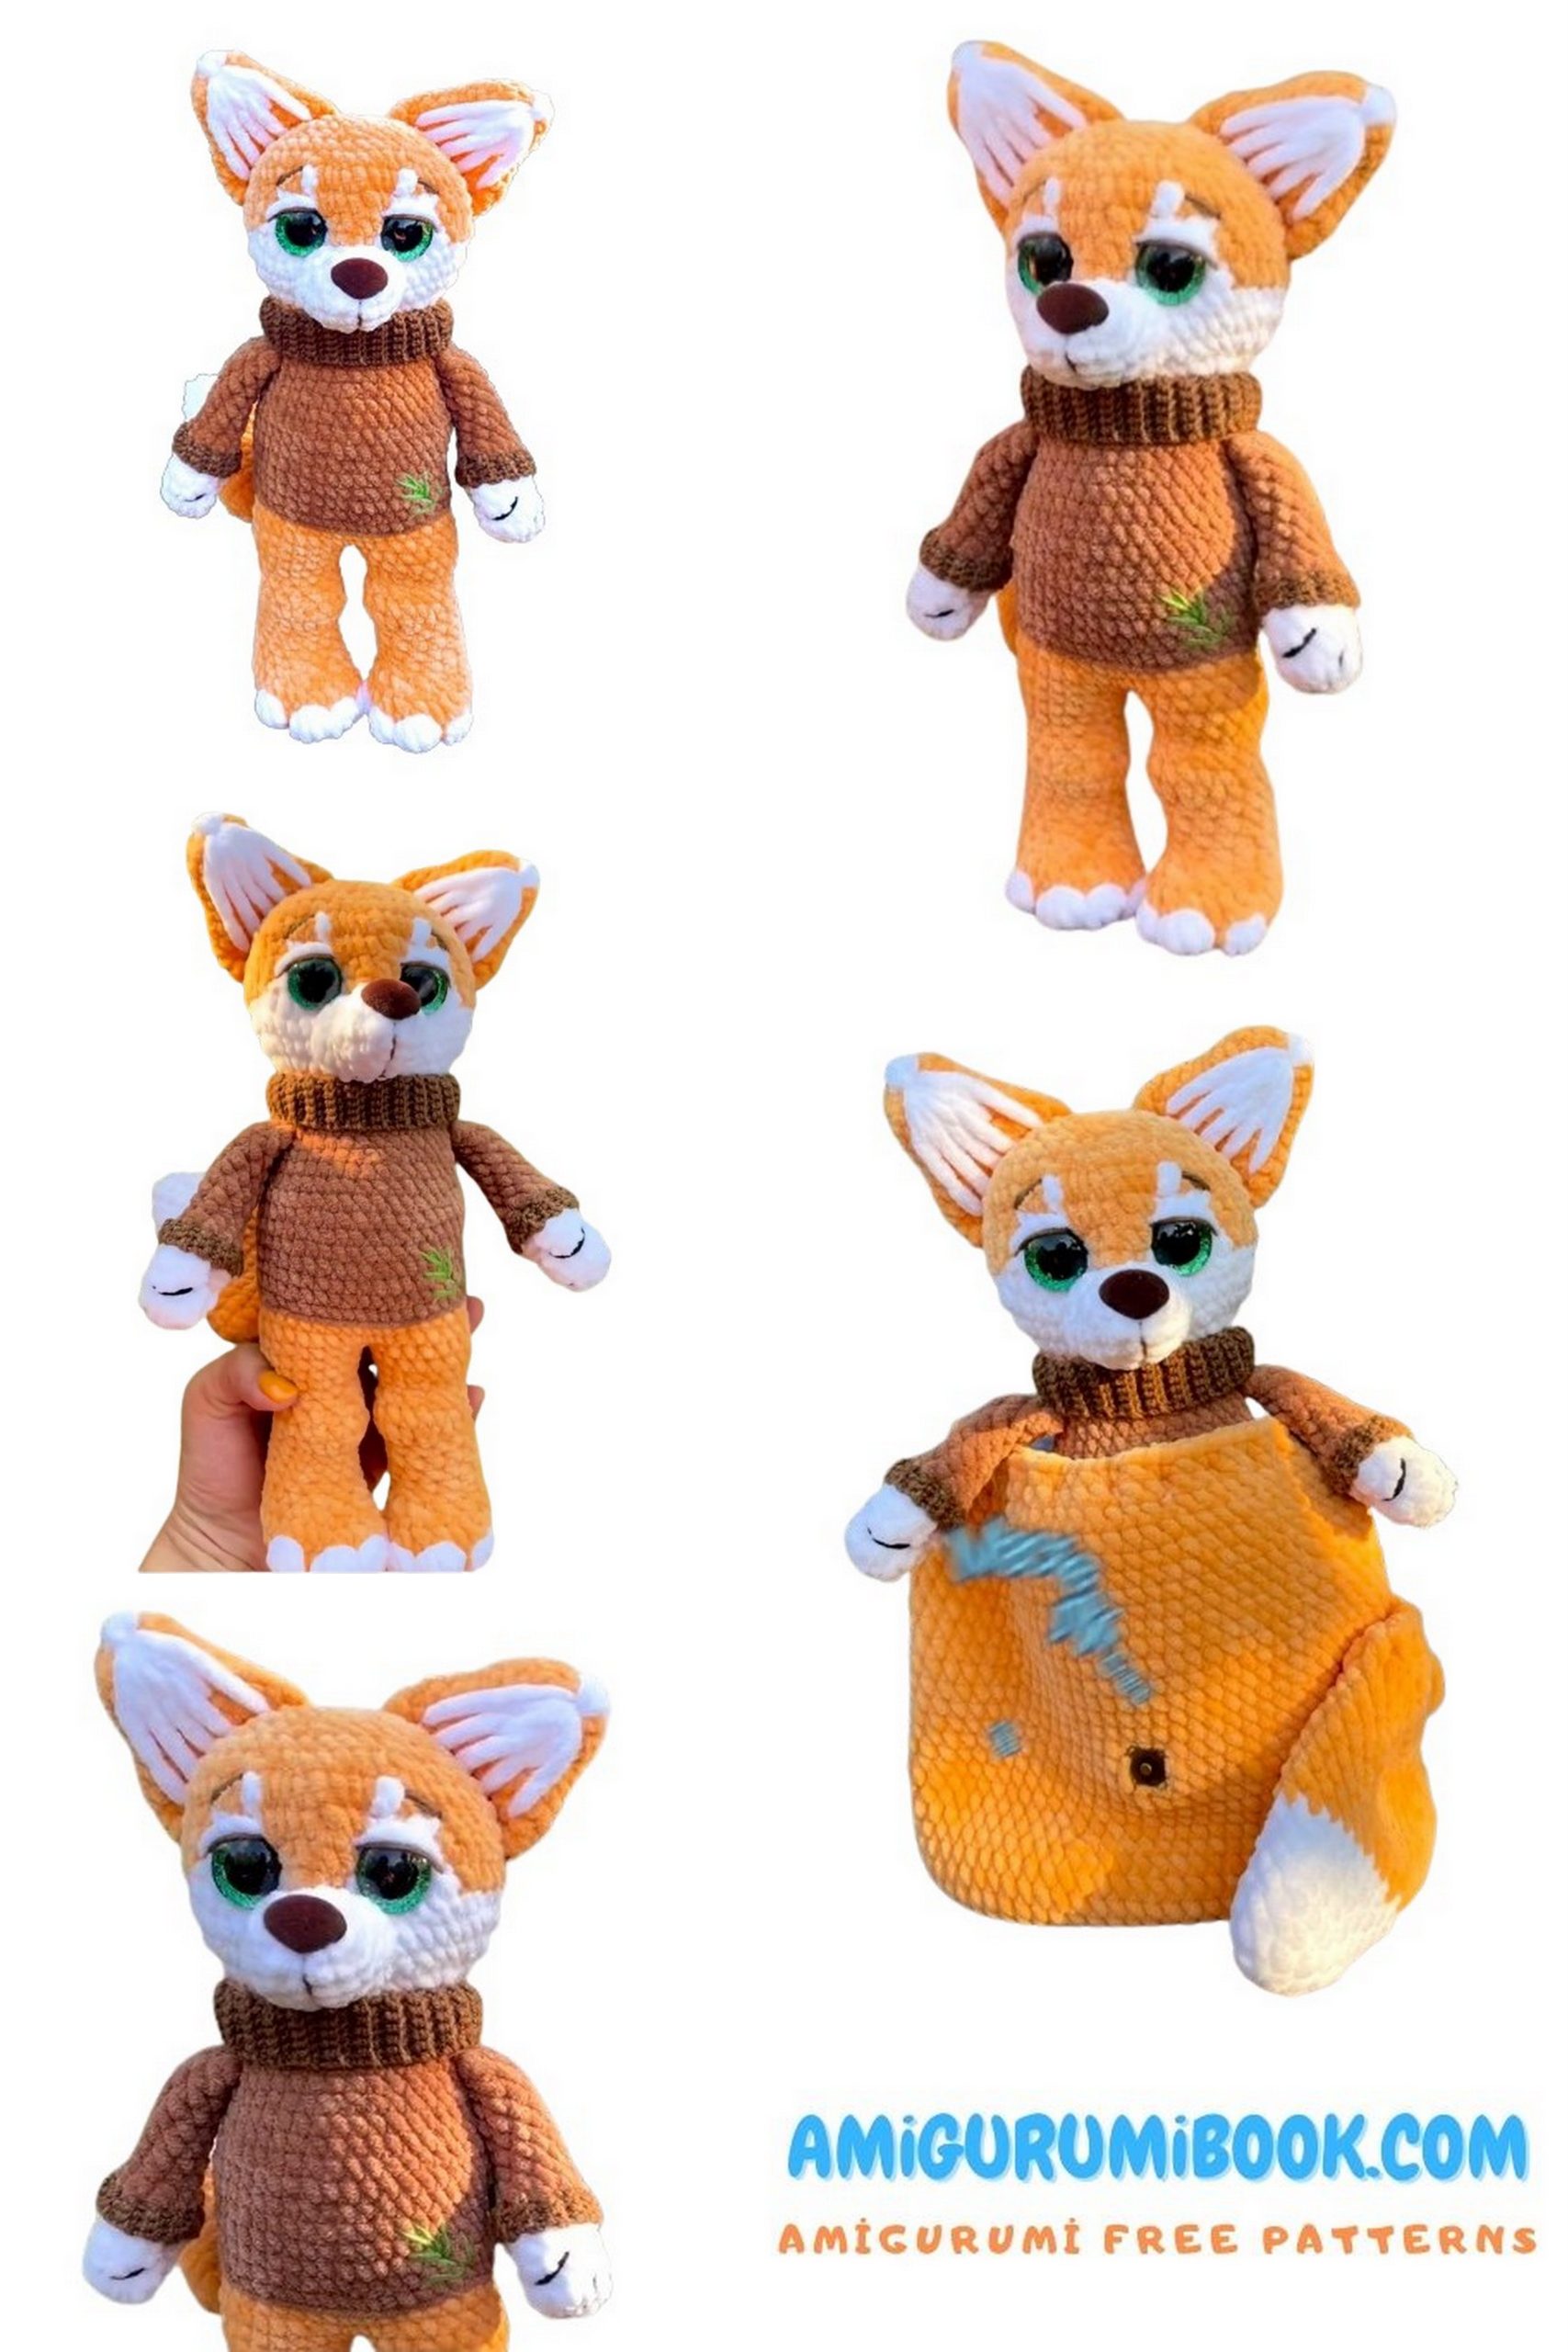
Begin by gathering the necessary materials: colorful yarn, an appropriately sized crochet hook, stuffing material, and toy eyes. Then, shape your Fox Tom by following the steps in the pattern. Each step is accompanied by detailed photos and explanations, ensuring a successful completion for everyone.
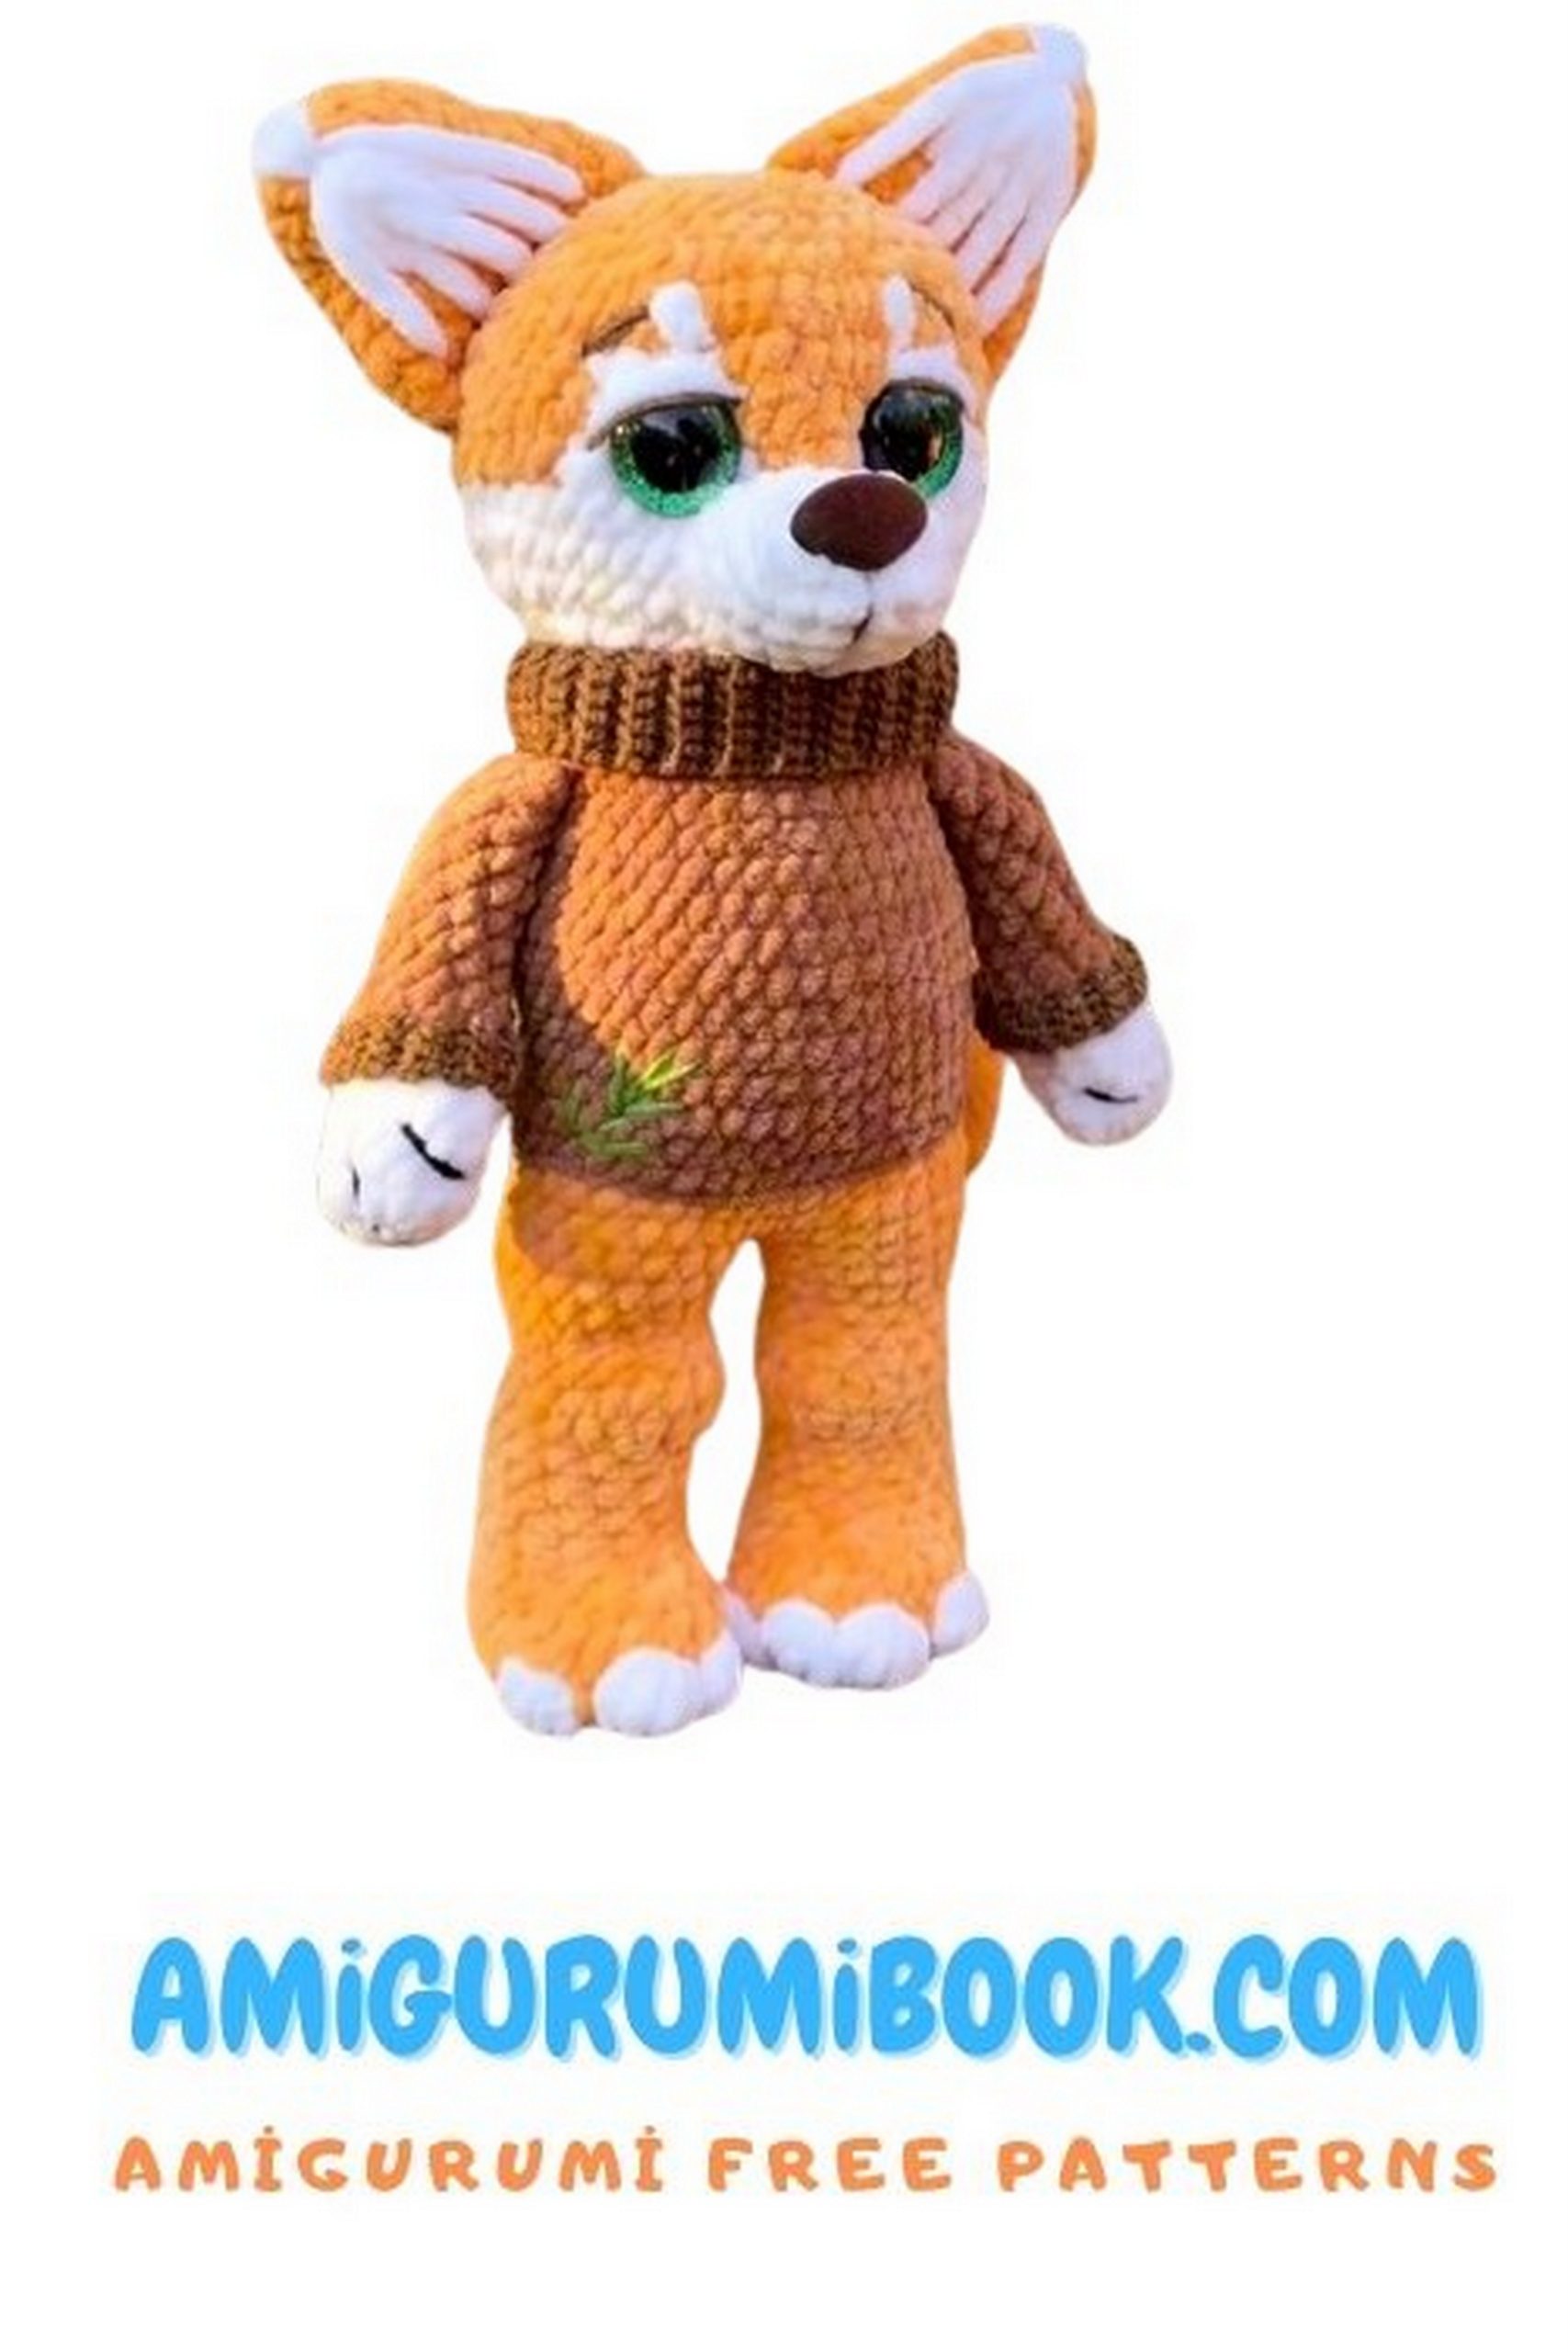
Fox Tom Amigurumi, with its charming details and colorful design, is sure to become a favorite toy among both children and adults. Additionally, it can serve as a fantastic handmade gift or home decor item.
Not only does this pattern offer an opportunity to enhance your crafting skills, but it also provides a fun and rewarding experience, resulting in a Fox Tom filled with handmade love. Start crafting now and immerse yourself in the enchanting world of amigurumi!
I hope you liked this wonderful amigurumi fox pattern. I think you should also see his friend amigurumi tiger.
If you want to access 1000+ free amigurumi patterns, you can download our application from this link!
NECESSARY TOOLS AND MATERIALS:
Yarn:
a)Half a skein of plush yarn in the main color. I used Wolans Yarns Bunny Baby 964 in orange.
b)Half a skein of plush yarn for the sweater. I used Wolans Yarns Bunny Baby 973 in brown.
c)Half a skein of white plush yarn. I used Wolans Yarns Bunny Baby 062.
YarnArt Jeans or similar in brown and black for facial features. I used YarnArt Jeans #70.
Stuffing – holofiber.
Crochet hook #3.0-4.0. #2.0 for cotton yarn.
Trapezoidal safety eyes with a diameter of 18-20mm.
Safety nose with a diameter of 12mm.
Needle with a large eye for sewing and finishing.
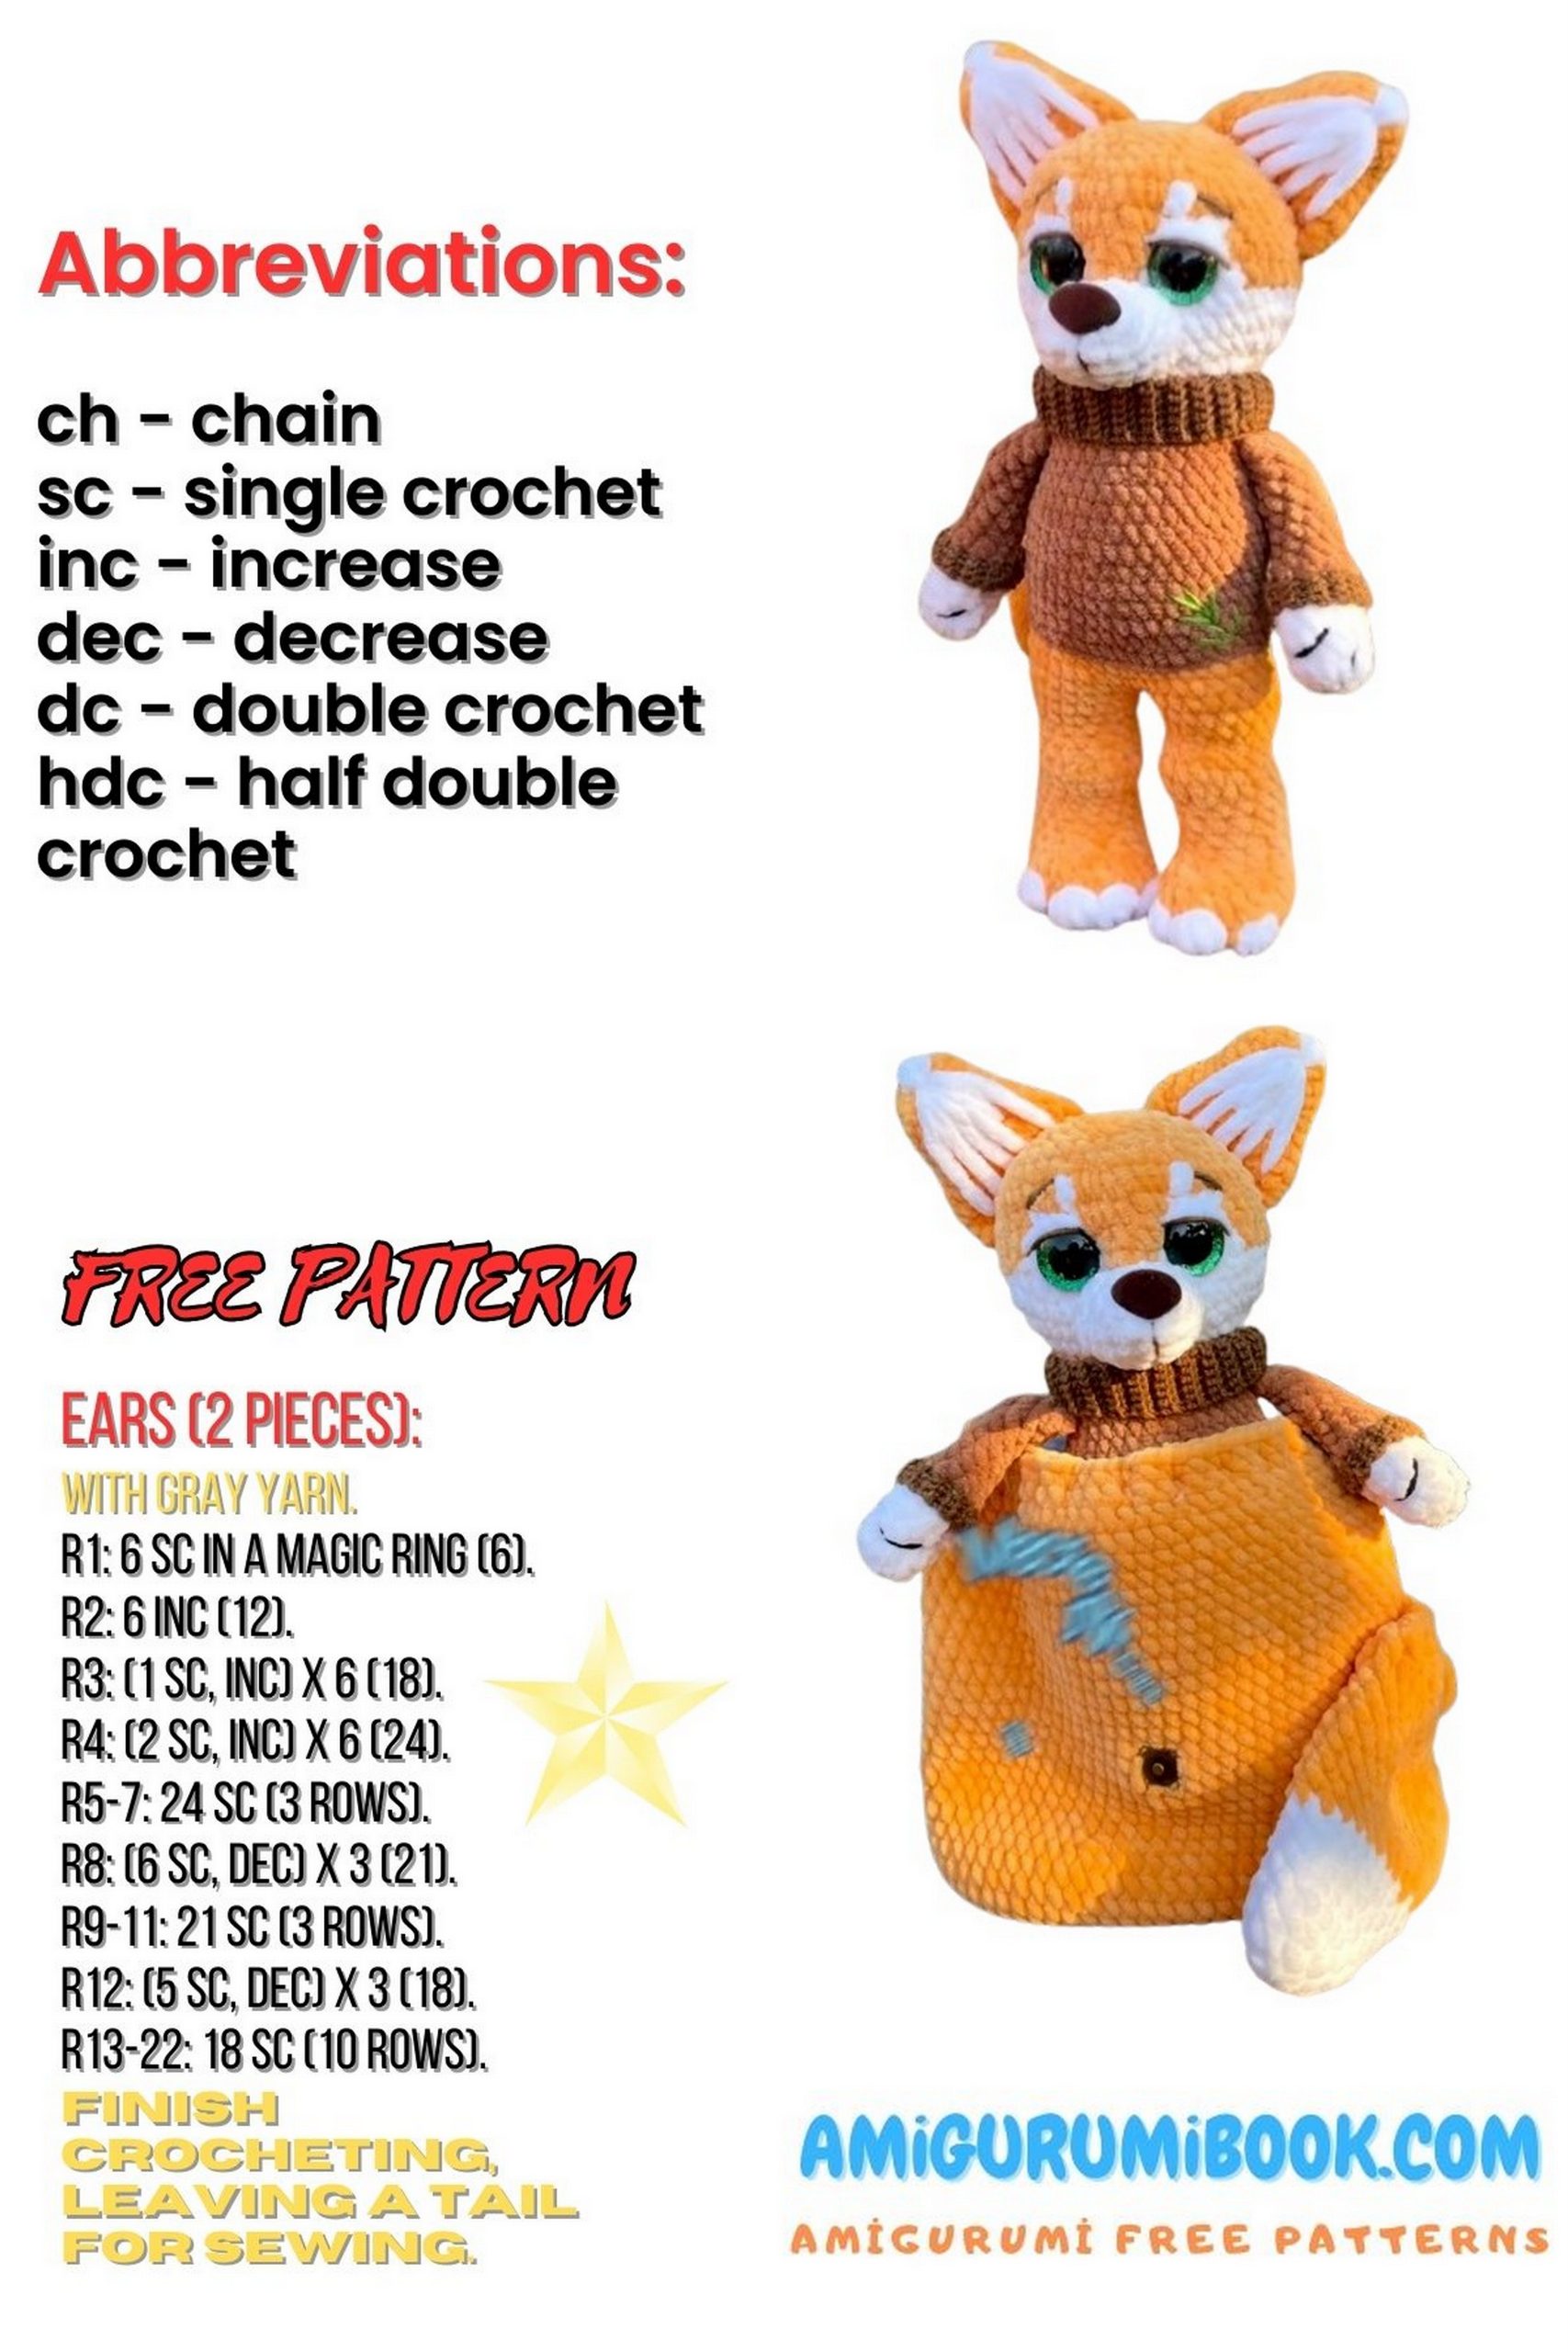
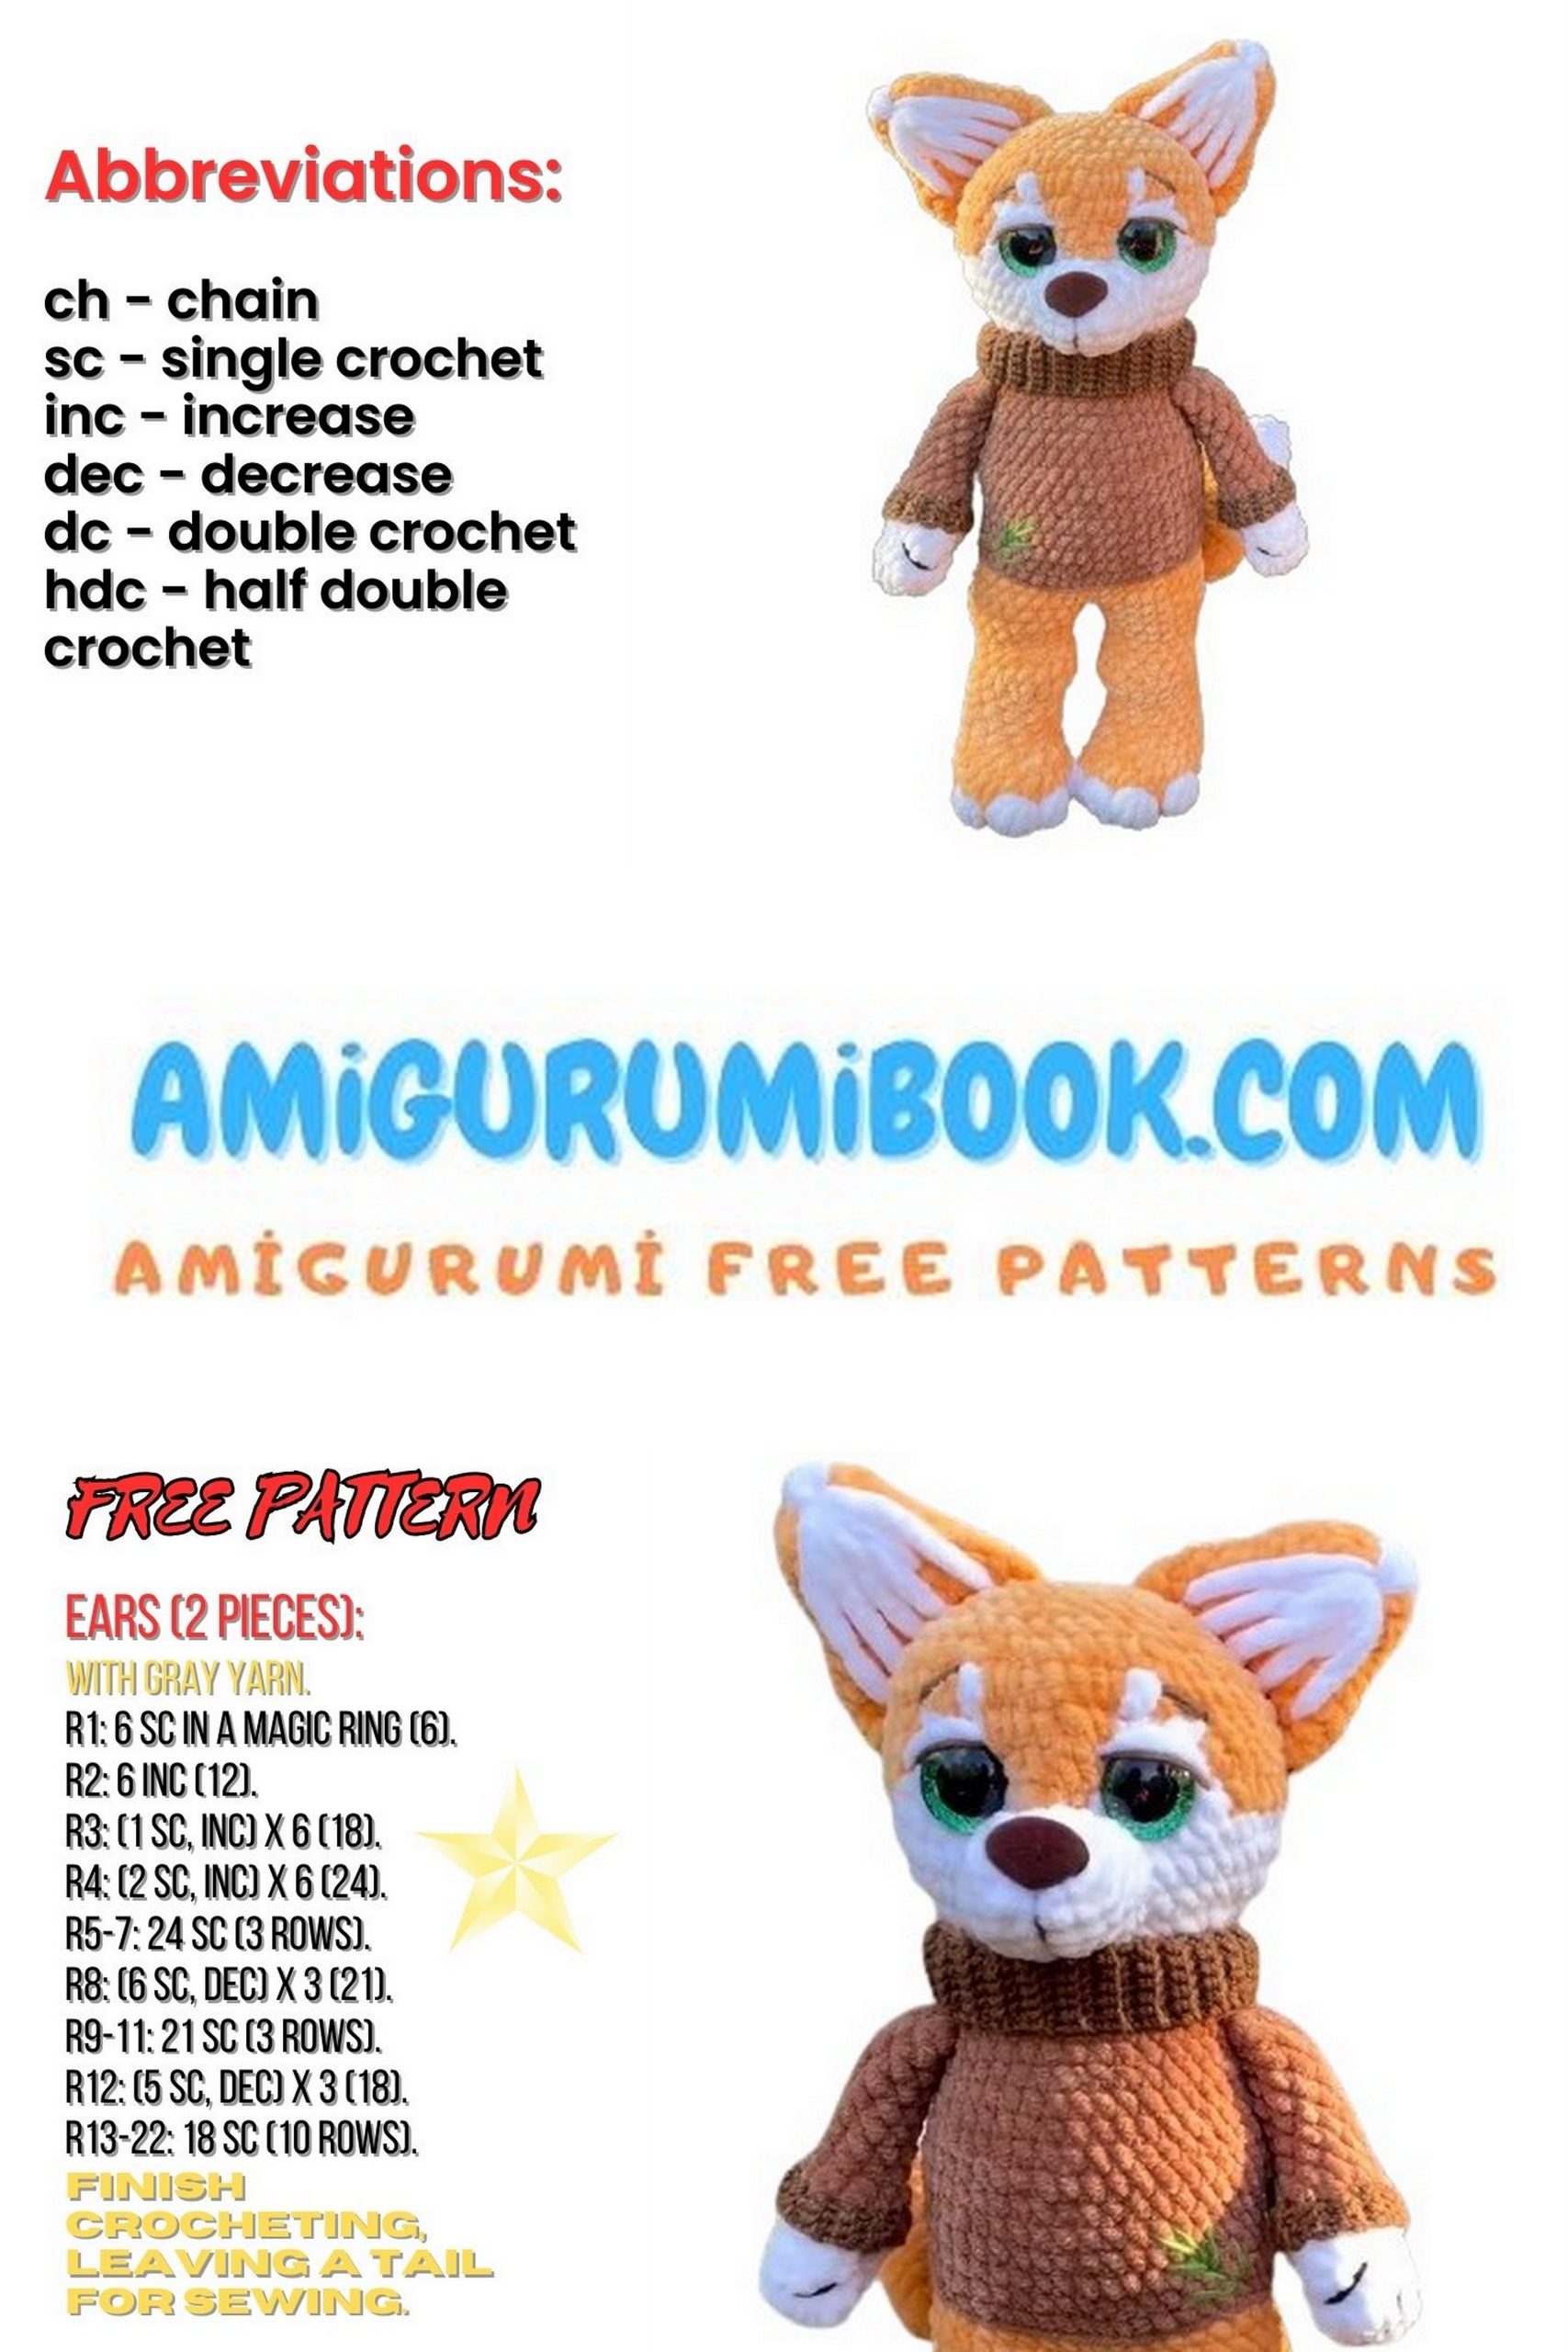
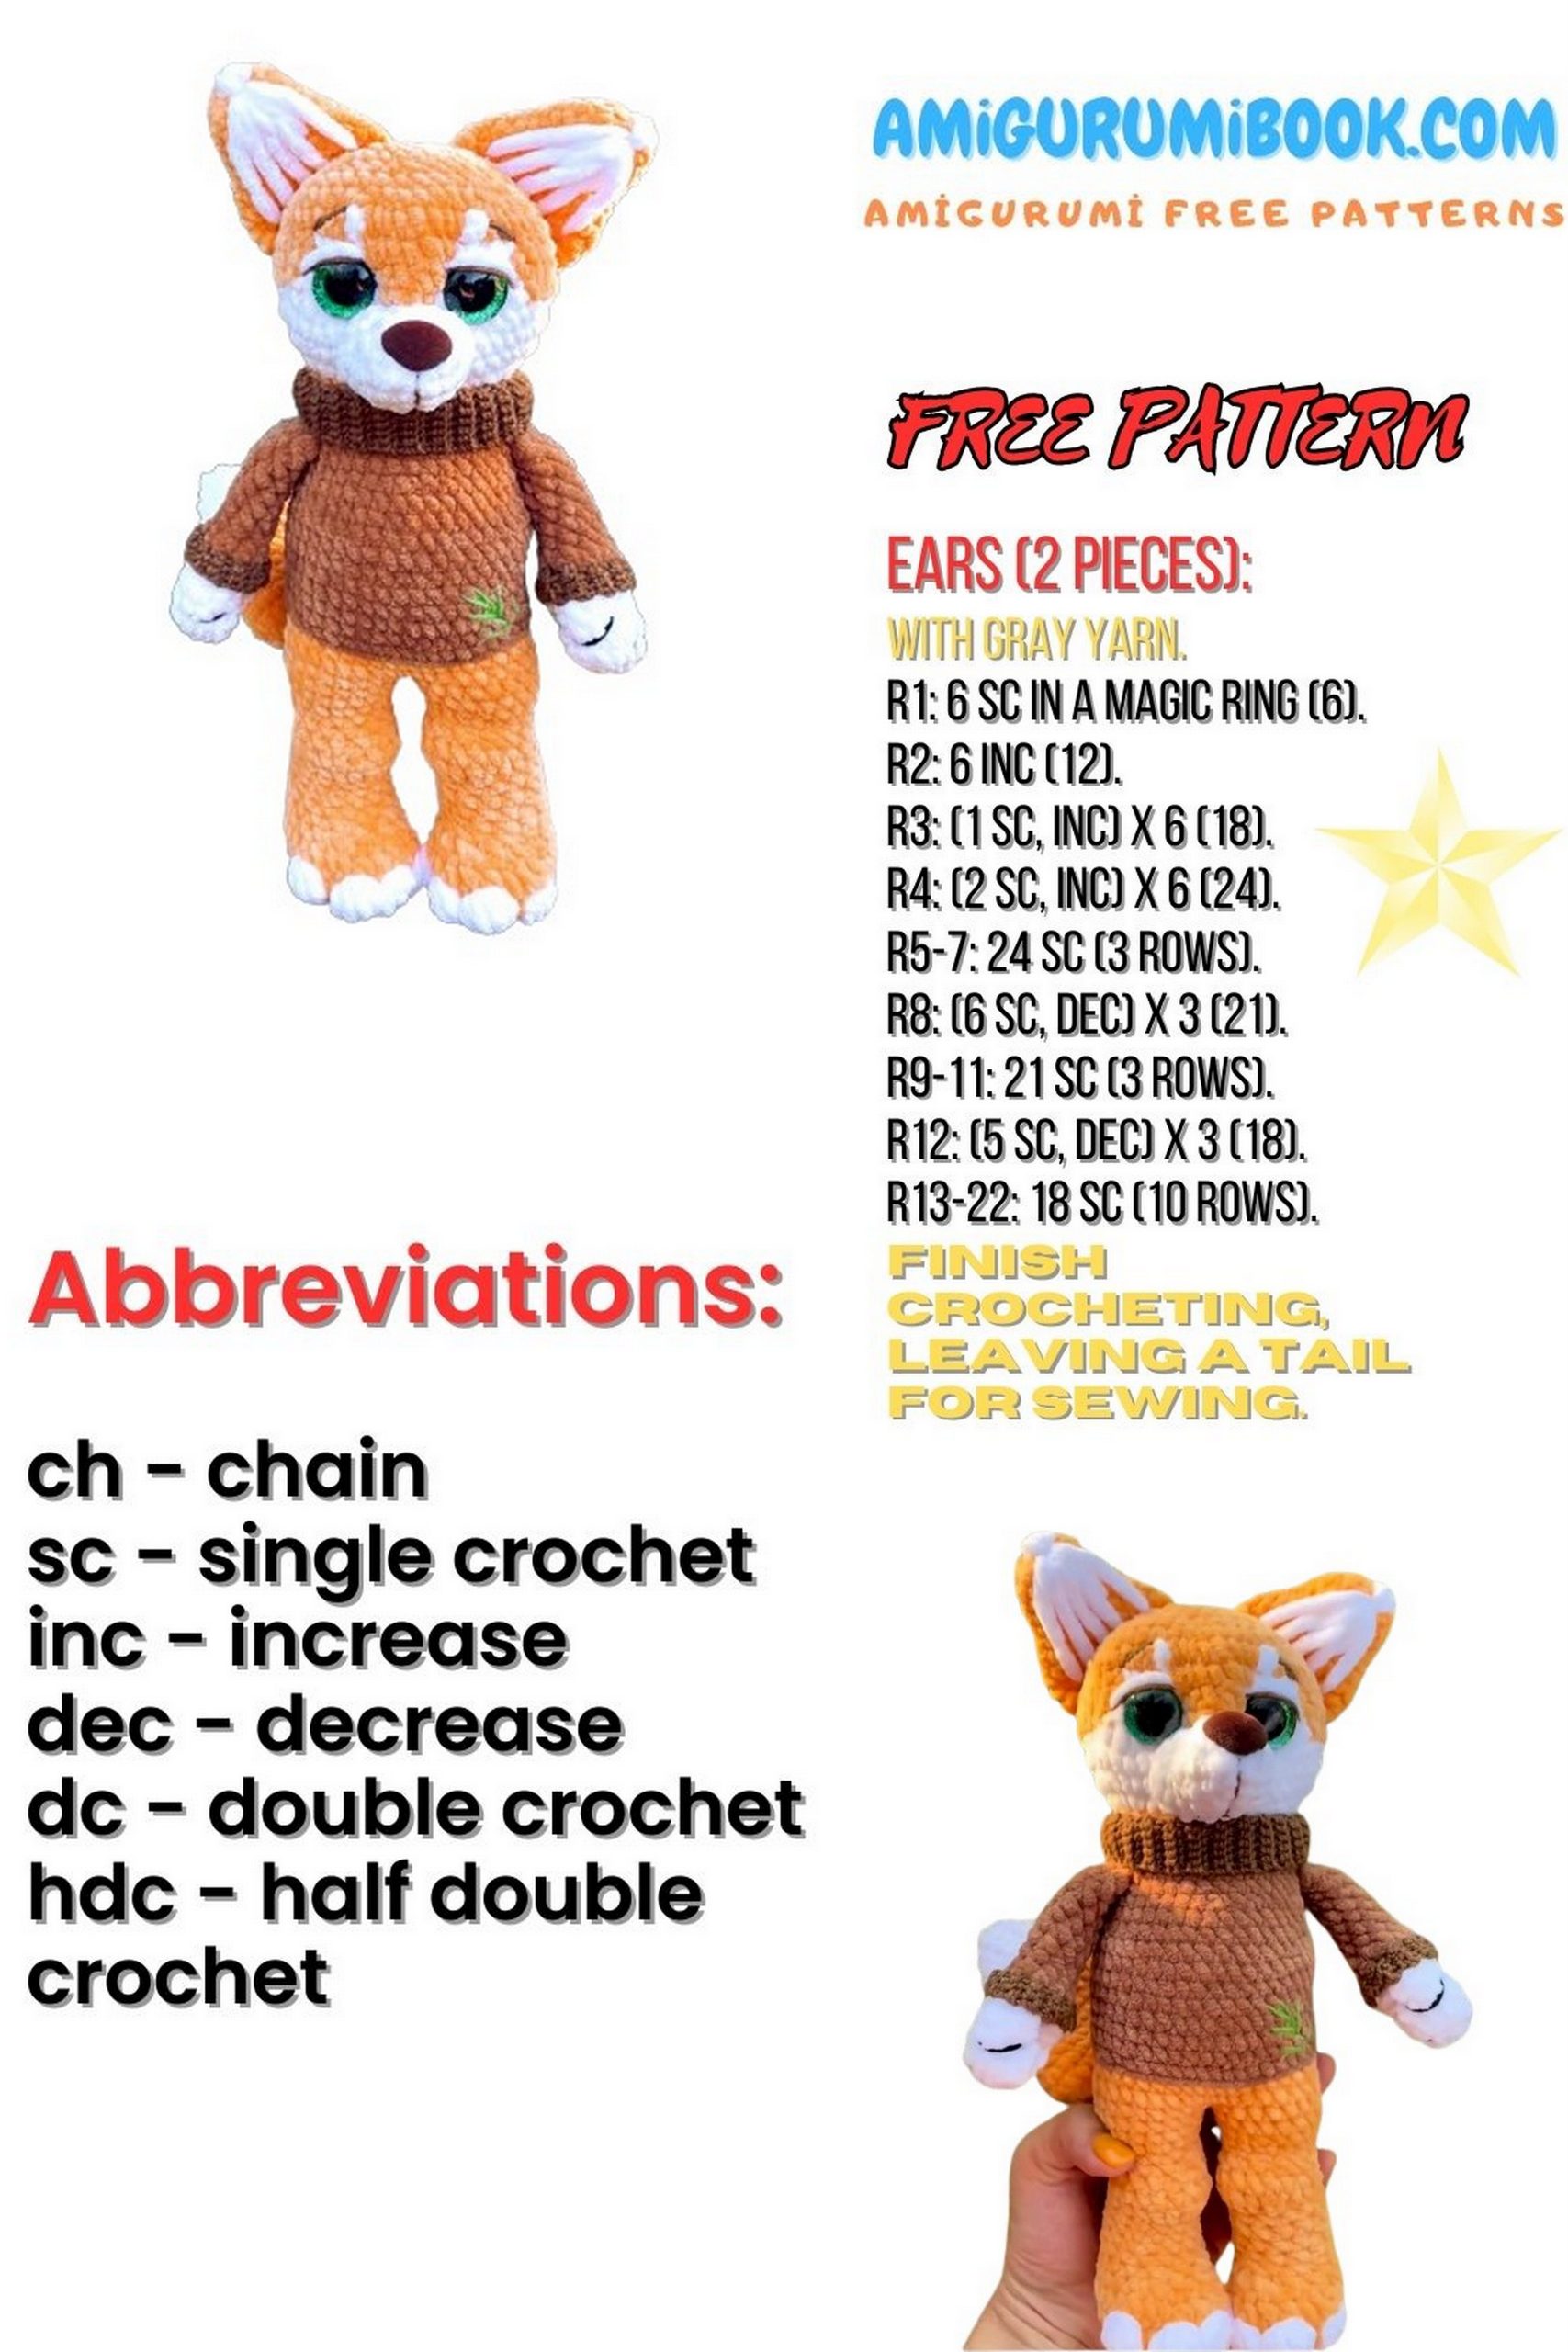
ABBREVIATIONS:
MR – magic ring
sc – single crochet
inc – increase (2 single crochets in one stitch)
dec – decrease (single crochet two stitches together through the front loops)
dec3 – decrease of 3 single crochets worked together
ch – chain
hdc – half double crochet
dc – double crochet
sl st – slip stitch
sk – skip
puff – puff stitch (3 hdc in one stitch)
*n – repeat n times
One small addition: try to crochet paired parts, such as paws and ears, on the same day. Because sometimes, even for one master, under the same conditions, paws or ears may differ from each other.
Let’s start! EVEN LOOPS!
PATTERN
Upper paws 2 pcs.: Fox Tom Amigurumi
Start crocheting with white yarn.
1 Row: 6 sc in MR.
2 Row: 6 inc = 12 sc.
3 Row: 1 sc, dec repeat 5 times = 10 sc.
Change color to brown (sweater). I only crochet the white part of the paw.
6 Row: 8 hdc, 2 dec = 10 hdc.
7 Row: 1 sc, dec repeat 5 times = 10 sc.
Fold it over the edges and crochet 5 sc. Secure and cut the thread.
We will attach the paws later. If desired, you can embroider stitches on the paws using YarnArt Jeans in black.
Lower paws and body: Fox Tom Amigurumi
Start crocheting with white yarn. Don’t forget to stuff our legs.
1 Row: 4 ch, insert the hook into the second chain and continue according to the pattern.
2 Row: inc, 1 sc, 5 sc in the last chain, 1 sc, inc = 12 ch (including the first ch).
In the last increase, change the color to the main color (orange). Secure the white thread but don’t cut it. We will use it to crochet claws.
3 Row: 1 sc, 2 inc, 1 sc, 2 inc, 1 sc, 2 inc, 1 sc, 2 inc = 20 ch.
4 Row: inc, 5 sc, (change color to white in the last sc and crochet a puff stitch in the next loop, closing it with the main color – see photo/video), 2 sc, puff stitch, 1 sc, puff stitch, 2 sc, puff stitch, 5 sc = 21 ch.
At this stage, fix the white thread and cut it – it won’t be needed anymore.
5 Row: dec, 19 sc = 20 ch.
6 Row: 6 sc, 2 dec, 1 sc, 2 dec, 5 sc = 16 ch.
7 Row: 1 sc, inc repeat 4 times = 20 ch.
8-10 Rows: 20 sc.
11 Row: dec, 5 sc, 2 inc in hdc, 5 sc, dec = 16 ch.
12 Row: 16 sc.
13 Row: 6 sc, 2 dec, 6 sc = 14 ch.
14 Row: 14 sc.
15 Row: (1 sc, inc) repeat 7 times = 21 ch.
16 Row: 21 sc.
Attention
Secure and cut the thread on the first leg. On the second leg, do not cut the thread. Join the legs together. I place the legs slightly inward so that our fox has a slightly “pigeon-toed” look.
17 Row: Crochet 13 sc along one leg, make 3 ch, join the second leg and crochet 20 sc along it, make a decrease, capturing one loop of the leg and one chain stitch, 1 sc through the “bridge” chain stitch, and again a decrease from the “bridge” stitch and one loop on the leg, 7 sc along the leg.
18 Row: 13 sc, dec3, 20 sc, dec3, 7 sc = 42 ch.
19 Row: 25 sc, (1 sc, inc) repeat 3 times, 5 sc, (inc, 1 sc) repeat 3 times = 48 ch.
Close all stitches of the next row (20th) with brown yarn to achieve a straight line for the sweater. Continue crocheting with brown yarn.
20 Row: 26-48 sc (7 rows).
Before starting the next row, align the marker in the center of the heel. If necessary, make offset loops.
27 Row: 10 sc, 2 dec, 20 sc, 2 dec, 10 sc = 44 ch.
28 Row: 10 sc, dec, 20 sc, dec, 10 sc = 42 ch.
29 Row: 10 sc, dec, 18 sc, dec, 10 sc = 40 ch.
30 Row: 40 sc.
31 Row: (8 sc, dec) repeat 4 times = 36 ch.
32 Row: 36 sc.
Attention
In the next row, crochet the upper paws of the Fox. Between the paws, crochet 13 sc in front and back. Align the marker in the center of the back and continue crocheting.
33 Row: 6 sc, crochet the paw in 5 sc, 13 sc, crochet the paw in 5 sc, 7 sc = 36 ch.
34 Row: (4 sc, dec) repeat 6 times = 30 ch.
Crochet the next row through the back loops with orange yarn. Secure and cut the sweater yarn. It won’t be needed anymore.
35 Row: 30 sc.
Start crocheting the head.
There will be frequent color changes, orange/white. For convenience, I make color highlights in the text. Be attentive and keep an eye on the marker. It should always remain in the center of the back. If necessary, crochet offset loops.
Attach white yarn and continue crocheting.
36 Row: 30 sc.
37 Row: 4 sc, 6 inc, 9 sc, 6 inc, 5 sc = 42 ch.
38 Row: 8 sc, 4 inc, 17 sc, 4 inc, 9 sc = 50 ch.
39 Row: 50 sc.
In the next row, close part of the stitches with orange yarn. This is necessary for a beautiful transition of colors on the muzzle.
40 Row: 17 sc – close each one with orange yarn, 6 sc, 4 sc – close each one with orange yarn, 6 sc, 17 sc – close each one with orange yarn = 50 sc.
41 Row: 16 sc, inc, dec, 3 sc, 1 sc – close with orange, 4 sc, 4 sc, dec – close with orange, inc, 16 sc = 50 ch.
42 Row: 18 sc, 1 sc – close with orange, 4 sc, inc, 2 sc, inc, 4 sc, 1 sc – close with orange, 18 sc = 52 ch.
43 Row: 19 sc, 2 dec – close with orange, inc, 4 sc, inc, 2 dec – close with orange, 19 sc = 48 ch.
Secure and cut the white thread. It won’t be needed anymore. Continue crocheting with orange yarn.
44 Row: (6 sc, dec) repeat 6 times = 42 ch.
45 Row: (5 sc, dec) repeat 6 times = 36 ch.
Insert the eyes at this stage, between rows 41 and 42.
46 Row: (4 sc, dec) repeat 6 times = 30 ch.
47 Row: (3 sc, dec) repeat 6 times = 24 ch.
48 Row: (2 sc, dec) repeat 6 times = 18 ch.
49 Row: (1 sc, dec) repeat 6 times = 12 ch.
50 Row: 6 dec.
Finish crocheting. Secure and cut the thread.
Muzzle: Fox Tom Amigurumi
Crochet with white yarn.
1 Row: 6 sc in MR.
2 Row: 6 inc = 12 sc.
3 Row: 1 sc, inc repeat 4 times = 16 sc.
5 Row: 5 inc, 7 sc = 17 sc.
Secure the thread, leaving a long tail for sewing.
Insert the nose between rows 2 and 3. The increases of the 5th row are located at the bottom.
Embroider the mouth.
Sew the muzzle close to the eyes, the lower part at the color junction. Don’t forget to stuff the muzzle while sewing.
Decorate the eyes, embroider eyebrows.
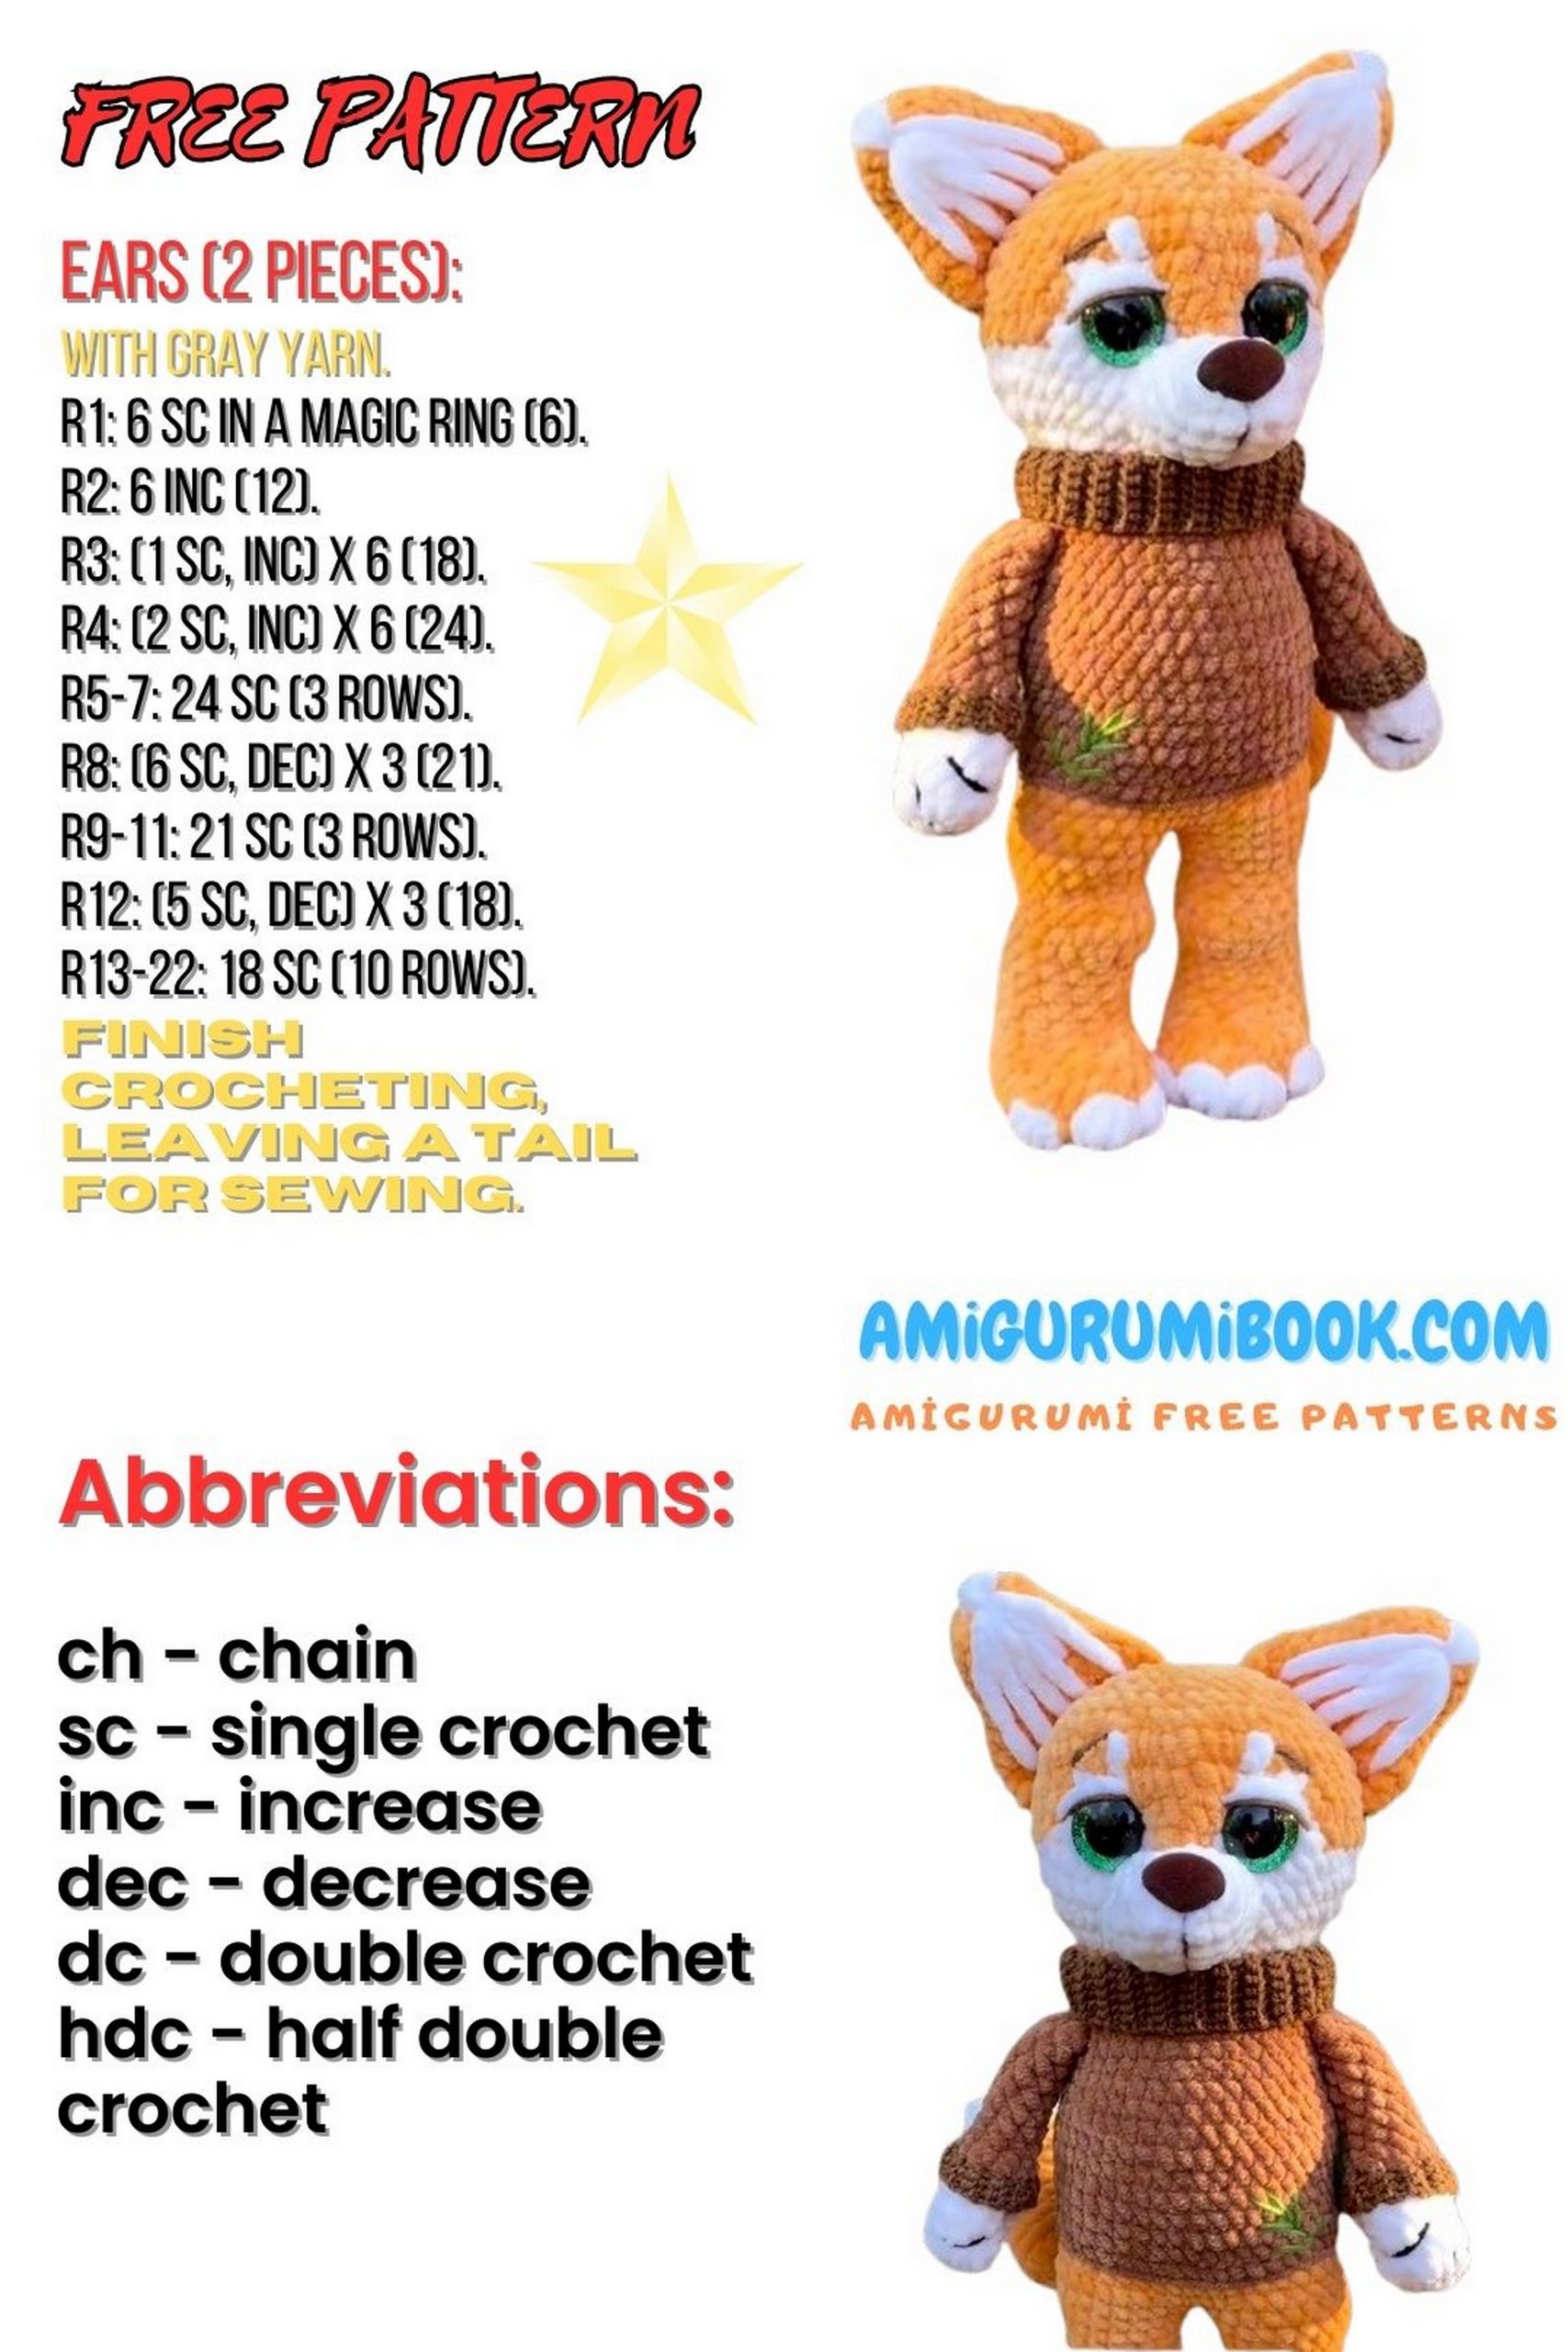
Ears (2 pcs): Fox Tom Amigurumi
1 Row: 6 sc in MR.
2 Row: (2 sc, inc) repeat 2 times = 8 sc.
3 Row: (3 sc, inc) repeat 2 times = 10 sc.
4 Row: (4 sc, inc) repeat 2 times = 12 sc.
5 Row: (5 sc, inc) repeat 2 times = 14 sc.
6 Row: (6 sc, inc) repeat 2 times = 16 sc.
7 Row: (7 sc, inc) repeat 2 times = 18 sc.
8 Row: (5 sc, inc) repeat 3 times = 21 sc.
9 Row: (6 sc, inc) repeat 3 times = 24 sc.
Fold in half and crochet 12 sc through both sides. Secure the thread, cut it, leaving a tail for sewing.
For decoration, you can make embroidery with white yarn on the ears.
Tail: Fox Tom Amigurumi
Start with white yarn.
1 Row: 6 sc in MR.
2 Row: (1 sc, inc) repeat 3 times = 9 sc.
3 Row: (2 sc, inc) repeat 3 times = 12 sc.
4 Row: (1 sc, inc) repeat 6 times = 18 sc.
5 Row: 18 sc.
6 Row: 18 sc, change color to orange in the last stitch.
7 Row: 18 sc.
8 Row: (3 sc, inc) repeat 6 times = 24 sc.
9 Row: 2 inc, 9 sc, 3 inc, 9 sc, inc = 30 sc.
10 Row: 30 sc.
11 Row: 2 inc, 12 sc, 3 inc, 12 sc, inc = 36 sc.
12 Row: 36 sc.
13 Row: dec, 12 sc, 3 dec, 12 sc, 2 dec = 30 sc.
14 Row: dec, 9 sc, 3 dec, 9 sc, 2 dec = 24 sc.
15 Row: dec, 6 sc, 3 dec, 6 sc, 2 dec = 18 sc.
16 Row: (dec, 7 sc) repeat 2 times = 16 sc.
17 Row: 16 sc.
18 Row: (dec, 6 sc) repeat 2 times = 14 sc.
19 Row: (dec, 5 sc) repeat 2 times = 12 sc.
Do not stuff. Fold in half and crochet 6 sc through both sides. Secure the thread, cut it, leaving a tail for sewing. I sew the tail diagonally from behind under the sweater.
Collar and sweater sleeves:
I crochet with a size 2 hook from YarnArt Jeans brown yarn in ribbing through the back loops. I crochet a strip of the required length (checking as I go) and sew it with a needle. The width of my ribbing is 12mm for the neckline and 5mm for the sleeves.