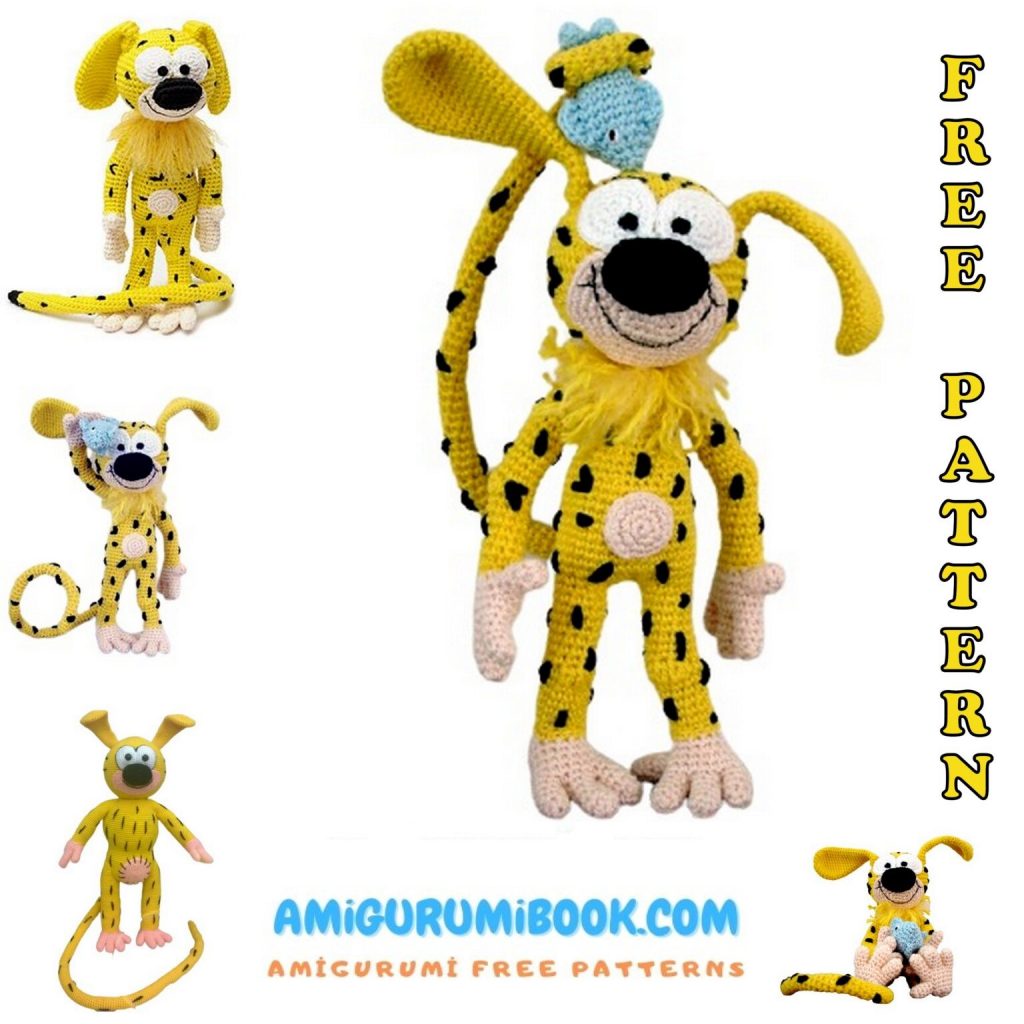
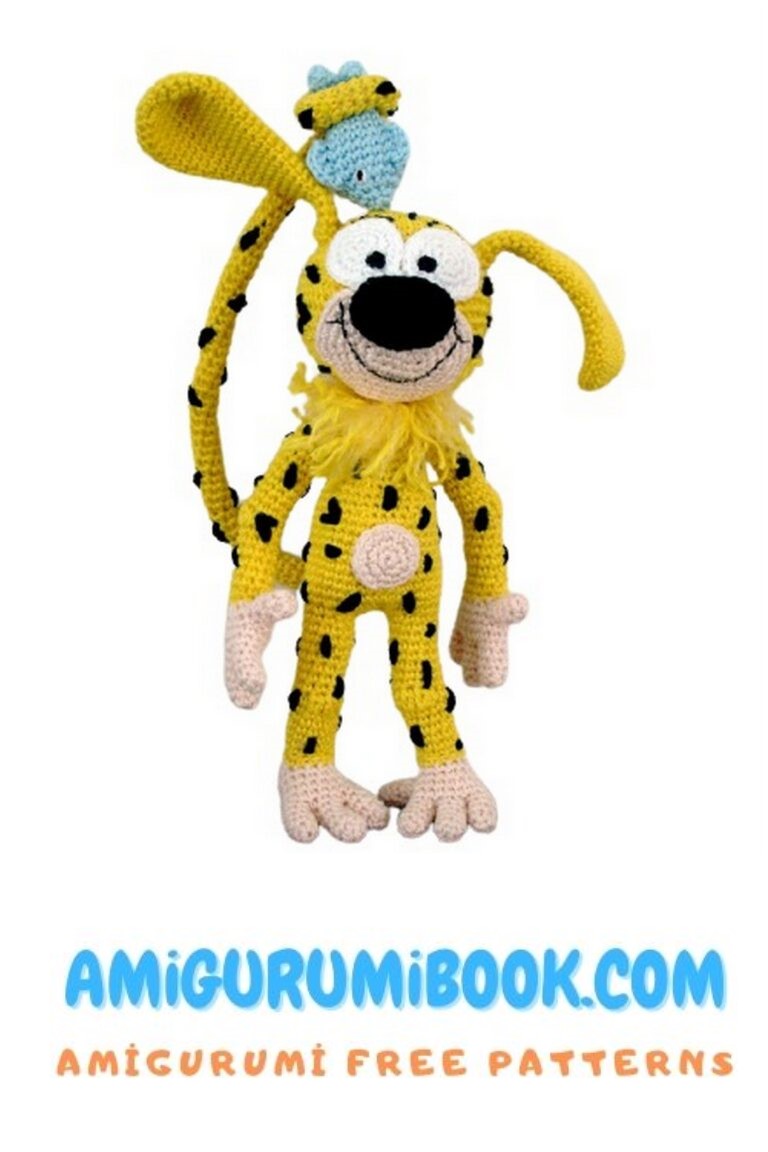
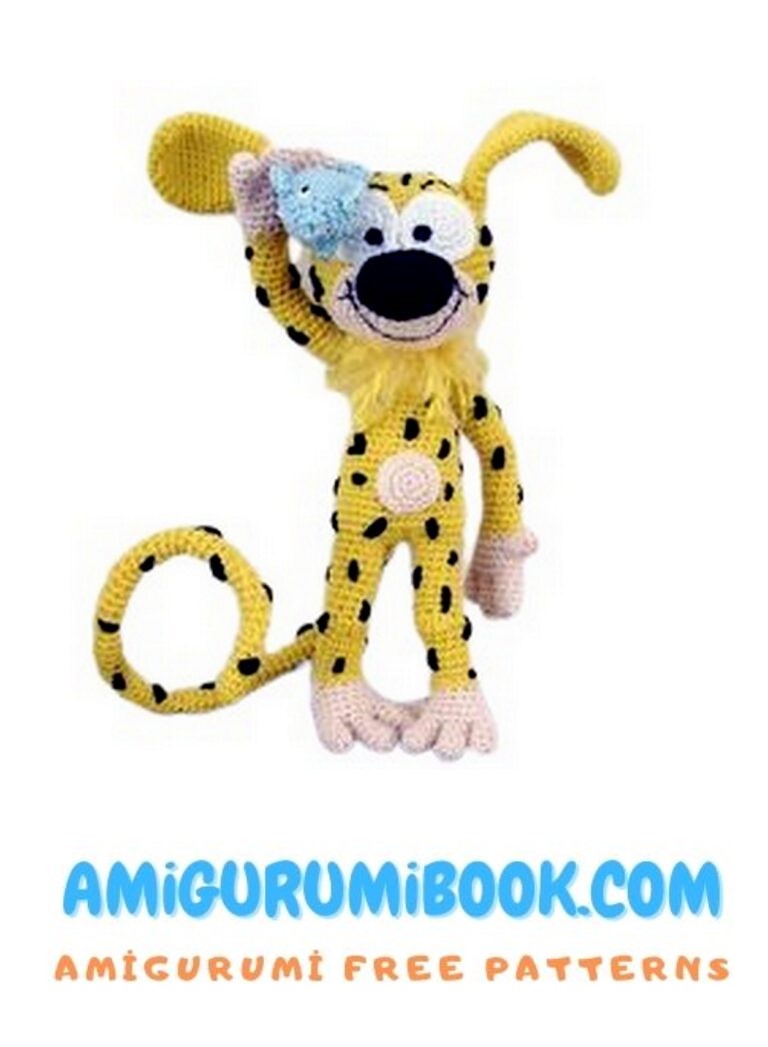
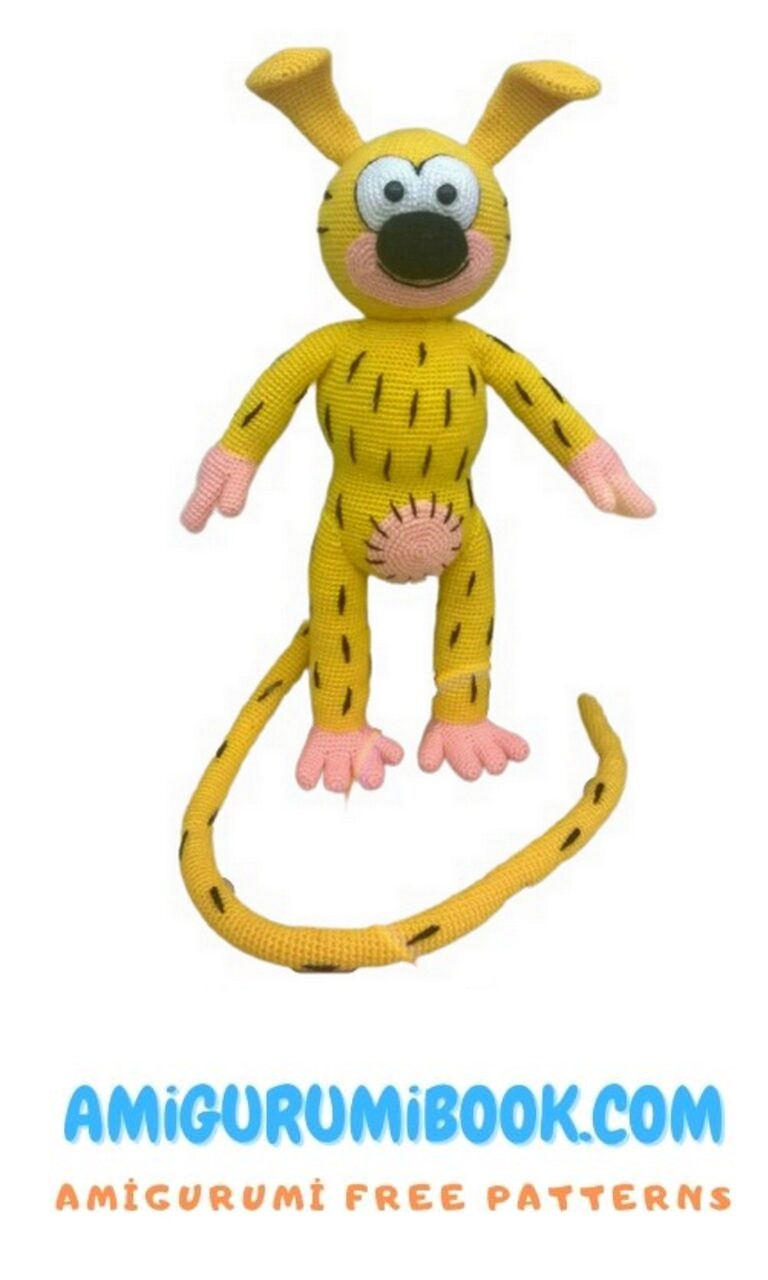
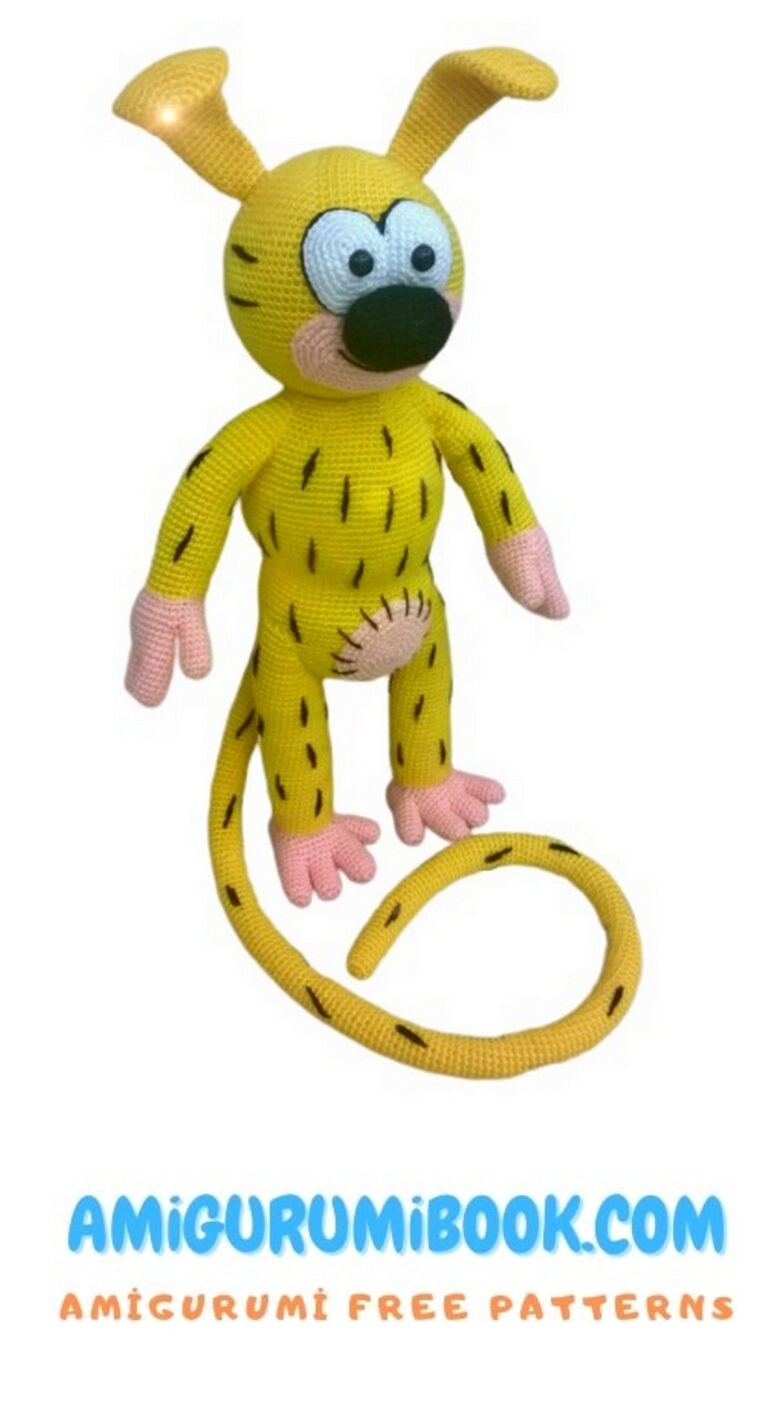
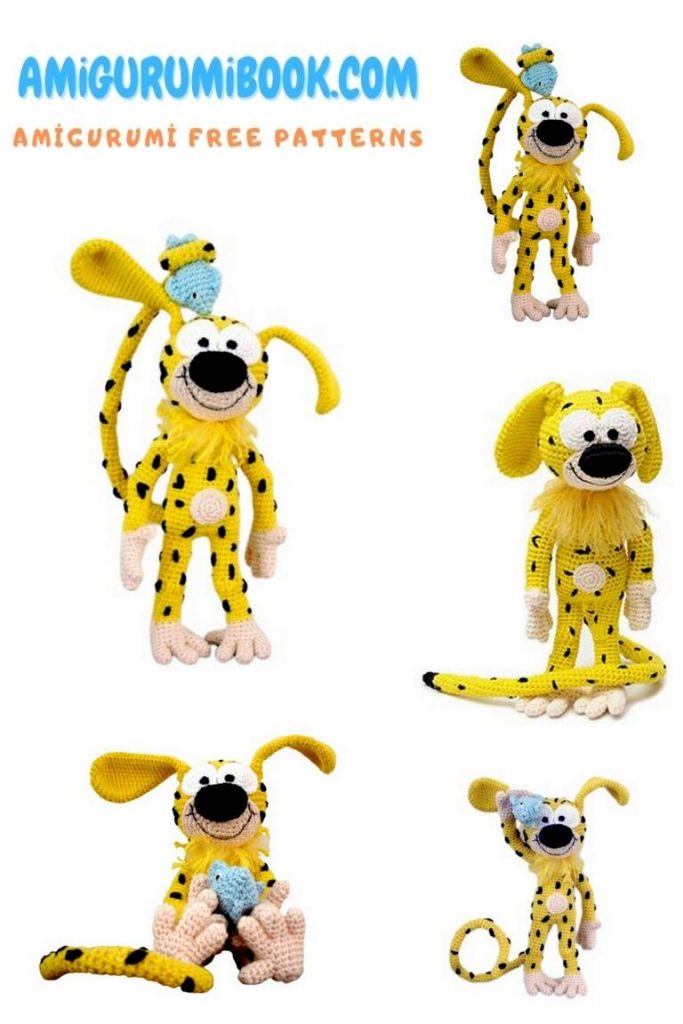
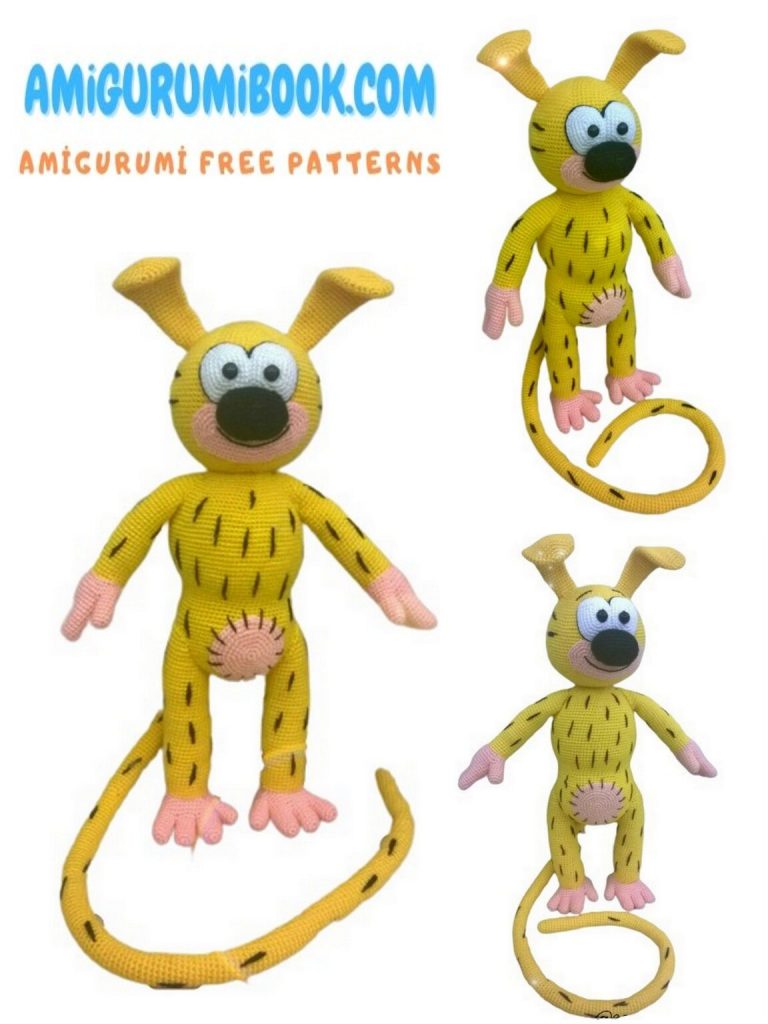
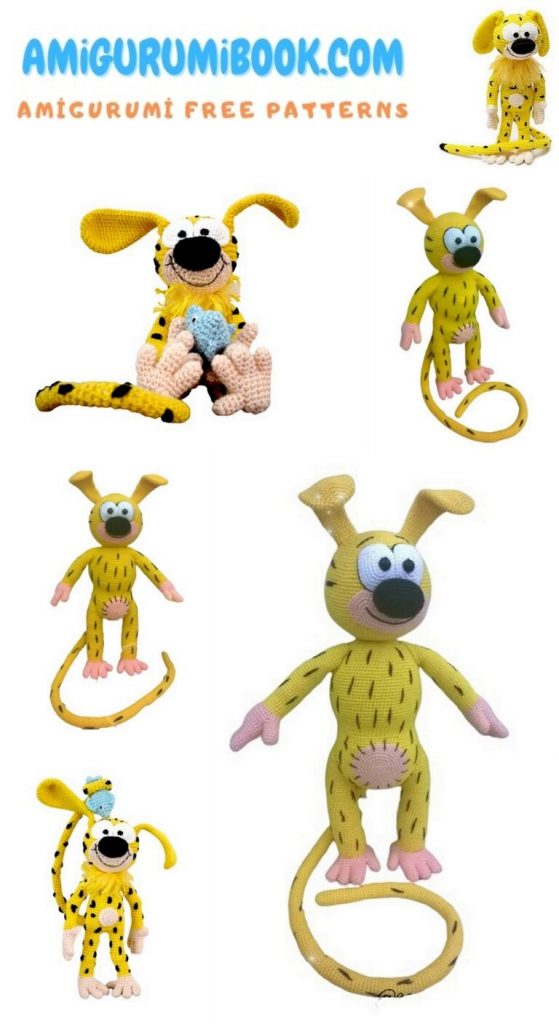
Looking for a wild and whimsical crochet project? This Marsupilami Amigurumi Free Pattern is just what you need! Inspired by the beloved comic and cartoon character, this amigurumi Marsupilami is full of personality with his long tail, spotted fur, and big bright eyes. Perfect for fans of retro cartoons or unique amigurumi designs, this free pattern is a fun and creative way to bring a classic character to life. Whether you’re new to crochet or a seasoned pro, you’ll have a blast making your very own Marsupilami!
If you want to access 1000+ free amigurumi patterns, you can download our application from this link!
Materials needed
Matching yarn and hook accordingly you will need crochet hook (I used 2,5 mm and DK-medium weigh cotton yarn)
yarn in:
– yellow,
– light peach (beige),
– little bits of white and black (for eyes and nose)
Embroidery & darning needles
Stuffing
Abbreviations:
Ch – chain
St(s) – stitch(es)
Sc – single crochet
Inc – increasing stitch (two sc in one stitch)
Dec – decreasing stitch (two stc stitched together, I used invisible decrease)
** – repeat what mentioned in between (followed by x number of repeats)
R – round
Work is done in continuous rounds (spiral work). Use marker for easier round
Following

Amigurumi Marsupilami Head
yellow yarn Ch6
R1 s c4 3s c in one s t , work a round chain, sc3, 2s c in one s t (12 s t s )
R2 *inc1, s c1* x6 (18 s t s )
R3 *inc1, s c2* x6 (24 s t s )
R4 *inc1, s c3* x6 (30 s t s )
R5 *inc1, s c4* x6 (36 s t s )
R6 *inc1, s c5* x6 (42 s t s )
R7 *inc1, s c6* x6 (48 s t s )
R8 *inc1, s c7* x6 (54 s t s )
R9 s c54
R10 *inc1, s c8* x6 (60 s t s )
R11 – R14 s c60
R15 *de c1, s c8* x6 (54 s t s )
R16 s c54
R17 *de c1, s c7* x6 (48 s t s )
R18 *de c1, s c6* x6 (42 s t s )
R19 *de c1, s c5* x6 (36 s t s )
R20 *dec1, sc4* x6 (30 sts)
R21 *dec1, sc3* x6 (24 sts)
R22 *dec1, sc2* x6 (18 sts)
Stuff the head nice and firm.
R23 *dec1 sc1* x6 (12 sts)
Tie off. Stuff the head some more if needed.
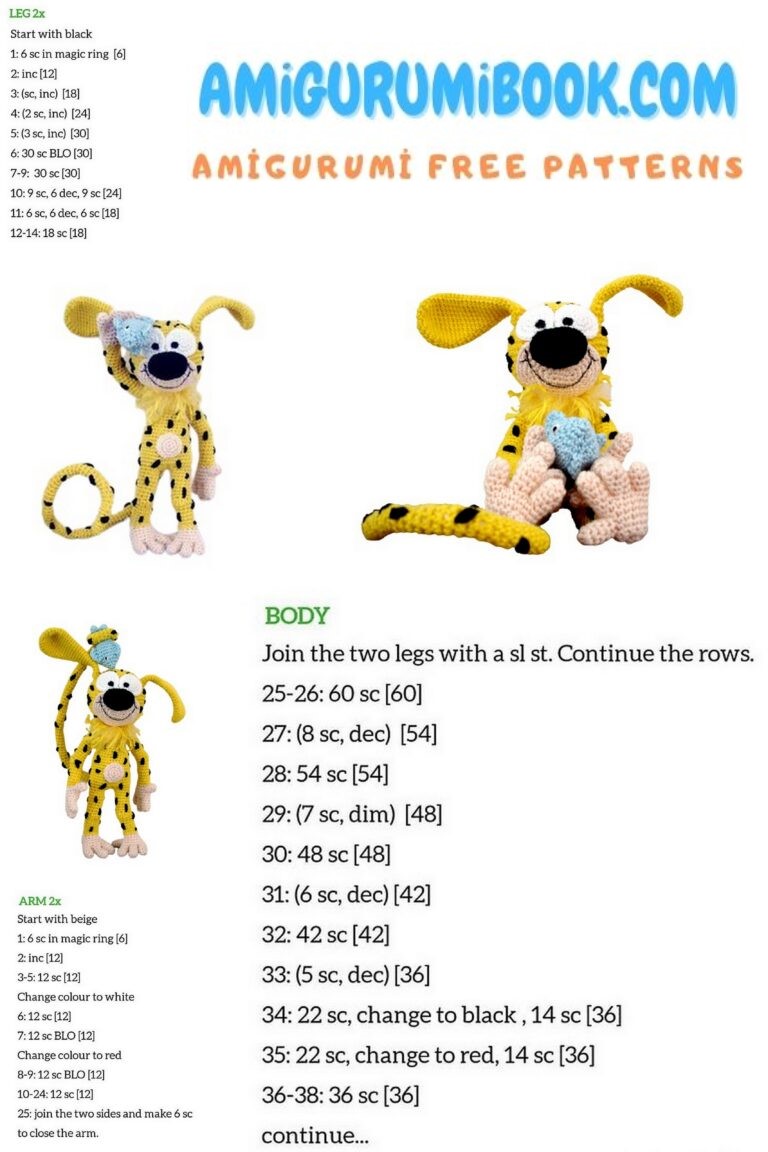
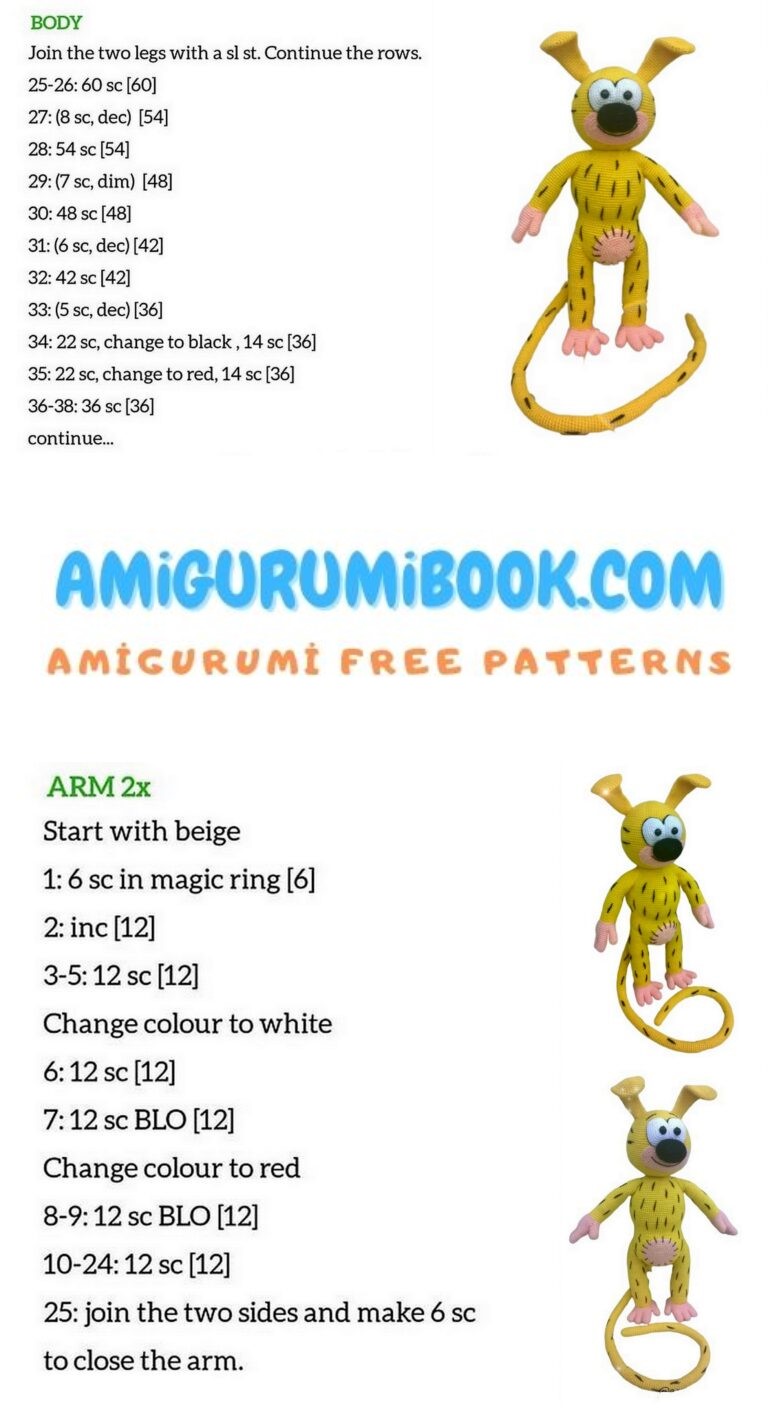
Amigurumi Marsupilami – Feet-legs-body
Feet and hands are done with light peach or beige color yarn, while the rest is crocheted with yellow
First make leg fingers
Start working with light peach color yarn or beige
Make 2
Sc4 in magic ring
R1 *inc1, sc1* x2 (6 sts)
R2-R4 sc6
Tie off
Make one (middle finger)
Sc4 in magic ring
R1 *inc1, sc1* x2 (6 sts)
R2-R5 sc6
Tie off.
And the last finger we won’t tie off but will continue
Sc4 in magic ring
R1 *inc1, sc1* x2 (6 sts)
R2-R4 sc6
R5 bring middle finger (longer one) and continue with 3sc over middle finger, bring the next finger. You will make 6sc over this finger, working around the finger pointing to back side of middle finger direction; continue stitching 3sc of middle finger; now back to finger we have started from, making 6sc. Round is finished with total of 18 sts (18 sts)
R6-R7 sc18
Stuff the fingers at this point.
R8 at this round we will connect thumb sc3, now sc3 through thumb and working piece (in order to connect them), sc12 (18 sts)
R9 sc3, sc3 just over thumb stitches (three that were left unstitched), sc12 (18 sts)
R10 sc10, ch1, turn
R11 sc14, ch1, turn
R12 sc7, ch1 fold the last row in half and slip stitch through 7 stitches (this can be difficult as the piece is small, if you find it easier, you can sew the back instead).
What we have done here, is closed the foot. Now it is round, opened only on top side, where we’ll continue with crocheting the leg.
Reaching the end – closing the back of the foot (after 7 sts made) change color to yellow.
Add more stuffing to the foot and continue stuffing the leg as you go.
R13 make 12sc around the top edge of the foot made (continue working in continuous rounds)
R14 sc12 back lops only (this is in case you want to ad fringes to ad more fur looking body. It is optional. I have made back loops on all, legs, arms and neck, but added fringes only around neck area.)
R15-R28 sc12
Note: to add knees make 3cluster stitches (each with 2dc) in the front area of the round 19.
At the end of R28 tie off and cut ends.
This leg we have just made was right side one.
Here are the instructions to make left side leg (the foot makes the difference)
Left foot – Amigurumi Marsupilami
Start making leg as written above. Changes on the pattern will start at R8.
R8 sc7, sc3 through both –thumb and working piece stitches, sc8 (18 sts)
R9 sc7, sc3 just through thumb stitches (three that were left unstitched), sc8 (18 sts)
R10 sc1, ch1, turn
R11 sc14, ch1, turn
R12 sc7, ch1 fold these tow rows you worked at in half (right sides facing each other)
Continue with the pattern as written above, but don’t cut the thread and tie off.
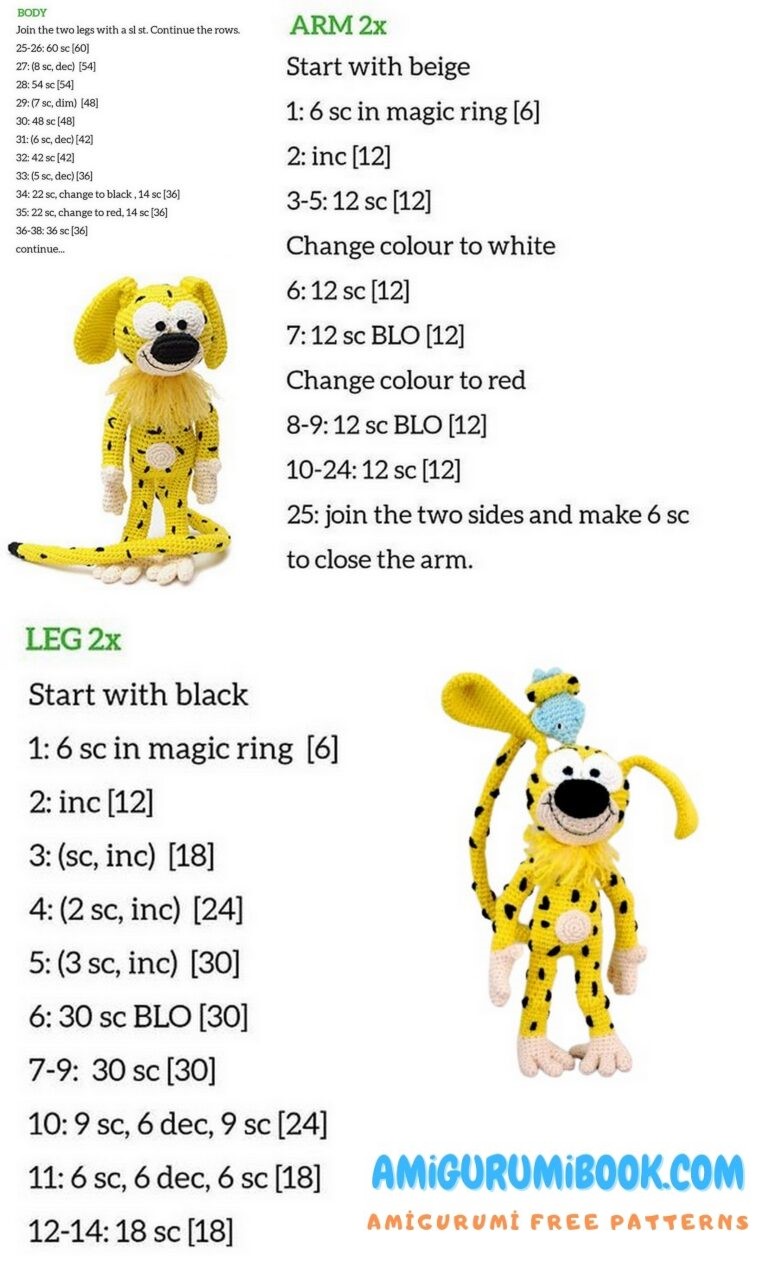
Legs finished, making body:
Connect legs
R1 Ch3, continue making sc on right leg; sc12, sc3 (over the back side of chain made at start) sc12 (left leg) (30 sts)
R2 *inc1, sc4* x6 (36 sts)
R3-R12 sc36
R13 *dec1, sc4* x6 (30 sts)
R14-R15 sc30
R16 *dec1, sc3* x6 (24 sts)
R17-R21 sc24
R22 *dec1, sc2* x6 (18 sts)
R23 sc18
Stuff the body nice and firm.
R24 *dec1, sc1* x6 (12 sts)
R25 sc12 back loops only
R26 sc12
Finish stuffing the body. Ad some more stuffing at the time when sewing head and body together to make the neck part nice and firm.
Arms x2 – Amigurumi Marsupilami
Firs make fingers
Each hand will have four fingers. Middle finger is one round longer.
Make2 (for each hand)
Sc4 in magic ring
R1 *inc1, sc1* x2 (6 sts)
R2-R4 sc6
Middle finger
Sc4 in magic ring
R1 *inc1, sc1* x2 (6 sts)
R2-R5 sc6
Sc4 in magic ring
R1 *inc1, sc1* x2 (6 sts)
R2-R4 sc6
R5 bring middle finger and stitch over it 3sc, bring next finger and sc6, (continue working around the fingers as you go), sc3 over middle finger previously added, sc6 over starting finger (18 sts)
R6-R7 sc18
Stuff fingers.
R8 connecting thumb round (both arms are the same) – sc5, sc3 through double stitches (thumb and working piece), sc 10 (18 sts)
R9 sc5, sc3 (thumb only) sc10 (18 sts)
Change color to yellow
Stuff the hand and continue stuffing the arm as you go.
R10 *dec1, sc1* x6 (12 sts)
R11 work in back loops only if wish to add fringes on hands *dec1, sc4* x2 (10 sts)
R12-R31 sc10
To add elbows, make 3 cluster stitches with 2dc each. Add them around rounds17-18.
Tie off leaving long end for sewing.
Eyes x2 – Amigurumi Marsupilami
With white yarn
Sc5 in magic ring
R1 inc5 (10)
R2 *inc1, sc1* x5 (15 sts)
R3 *inc1, sc2* x5 (20 sts)
Ti off leaving long end for sewing
Black pupils are placed in the inner sides of eyes, between rows 2-3. I have painted mine, but if you are using safety eyes or beads this is the place where to position them.
White eye parts are placed next to each other on the upper half side of the head. (eyes and mouth piece will meet on the middle of the head (so pay attention to that).
Nose will be placed the way to touch the outer eye line and will go through 4-5 rounds over the mouth piece.
Nose – Amigurumi Marsupilami
With black yarn
Ch8
R1 sc6, 3 sc in one st, sc5, 2 sc in one st (16 sts)
R2 *inc1. sc1* x8 (24 sts)
R3 sc24
R4 *dec1, sc1* x8 (16 sts)
Tie off leaving long end for sewing the nose on the head. Stuff the nose well.
Place and sew the nose as described above.
Mouth facial piece
With light peach or beige
Ch6
R1 sc4, 3sc in one st, sc3, 2 sc in one st (12)
R2 *inc1, sc1* x6 (18 sts)
R3 *inc1, sc2* x6 (24 sts)
R4 *inc1, sc3* x6 (30 sts)
R5 *inc1, sc4* x6 (36 sts)
R6 *inc1 sc5* x6 (42 sts)
Tie off leaving long end for sewing.
Amigurumi Marsupilami Ears
Sc6 in magic ring
R1 inc6 (12 sts)
R2 *inc1, sc1* x6 (18 sts)
R3 *inc1, sc2* x6 (24 sts)
R4-R8 sc24
R9 *dec1, sc10* x2 (22 sts)
R10 sc22
R11 *dec1, sc9* x2 (20 sts)
R12 sc20
R13 *dec1, sc8* x2 (18 sts)
R14 sc18
R15 *dec1, sc7* x2 (16 sts)
R16 sc16
R17 *dec1, sc6* x2 (14 sts)
R18 sc14
R19 *dec1, sc5* x2 (12 sts)
R10-R17 sc12
Flatten the ears, tie off leaving long end for sewing them on the head later.
Belly – Amigurumi Marsupilami
Sc6 in magic ring
R1 Inc6 (12 sts)
R2 *inc1, sc1* x6 (18 sts)
Tie off leaving long end for sewing
Position the belly on the lower side of the body and sew it nicely.
Tail – Amigurumi Marsupilami
Sc6 in magic ring
R1-… make tail as long as you like using 6sc Marsupilami has very long tail. I suggest making it 26 cm (12”). That size won’t make it too long and will still be nice and long Last 5 rounds *inc1, sc2* x2 (8 sts), next 4rounds stitch 8sc for firmer tail body connection.
Tie off leaving long end for sewing.
Time to sew all body parts together.
Connect head and body. Sew on the arms. Place them around rounds 24-25. Round 25 needs to be left free as you will put additional hairs here to create fur around neck.
At the end place on and sew the ears. Sew them on top sides of the head, rounds 5-6.
When sewing use one round stitches on the head and sew through both loops of the ears. Try to make them point upwards so ears can appear fluffy and in motion.
At the end sew the tail on.
Position it centered on the lower back side of the body, 5-6 rounds upwards from feet connected round.
What is left is to embroider black spots on it’s body.
Making fur around neck (arms and legs) is optional.
As you could see, I left front loops on arms, legs and around neck area. I have put on these extra hairs around neck only.
It is done as making hair. You will hook and knot yarn pieces through front loops, and when all done, trim it in V shape (longer points in front and back).
I have also added a fish Marsupilami holds in his hand. You can add it as well if you wish.
Fish
With same size hook and yarn of your choice
Make 2 (tail fins)
Sc4 in magic ring
R1 *inc1, sc1* x2 (6 sts)
R2 *inc1, sc2* x2 (8 sts)
R3 dec4 (4 sts)
R4 connect both fin pieces, making 8sc around
R5 *inc1, sc3* x2 (10 sts)
R6 *inc1, sc4* x2 (12 sts)
R7 *inc1, sc5* x2 ( 14 sts)
R8 *inc1, sc6* x2 (16 sts)
R9 *inc1, sc3* x4 (20 sts)
R10-R12 sc20
From next round we’ll start decreasing so start stuffing the body as you go.
R13 *dec1, sc3* x4 (16 sts)
R14 *dec1, sc2* x4 (12 sts)
R15 *dec1, sc1* x4 (8 sts)
R16 dec4 (4 sts)
By now fish should be stuffed well. Tie off leaving long end for sewing. Thread the needle with excess yarn and close the last round nicely.
Upper fin, slip stitch to 8th round top stitch on the body (work through top stitches of rounds8-5) ch1, hdc in same st, 2dc in next two sts, hdc in 4th st and sc in same
Tie off, hide ends
Lower side fins
Here start at 7th round stitch; ch1, hdc in same stitch, 2dc in next st, hdc &sc in third st (tie off, hide ends)
Repeat at both sides paying attention to make them as symmetrical as possible.
With white yarn and embroidery needle sew on the eyes. With black thread ad pupils on top of each eye.
Hope the fish was not difficult to make and it ended up cute.