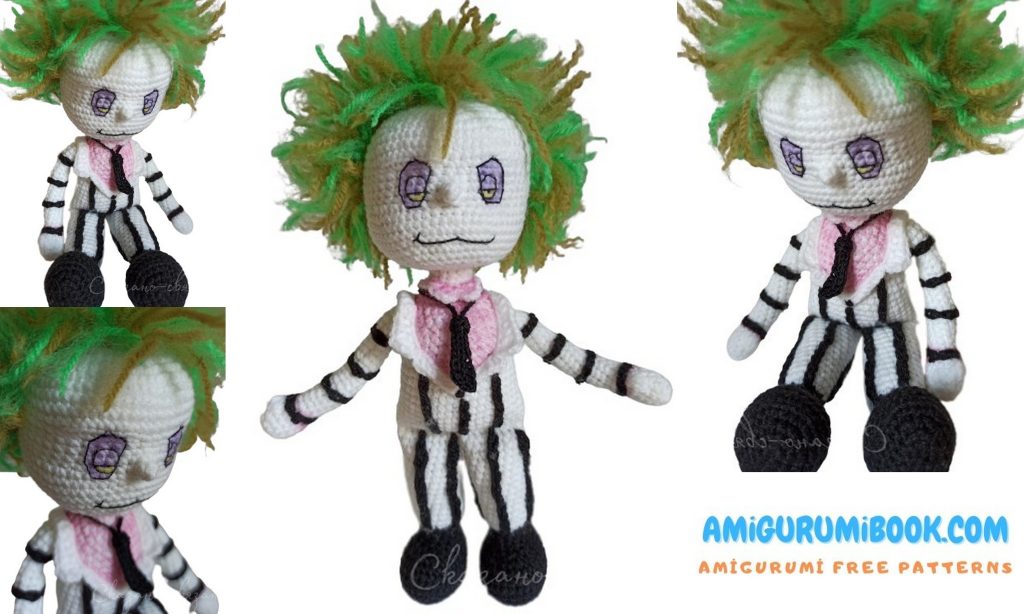
Beetlejuice amigurumi is a fun and creative crochet project inspired by the iconic character from the cult classic movie. This free pattern allows crafters of all skill levels to bring Beetlejuice to life with yarn and a hook. free crochet patterns
You may also like more amigurumi patterns.
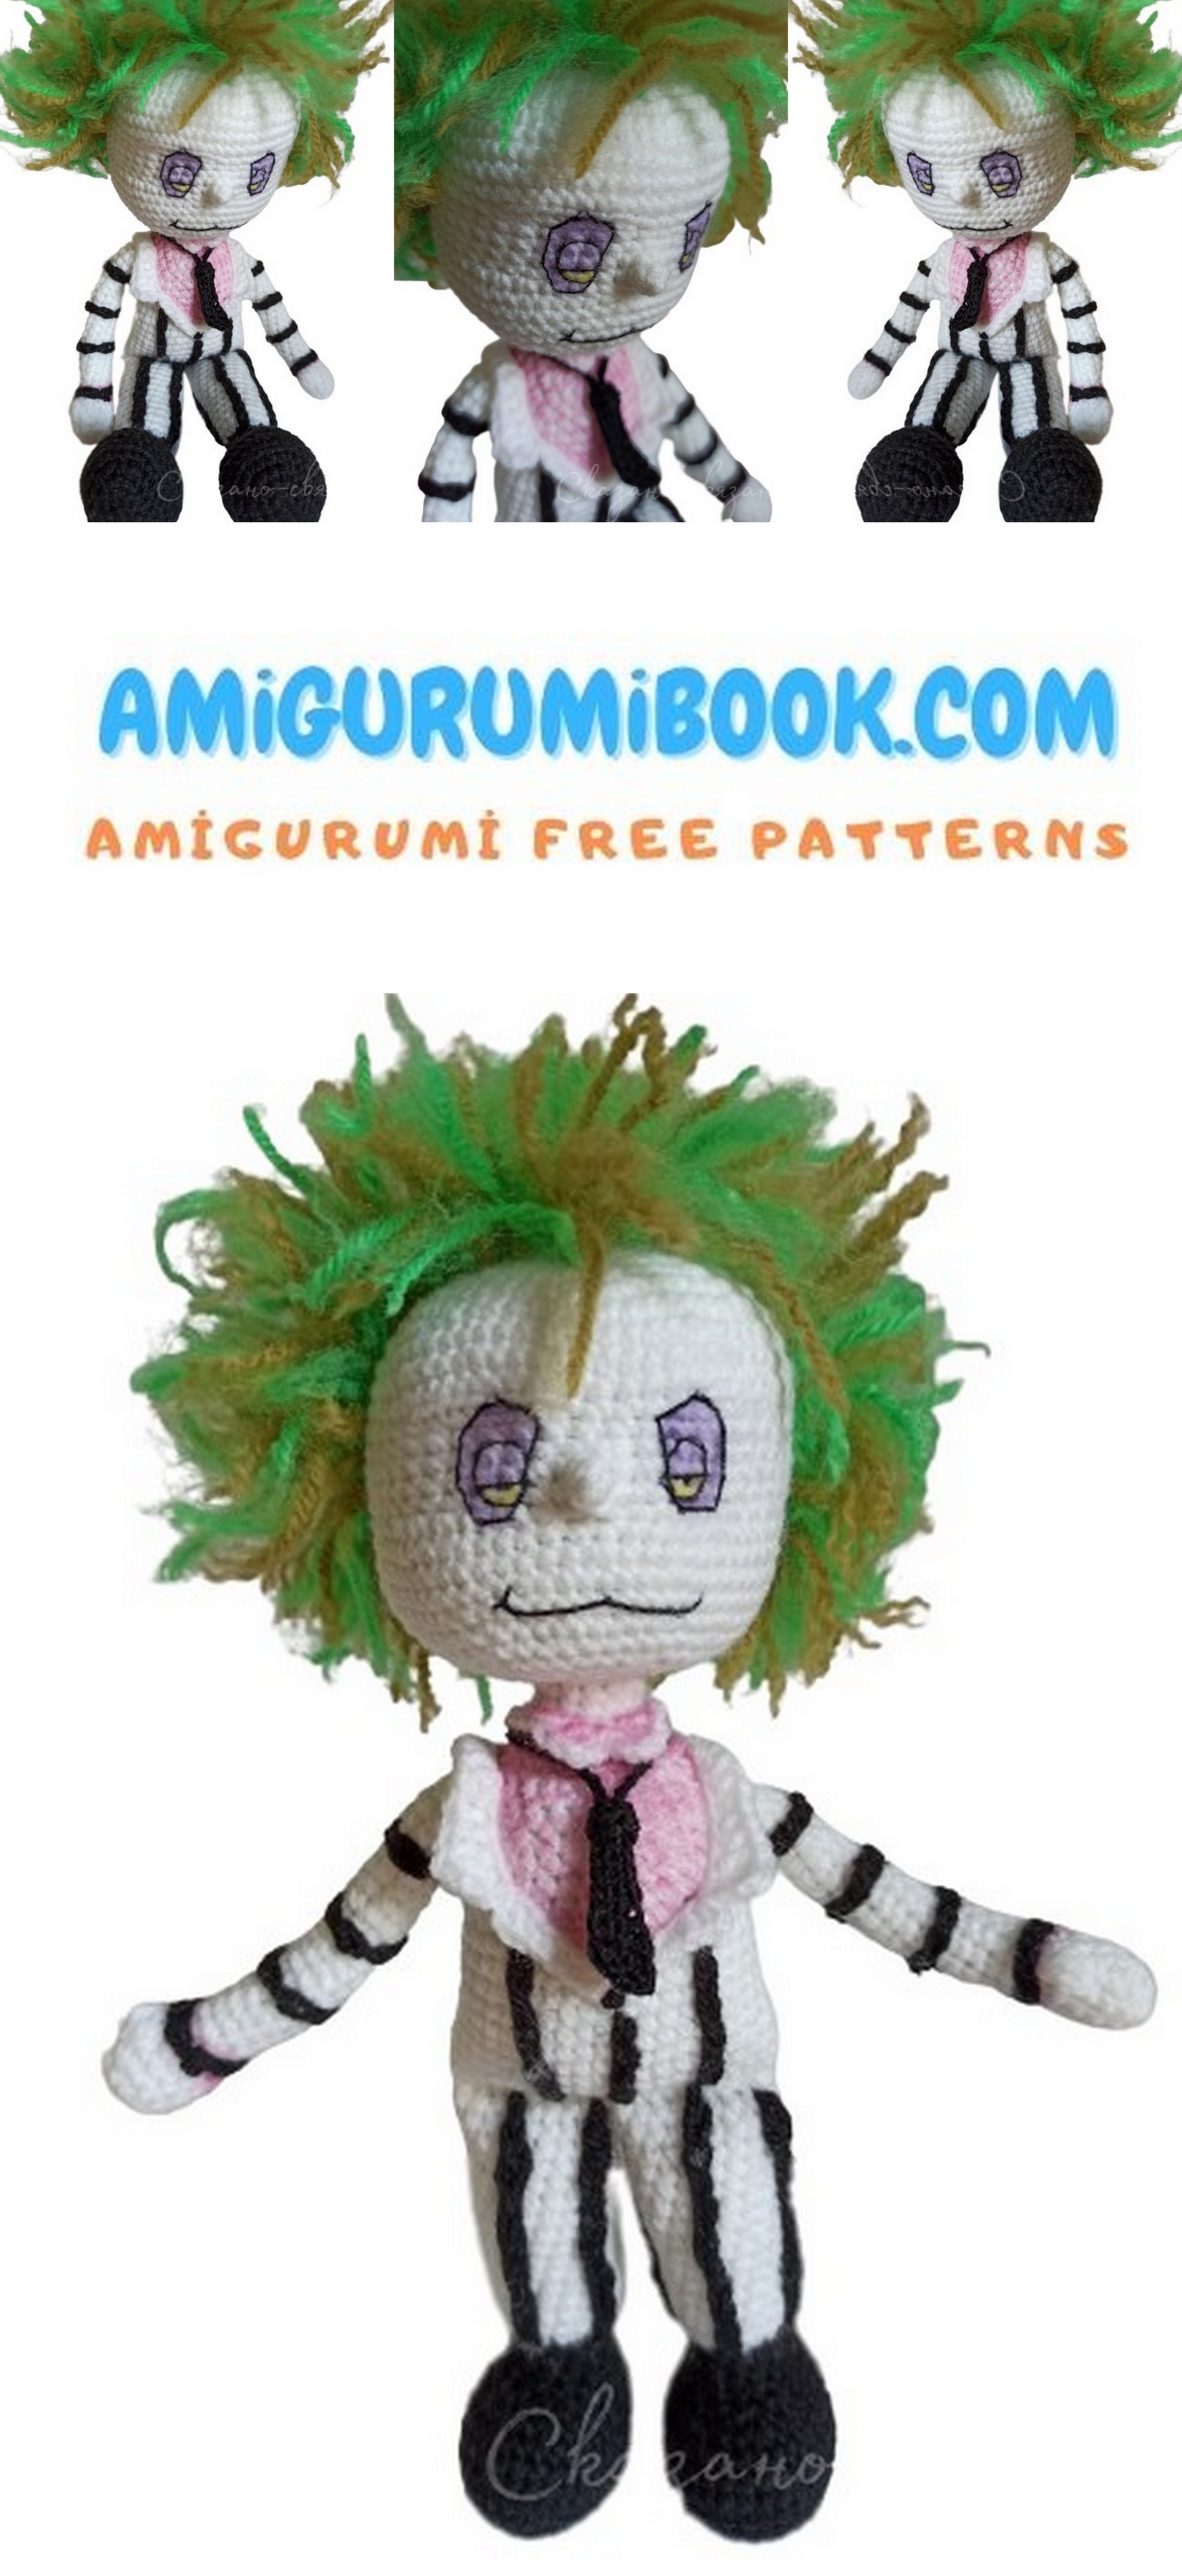
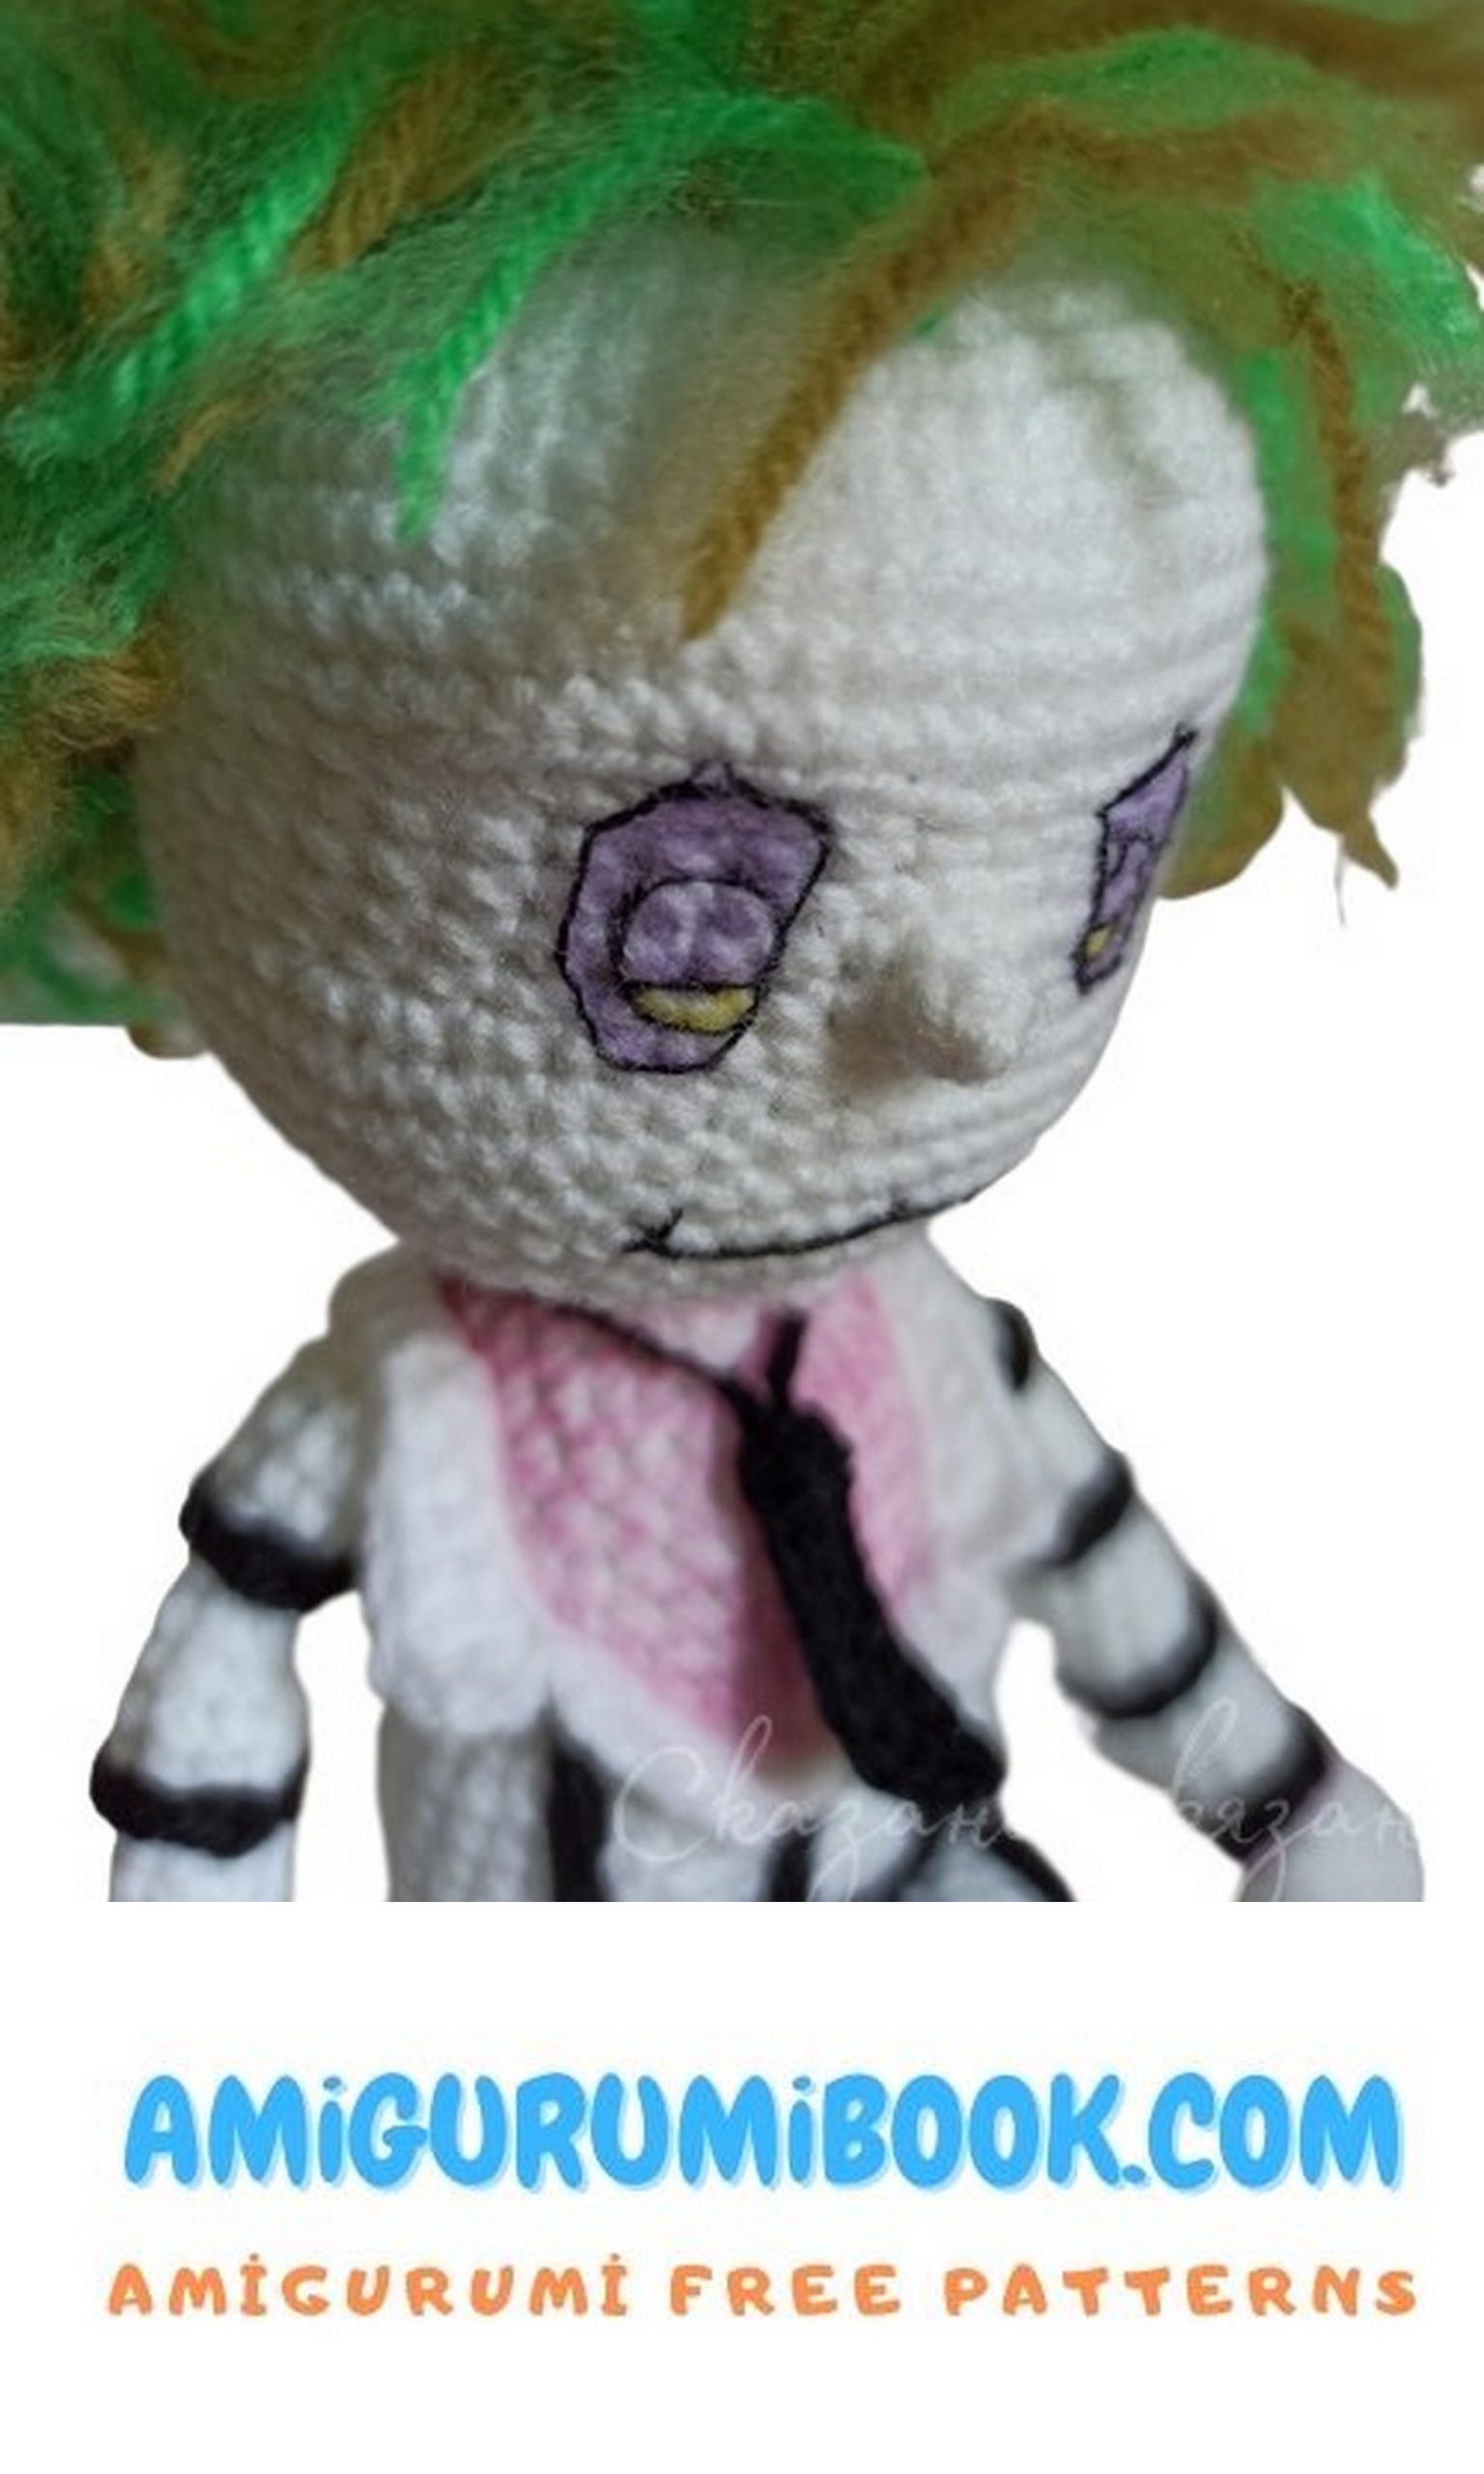
Are you a fan of the classic movie “Beetlejuice”? If so, we have an exciting and creative project for you! Introducing our Beetlejuice Amigurumi Free Pattern tutorial, where you can learn how to crochet your very own Beetlejuice doll. This charming and quirky character from the iconic film can now be part of your crochet collection.
Our free pattern provides a step-by-step guide, making it suitable for both beginners and experienced crocheters. You’ll find detailed instructions, clear stitch explanations, and helpful abbreviations to guide you through the process. Whether you’re a crochet enthusiast or a movie buff, this project is a fantastic way to combine your passions and create a unique piece of decor or a gift for a fellow fan.
Materials:
♥ Yarn “Children’s Novelties,” 100% acrylic, 50g/200m, in white, black, and green colors, approximately 25g each.
♥ Crochet hook size 1.25
♥ Stuffing (polyfill, holofiber, polyester fiberfill, etc.)
♥ Embroidery needles
♥ Pastel for shading
Abbreviations:
SC – Single Crochet
MR – Magic Ring
INC – Increase
DEC – Decrease
HDC – Half Double Crochet
DC – Double Crochet
TR – Treble Crochet
CH – Chain
SS – Slip Stitch
BLO – Back Loop Only
FLO – Front Loop Only
Head
Row 1: Start with an MR, SC 8 into the MR. (8)
Row 2: INC in each stitch around. (16)
Row 3: 1 SC, INC repeat around. (24)
Row 4: 3 SC, INC repeat 6 times. (30)
Row 5: 4 SC, INC repeat 6 times. (36)
Row 6: 5 SC, INC repeat 6 times. (42)
Row 7: 6 SC, INC repeat 6 times. (48)
Row 8: 7 SC, INC repeat 6 times. (54)
Row 9: 8 SC, INC repeat 6 times. (60)
Rows 10-12: Three rows of 60 SC each.
Row 13: 18 SC, DEC 5 times, 4 SC, DEC 5 times, 18 SC. (50)
Row 14: 50 SC.
Row 15: 24 SC, INC, 25 SC. (51)
Row 16: 24 SC, INC twice, 25 SC. (53)
Row 17: 24 SC, INC four times, 25 SC. (57)
Row 18: 17 SC, INC five times, 2 SC, skip 8 SC, 2 SC, INC five times, 18 SC. (59)
Row 19: 29 SC, INC, 29 SC. (60)
Rows 20-22: Three rows of 60 SC each.
Row 23: 8 SC, DEC repeat 6 times. (54)
Row 24: 7 SC, DEC repeat 6 times. (48)
Row 25: 6 SC, DEC repeat 6 times. (42)
Row 26: 5 SC, DEC repeat 6 times. (36)
Row 27: 4 SC, DEC repeat 6 times. (30)
Begin to stuff the head, shaping the cheeks.
Row 28: 3 SC, DEC repeat 6 times. (24)
Row 29: 2 SC, DEC repeat 6 times. (18)
Row 30: 6 SC, DEC three times, 6 SC. (15)
Rows 31-34: Five rows of 15 SC each.
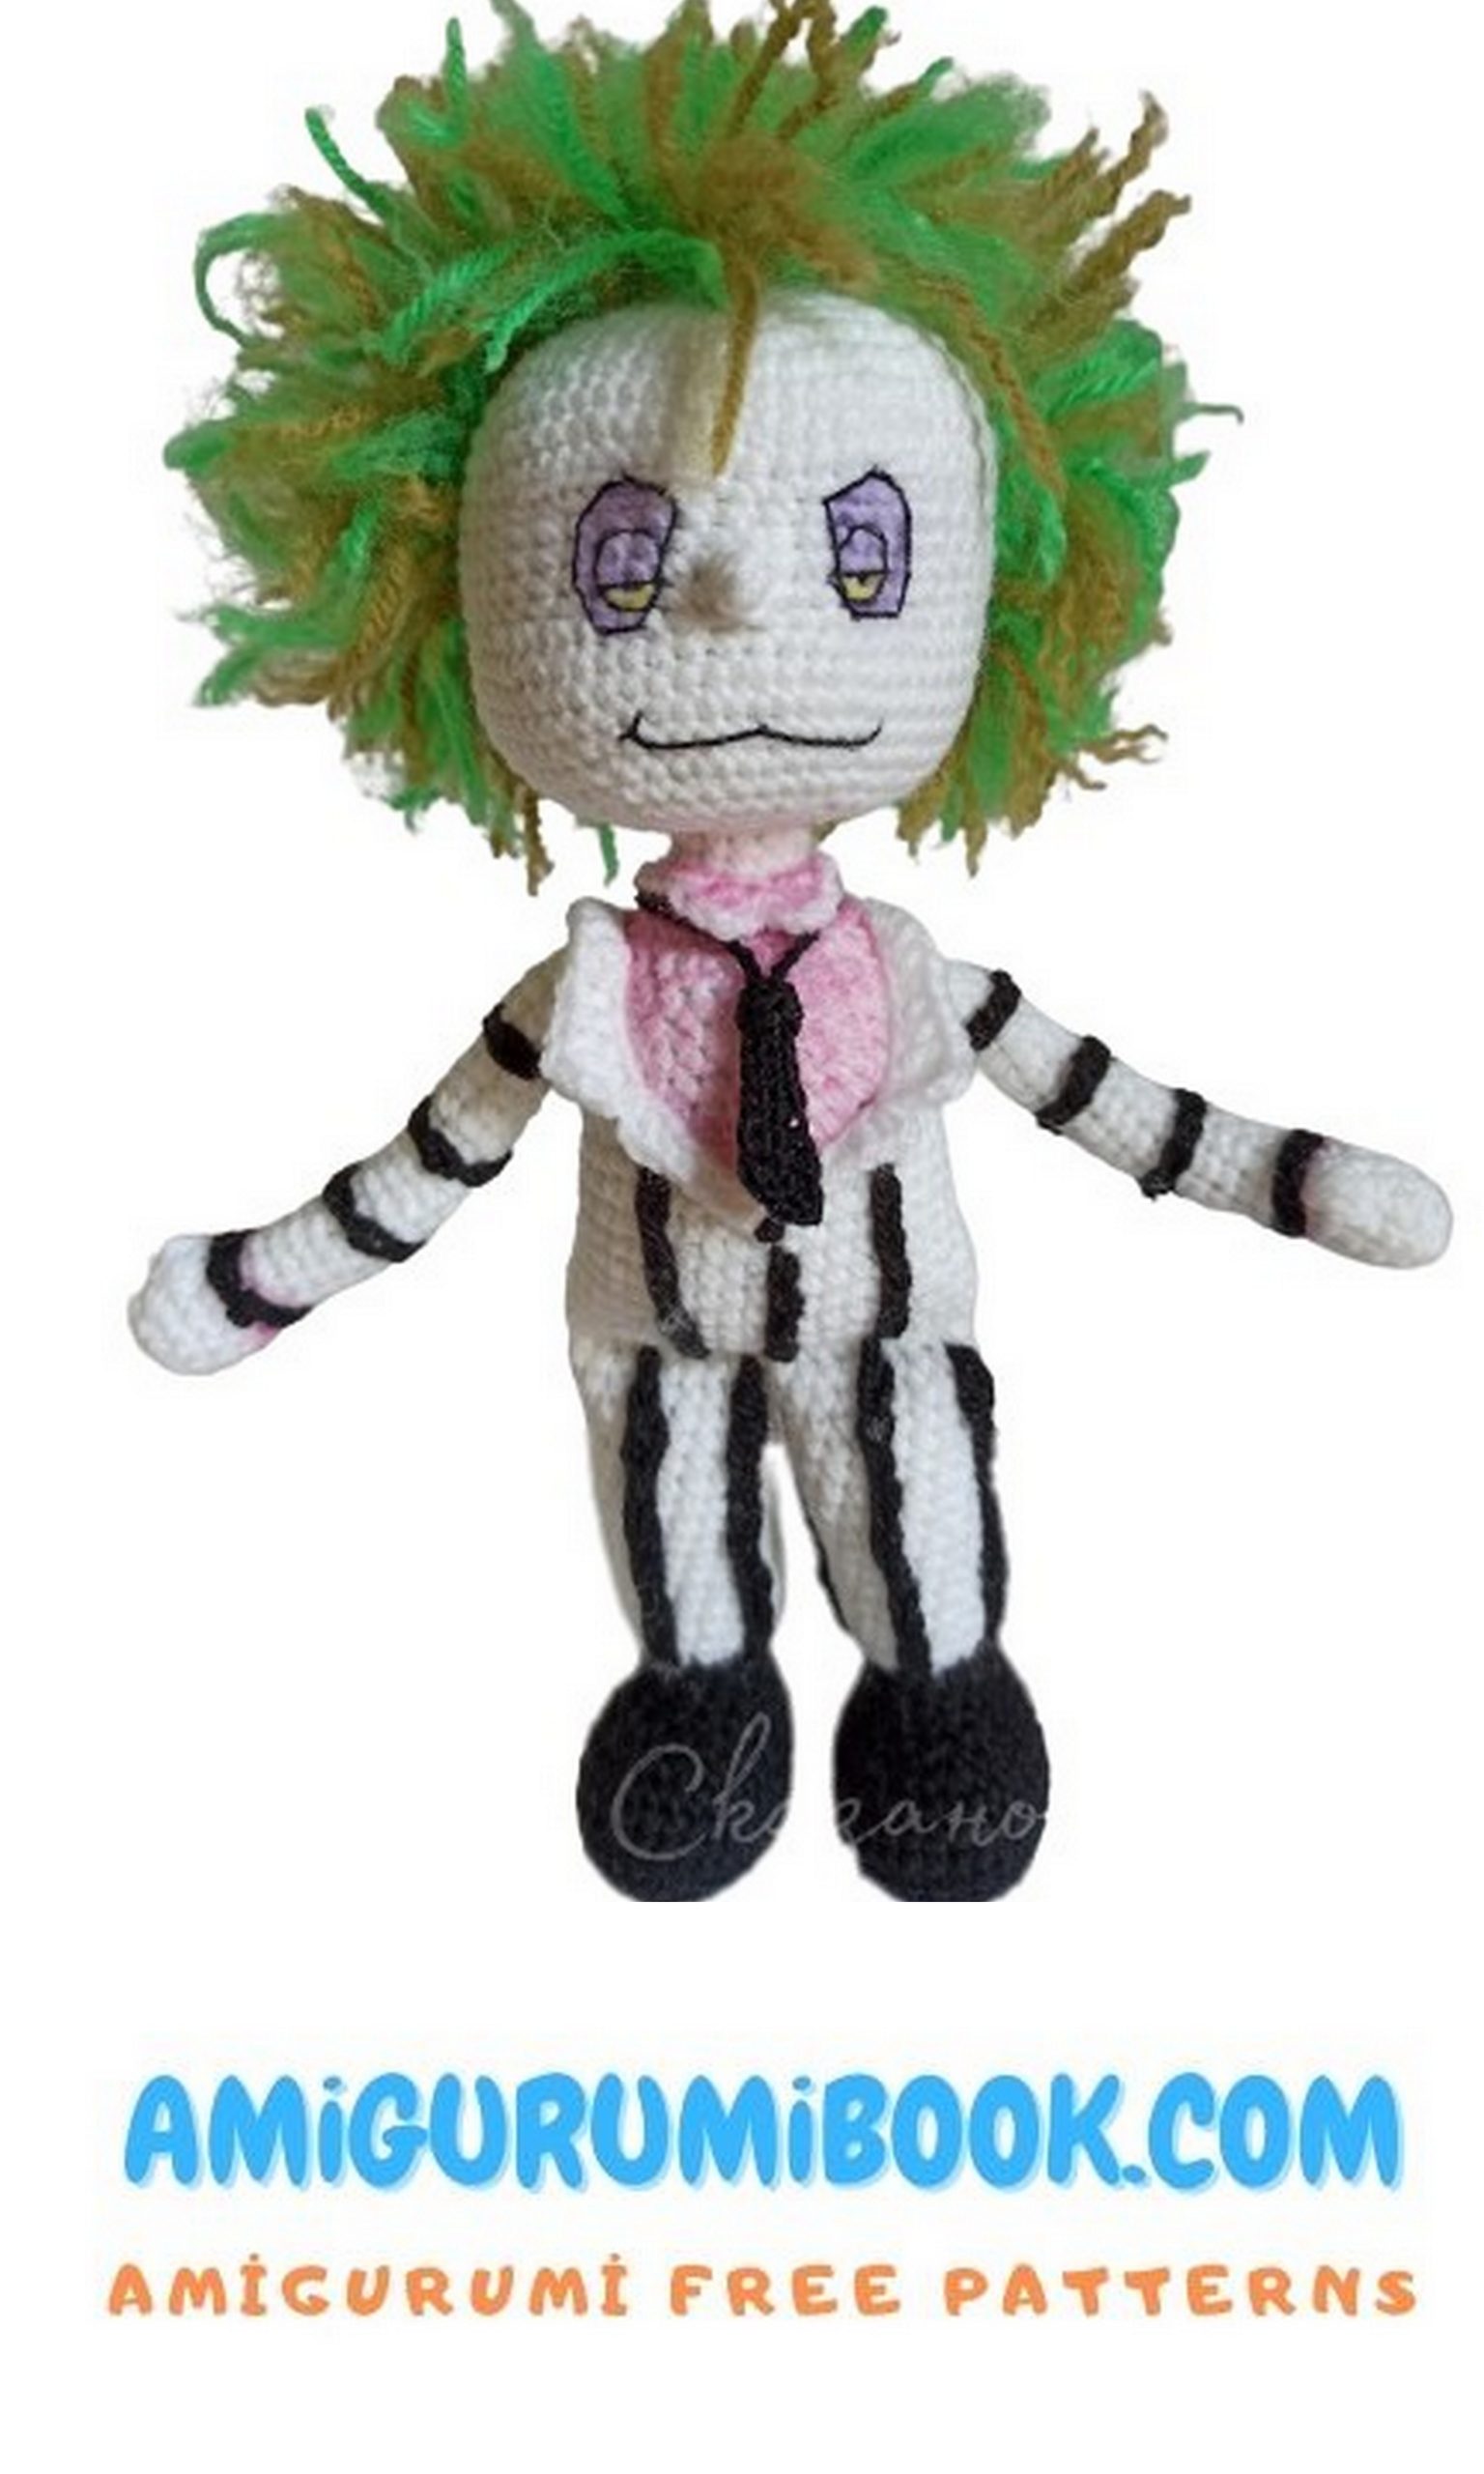
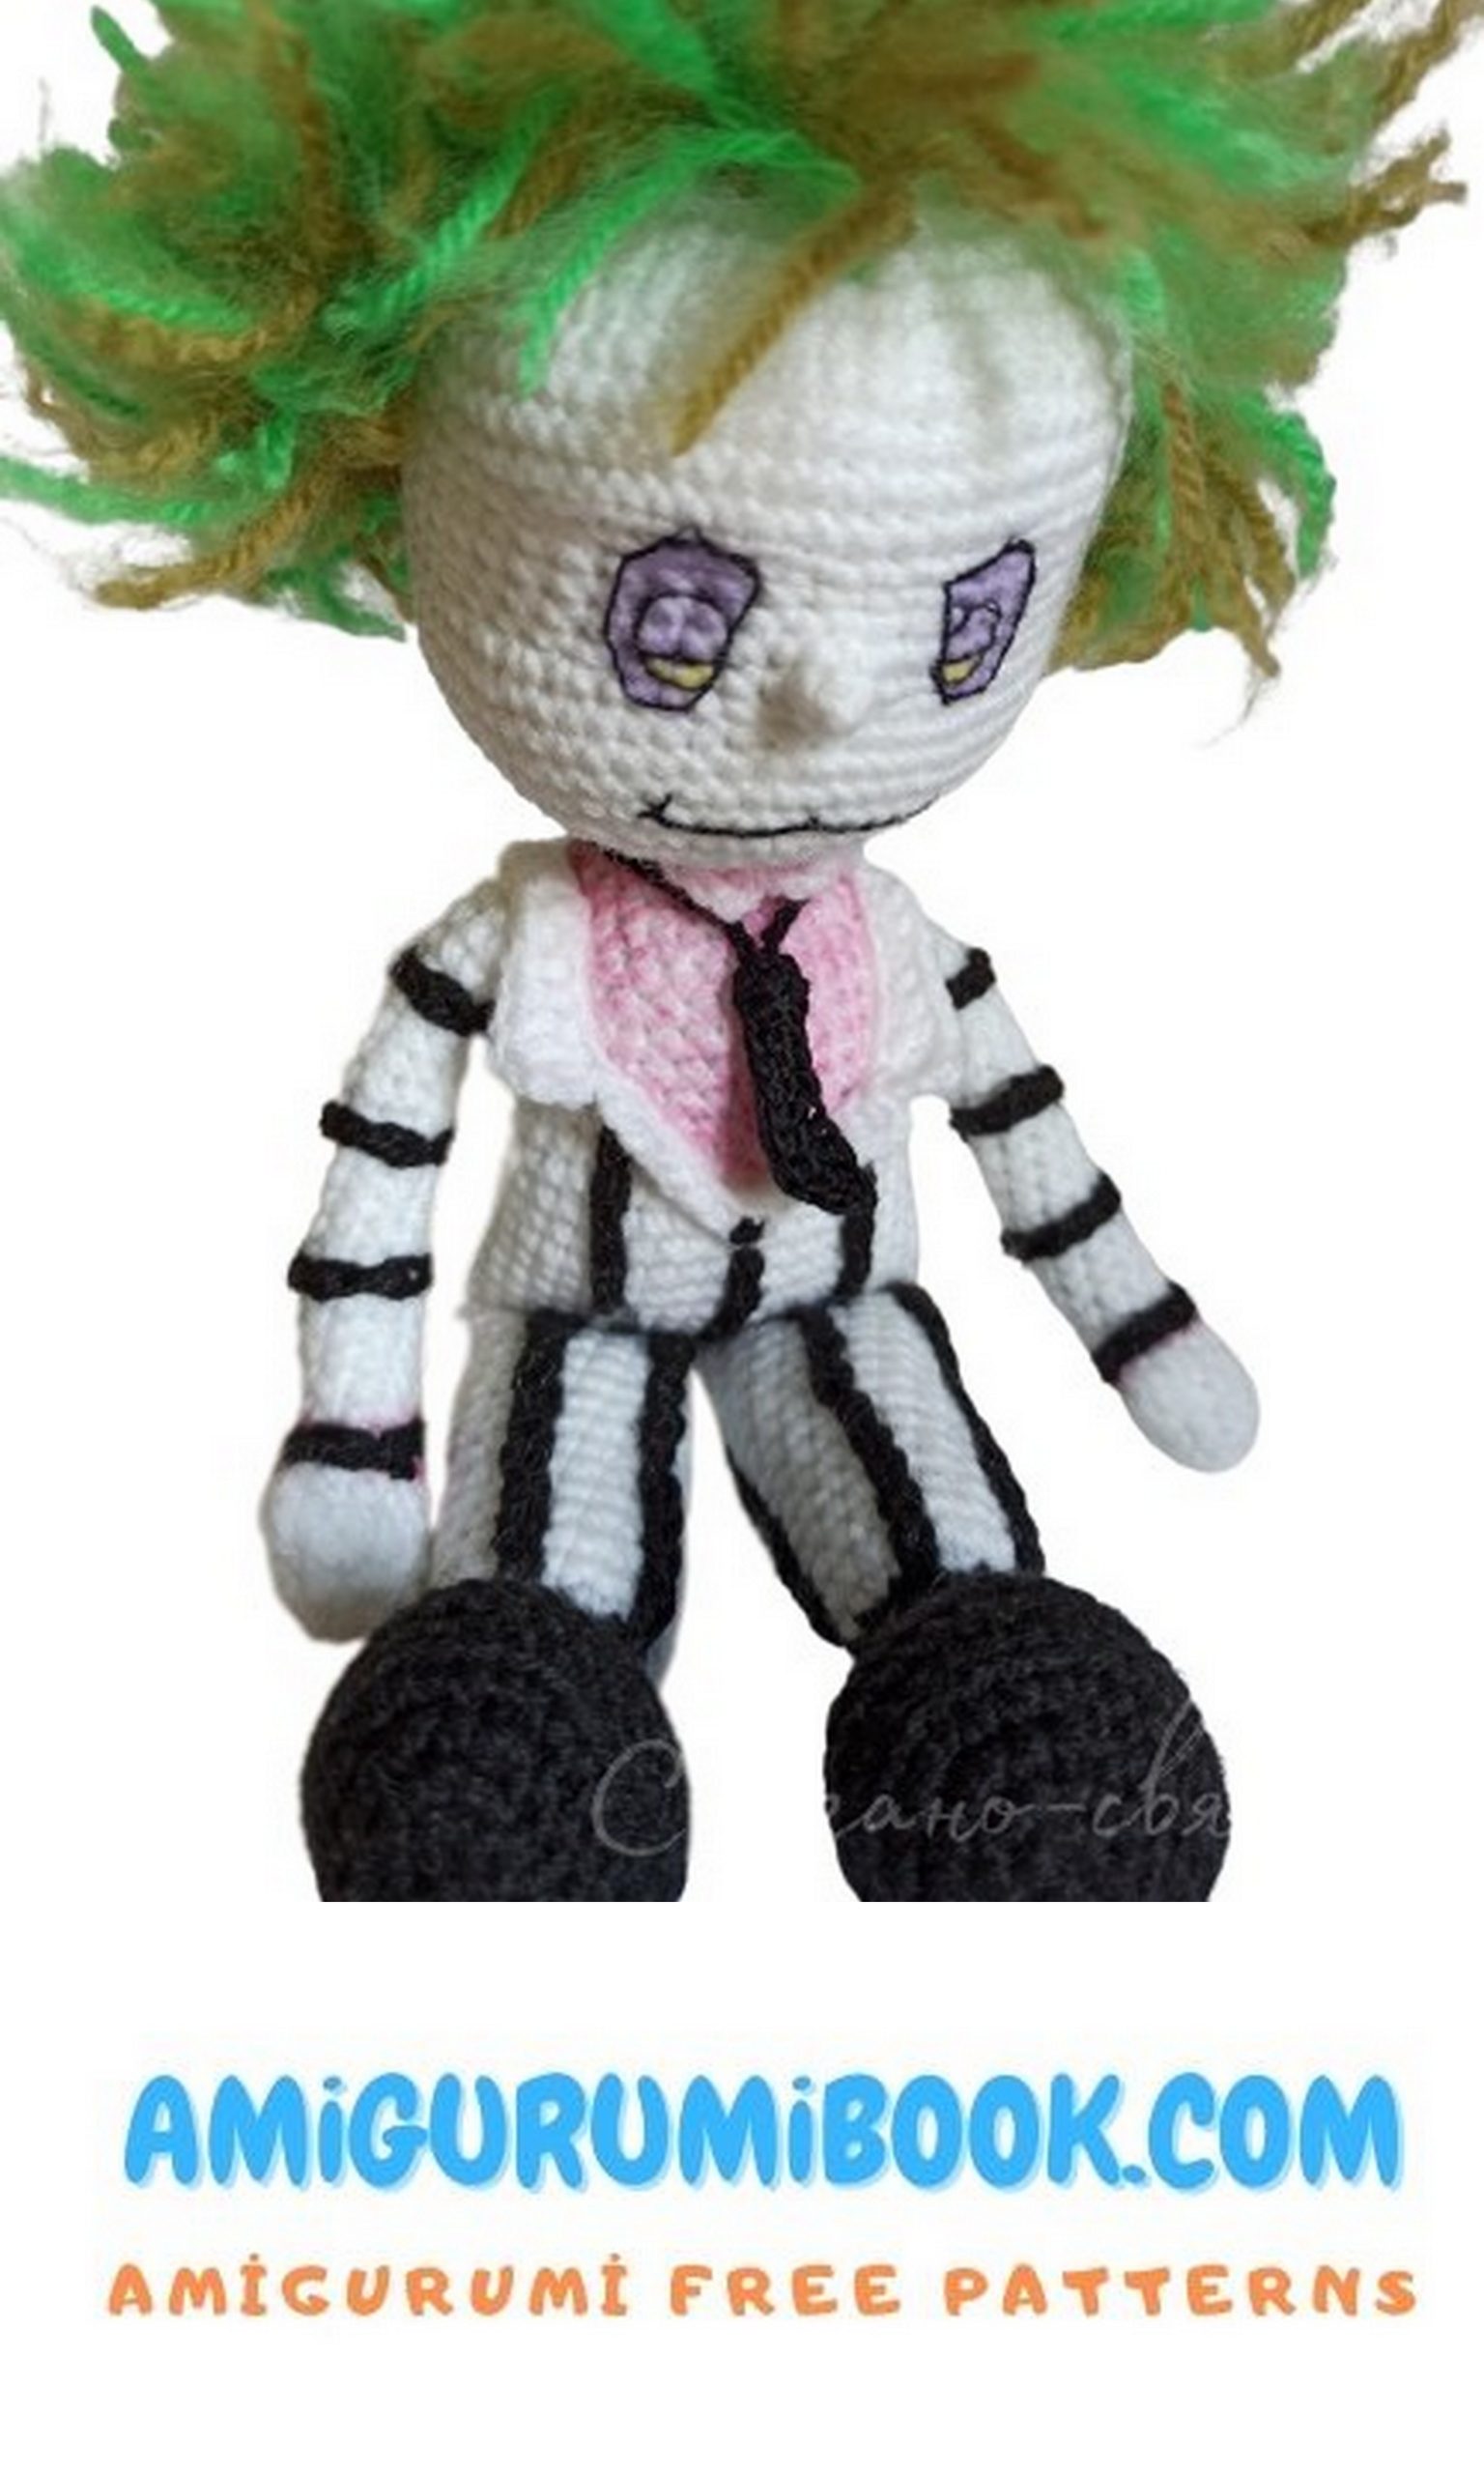
Cut green yarn into 8-9 cm pieces, sew to the head, embroider the face, shade the eyes, and gently brush the hair using a fine-toothed comb or brush with small bristles.
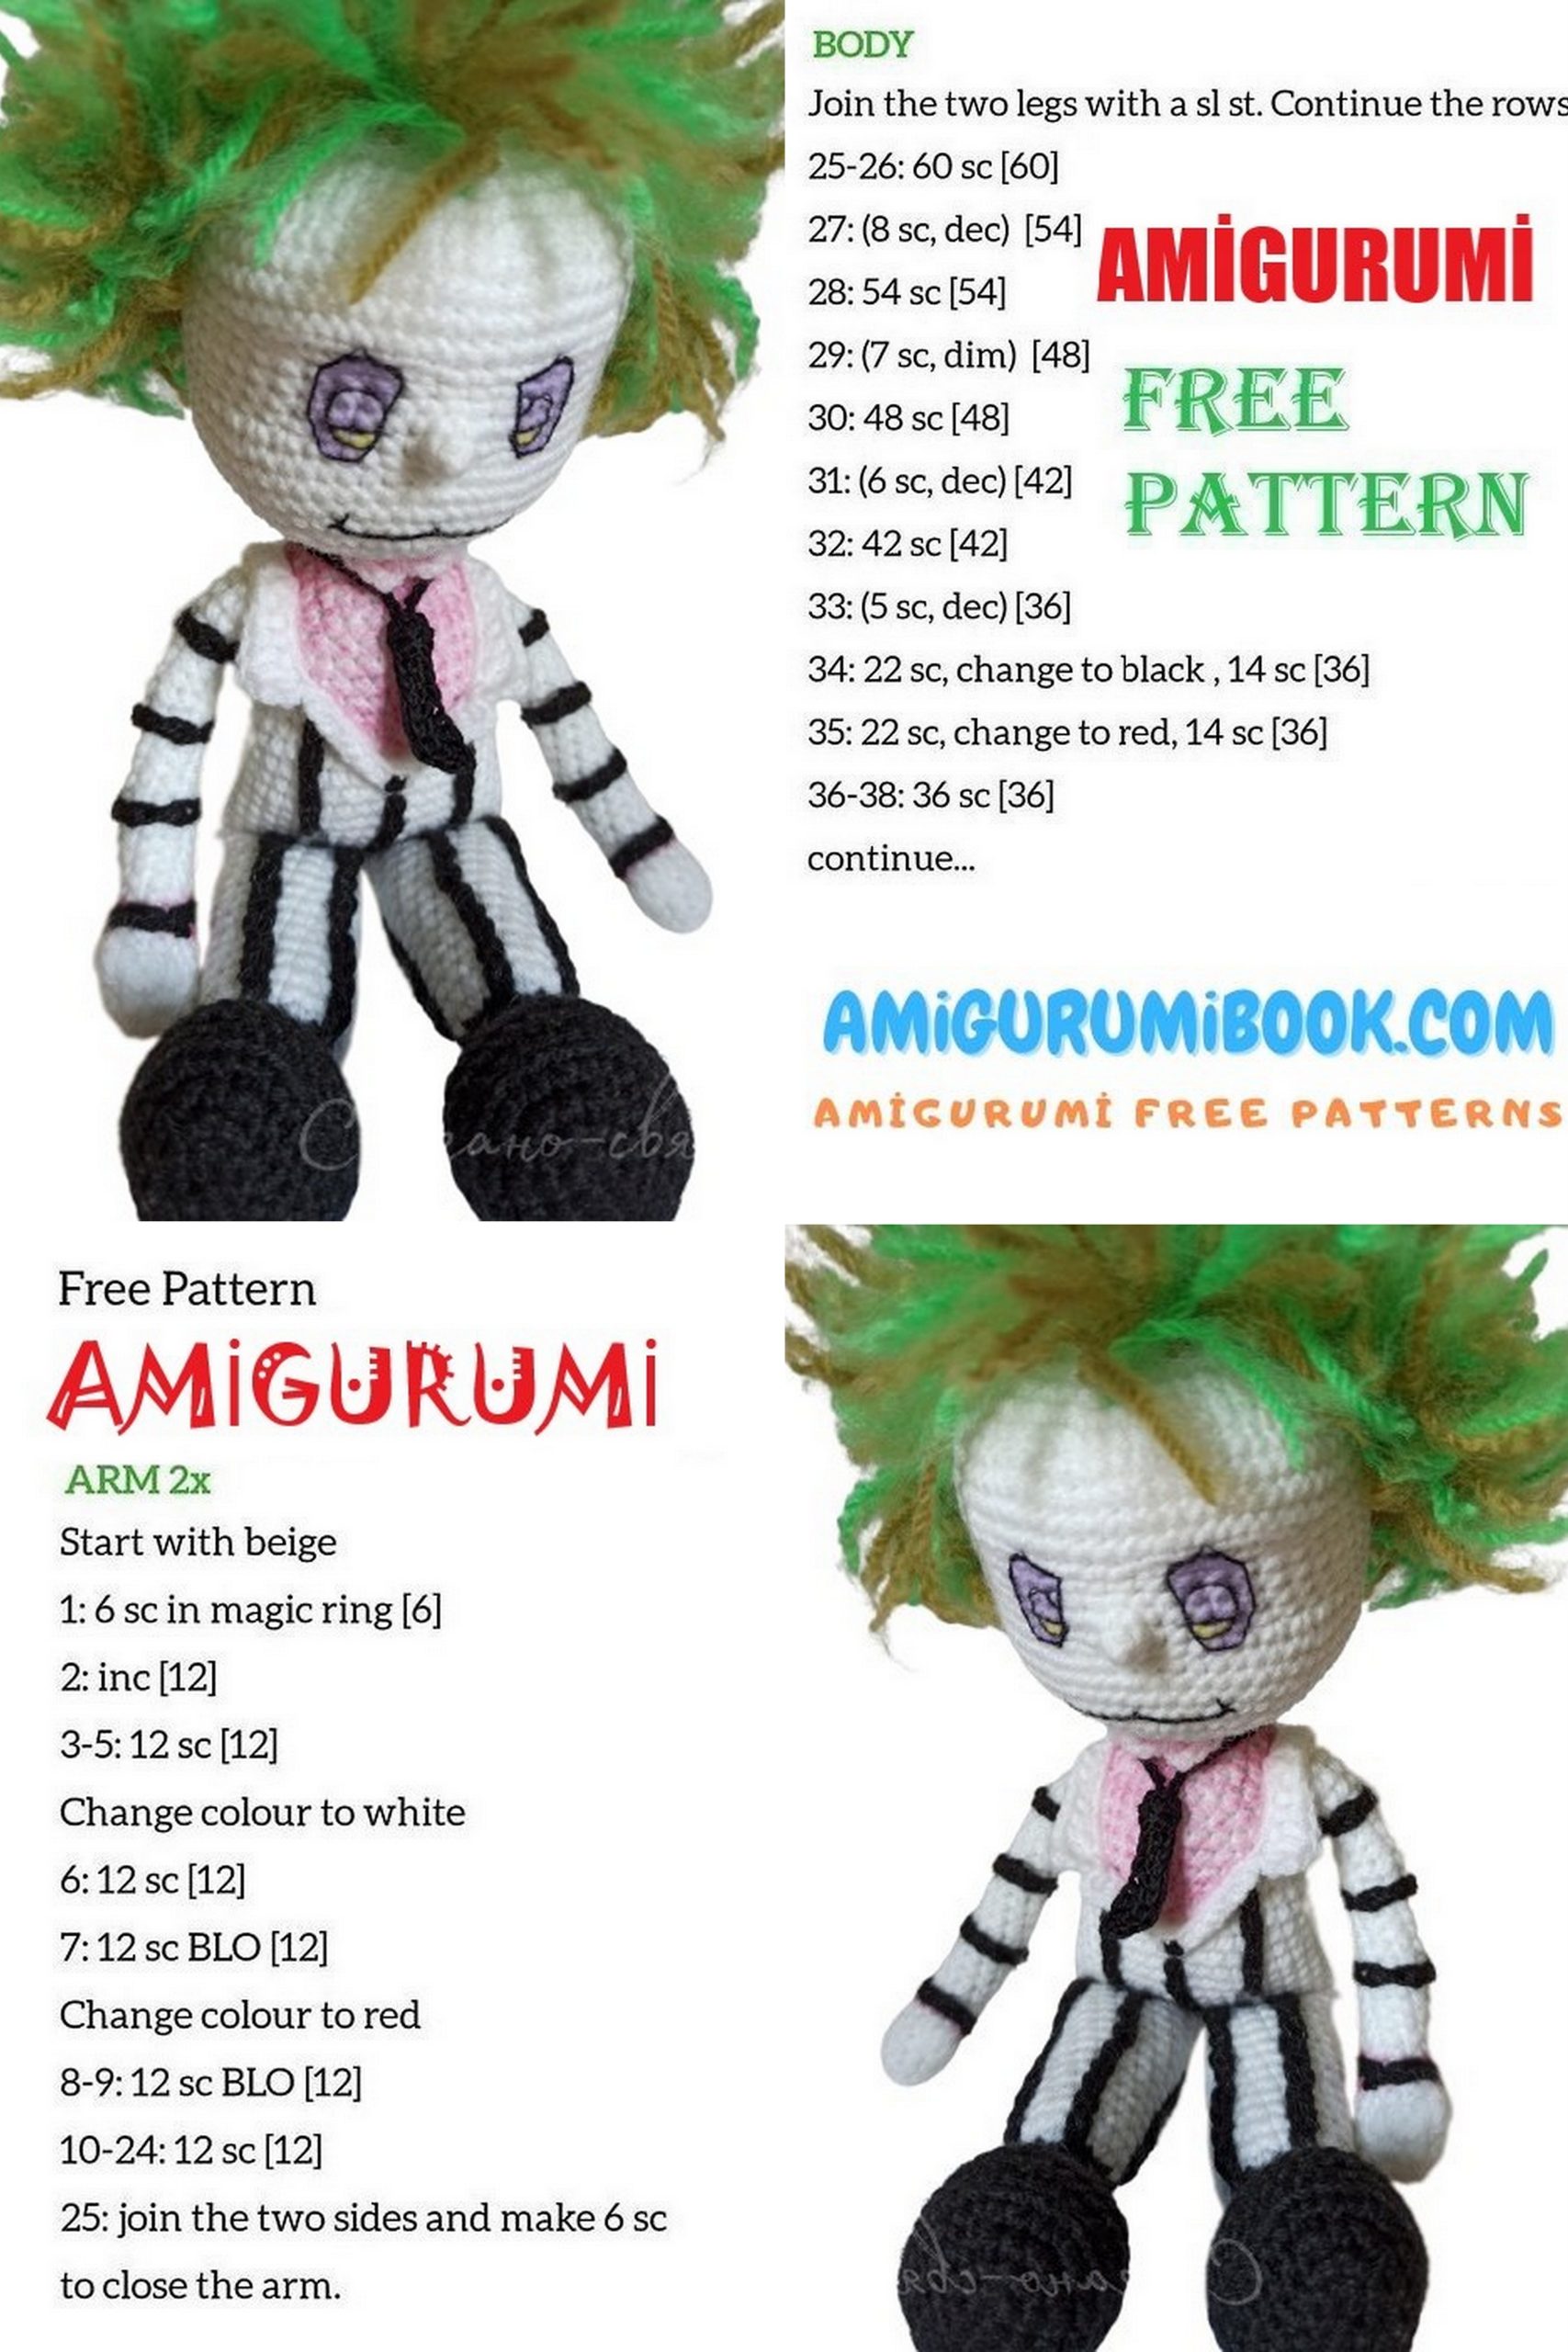
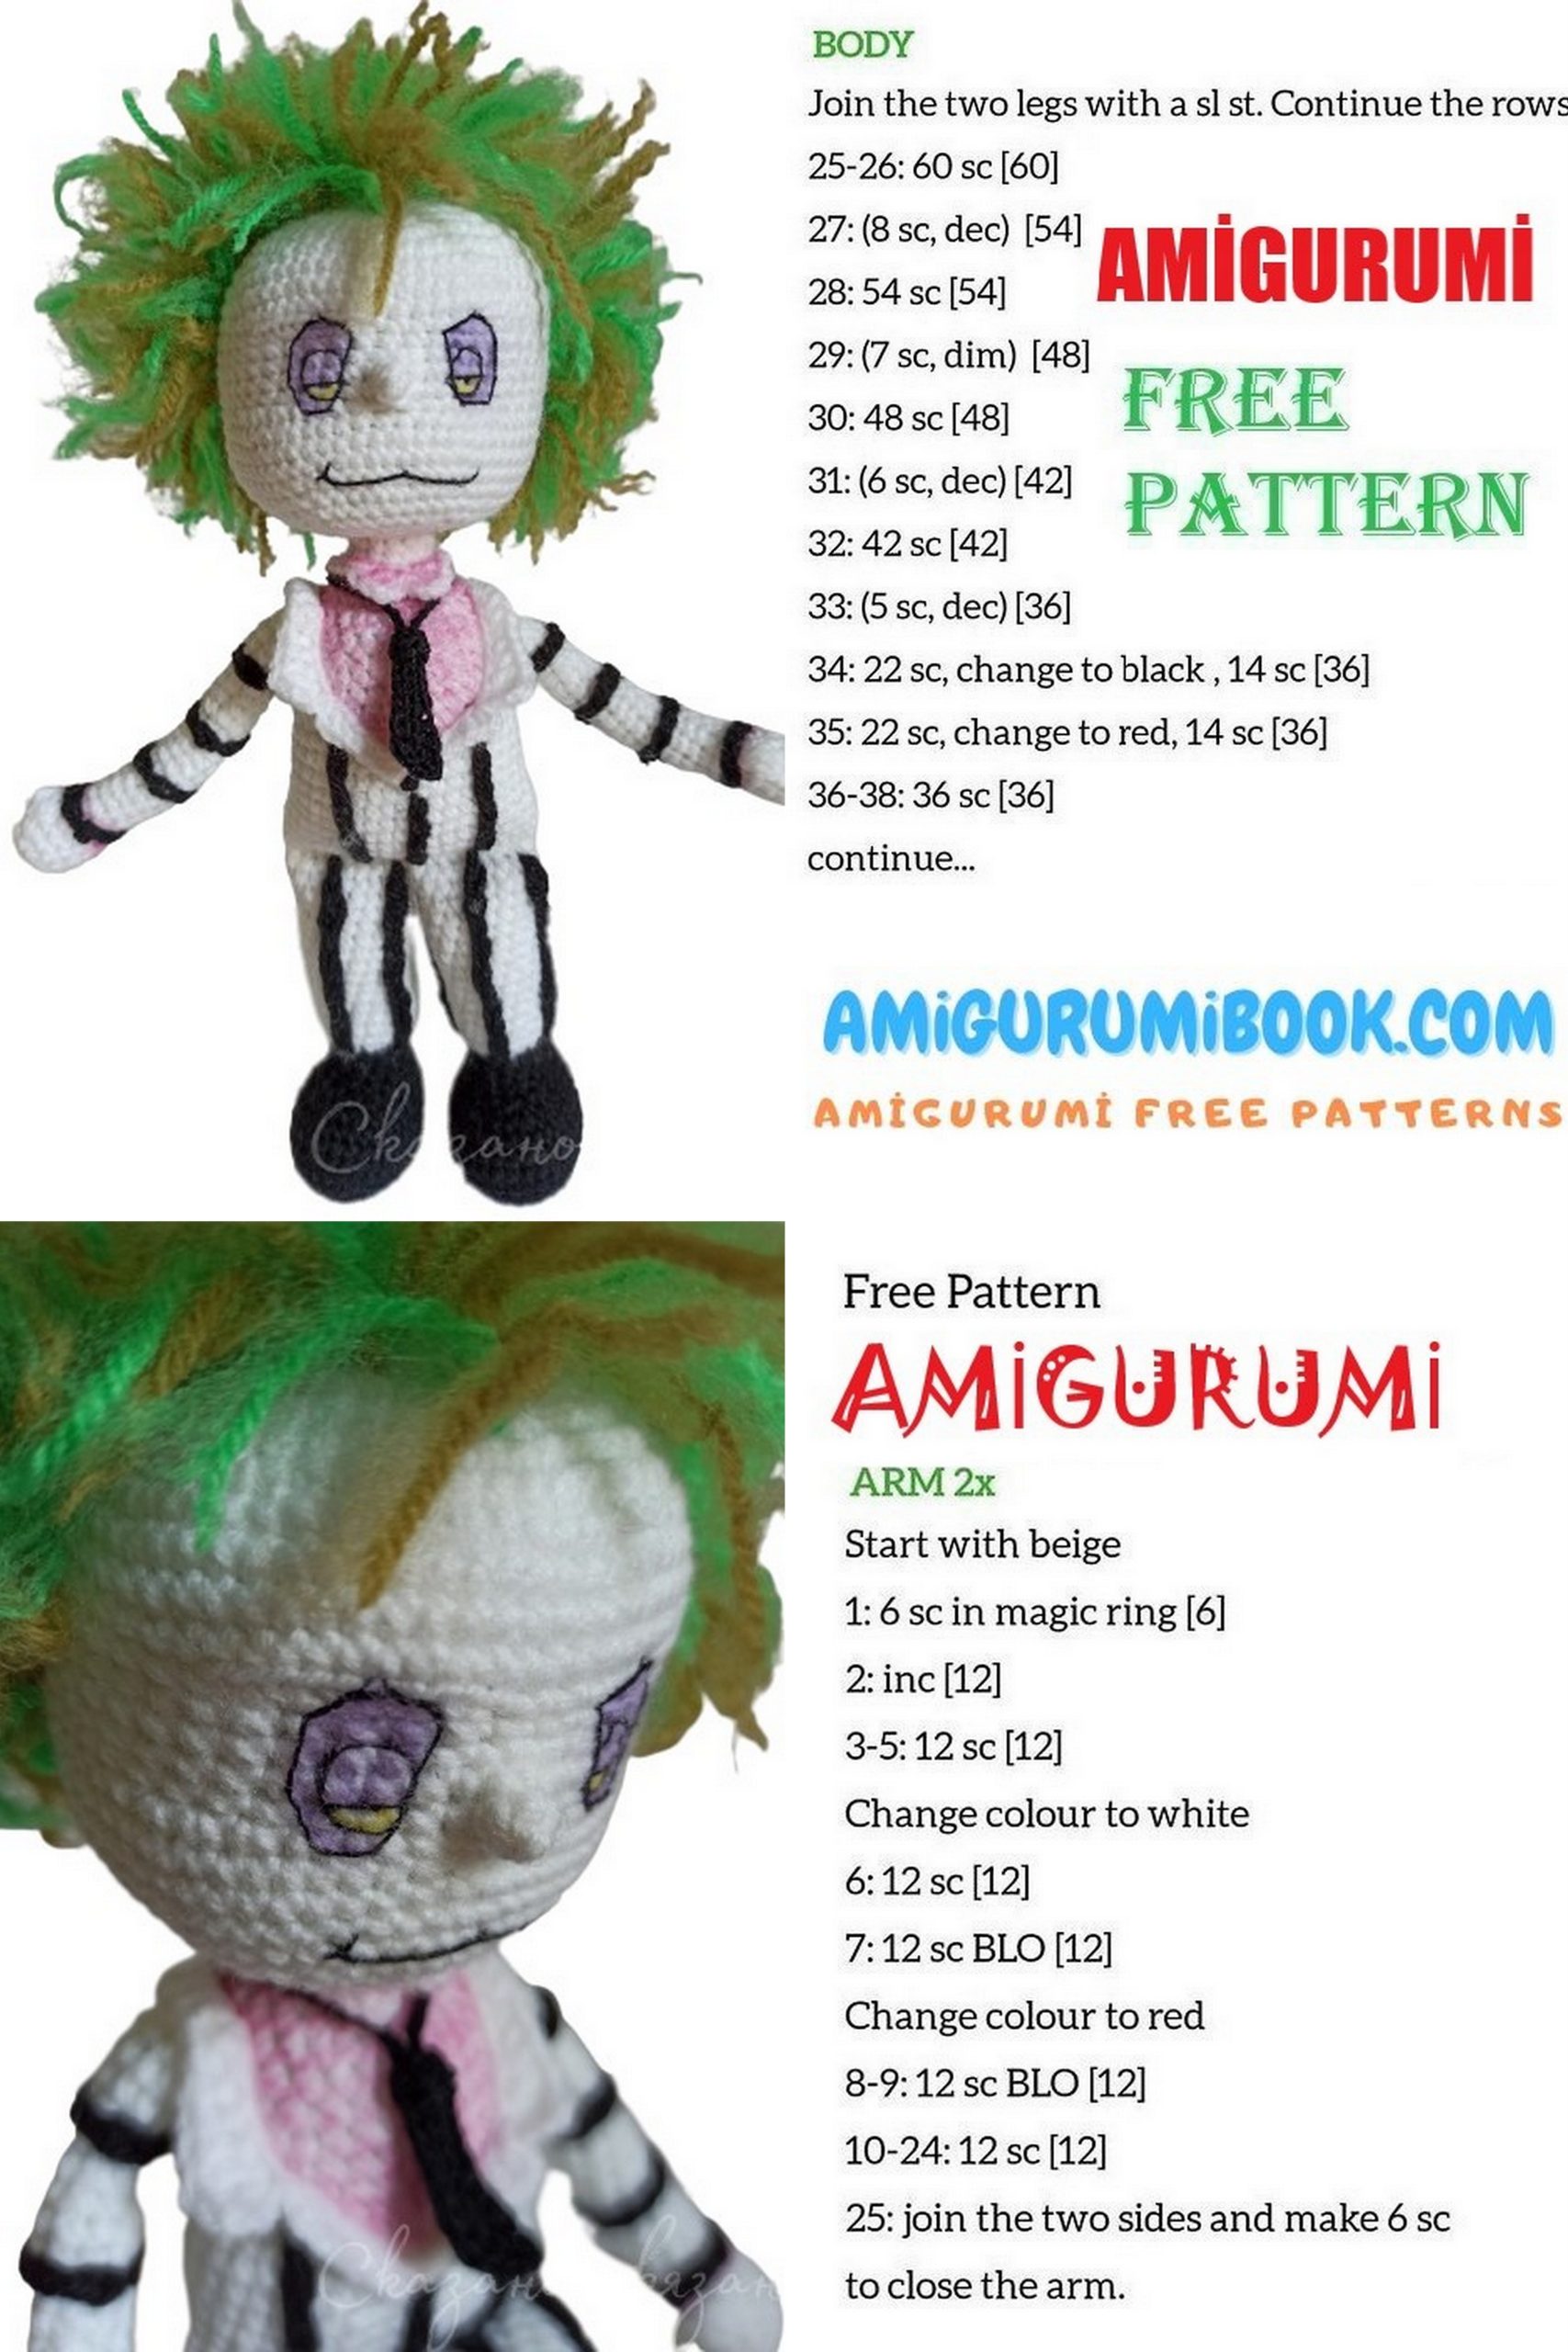
Arms:
Crochet with white yarn in a spiral.
Row 1: Start with a Magic Ring (MR), SC 6 into the MR. (6)
Row 2: INC in each stitch around. (12)
Rows 3-4: 12 SC in each row.
For the left arm:
Row 5: 1 SC, create a bobble of 3 DC, 10 SC. (12)
For the right arm:
Row 5: 10 SC, create a bobble of 3 DC, 1 SC. (12)
Row 6: 2 SC, DEC repeat 3 times. (9)
Rows 7-26: Twenty rows of 9 SC each.
Fold in half, join with 4 SC through both sides.
Embroider stripes with black thread using a tambour stitch.
Legs:
Start crocheting with black yarn.
Row 1: Chain 6, starting from the second chain from the hook, SC 4, 3 SC in the last chain, work 3 SC along the opposite side of the chain, INC. (12)
Row 2: INC, 3 SC, INC three times, 3 SC, INC twice. (18)
Row 3: 1 SC, INC, 3 SC, (1 SC, INC) repeat 3 times, 3 SC, (1 SC, INC) repeat 2 times. (24)
Row 4: 2 SC, INC, 3 SC, (2 SC, INC) repeat 3 times, 3 SC, (2 SC, INC) repeat 2 times. (30)
Row 5: Work 30 SC in the BLO.
Rows 6-8: Three rows of 30 SC each.
Row 9: 6 SC, (1 SC, DEC) repeat 6 times, 6 SC. (24)
Row 10: 6 SC, DEC six times, 6 SC. (18)
Row 11: (1 SC, DEC) repeat 6 times. (12)
Rows 12-14: Three rows of 12 SC each.
Switch to white yarn, stuff the parts as you crochet.
Row 15: Work (1 SC, INC) repeat 6 times in the FLO. (18)
Rows 16-30: Fifteen rows of 18 SC each.
Row 31: Fold the piece in half, SC 9 through both sides.
Embroider stripes with black thread using a tambour stitch.
Body:
On the right leg, don’t cut the yarn, continue crocheting in a spiral, joining with the left leg from the side of the buttocks.
Row 1: SC 8 through the front loops of the stitches on the right leg, INC, turn to the other side, INC, SC 8 along the left leg, SC 8 along the right leg, INC, turn to the buttocks, INC, SC 8 along the right leg. (40)
Rows 2-11: Ten rows of 40 SC each.
Row 12: SC 16, (DEC, 2 SC) repeat 4 times, SC 8. (36)
Row 13: 36 SC.
Row 14: 15 SC, DEC, 11 SC, DEC, 6 SC. (34)
Row 15: 34 SC.
Row 16: 11 SC, DEC, 3 SC, DEC, 4 SC, DEC, 3 SC, DEC, 5 SC. (30)
Row 17: 30 SC.
Row 18: 8 SC, 4 SC on the handle and body, 10 SC, 4 SC on the second handle and body, 4 SC. (30)
Adjust the position of the handles based on the beginning of the row marker.
Start stuffing the body.
Row 19: 9 SC, DEC, 2 SC, DEC, 1 SC, DEC in 3 stitches, 1 SC, DEC, 2 SC, DEC, 4 SC. (24)
Row 20: DEC repeat 11 times, 2 SC. (13)
Row 21: 13 SC through the back loops.
Rows 22-31: Ten rows of 13 SC each.
Stuff the neck very tightly, create a bobble of 6 SC, pull the loops tight, secure and hide the tail.
Crochet a tie and put it around the neck before sewing on the head.
Sew the head in place using thread attachment.
Collar:
Chain 25, starting from the second chain from the hook, SC 9, 1 HPS, 1 CPS, 2 chains, slip stitch (SS), 2 chains, 1 HPS, 1 CPS, SC 10.
Sew to the remaining unworked loops on the neck.
Jacket:
Chain 50, starting from the second chain from the hook: SC 4, 1 HPS, 1 CPS, 2 chains, SS, 3 chains, 1 HPS, 1 CPS, 2 CPS, 27 HPS, 2 CPS, 1 CPS, 2 chains, SS, 3 chains, 1 CPS, 1 HPS, 4 SC, try on the body, sew in place.
Embroider stripes on the body using tambour stitch, shade the shirt.
Tie:
Chain 10, starting from the second chain from the hook: SC 4, 2 HPS, 1 CPS, 1 HPS, 1 SC, chain, turn, work 1 SC on the opposite side of the chain, 1 HPS, 1 CPS, 2 HPS, 4 SC, chain 40, SS to the beginning of the tie, chain 5, work 4 SC in reverse, wrap this tail around to form a knot-like shape on the tie, secure with a needle and thin black thread.
Thank you for your attention! Happy crocheting!